
2 Methods on Easy Google Drive Two-Way Sync [Full Guide]
To perform Google Drive two-way sync, you can refer to the 2 ways introduced in the article. According to your need, choose the method that suits you best.
by CBACKUP Lasted Updated March 17, 2023
What is two-way sync?
Two-way sync is a common cloud sync mode. In two-way sync, your data will be copied in both directions between the sync source and the sync destination. Different from one-way sync, any changes in two-way sync on either side will be synced to the other side completely.
![]()
Many mainstream cloud drive services provide two-way sync feature like OneDrive two-way sync. Since Google Drive is a widely-used cloud service, you might use Google Drive as your cloud drive and want to create Google Drive two-way sync for your data.
Google Drive two-way sync will bring you a lot of convenience such as keeping files up to date, sharing files, accessing data easily, better protection for data, etc.
Let’s get started to know something about 2 methods for Google Drive two-way sync now.
How to create Google Drive two-way sync: 2 methods
Commonly, there are 2 different ways to create two-way sync in Google Drive, such as performing it in the Google Drive desktop app, or another easy sync tool. Please keep reading to learn more instructions and operation guidelines of them. After looking through, you can pick out the most suitable one for your data then.
Method 1. Perform Google Drive two-way sync via Drive for Desktop
As we all know, Google Drive provides a desktop client called Drive for Desktop. With the Mirror files feature in it, you can create Google Drive 2-way sync easily. Here are the detailed steps to set up it in the Google Drive desktop app:
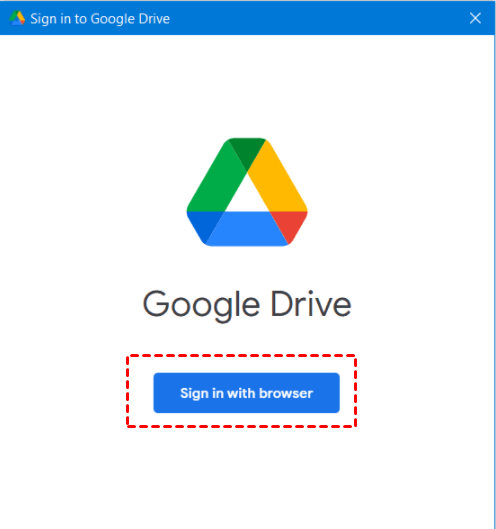
1. Download and install the Drive for Desktop app on your computer. Run it and click on Sign in with browser to log into your Google account.
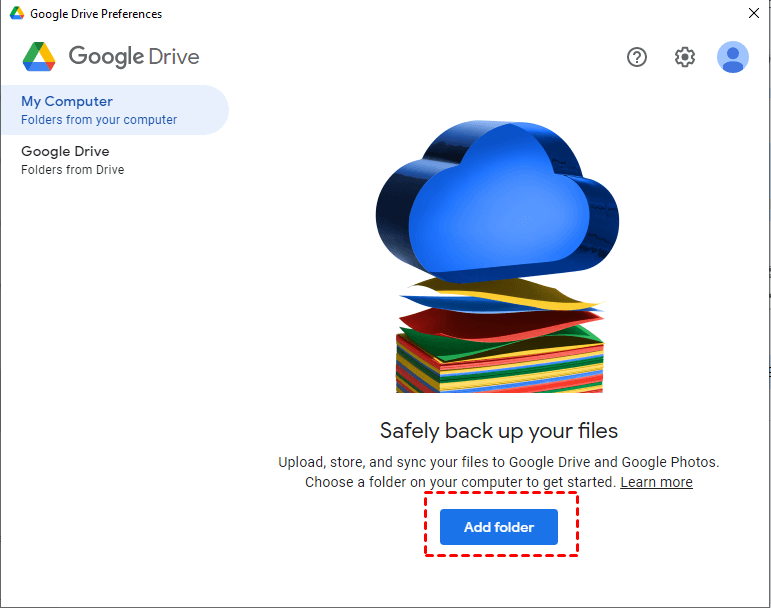
2. On this page, click on the Add folder button to select a folder from your computer for auto sync folder to Google Drive.
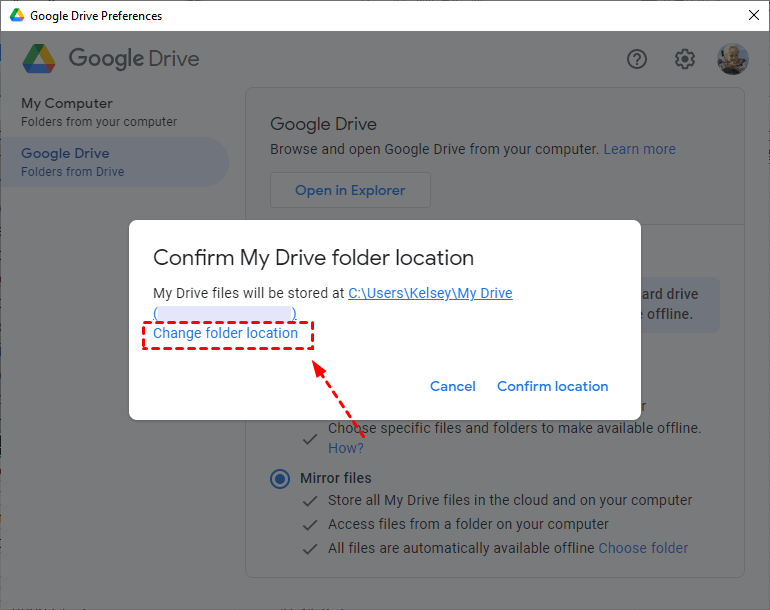
3. Then go to the Google Drive tab on the left panel. Under My Drive syncing options, choose Mirror files.

4. Then, Google Drive will ask you to confirm My Drive folder location. You can change it according to your need.
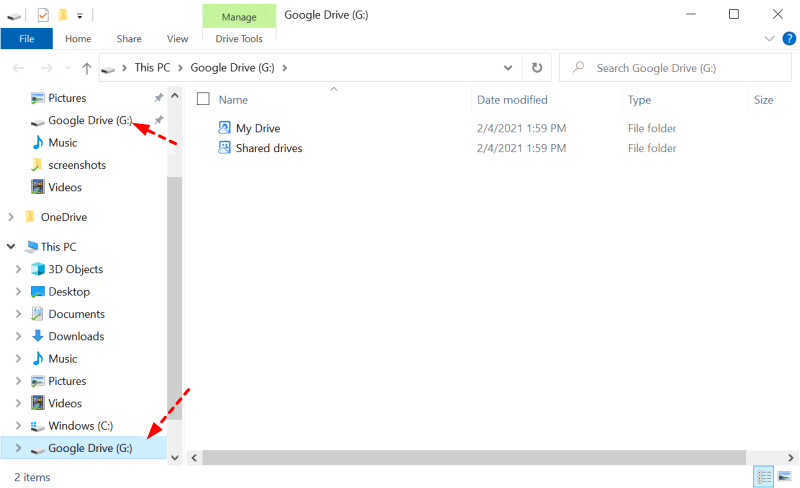
5. After confirming, hit Comfirm location > Save to perform Google Drive two way sync.
Method 2. Perform Google Drive two-way sync quickly
Drive for Desktop can help you perform Google Drive two-way sync, but you may meet some errors when you use it like Google Drive does not sync all files, uploaded files not showing in Google Drive, and more.
It will be quite troublesome for you to solve each of Google Drive errors. For this, we highly recommend you a professional sync tool - AOMEI Backupper Server. With the help of it, you can perform two-way sync to your cloud drive easily.
Let’s see what the shining points of such a tool are:
● In AOMEI Backupper, you can set up scheduled sync to help you sync files automatically, saving you a lot of time and effort.
● Many cloud drives are supported to be the sync destination like Google Drive, Dropbox, OneDrive, etc.
● You can also use AOMEI Backupper to sync data to local drives, external hard drives, NAS, network location, and so on.
Now, here is a guideline to use AOMEI Backupper to perform Google Drive two-way sync directly and quickly:
1. Download and install the AOMEI Backupper desktop client on your computer first.
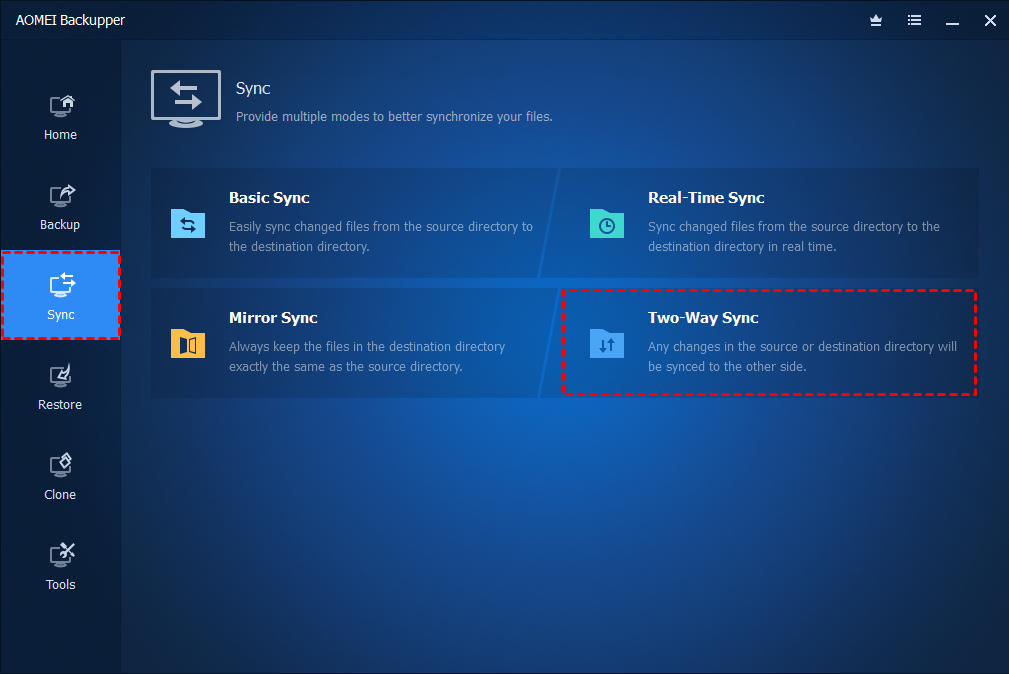
2. Go to click on Sync on the left menu, then choose the Two-Way Sync option on this page.
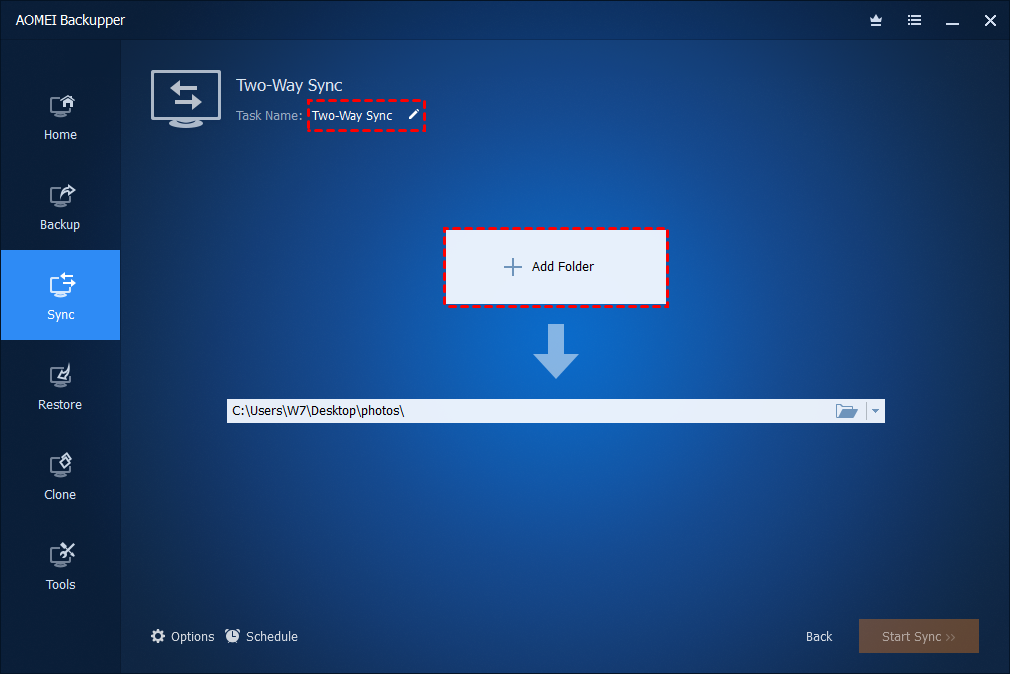
3. Click on Add Folder and you can choose the folder that needs to sync.
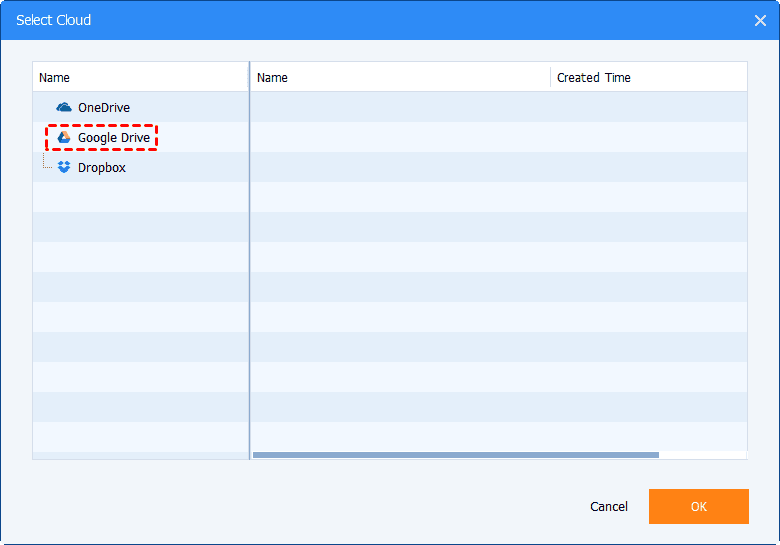
4. After choosing the sync source, please click on the drop triangle icon to click the Select a cloud drive option. Here you can choose Google Drive and click on OK then.
5. After the above, click on Start Sync to begin the Google Drive two-way sync directly.

- Notes: You can learn something about other sync modes in AOMEI Backupper. Maybe you need them in the future.
- Basic Sync: Sync your data from source to destination easily.
- Real-Time Sync: Sync any changes in your files from source directory to destination directory in real time.
- Mirror Sync: Always keep the files in the destination directory exactly the same as the source directory.
Perform Google Drive manual sync on web page
If you do not need two-way sync in Google Drive, you can consider using the traditional sync method - perform Google Drive basic sync on the official web page. But this is a traditional method, which means you need to create bulk upload to Google Drive manually. Thus, it is more suitable for you when you have only a few files to sync.
1. Navigate to the Google Drive web page. Log into your account correctly.
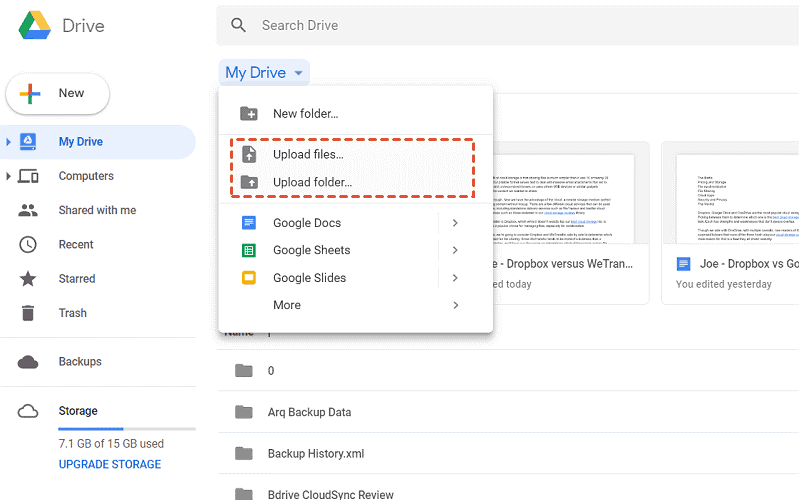
2. On the My Drive page, click on Upload files or Upload folder to select your data manually. Then Google Drive will sync your selected files.
Tip: Back up files to Google Drive for better protection
Two-way sync definitely brings much convenience to you, but once your data get lost from source or destination, it will disappear on the other side. To protect your files and other data better, it is advisable for you to backup files to Google Drive, instead of syncing.
If you want an easy way to perform backups, you can do it in AOMEI Backupper as well. It offers a professional file backup feature. At the same time, you can also create system backup, partition backup, and disk backup with it directly. Let’s see how to create a file backup to Google Drive via AOMEI Backupper now:
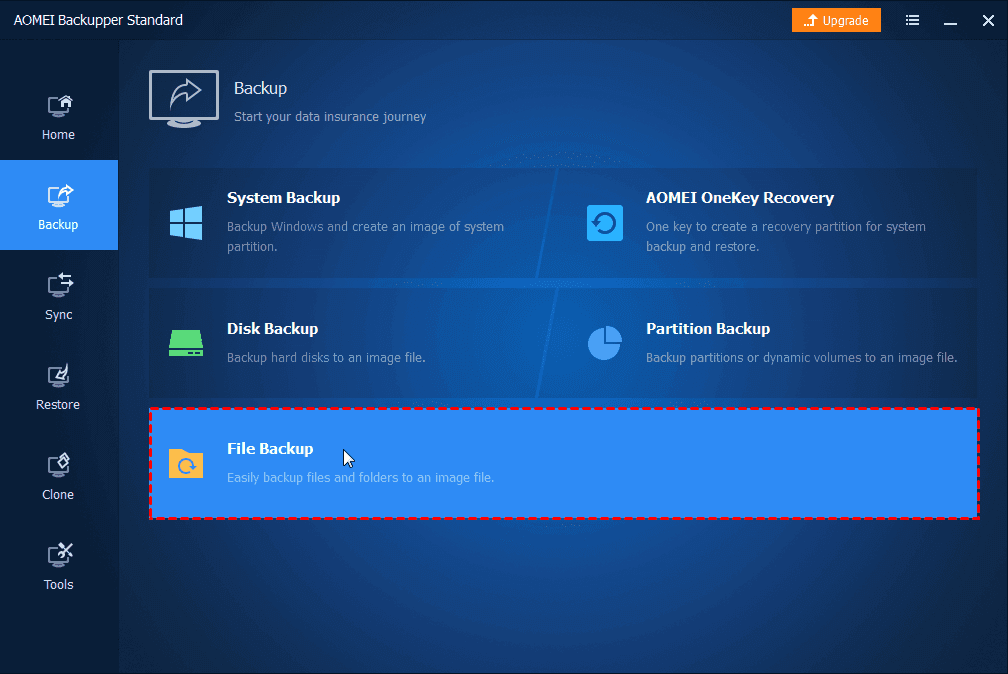
1.Run the AOMEI Backupper client. Click Backup > File Backup.
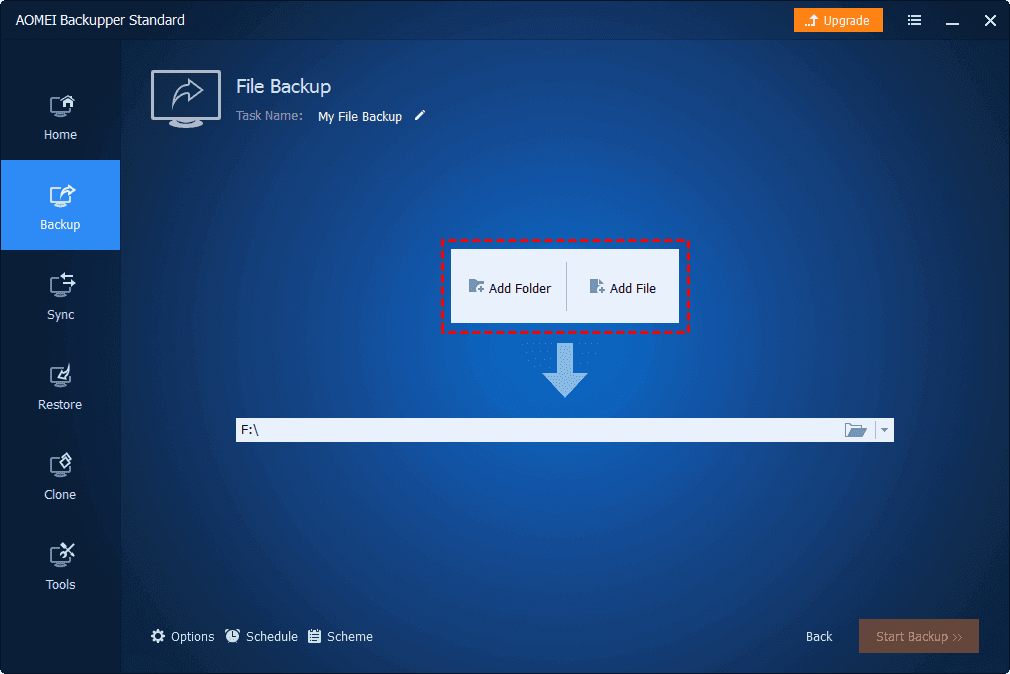
2. Click on Add Folder or Add File to choose your data to back up.
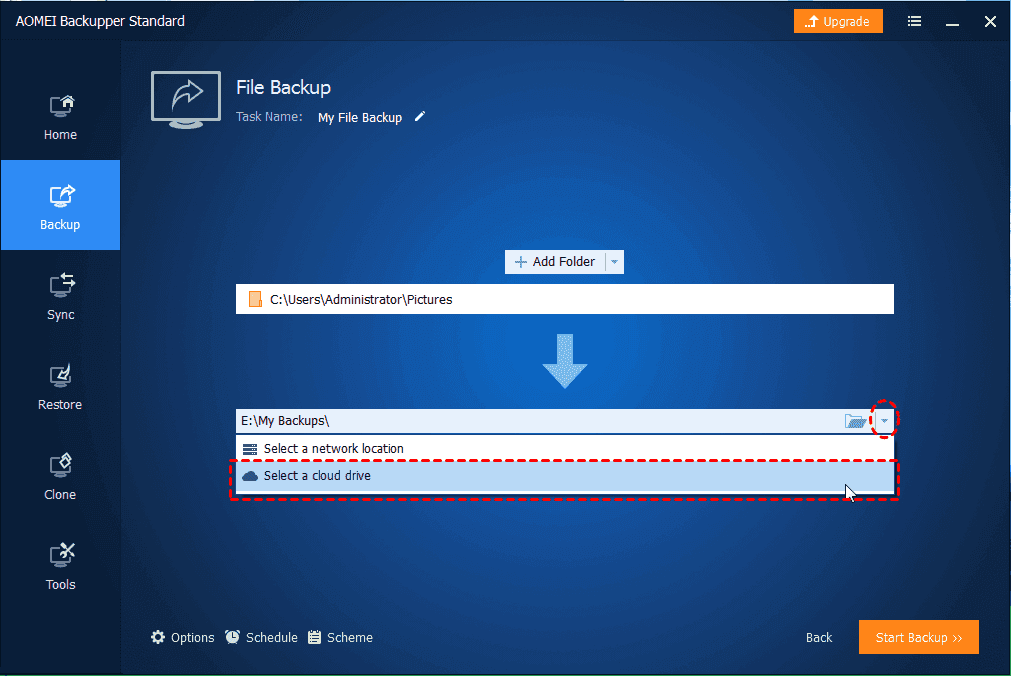
3. Here you can click Select a cloud drive. Then select your Google Drive. After configuration, click on Start Backup to back up files to Google Drive right now.
Written in the end
In this article, we prepared 2 ways for you to perform Google Drive two-way sync. At the same time, a manual method to create Google Drive sync on a web page is also introduced. Besides, you can learn something about how to back up files to Google Drive with an easy tool.

Secure & Free
