
How to Backup and Restore Windows 11 with Ease: 3 Ways
Do you want to know the easiest solution to get your computer files backup and restore on Windows 11 with ease? Follow this tutorial to get clear ideas.
by Jonna Lasted Updated April 24, 2024
Does Windows 11 have a backup and restore program?
I am using Windows 11 with a lot of school material and several gigabytes of games. I need to backup my data for safekeeping and want to restore it whenever necessary. Is there a backup and restore program that is built-in with Windows 11? Or do you recommend other solutions for file backup and restoration on Windows 11?
- Question from support.google.com
Backing up Windows 11 regularly is something you should do to prevent the data from accidental loss. Actually, Windows 11 provides built-in backup and restore solutions for users.
In this article, we’ll talk about how to backup and restore Windows 11 files in 3 ways. The first two methods are using tools inbuilt with Windows systems, which allow you to backup Windows 11 to an external hard drive or a network location. The third method is to use a third-party tool to back up Windows 11 to cloud. You can choose the fittest one according to your needs. If you are ready to create backup and restore in Windows 11, get started with the step-by-step guides below now.
Way 1. Backup and restore files on Windows 11 with File History
File History is an easy way to backup and restore files on Windows 11 from your system. It will take snapshots of your file versions to the Library when you are on an external hard drive or connected over USB after you set up File History on your computer. You can recover these backed-up files when your original data is lost or damaged.
Important: File History only backs up files in the Documents, Music, Pictures, Videos, and Desktop folders and the OneDrive files that are available offline on your PC.
#1. Backup Windows 11 files with File History
Here is how backup Windows 11 files using File History:
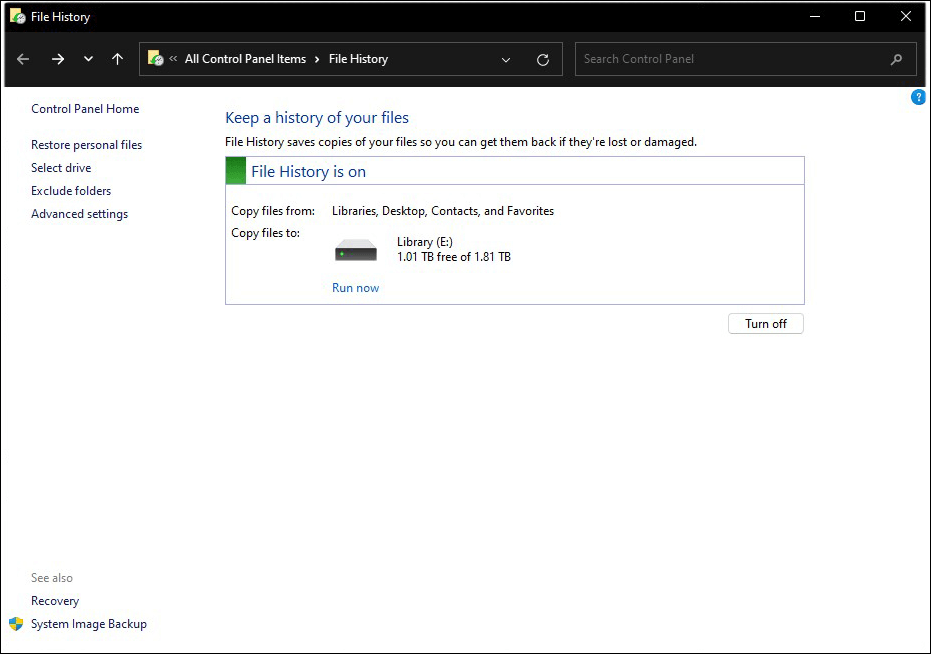
Step 1. Type and search File History in the Windows search box, and click on the result to open it.
Step 2. In the Backing up using File History position, you can add and select a new hard drive or USB you want to store files. And click OK.
#2. Restore Windows 11 files using File History
After you turn on your File History, it will automatically get your files backup. To restore your data with it:
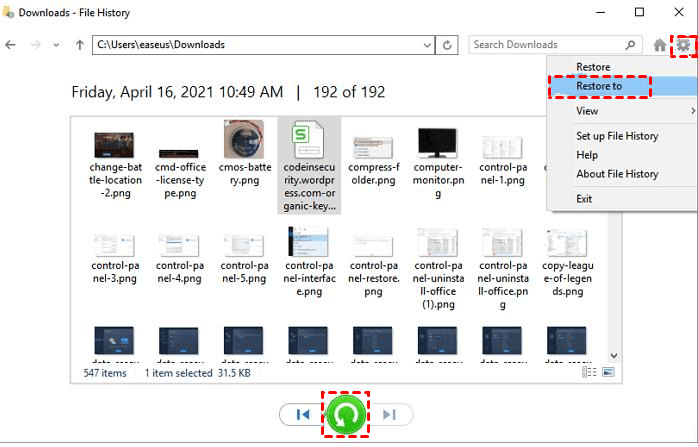
Step 1. Click on Restore personal files from the left side of File History to locate the files/folders you want to recover.
Step 2. Right-click the green refresh button to recover backups to the original location. Or click on the Settings button to select the Restore to position to recover your data to a new location.
Way 2. Backup and restore Windows 11 using Backup and Restore
Backup and Restore (Windows 7) is another Windows 11 baked-in backup tool, which enables you to perform Windows 11 system image backup and file backups with external storage devices or to a network storage location. And you could get data on your hard drive backup automatically. Here is what to do to perform Windows 11 system backup and restore using this tool:
#1. Backup files on Windows 11 with Backup and Restore
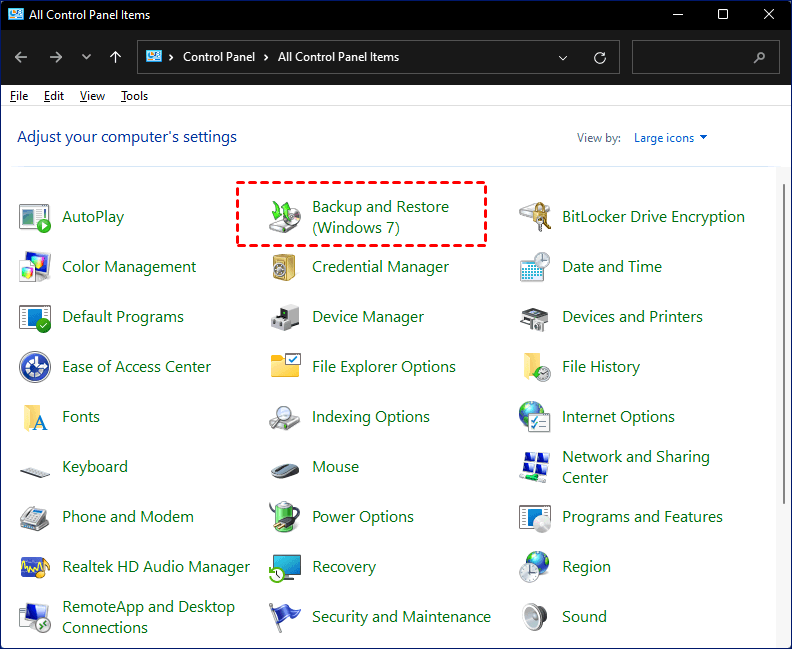
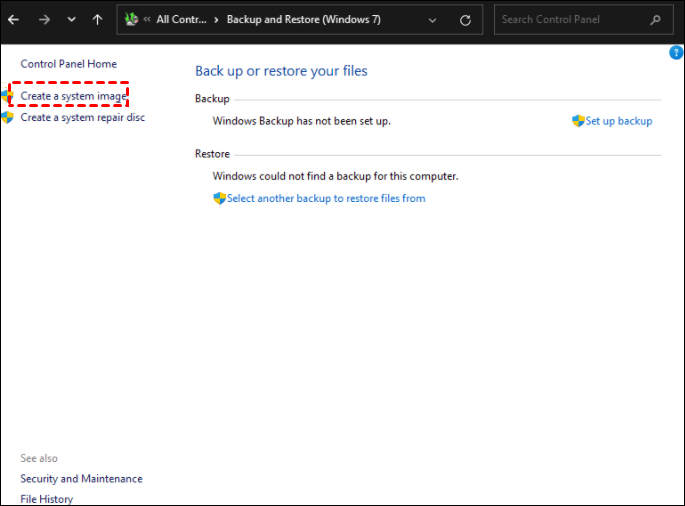
Step 1. Head to Control Panel and navigate to the Backup and Restore (Windows 7) position.
Step 2. In the pop-up window, click on Create a system image on the left panel.
Step 3. Select the backup location among On a hard disk, On one or more DVDs, and On a network location, and hit Next.

Step 4. Choose drthe ives you wish to back up, then click Next to backup Windows 11 files.
#2. Restore Windows 11 backups using Backup and Restore
To restore Windows 11 backup images:
Step 1. Click the Windows Start button, press Settings, and click the Restart button.
Step 2. Tap on Troubleshoot > Advanced options > See more recovery options > System Image Recovery in turn.
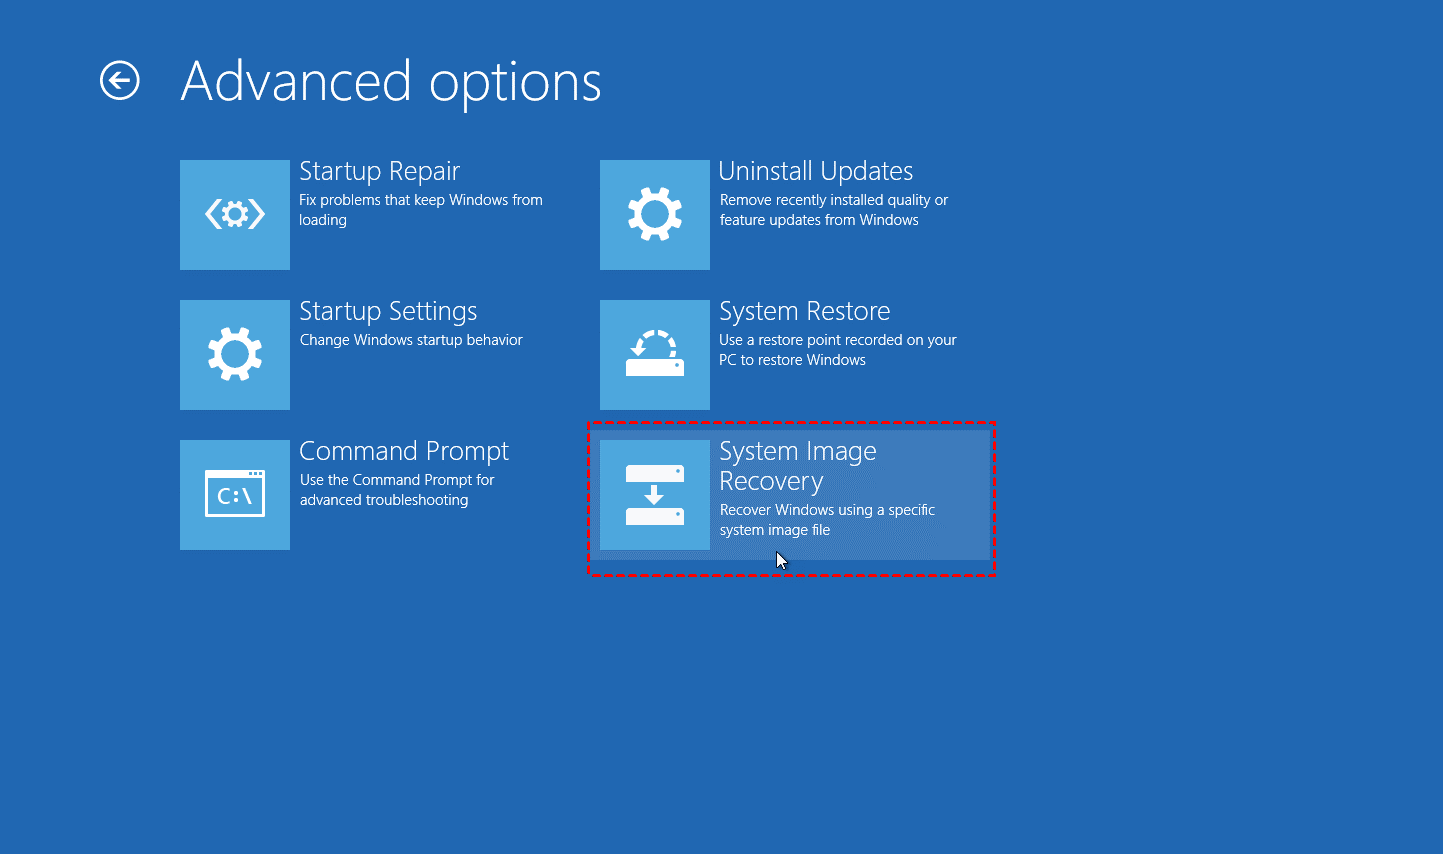
Step 3. Click on Select a system image > Next to restore your Windows 11 backups.
Easier Way to backup and restore data on Windows 11
As you can see, the above-mentioned 2 ways to get files on Windows 11 backup and restore are a little bit complicated. And there are times that data loss may occur if not done properly.
In fact, there is another easier way, which is a little bit different from the aforementioned ones, that enables you to backup and restore files on Windows PCs, like Windows 11, 10, 8.1, 8, 7, Vista, XP, that's using the free cloud backup service - CBackup.
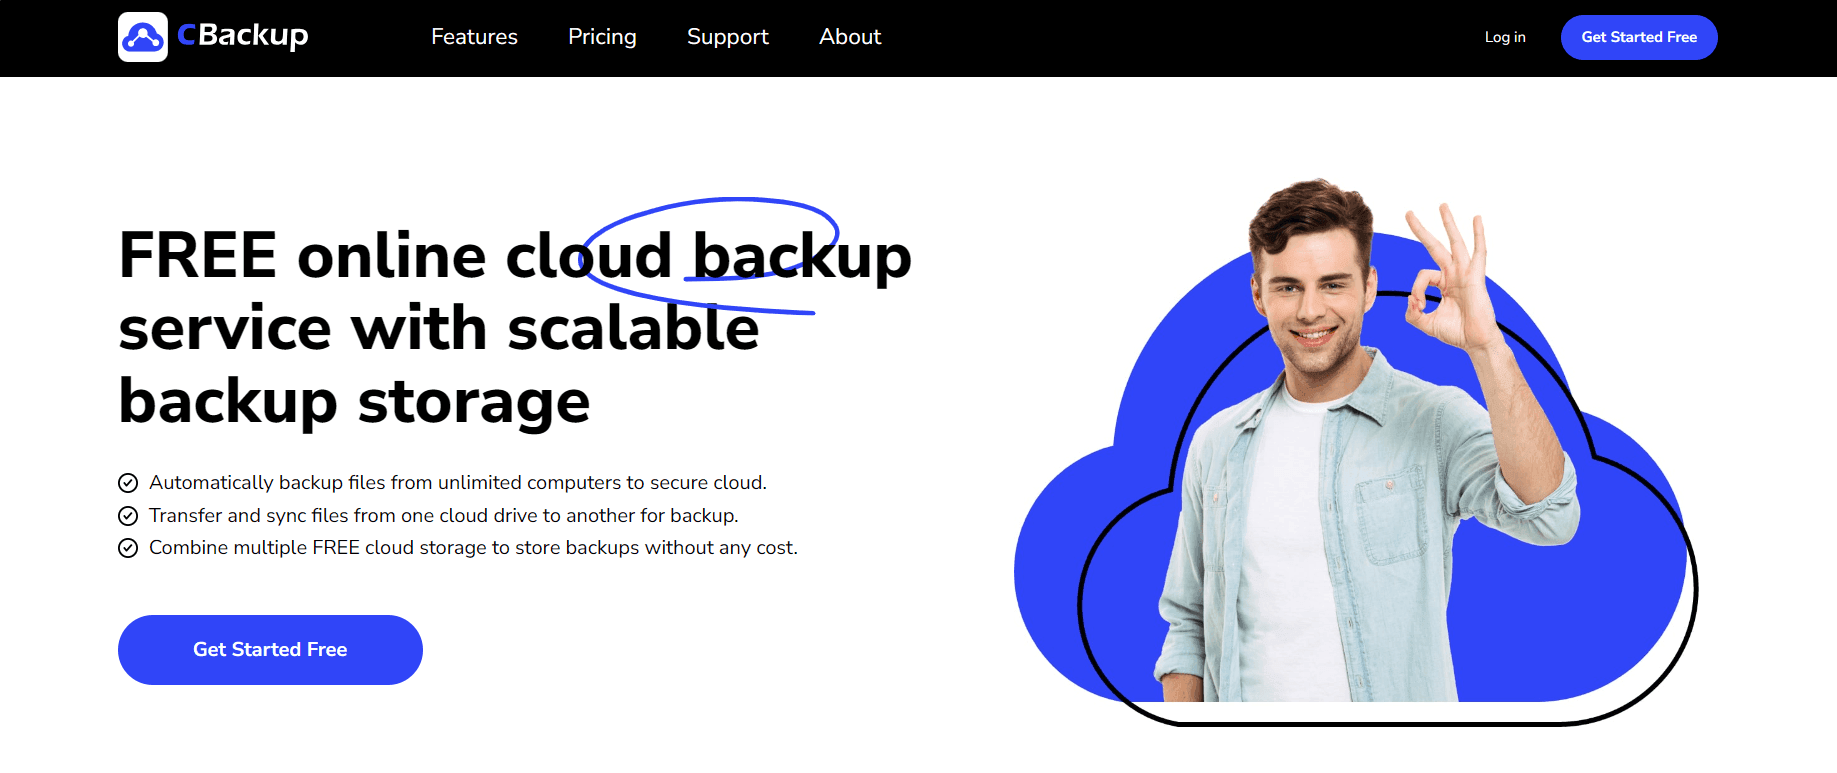
CBackup is a professional cloud backup tool that supports backing up any type of local data to public clouds like Google Drive, OneDrive, and Dropbox automatically for free on Windows PCs. And it offers you restoration from clouds to the original place or any new local location without restrictions. This helps you make full use of the free space of diverse cloud storage. And cloud storage data is accessible more easily.
Besides, it is flexible to backup different data, system files, partitions, hard disks, single files, even multiple hard disks, etc.
#1. Backup Windows 11 data with CBackup
Here we take backing up Windows to Google Drive as an example toshow you how to create backup for Windows 11. Please download the CBackup application, and sign up for a free CBackup account.
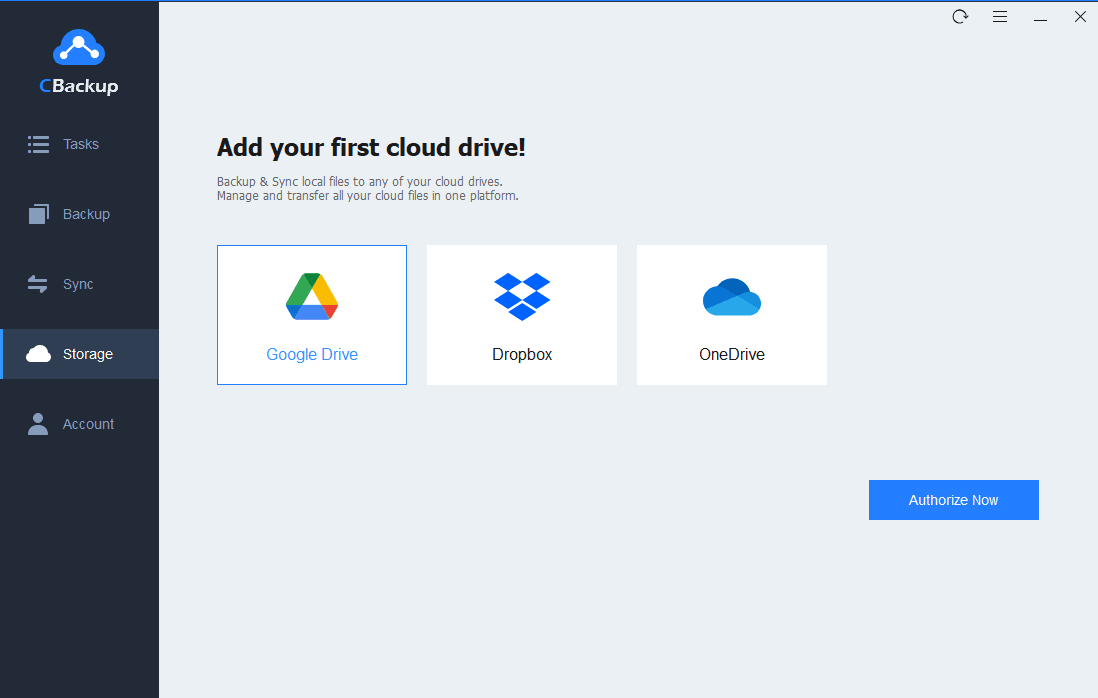
Step 1. Log into the CBackup desktop app. Head towards Storage > select Google Drive, and click Authorize Now. Then, follow the on-screen guidance to allow CBackup to connect your Google storage.
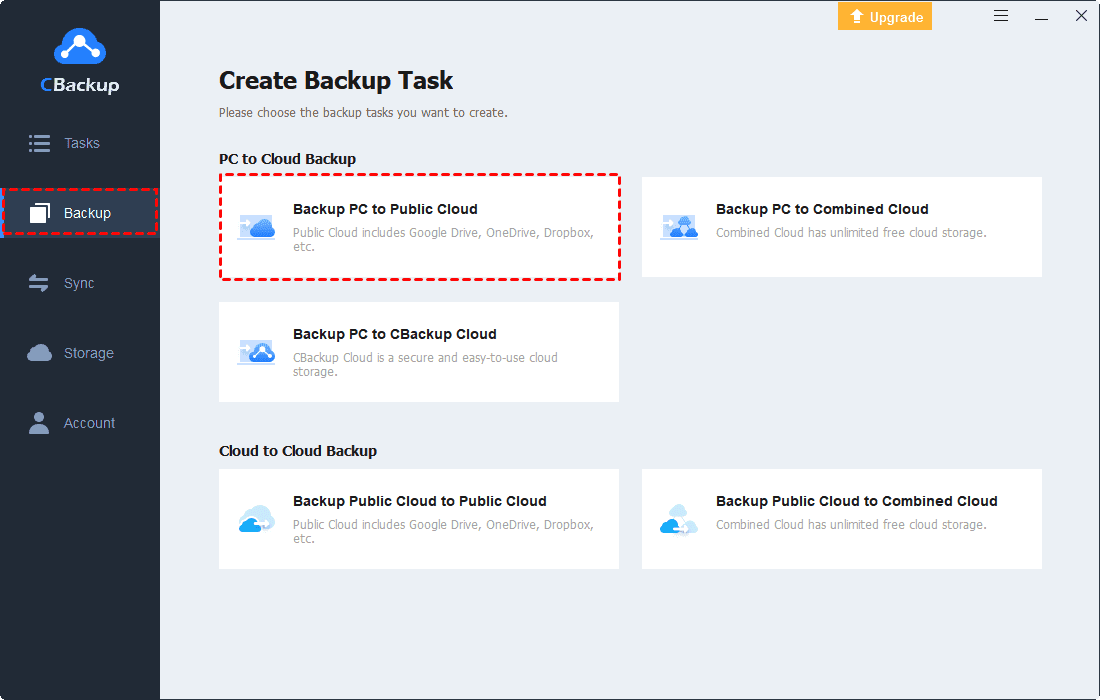
Step 2. In the Backup tab, click on Backup PC to Public Cloud to create Windows 11 backup.
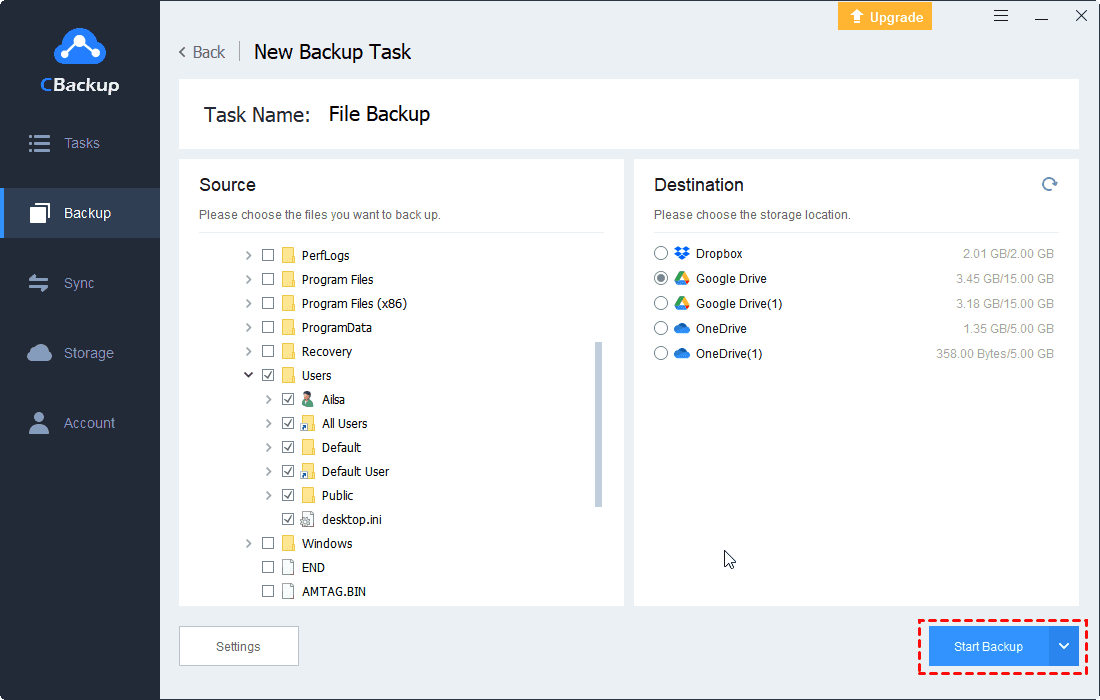
Step 3. Modify the task name to identify it. Locate the Windows 11 files you want to backup.
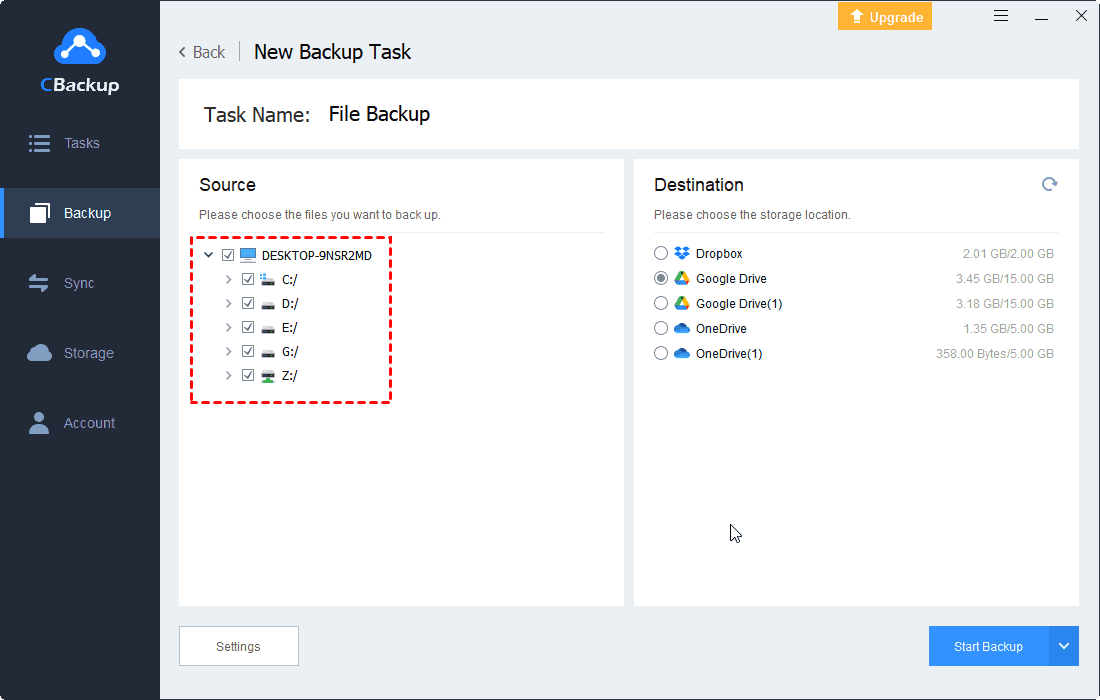
Step 4. Pick Google Drive as the backup destination. Finally, press on Start Backup to create Windows 11 cloud backup easily.
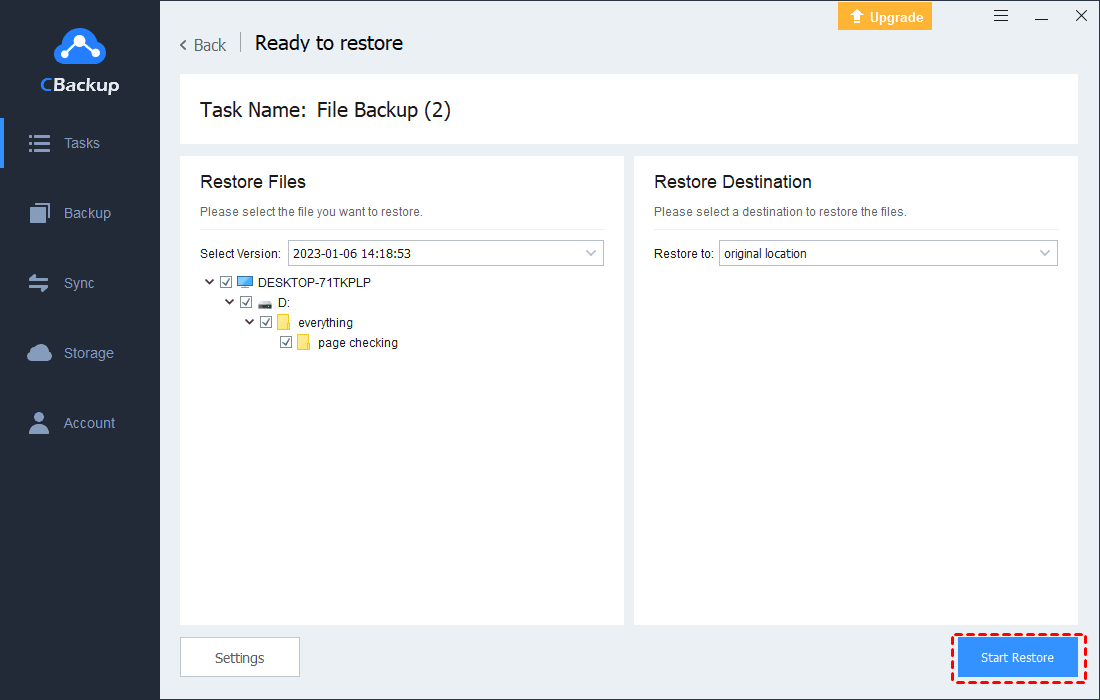
#2. Restore Windows 11 data with CBackup
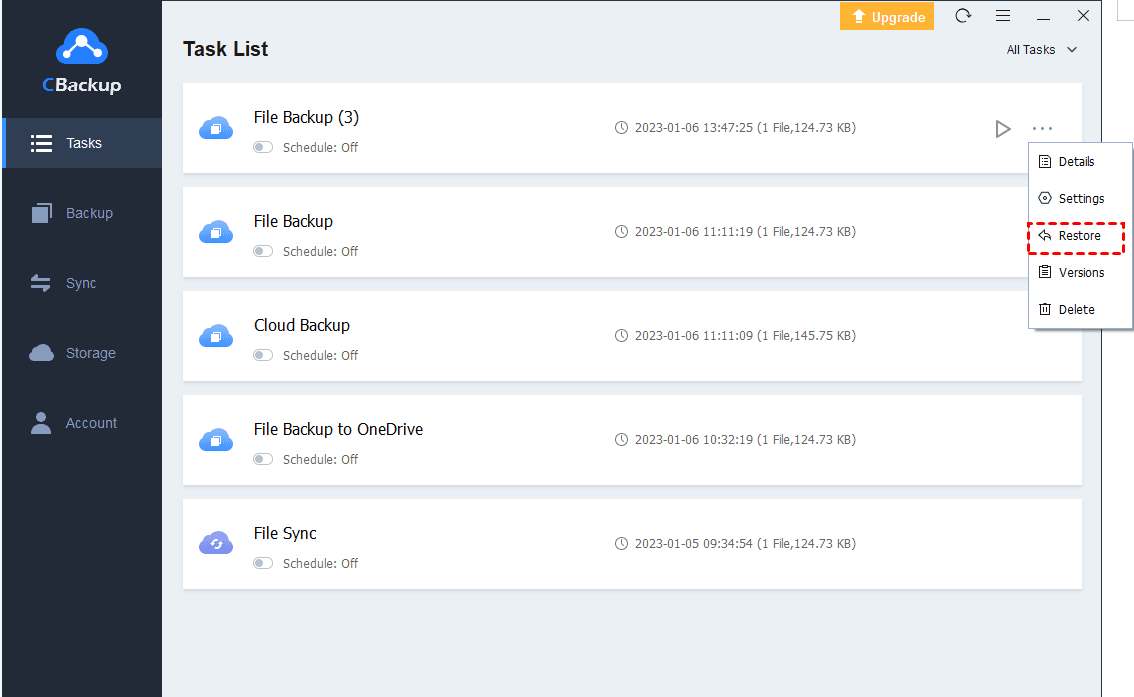
After the completion of the Windows 11 backup, you could find it in the list of backup tasks. To restore Windows 11 files:
Step 1. Locate the Windows 11 backup task you want to recover, and then, click the three-dot button of the task line, and choose the Restore option.
Step 2. Click the down-pointed triangle button to choose the Windows 11 backup version you want to restore.
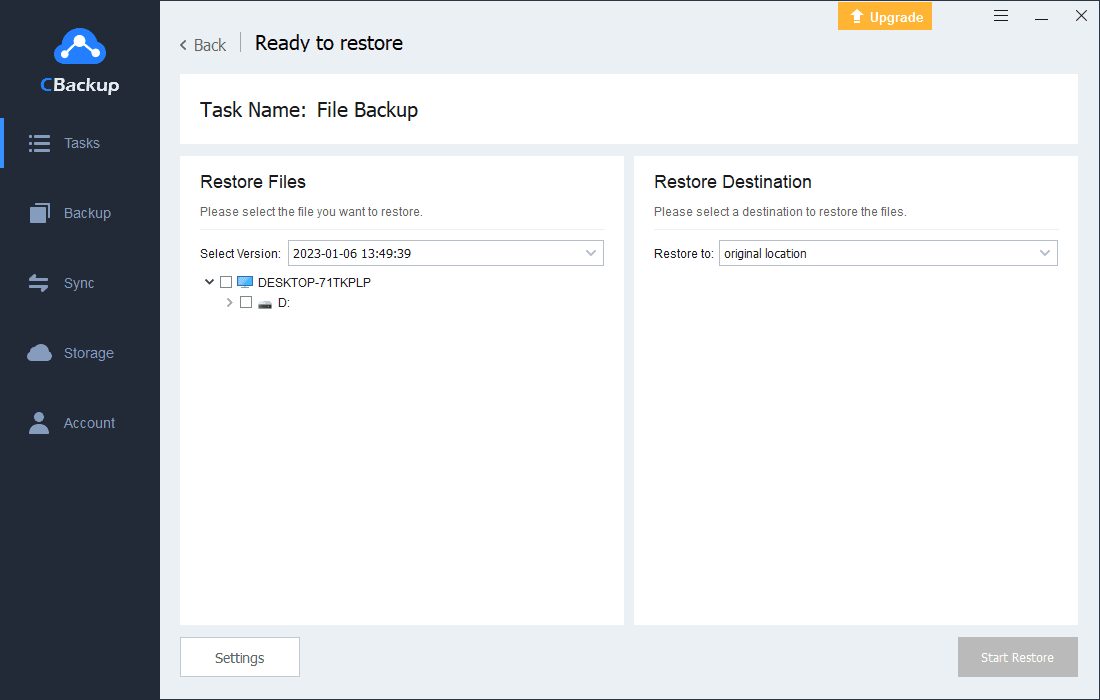
Step 3. Choose to restore to the original location or a new location. Now, you could hit Start Restore to get your selected data restored.
- ✎Notes: In addition to doing backup and restore on Windows 11, you could try the following functions of CBackup to empower your data protection:
- You could backup files from one cloud to another, like backup OneDrive to Google Drive, backup Dropbox to OneDrive, etc. And restore data easily and quickly when data get lost.
- Transfer everything from one cloud to another easily, especially useful to switch cloud drives with one click. And you don't need to download and reupload files to move files between cloud storage.
- Combine multiple cloud storage spaces into one and you will get huge cloud storage named Combined Cloud, and then backup files to it.
Bottom line
We have shown you 3 ways to get file backup and restore on Windows 11 on this page. The first two methods rely on the tools that come with Windows but could be a bit difficult to obtain for non-experts.
The last one is more friendly to users who are not quite familiar with the new Windows system. With CBackup, you can back up all your computer data to a connected cloud drive and restore backups from Google Drive, or other cloud storage anytime, anywhere.

Secure & Free
