
How to Backup Windows 11 to External Drive Easily | 3 Ways
If you want to backup windows 11 to external drives, you can use Windows built-in tools like Backup and Restore and File History. You can also employ professional Windows backup software to finish this job. Scroll down to get more details.
by Jonna Lasted Updated September 30, 2024
How Do I Backup Computer to an External Hard Drive Windows 11?
It seems that Windows 11 has removed the "backup to an external hard drive" feature in the settings app. How can I backup Windows 11 to my external drive? Or do you have a good 3rd party application that can help to get the job done? Can you share it, please?
- Case from reddit.com
It is good practice to regularly backup your computer files to a secure storage source such as an external hard drive. This allows you to easily recover data in case of accidental file loss and file corruption. If you are also interested in how to backup files in Windows 11 to an external drive, read on and follow the sections below to get started.

3 Ways to Backup Windows 11 to External Drive Effortlessly
There are many different solutions for you to backup Windows 11 to an external hard drive. For example, you can get Windows 11 backup with File History or Backup and Restore, two Windows inbuilt backup tools. Alternatively, it is also a good choice to use professional Windows 11 backup software to automatically get Windows 11 backup files to your external drive.
Next, let’s get down to the point of how to back up a computer to your external hard drive on Windows 11.
-
Option 1. Backup Windows 11 to External Drive with Backup and Restore
-
Option 2. Copy Windows 11 to External Drive using File History
-
Option 3. Backup Windows 11 to External Drive via Third-party Tool
Option 1. Backup Windows 11 to External Drive with Backup and Restore
You can use Backup and Restore on Windows 11 to do backups for computer files and folders and easily create a system image for your PC. A system image is to copy drives that are required for Windows to run. Backups of files and folders are available in all editions of Windows, but its full set of features is only accessible for Professional, Business, and other high-end editions of Windows.
You can connect your hard disk to the PC and perform a backup of your computer data using Windows 11 Backup and Restore with the steps below:
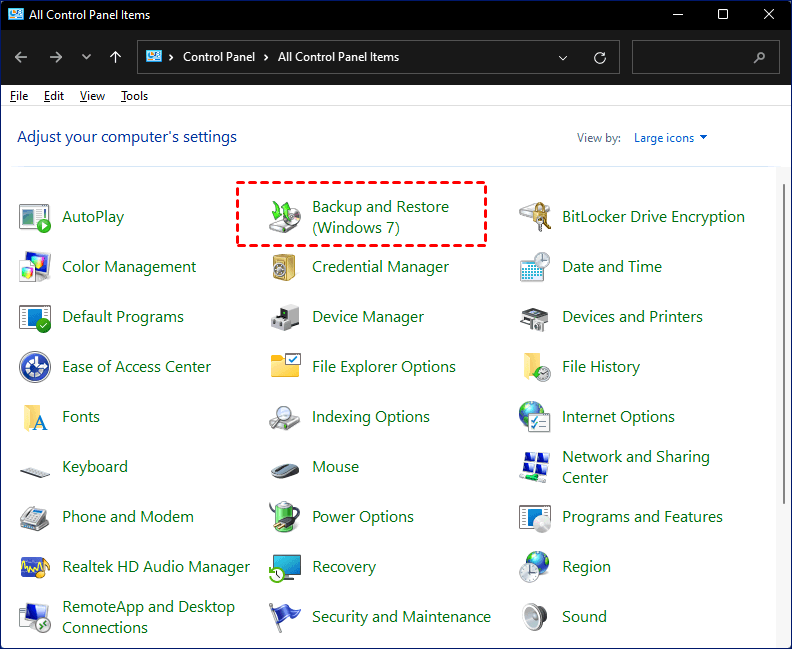
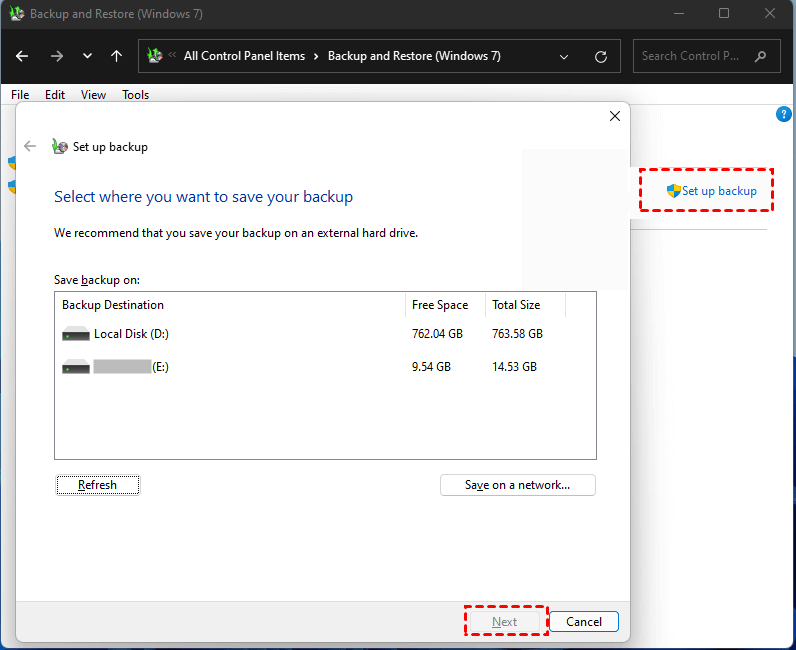
1. Go to Control Panel and select Backup and Restore (Windows 7), and tap on Set up backup.
2. Pick the external hard drive that you want to save your Windows 11 files and click Next.
3. Then, choose Let Windows Choose to hit Next.

- Notes:✎...
- The Let Windows choose option is to backup data stored libraries, on the desktop, and default Windows folders, etc.
- The Let me choose option allows you to select libraries and folders in the backup.
4. Afterward, you can set up auto-backups of your Windows 11 data and run the backup simply.
☛Restore File Backups from Backup and Restore
You can restore your backups from Backup and Restore when your data is lost if you have created backups of your files. Here's how:
1. Head to Control Panel and hit Backup and Restore (Windows 7) as before.
2. In the Restore section, press the Restore my files button, locate the files you need to recover, and then, restore them to your laptop.

Option 2. Copy Windows 11 to External Drive using File History
File History can help to get files kept in the Documents, Music, Pictures, Videos, and Desktop folders and the offline OneDrive files backup to an external hard drive on Windows 11. But it is important to find that File History is to create a full copy of the original files and folders. After multiple backups, you may find plenty of duplicates of the same file.
1. Connect an external drive to the computer, and navigate to the Update & Security section on your computer’s Settings.
2. Tap on Backup and click Add a drive to save your external drive as the backup destination to let Windows 11 backup files to external drive. Then, turn on the Automatically back up my files option if you need.

- Note:✎...
- ✎Note: You can hit the More options button to determine your backup modes and files/folders that need to be backed up in the auto-backups.
☛Restore Backups from File History
Data backups are easy to get restored from your external drive on File History as well. Here are detailed guides:
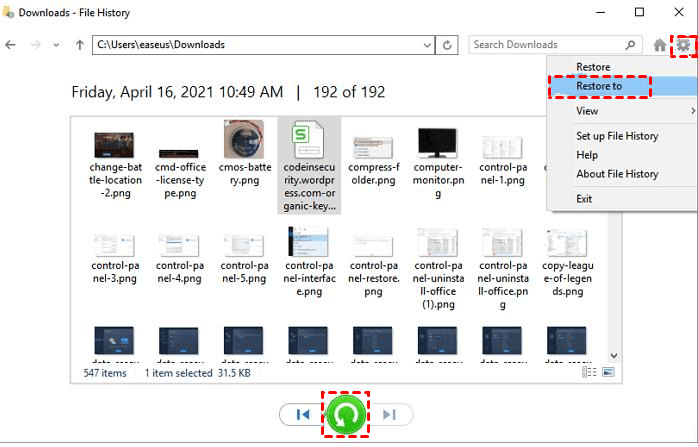
1. Press Restore personal files on the File History screen, and select the backup version of the files you intend to recover.
2. Click on Settings and press Restore to to restore your files to a new location or select Restore to recover data to the original location.
Option 3. Backup Windows 11 to External Drive via Third-party Tool
In addition to the foregoing 2 methods, backing up Windows 11 to an external drive with free Windows backup software is also an easy way. Here we highly recommend AOMEI Backupper Standard.
This freeware is a PC backup & restore tool that offers you to deploy Windows 11 auto backups without any effort. It enables you to back up computer files to clouds, external hard drives, and network storage devices. Besides, you can sync and clone files from one source directory to another with simple clicks.
Besides, with this tool, you could also create Windows 11 system backup to external hard drive, cloud, NAS, and other devices with ease.
1. Download and install AOMEI Backupper Standard. Then, plug in the external drive to your device.
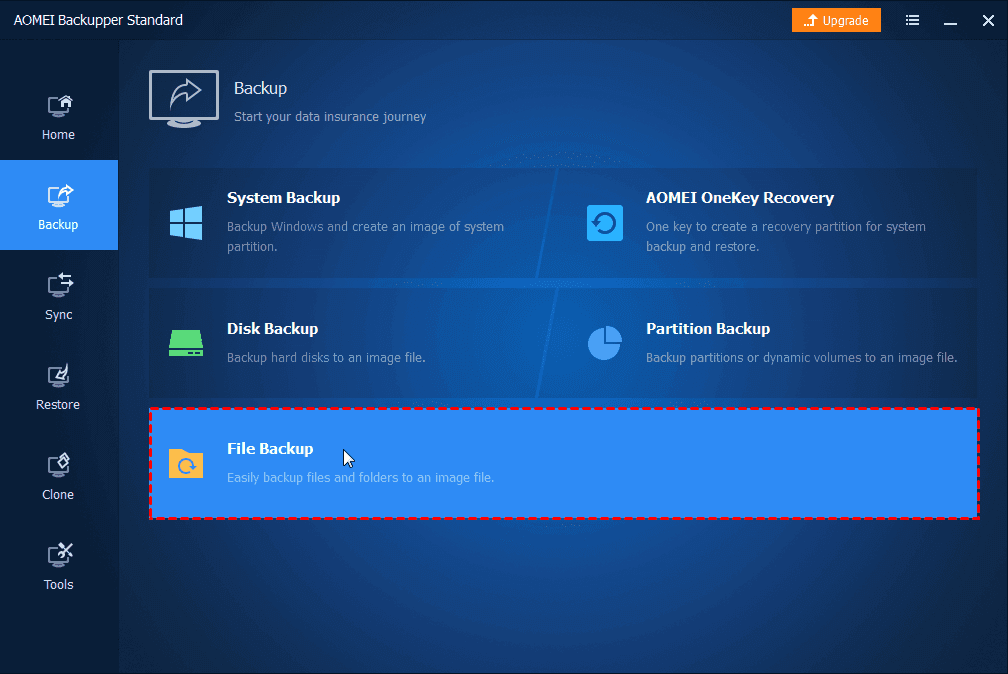
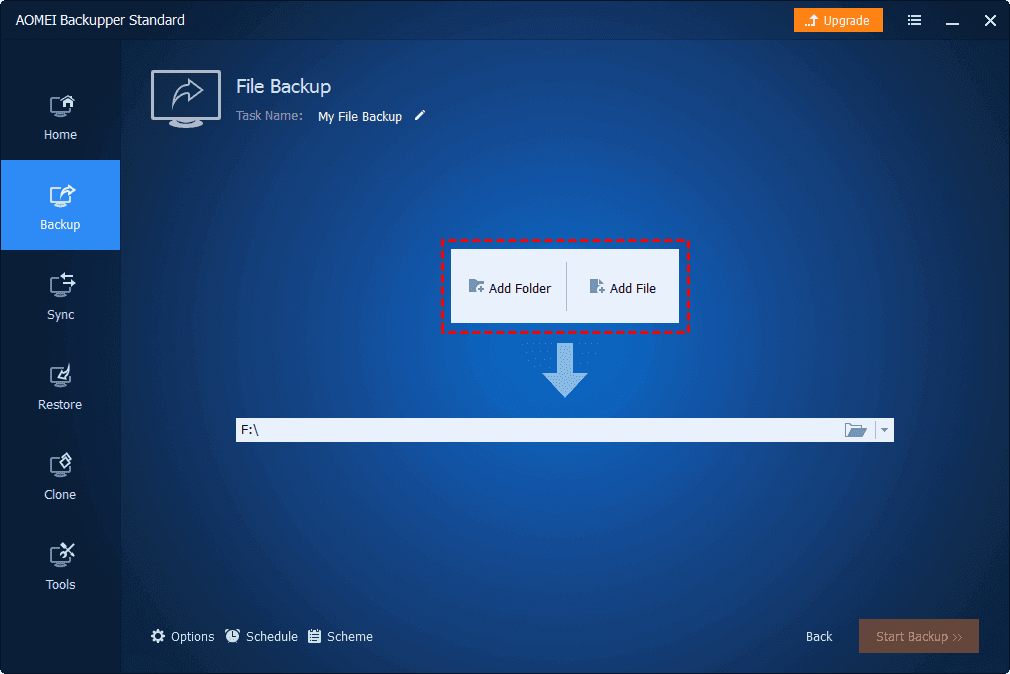
2. Open this tool and opt for the Backup tab on the left panel. After that, click File Backup.
3. Locate the files you want to back up on your PC by clicking Add Folder or Add File.
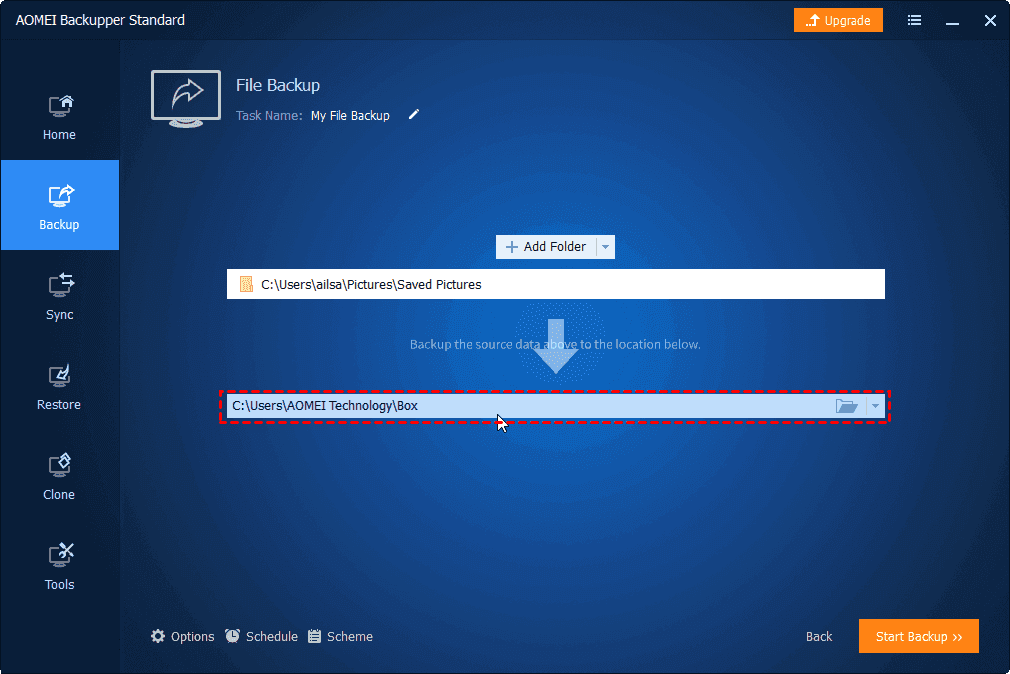
4. Opt for your connected external hard drive as the backup destination. And click on Start Backup to backup to external hard drive on Windows 11.
☛Restore Backups from AOMEI Backupper Standard
If you want to restore backups of files on AOMEI Backupper after backing up Windows 11 to USB drive, you can refer to the following instructions.
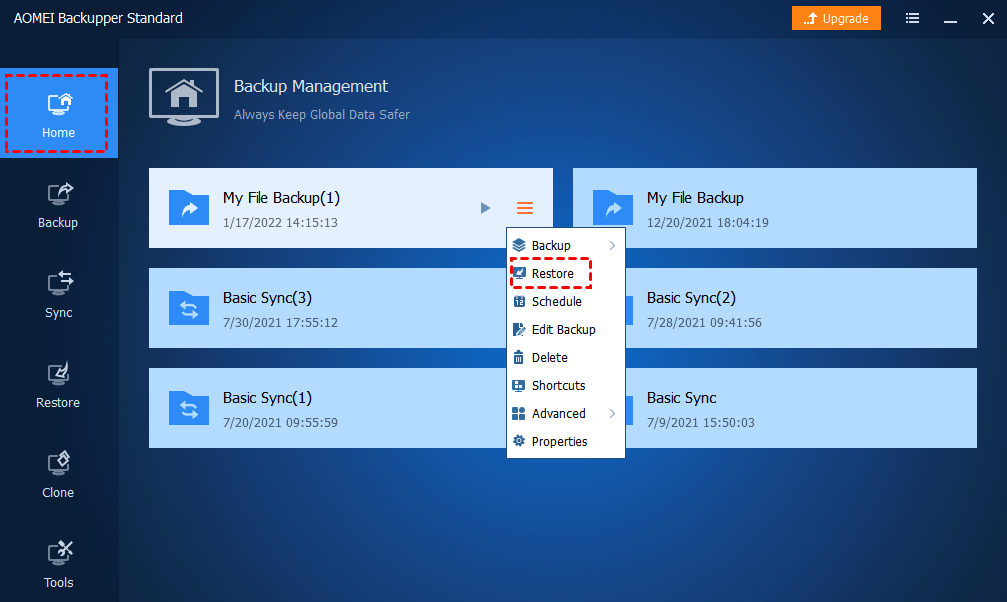
1. Switch to the Home section and find the backup task you want to recover.
2. Click on the three-line button of the task and select Restore.
Tip: Best Solution for Cloud Backup Windows 11
Apart from getting Windows 11 files backup to an external drive, backing your computer files up to a secure cloud can also protect your files from loss and hacking. CBackup is a go-to cloud storage application that supports you to back up computer files to cloud, Google Drive, OneDrive, Dropbox, and other popular cloud storage solutions.
This cloud backup service provides 5GB of free space for its cloud and other powerful backup features like automatic backups, file filter, and so on. Further, it can work as a cloud file transfer service that helps you to transfer data between clouds with ease. Now, let’s start to get Windows 11 cloud backup using CBackup.
1. Download CBackup and install it on your laptop. Sign up for a CBackup account and log in to the desktop app.
2. Head over to Backup and click on Backup PC to cloud.

3. Select files that need to be backed up in the Source. And cloud is selected as your backup destination by default.
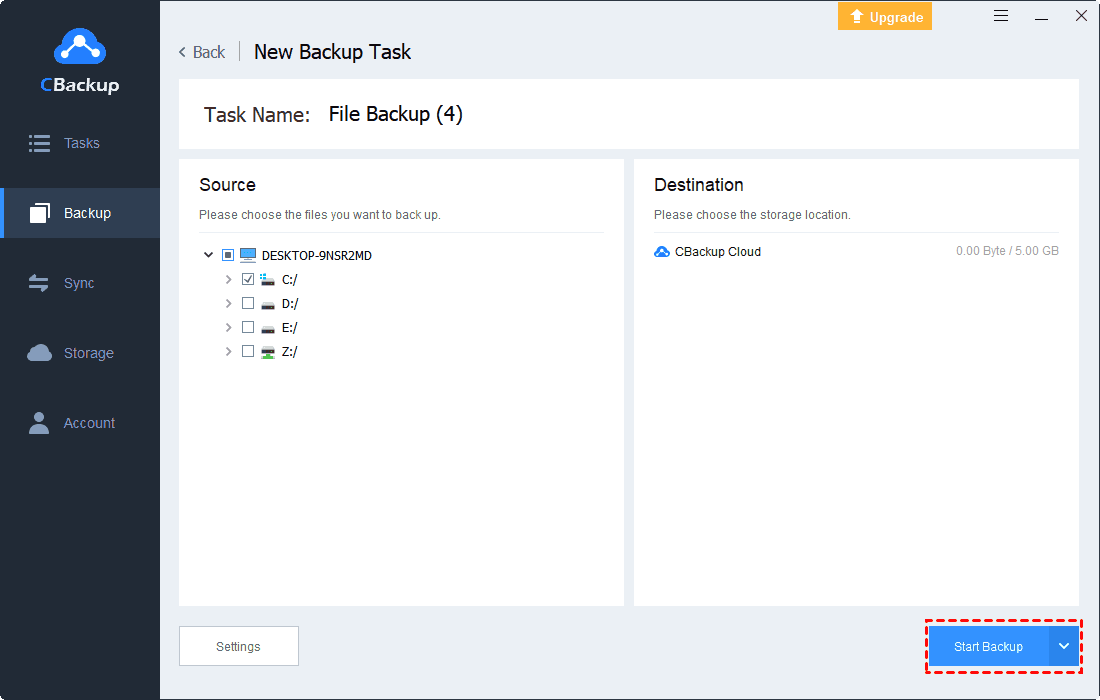
4. Finally, click on Start Backup to back up Windows 11 files to the cloud.
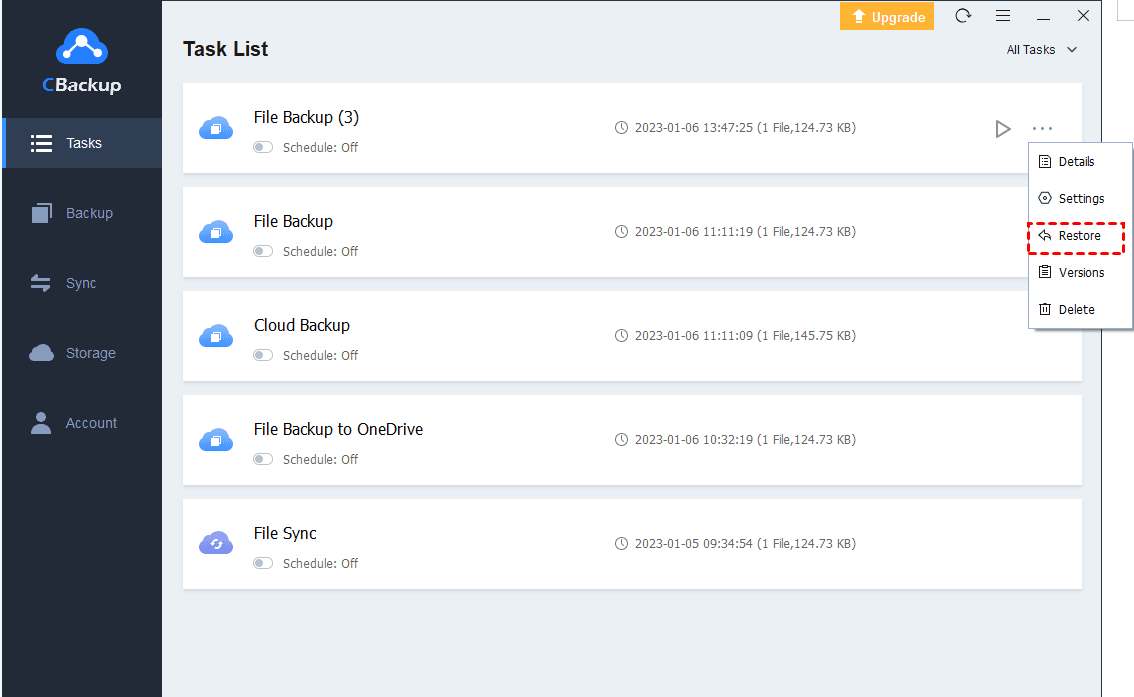
After completing file cloud backup, you can restore them at any time with CBackup. Just find the backup task you wish to restore, and click on the three-dot button of the task. Then, select Restore and choose the version you want.
Conclusion
This post introduced 3 ways for you to backup Windows 11 to an external drive. You can choose the most suitable one to accomplish your backup task. Moreover, we provide a free cloud backup solution for Windows backups. We hope this article has helped you understand the easy backup and restore process available on Windows 11.

Secure & Free
