
Solve Windows 11 Go Back Button Not Working Effortlessly
This tutorial provides fixes to Windows 11 go back button not working problem and a piece of freeware to backup your Windows files to prevent data loss.
by Jonna Lasted Updated October 8, 2024
Go back button is not working
“I'm experiencing this issue where I am unable to revert to Windows 10. Upon going to the Start Menu, typing ‘Go back to Windows 10’ and clicking on the ‘Go back’ button, nothing happens. Any idea as to why is the Windows 11 go back button not working, and is there an alternate method of reverting to Windows 10 that won't jeopardize my files and apps? ”
From October 5, 2021, people are allowed to upgrade to Windows 11 with eligible Windows 10 PCs for free. This new release makes improvements in screen layout, task management, multitasking, Microsoft Teams connections, and so on, to give users a better experience.
However, after upgrading from Windows 10 to Windows 11, many users find that they are not used to the new interface and want to downgrade to Windows, but the “Go back” button does not work. To fix the “go back to Windows 10 button not working” issue, please read on.
2 solutions to Windows 11 go back button not working
It is important to note that Microsoft enables you to go back from Windows 11 to the previous Microsoft OS within the first 10 days of Windows 11 installation. What if your go back button is not running? How to revert back to Windows 10 if you have installed Windows 11 for more than 10 days? Find your answer in the following content.
Way 1. Roll back to Windows 10 with Recovery
If you have installed Windows 11 for less than 10 days and you are experiencing the Windows 11 go back to Windows 10 not working problem, you can refer to the methods below:
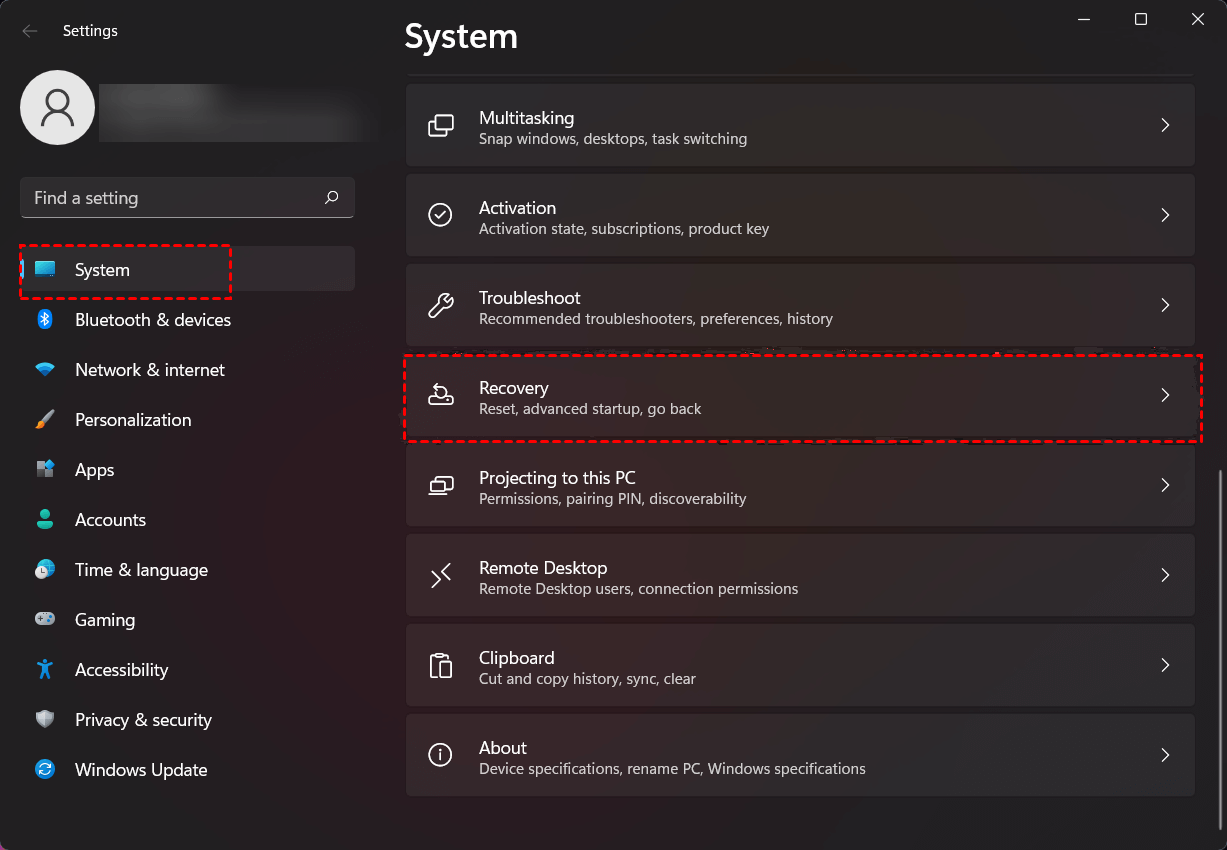
Step 1. Go ahead to Settings, choose System, and scroll down to find the Recovery options.
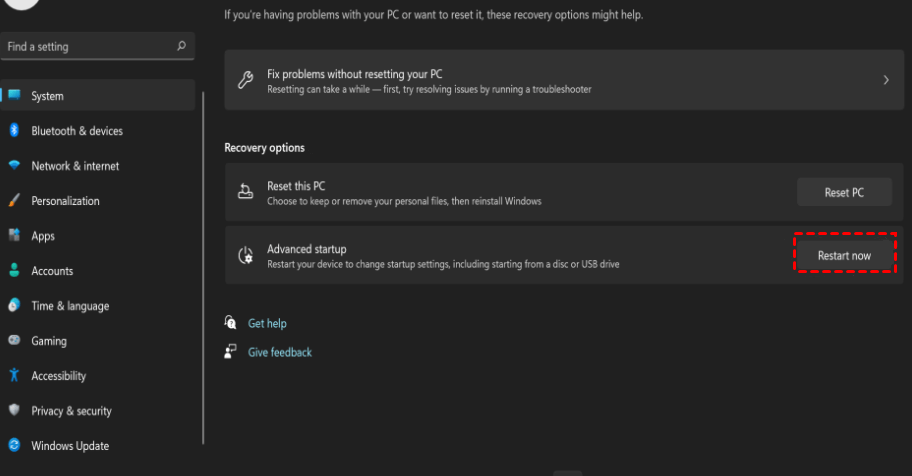
Step 2. On the Recovery screen, find the Advanced startup section and click on Restart now. And then, you will enter into the Windows Recovery Environment.
Step 3. Select Troubleshoot > Advanced options > Uninstall Updates > Uninstall latest feature update > Uninstall feature update subsequently.
Way 2. Go backup to Windows 10 via reinstallation
If you have had Windows 11 installed for more than ten days, you can reinstall Windows 10 to achieve the downgrade.
✎Note: System reinstallation may cause files loss. For this reason, you should backup your important Windows data on your PC in advance.
Step 1. Locate the Windows 10 download page, tap on Download tool now.
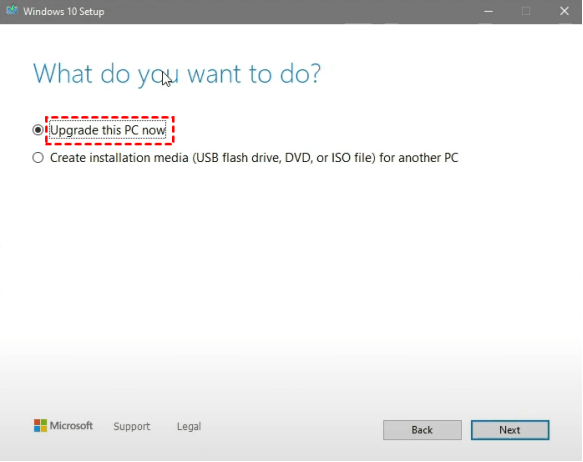
Step 2. Open the MediaCreationTool21H1.exe file, and hit Accept > Upgrade this PC now > Next to launch the setup.
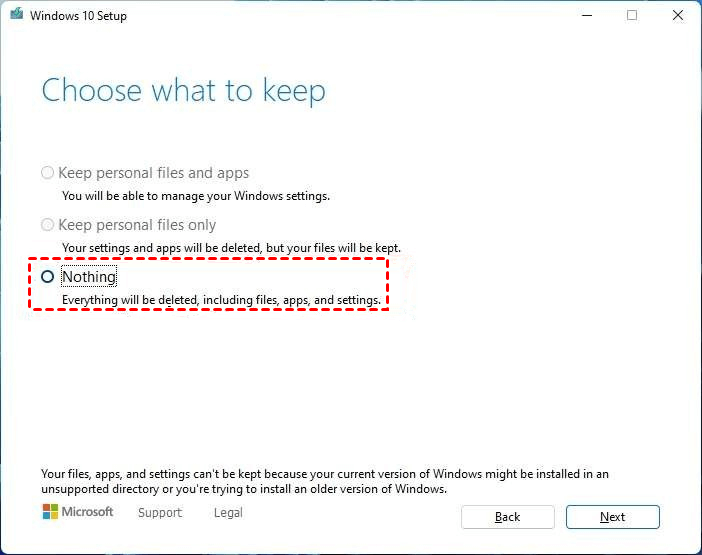
Step 3. Hit Accept from the following screen, select the Nothing option on the Choose what to keep window, and press Next.
Step 4. Finally, click the Install button to begin the installation process.
Bonus Tip: Backup Windows files before rolling back to Windows 10
As mentioned above, to solve the issue of Windows 11 go back button not working, reinstalling the system can work but would result in the miss of files, especially those in the C drive, and there is no way to retrieve the files. Therefore, before you roll back from Windows 11 to Windows 10, you'd better make a backup of all your important files, and restore them to your computer after you have finished installing the new system.
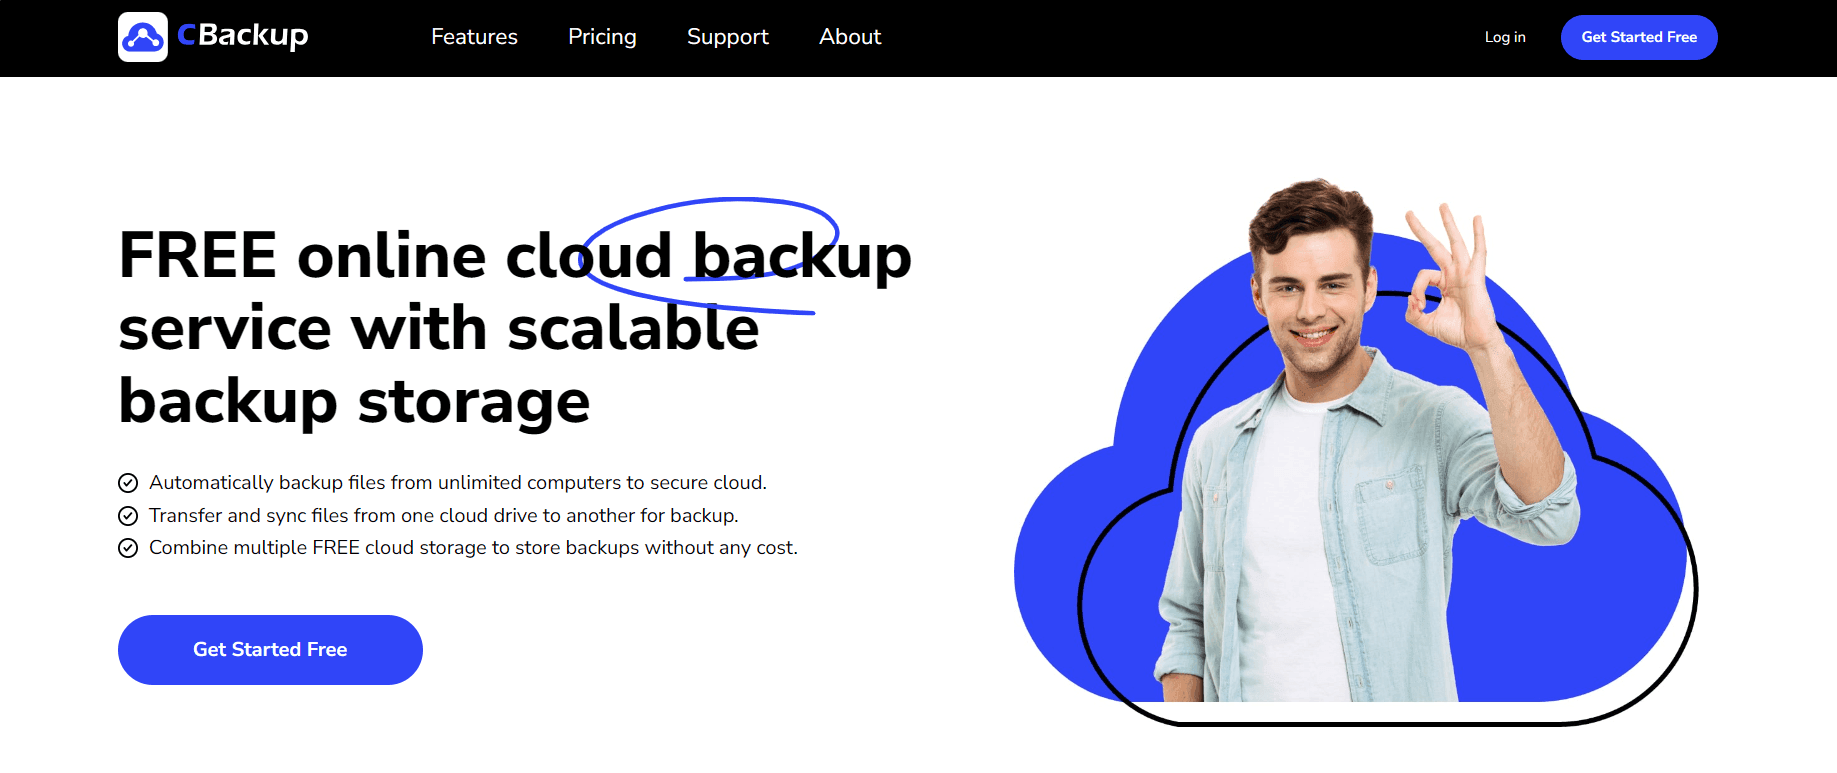
We highly recommend you to use CBackup to make a pre-backup of your Windows files. CBackup is reputable cloud backup software. It supports backing up all files to clouds from an unlimited number of Windows computers. Its restoring feature allows you to recover the backups to any place on your computer.
Stunning features of CBackup that could help you in backup tasks:
☛You can choose to backup Windows files to Google Drive, OneDrive, Dropbox, and the cloud, which offers 5GB of free cloud storage space.
☛It is scheduled backup software that enables you to backup PC items at a fixed frequency (daily/ weekly/ monthly).
☛It proposes email notifications to make you know the backup or restoration status of your tasks.
☛It supports cloud-to-cloud data sync without restriction on the size of a single file.
Next, apply for a CBackup account on its website for preparation, and then, let’s work out how to get CBackup to backup your PC data in detail:
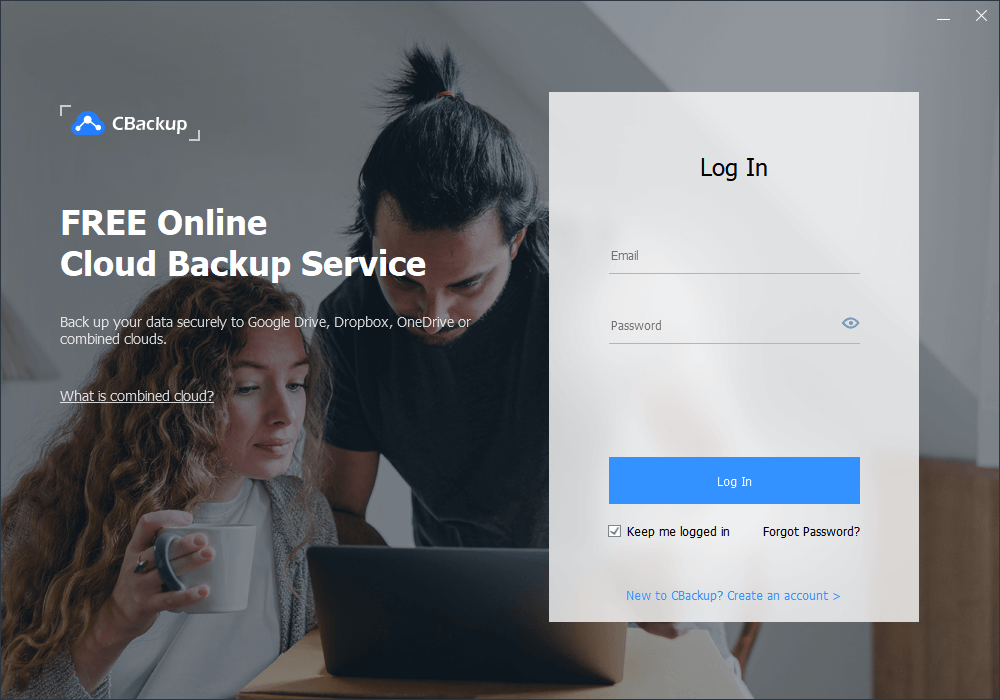
Step 1. Download and install CBackup on your computer. Log into it with your registered credential.
Step 2. Go to the Backup tab and click on Backup PC to cloud.
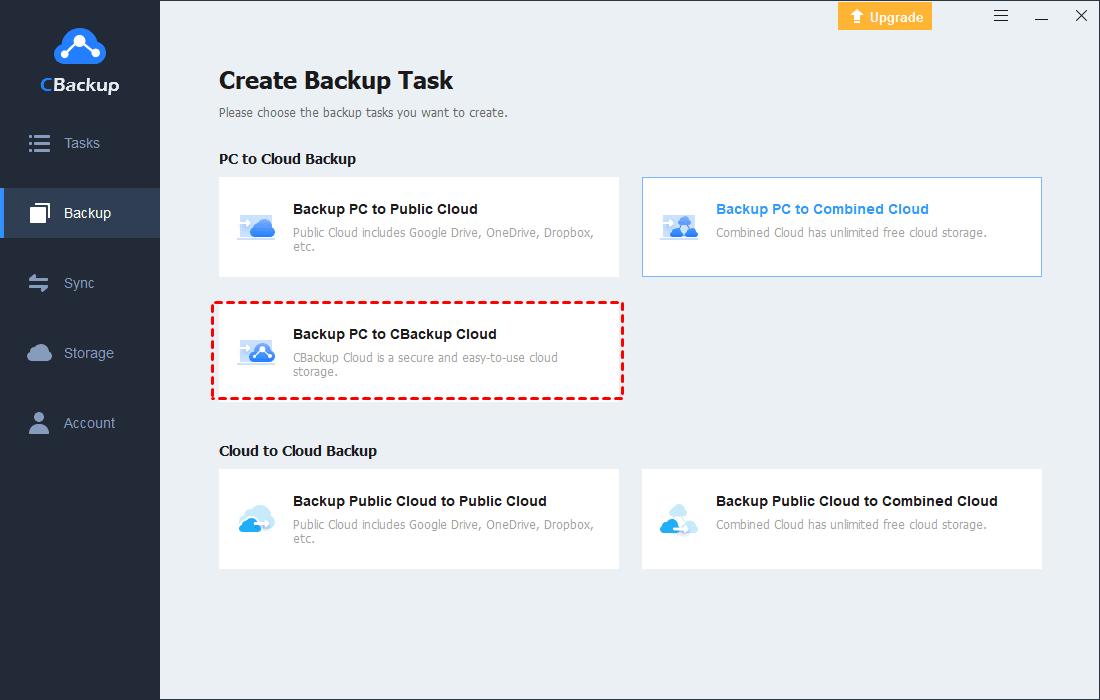
✎Note: If you want to backup files to third-party clouds, you are supposed to head to My Storage, select the cloud drive you want to backup your files. Then, follow the prompts to grant CBackup accessing your cloud space. And then go to the Backup tab and select Backup PC to Public Cloud option.
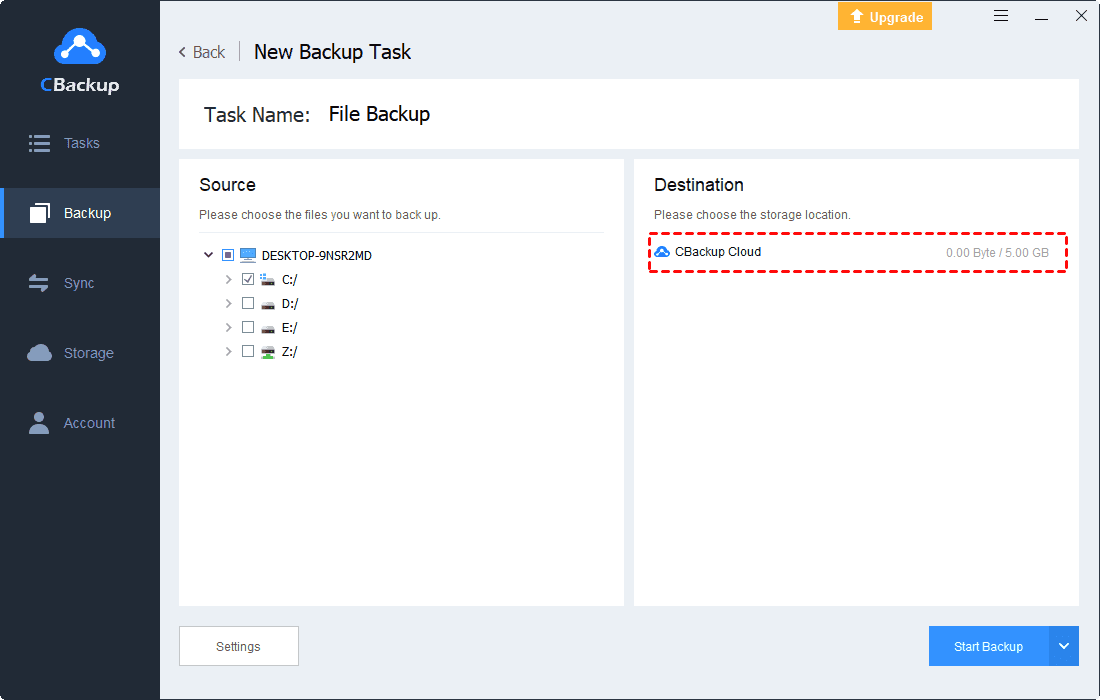
Step 3. Choose files/folders that you need to back up to the cloud. Then click Start Backup to bring it to an end.
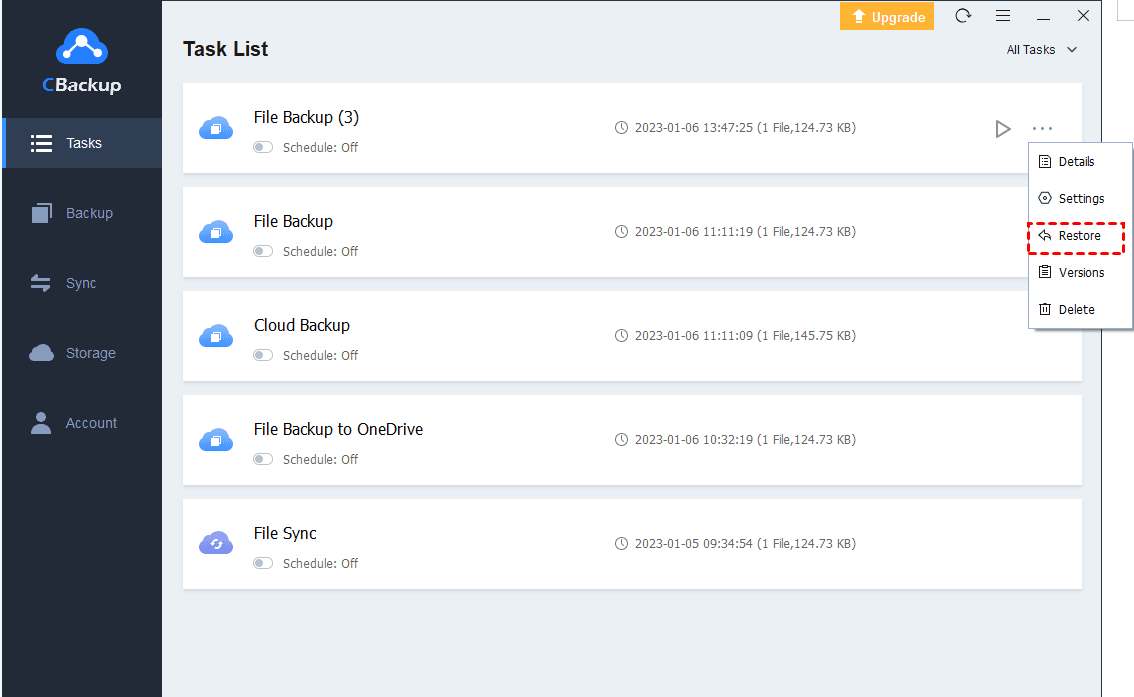
How to restore backups from CBackup
You can restore backed-up data to a local location by clicking the More options (three-dot) button, and tap on the Restore position.
To sum up
This page focuses on workarounds for the "Windows 11 go back button not working" problem. To ensure that your data will not be lost in the downgrade of your system, we recommend that you make a backup of all your data before going back to Windows 10 from Windows 11.
CBackup is an all-in-one cloud backup service, which allows you to backup PC stuff to cloud accounts automatically for free and gets data restoration quickly and easily.

Secure & Free
