
Ultimate Guide: Hidden Album on Google Photos
This article is an ultimate guide about hidden album on Google Photos. No matter you want to hide or unhide album on Google Photos, you can read this article to learn detailed steps.
by Jonna Lasted Updated December 6, 2023
Hidden album on Google Photos
Storing Photos on the cloud is a great way to protect your photos and save local storage space. Google Photos is one of the most popular cloud storage for photos because it provides you with unlimited storage as long as you upload your photos and videos in High Quality mode (discontinued). In addition, it also offers many advanced features like shared albums, automatic creations, and an advanced editing suite.
Nowadays, more and more users choose to back up their photos to Google Photos. After uploading, they can access and manage these photos from any device. However, there may be some private photos among the uploaded photos that the user does not want to display on the main page of Google Photos. Given this situation, Google is rolling out a new feature that can help users hide photos on Google Photos that they want to save but don't necessarily want others to see.

Called Archive, the feature is now available for both Android and iOS users as well as the desktop version of Google Photos. To hide pictures, you just need to select them and choose Archive to hide them. After archiving, the photos will no longer display on your album or homepage, but they remain in your Google Photos and you can view them in the Archive option.
Why need to create a hidden album on Google Photos?
The biggest reason for hiding photos on Google Photos is that we often have some private photos and videos on Google Photos. To avoid accidental exposure, we may want to create a hidden album to make photos that are visible only to ourselves.
For example, sometimes you need to log in to your Google account when your computer or laptop is connected to a projector, or while showing some pictures to your friends directly from a laptop screen. But it could happen that you accidentally bring up some of your personal pictures, leading to definitive embarrassment.
It is also because some photos on Google Photos can be an embarrassing reminder of the silly selfie you took, text message conversation you screenshotted, or embarrassing picture you sent. Although these photos may make you feel awkward, you still want to keep them in a private album.
How to make Google Photos hide or unhide photos on the webpage?
The following contents will show you how to hide photos in Google Photos, how to add photos to hidden album, and how to see hidden photos in Google Photos:
1. Log in to your Google Photos account https://www.google.com/photos/about/ using your username and password.
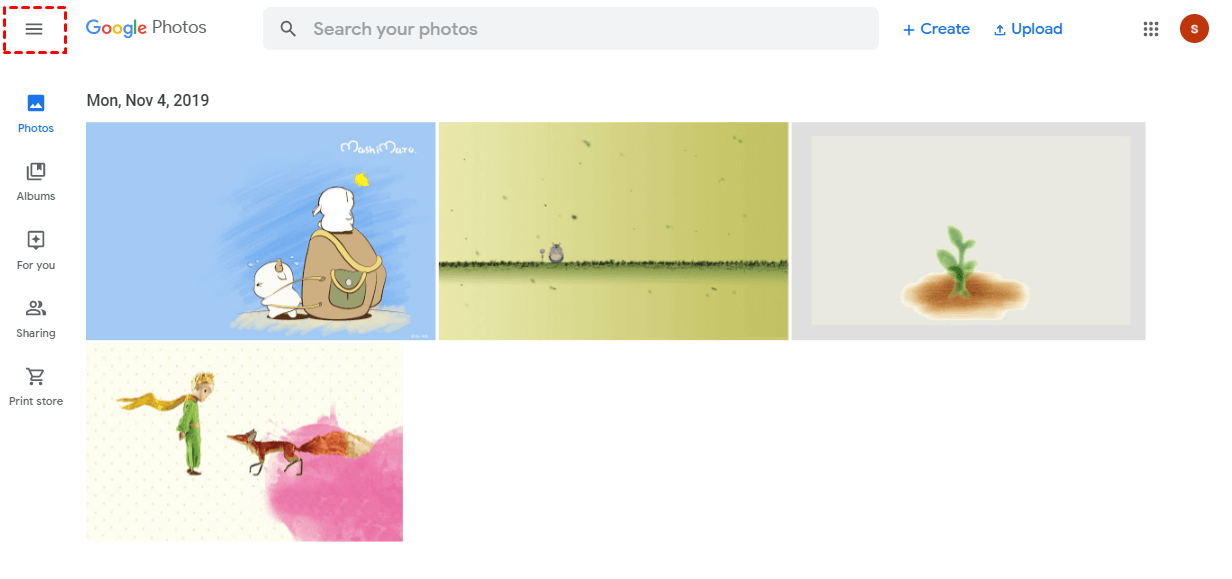
2. On the Home screen, you will see all the images uploaded by you. Now click on "Options" (Three horizontal lines given at the top left).
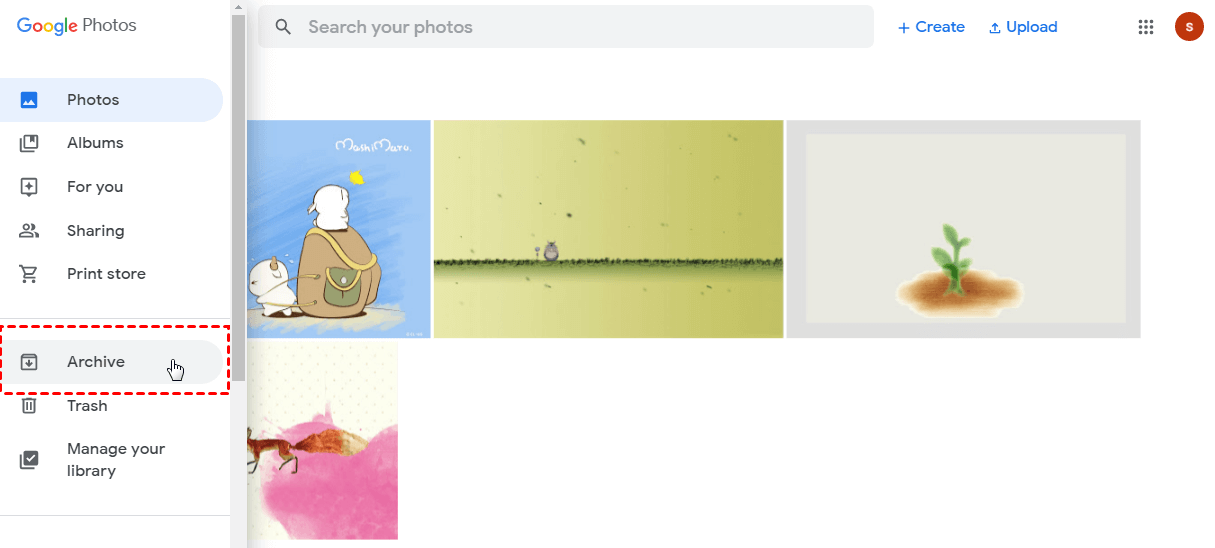
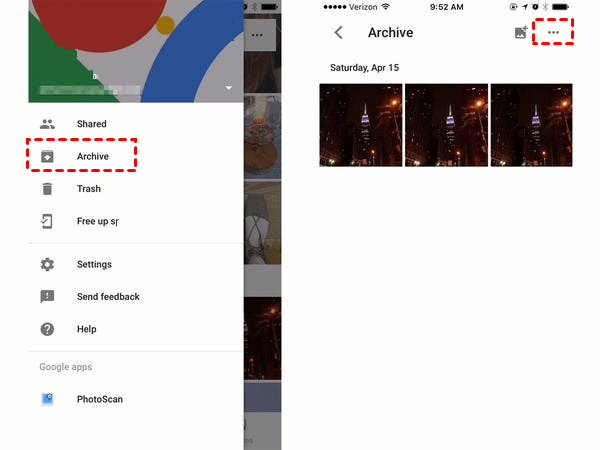
3. Choose the "Archive" fifth option from the top. This option lets you create a hidden album in Google Photos.
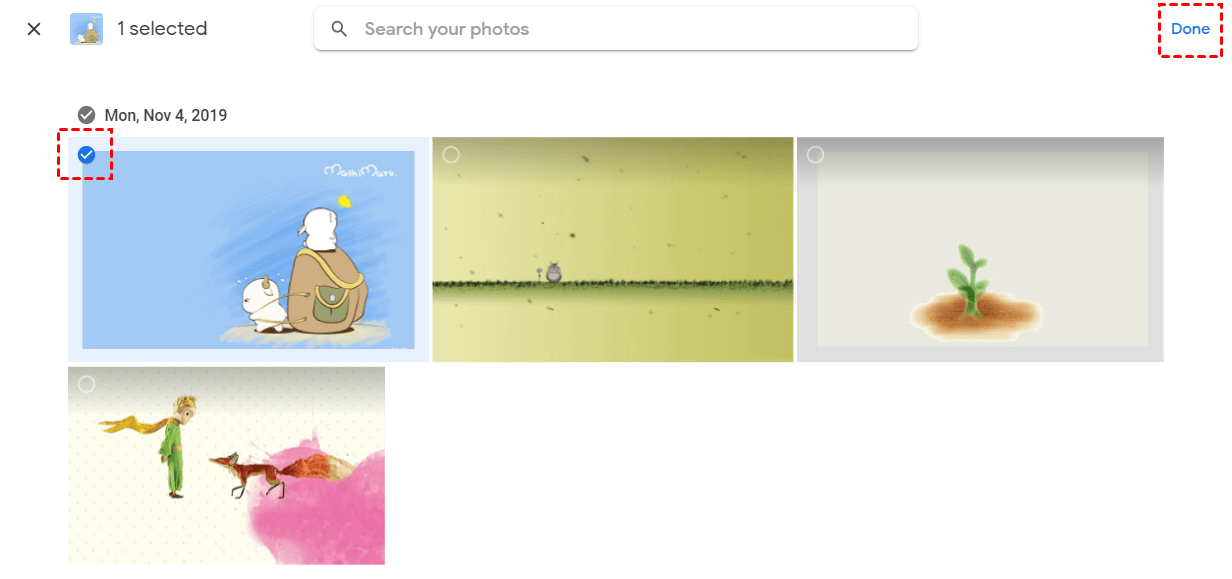
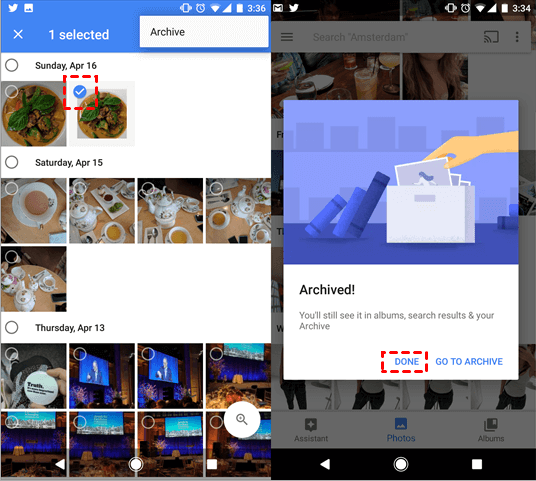
4. On the Archive page, click "Add photos" on the top right. Then, select the photos you want to archive. After selection, click "Done" on the top right.
5. Now, your selected photos have been archived, if you want to view the hidden photos in Google Photos you have just hidden, you can click the "Archive" option (as shown in the picture in step three) to see all of them here. If you want to archive more photos, click "Add Photos" on the top right.
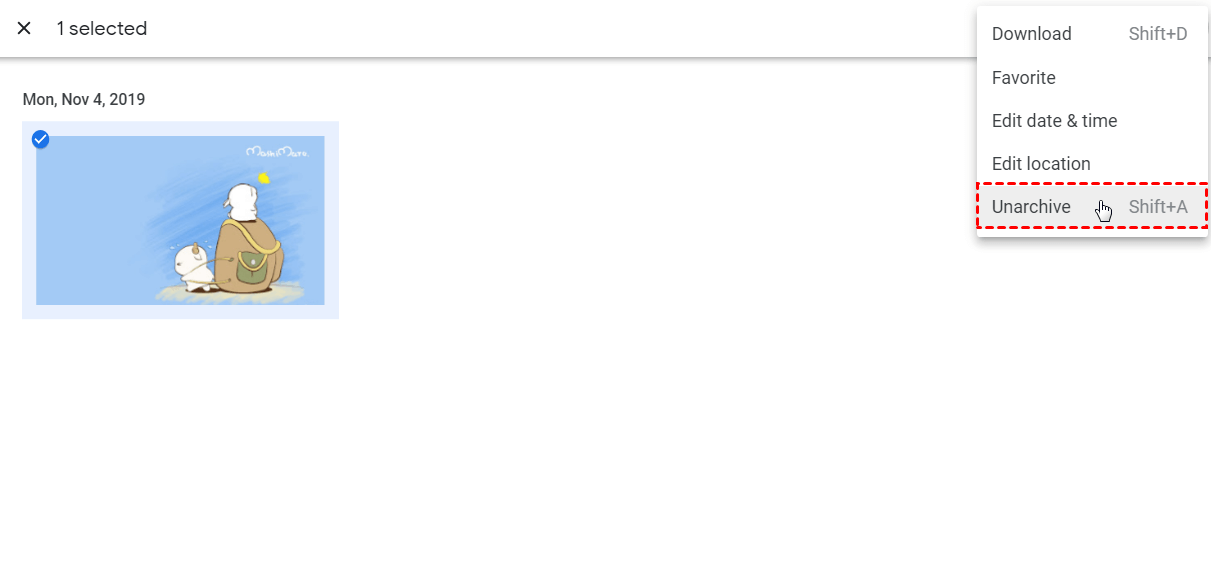
6. If you want to let Google Photos show hidden albums, you can select the photos you need, and then click the three dots icon on the top right to select "Unarchive" in the drop-down menu. Then, your photos will be on the home screen of your Google Photos.
How to hide or show albums on the Google Photos app (Android)
You can also create a hidden album with Archive or Locked Folder on the Google Photos app on your mobile devices with the following steps:
Google Photos hide (or show) album with Archive
1. On your Android phone or tablet, open the Google Photos app.
2. Sign in to your Google Account.
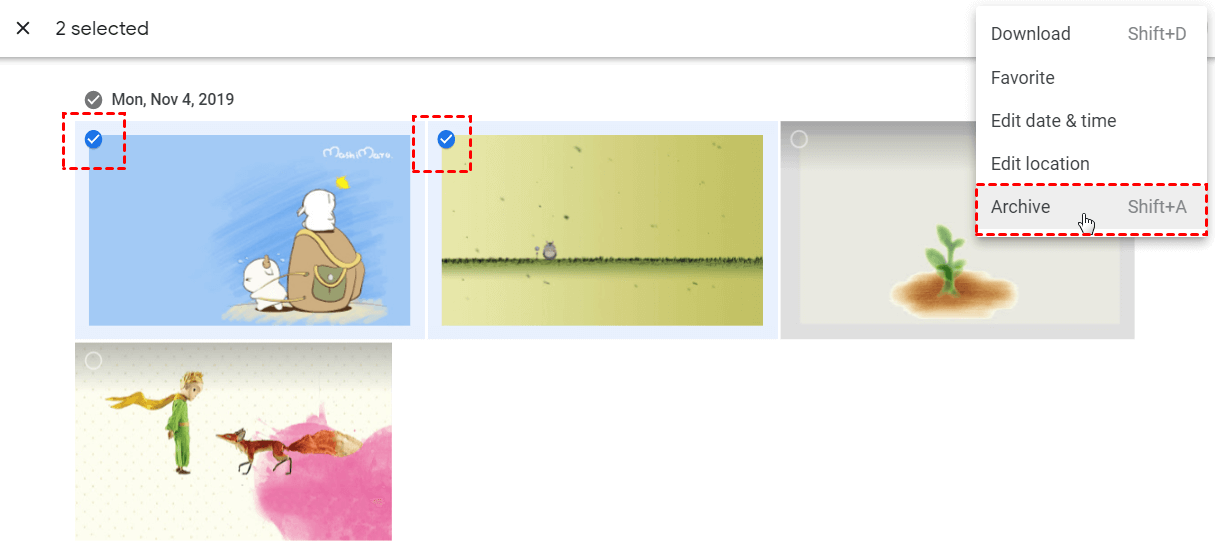
3. Select a photo and then tap the "Menu" button (three dots icon on the top left) > "Archive."
4. After archiving, you can click "Archive" to view your hidden photos here.
5. To unarchive your photos, select the photos and click the three dots icon on the top right to select "Unarchive" in the drop-down menu.
Google Photos hide photos with Locked Folder
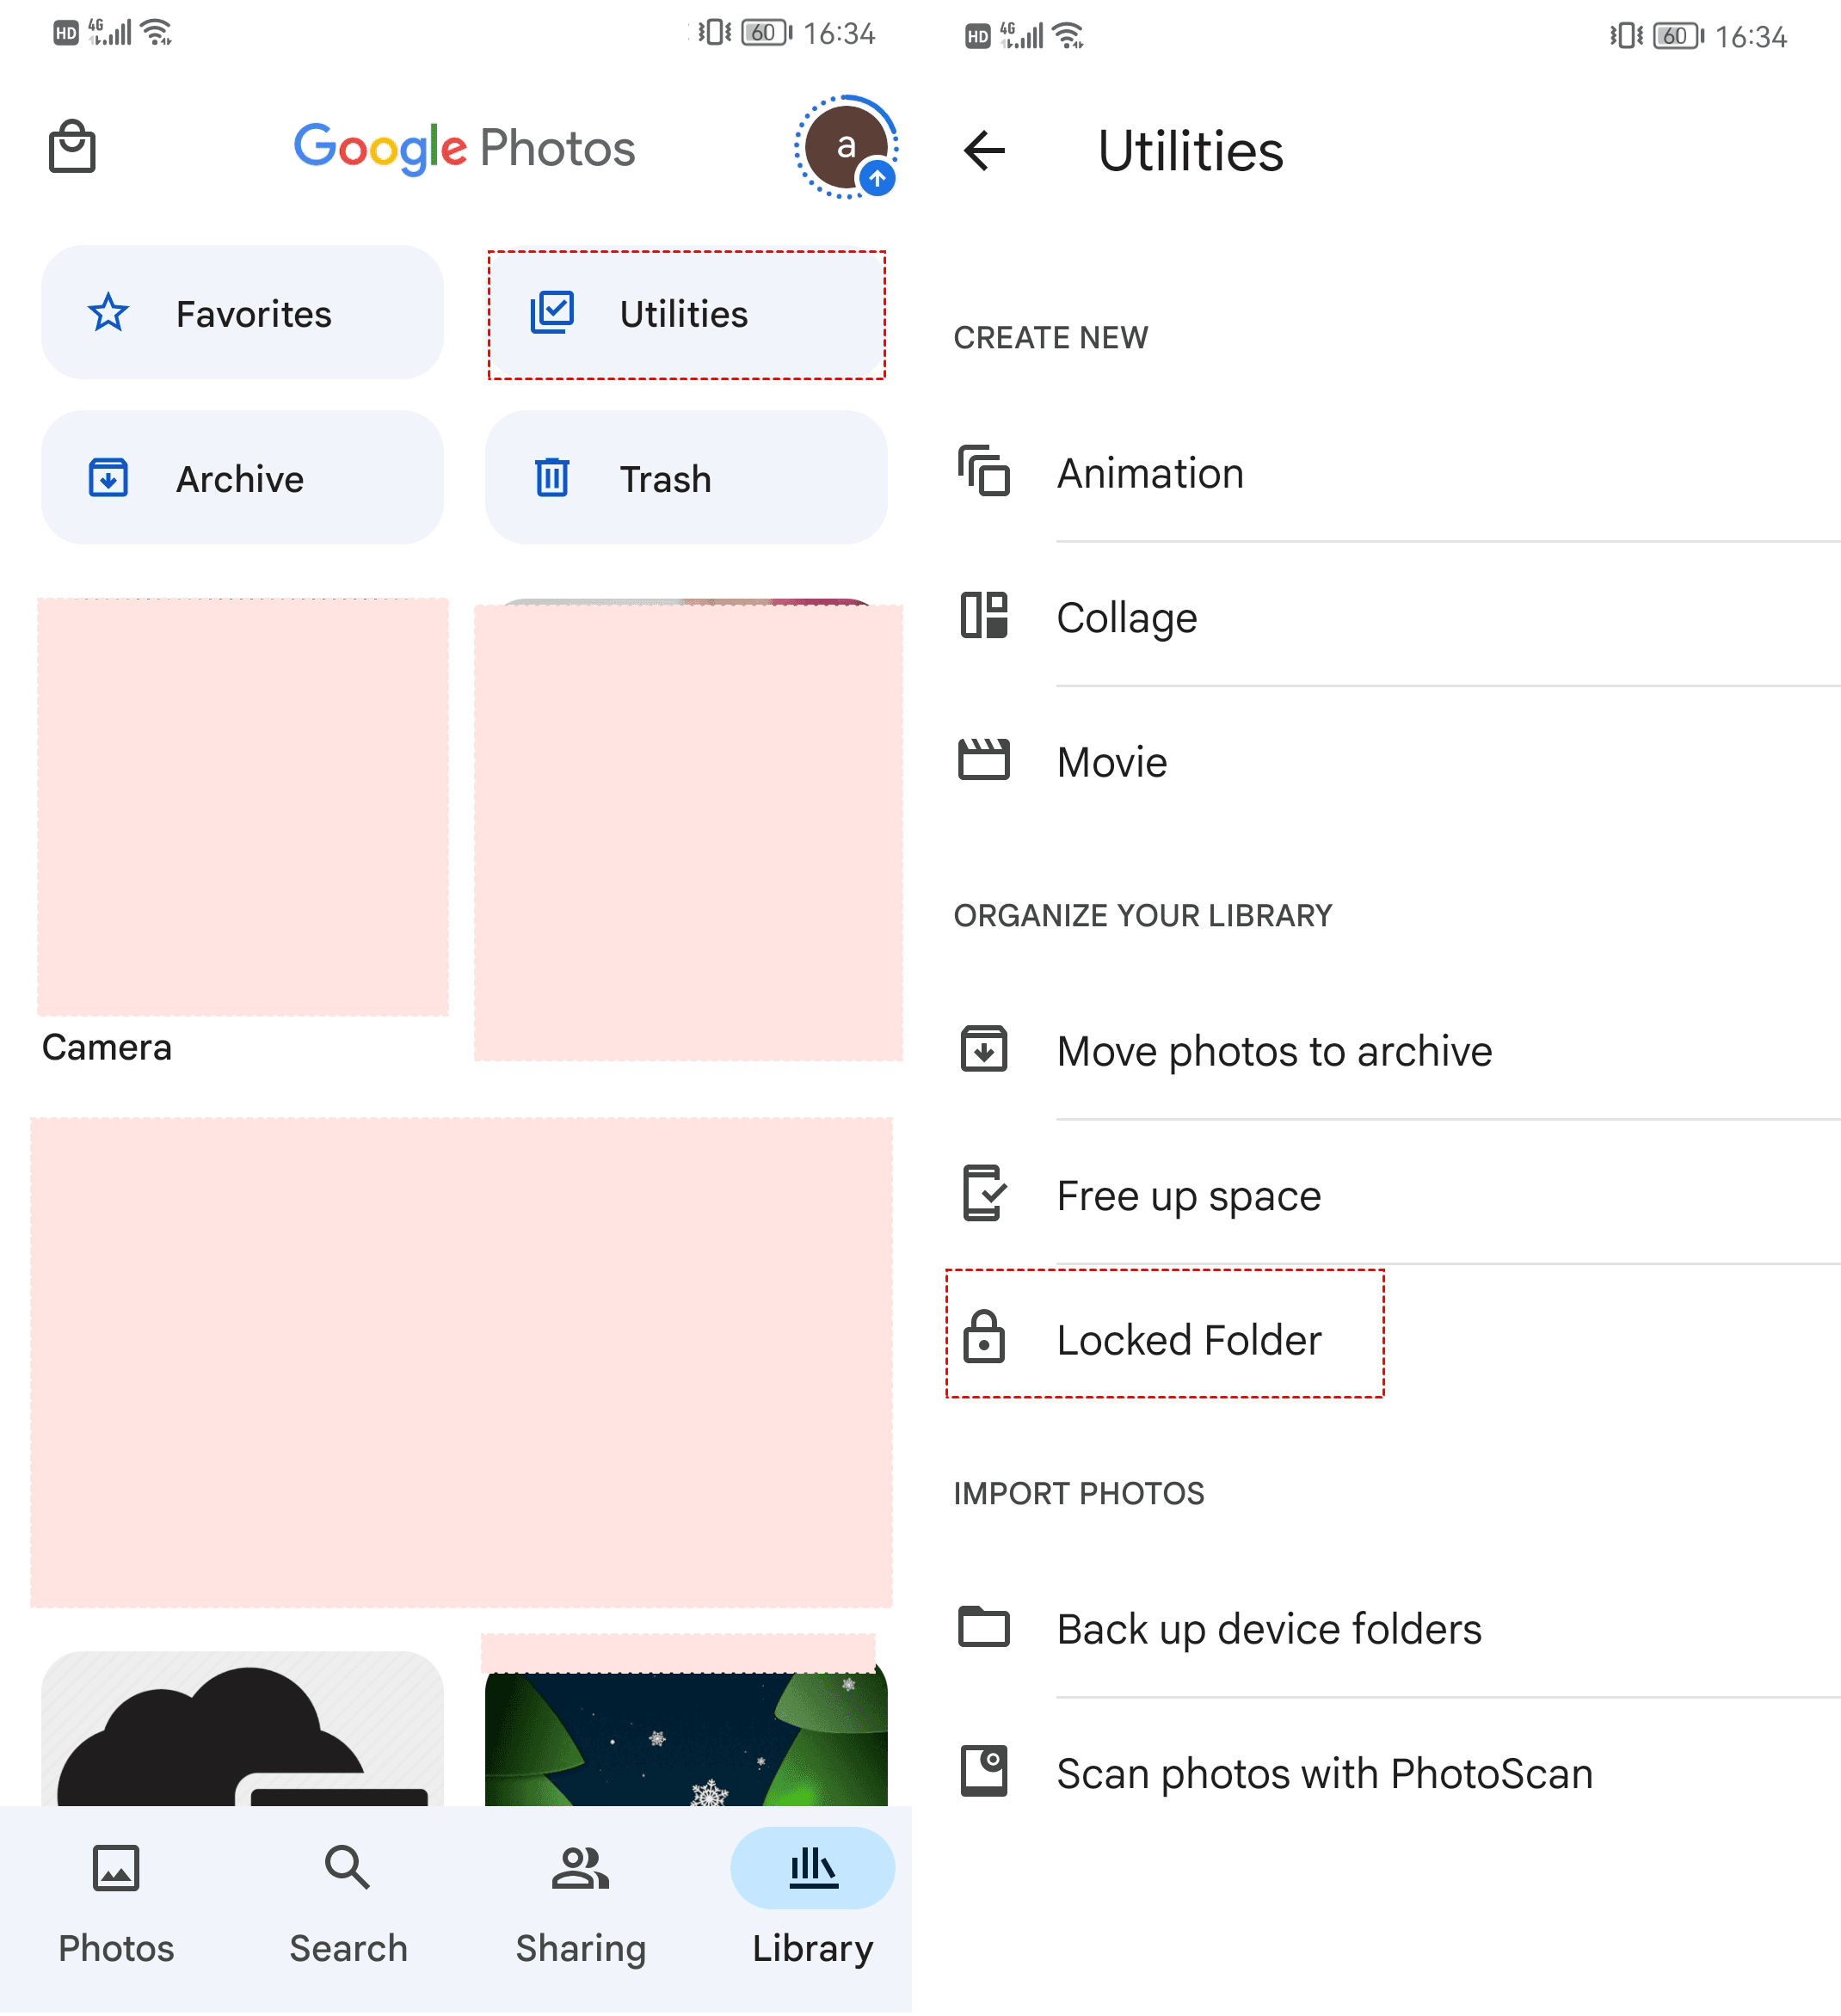
Locked Folder is another new feature that Google Photos provided earlier in 2021, you could save sensitive photos and videos in Locked Folder and these items will not show in search results, or albums and they cannot be accessed by other apps. So, it's safe to store your private files. Here is how to hide album in Google Photos with Locked Folder:
1. log in your Google Photos app, click Libary on the bottom right, then select Utilities > Locked Folder.
2. Open Locked Folder with your device screen lock, then click Move items or click the plus picture icon on the top right.
3. Choose the photos and it will notify you that items in locked folder can't be (and will stop being) backed up or shared. they also won't appear in your Photos grid, search, or apps that access your device photos. Then hit Move.
That's all about how to make Google Photos hidden album on Android with locked folder. If you want to move out of the Locked Folder, just open Locked Folder, and choose the photos you want to move out of Locked Folder, click Move on the bottom left, and confirm Move in the pop up.
Now, you just make Google Photos show album now.
Bonus tips: Google Photos no longer provide unlimited storage
Google announced that it no longer provides Google Photos Unlimited Storage Service after June 1, 2021. Thus, you can't store as many as you have on Google Photos if you don't want to upgrade your Google Drive plan. Fortunately, here is a free way for you to get more Google Photos storage space, the free cloud backup service CBackup, allows you to increase Google Drive storage space for free by merging multiple Google Drive accounts (Google Drive and Google Photos share the same cloud storage space).
Besides, you could use CBackup to:
-
Backup files to Google Drive, Dropbox, OneDrive, and cloud automatically on a daily, weekly, or monthly basis.
-
Perform cloud to cloud backup, which allows you backup Dropbox to Google Drive, backup Google Drive to OneDrive, etc.
-
Sync files from one cloud to another with everything to easily switch cloud drives if you don't want to use Google Drive anymore.
Tip 1. Increase Google Photos Storage Space for Free
Here is how to use CBackup to expand your Google Photos storage space:
1. Download CBackup and create a new CBackup account, and then sign in to the CBackup desktop app.
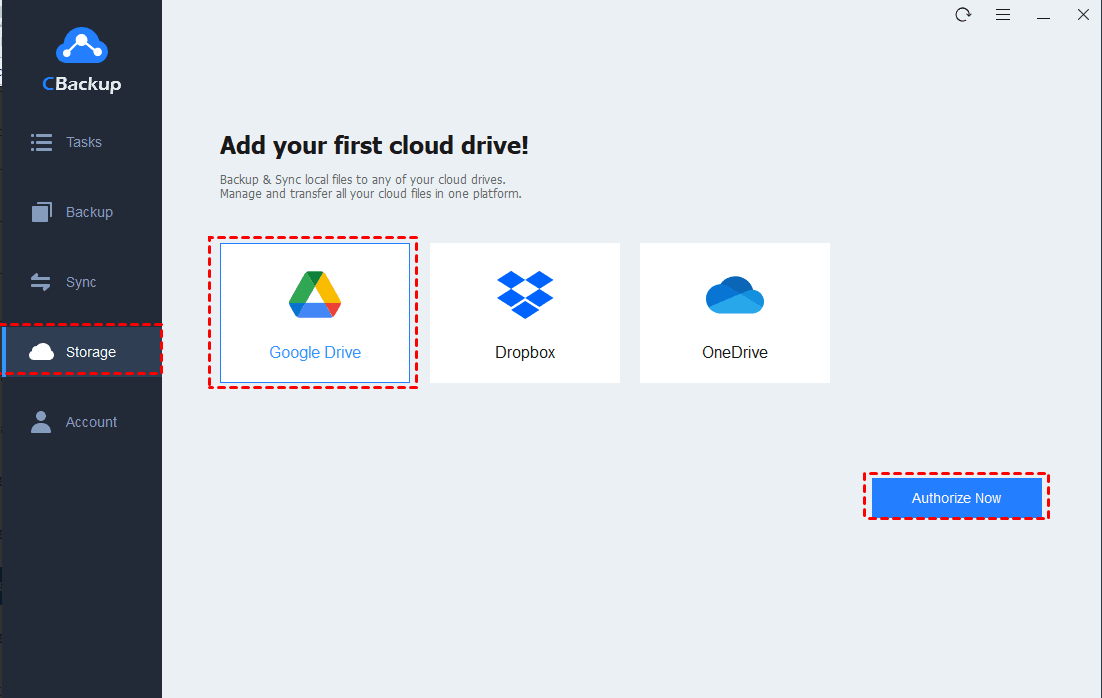
2. Click "Storage" on the left side, then choose Google Drive and hit "Authorize Now". Then follow the on-screen guide to allow CBackup to access your Google Drive files. Repeat the process to add other Google Drive accounts.
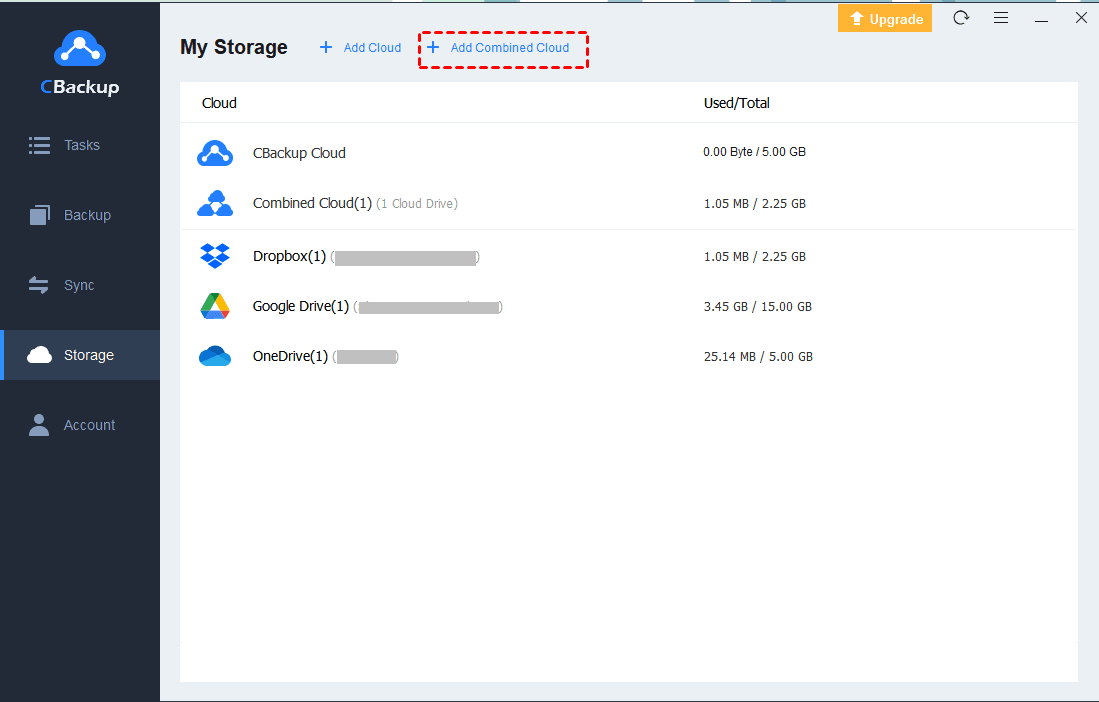
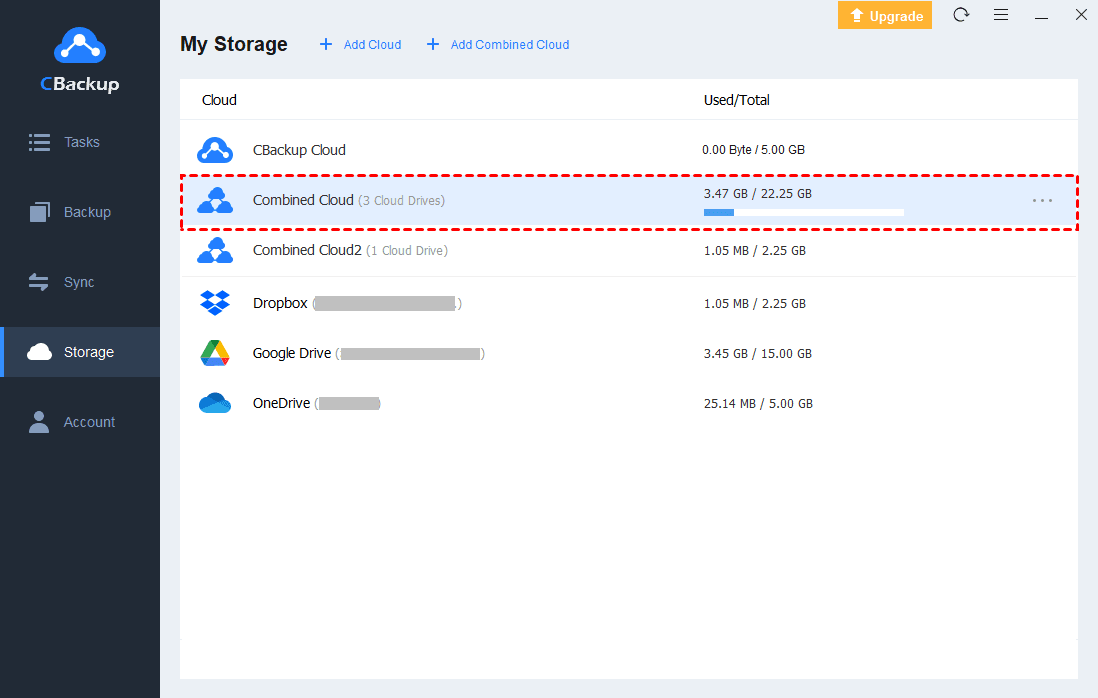
3. Select the "Storage" tab, and then press the "+ Add Combined Cloud".
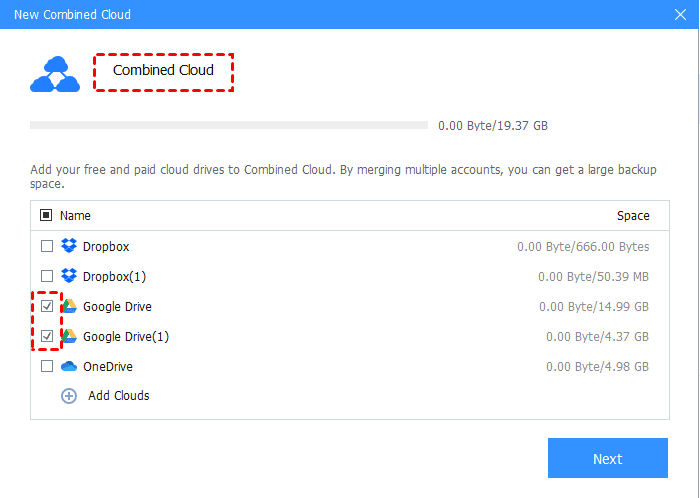
4. Tick all the Google Drive accounts, and click Next.
5. Determine the order to store backup files for all Google Drive accounts, and click Combine.
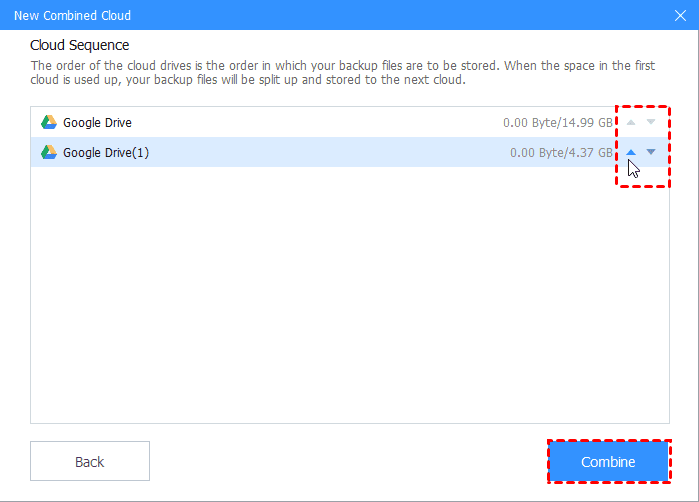
Now Google Drive has been increased successfully. And you could see the Google Combined Cloud on the Storage tab.
Tip 2. Backup Files to Google Drive Easily
Besides, CBackup allows you backup files to Google Drive easily, here it is:
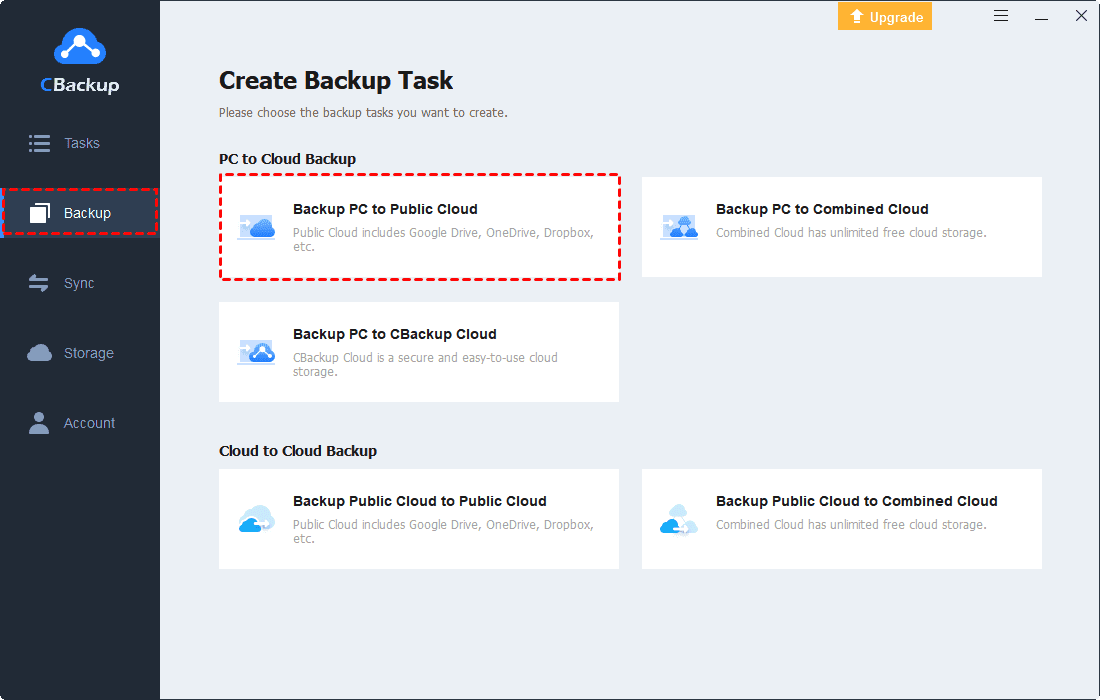
1. Select the "Backup" tab, and then press the "Backup PC to Public Cloud" button to backup files to cloud.
2. Specify the "Task Name", and choose the folders you want to backup in the Source, and tick Google Drive as the destination.
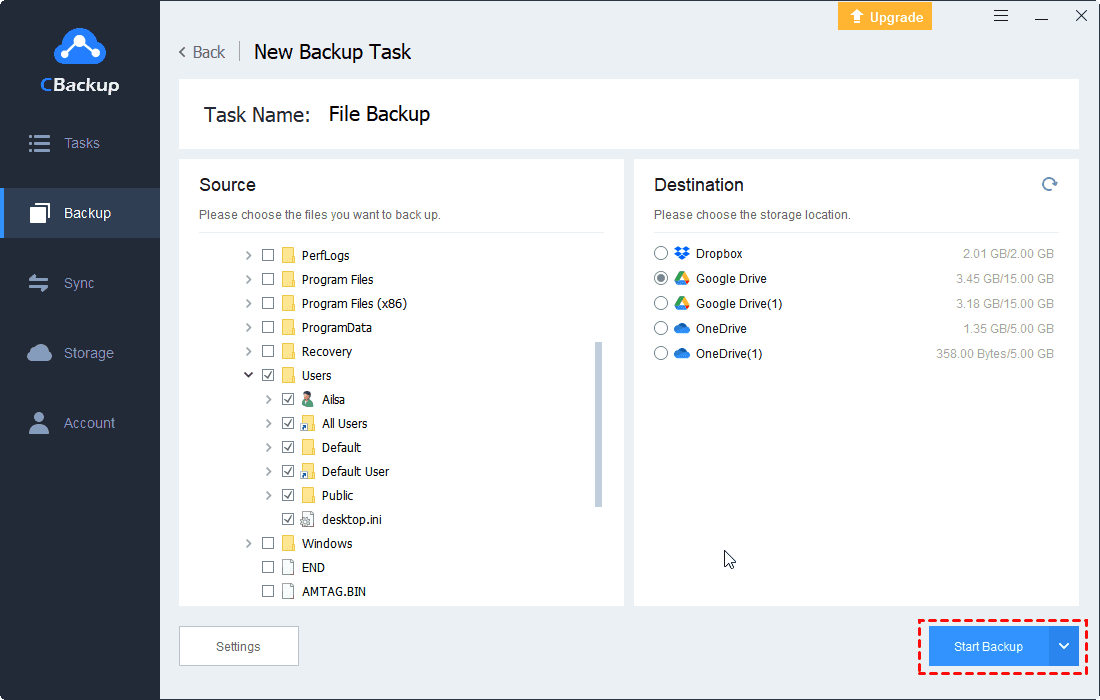
3. Press the "Start Backup" button to backup files to Google Drive.

Conclusion
That’s all about the hidden album on Google Photos. If you don't know how to hide photos on Google Photos, you can follow the steps above to achieve it by archiving or using the Google Photos Locked Folder function. Hiding private photos on Google Photos is a good way to protect your privacy and help you avoid embarrassing situations caused by unexpected photo sharing.
If you don't want to use Google Photos after Google ended the unlimited storage service, you could use CBackup to increase Google Photos storage. If you want to keep a backup version of your important photos, CBackup is a great choice, you can try it to protect your photos first.

Secure & Free
