
How to Move Photos to Album in Google Photos?
Moving photos to album in Google Photos can help you manage and find your photos easier. If you don’t know how to create album and move photos to it, please read on.
by Jonna Lasted Updated February 1, 2023
Album in Google Photos
Google Photos makes accessing and sharing your photos from one place easier than ever. What's more, it also works very hard to organize all of your photos into albums, and easily manage who can see which photos. These albums let you easily share important moments with friends, as well as keeping more private moments for your eyes only.
How to create an album and move photos to album in Google Photos?
If you want to create albums in your Google Photos, you can read the contents below and follow the steps to create an album in your Google Photos and move photos to it.
Create album and move photos to it on computer:
1. On your computer, open photos.google.com. and sign in to your Google account.
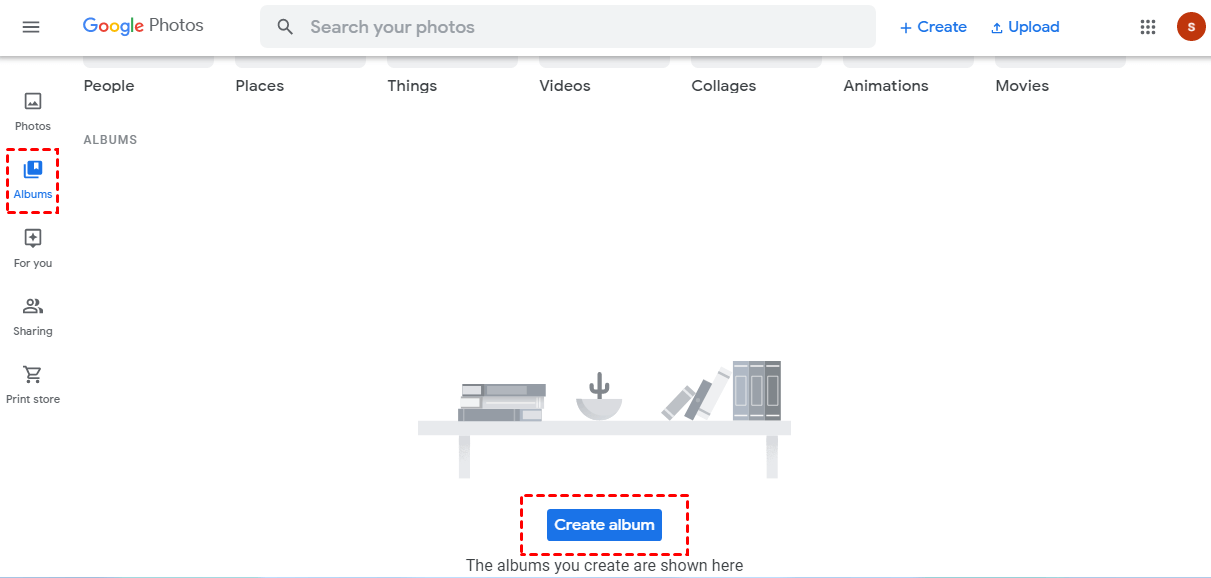
2. Click on the “Album” option on the left and click on “Create album”.
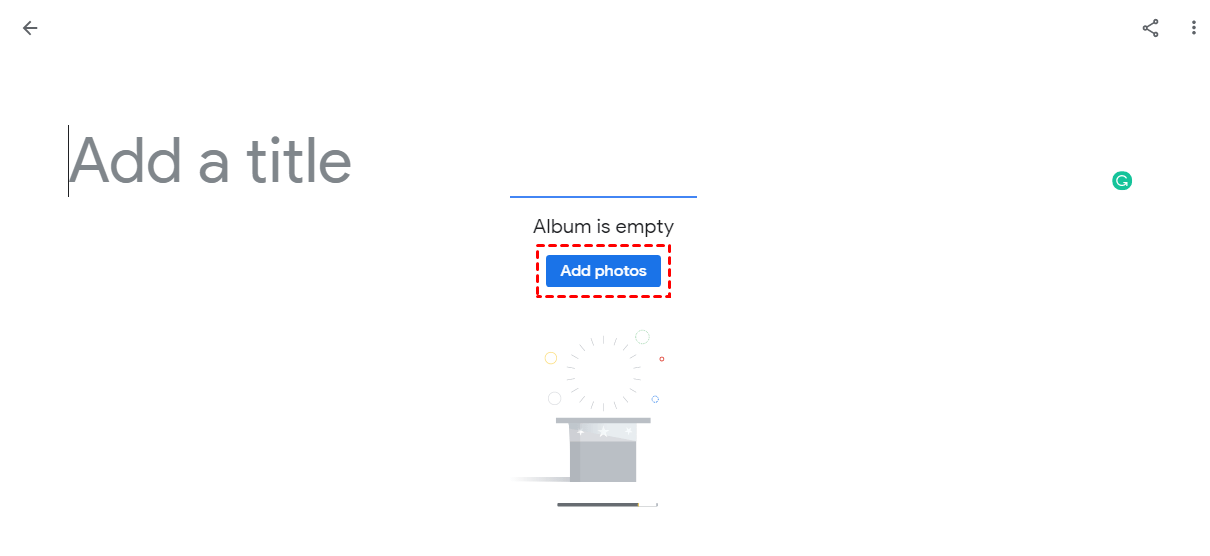
3. Name your Album. Click “Add photos” to select photos that you want in your album and click “Done”.
✎Note: In your album, you can remove photos that you don’t need. Select the photos, click the three dots icon on the top right, and click “Remove from album”.

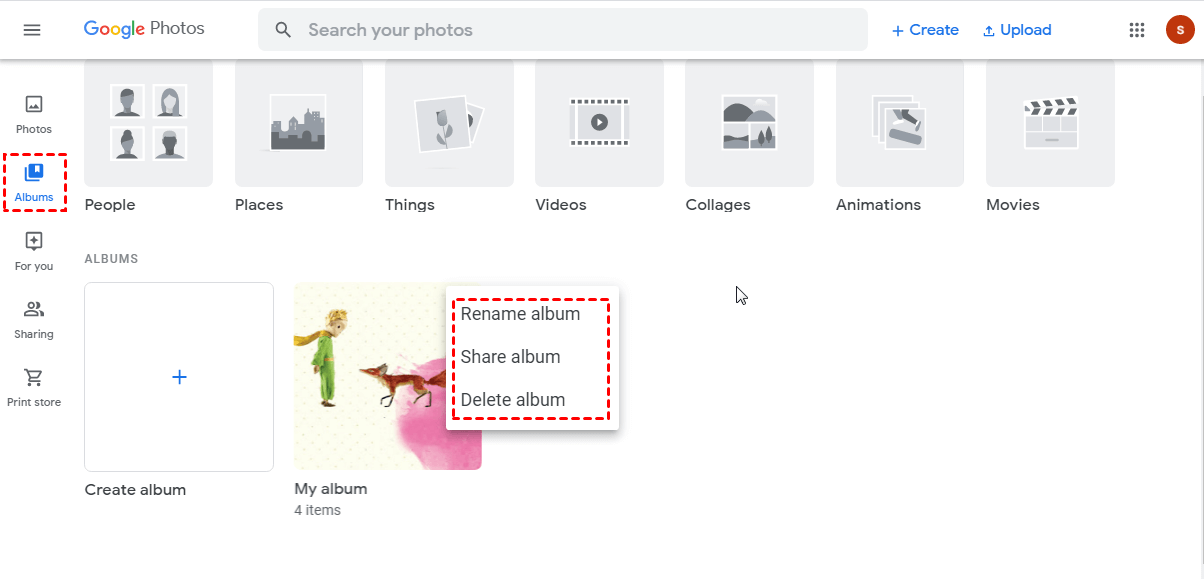
4. After creating, you can click “Album” to see your album here. Click the three-dot icon on the upper right corner of the album, you can choose to “Rename album”, “Share album” and “Delete album”.
Alternatively, you can choose the photos that you want in your album on the main page. After selecting, on the top right, click Add (+) > Album > New Album to create a new album and then add photos to it.

Create album and move photos to it on mobile devices:
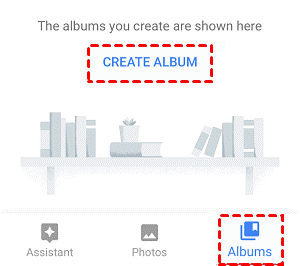
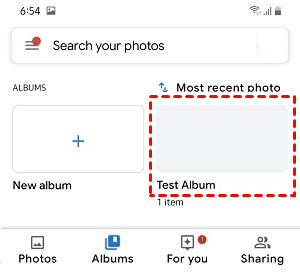
1. Open Photos App on your devices and tap on “Albums” tab located in the bottom menu.
2. On the next screen, scroll down and tap on “Create Album” option.
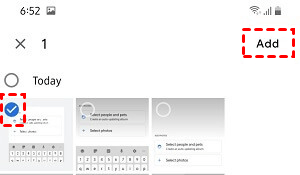
3. On the next screen, add a title for your album and tap on “Select Photos” option to select photos that you want to add to the album and tap on "Add".
✎Note: You can remove photos from any album in Google Photos with the following steps.
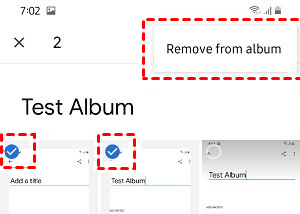
1. Tap on "Albums" tab in the bottom menu. In your album, tap and hold on the photo that you want to remove.
2. Tap on three dots icon located at the top-right corner of your screen and then tap on “Remove from Album” option.
How to move albums from Google photos to Google Drive?
Generally, users upload their photos from local devices to Google Drive by Google Drive for desktop or manual uploading, but sometimes, they also need to move photos or even albums from Google Photos to Google Drive for better management.
Way 1. Downloading and uploading
To move photos or albums from Google Photos to Google Drive, downloading and uploading is a time consuming but feasible way.
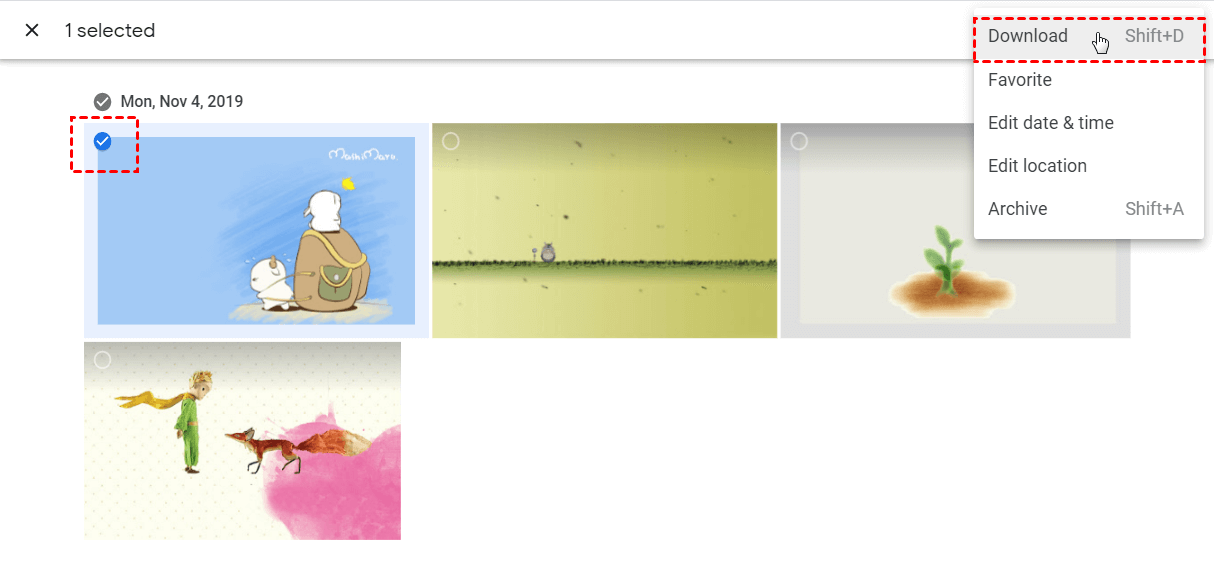
1. Firstly download all photos from Google Photos to local devices.
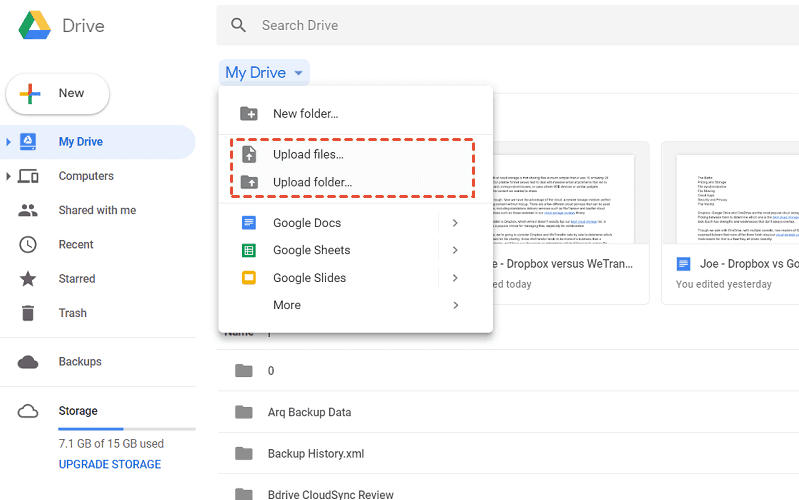
2. Upload these photos from the local computer to Google Drive.
Way 2. Use a reliable transfer tool
Actually, there are many professional cloud transfer tools in the market that can help you transfer photos or albums from Google Photos to Google Drive directly, saving much time and effort. MultCloud is a free tool that can help you achieve it.
1. Create a MultCloud account and sign in.
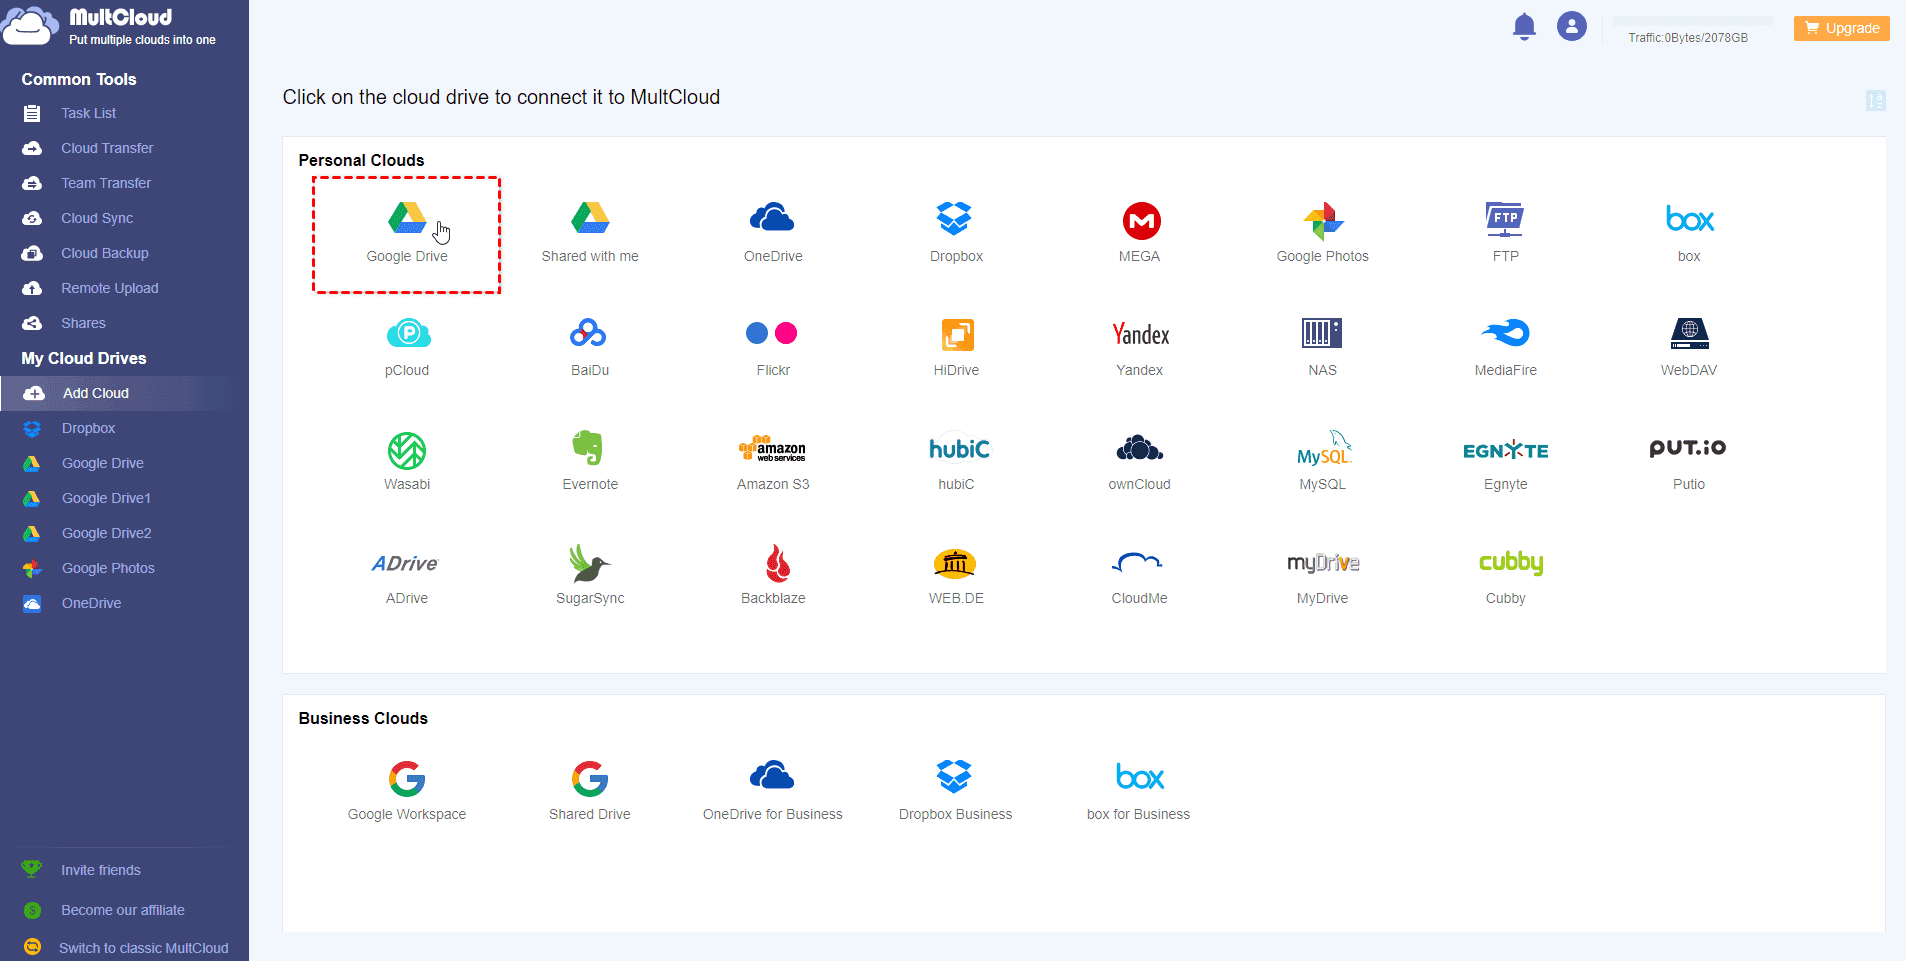
2. On its main page, click “Add Clouds” on the left panel to add accounts of Google Photos and Google Drive. Then click “Next”, just follow the easy guidance to finish the adding process.
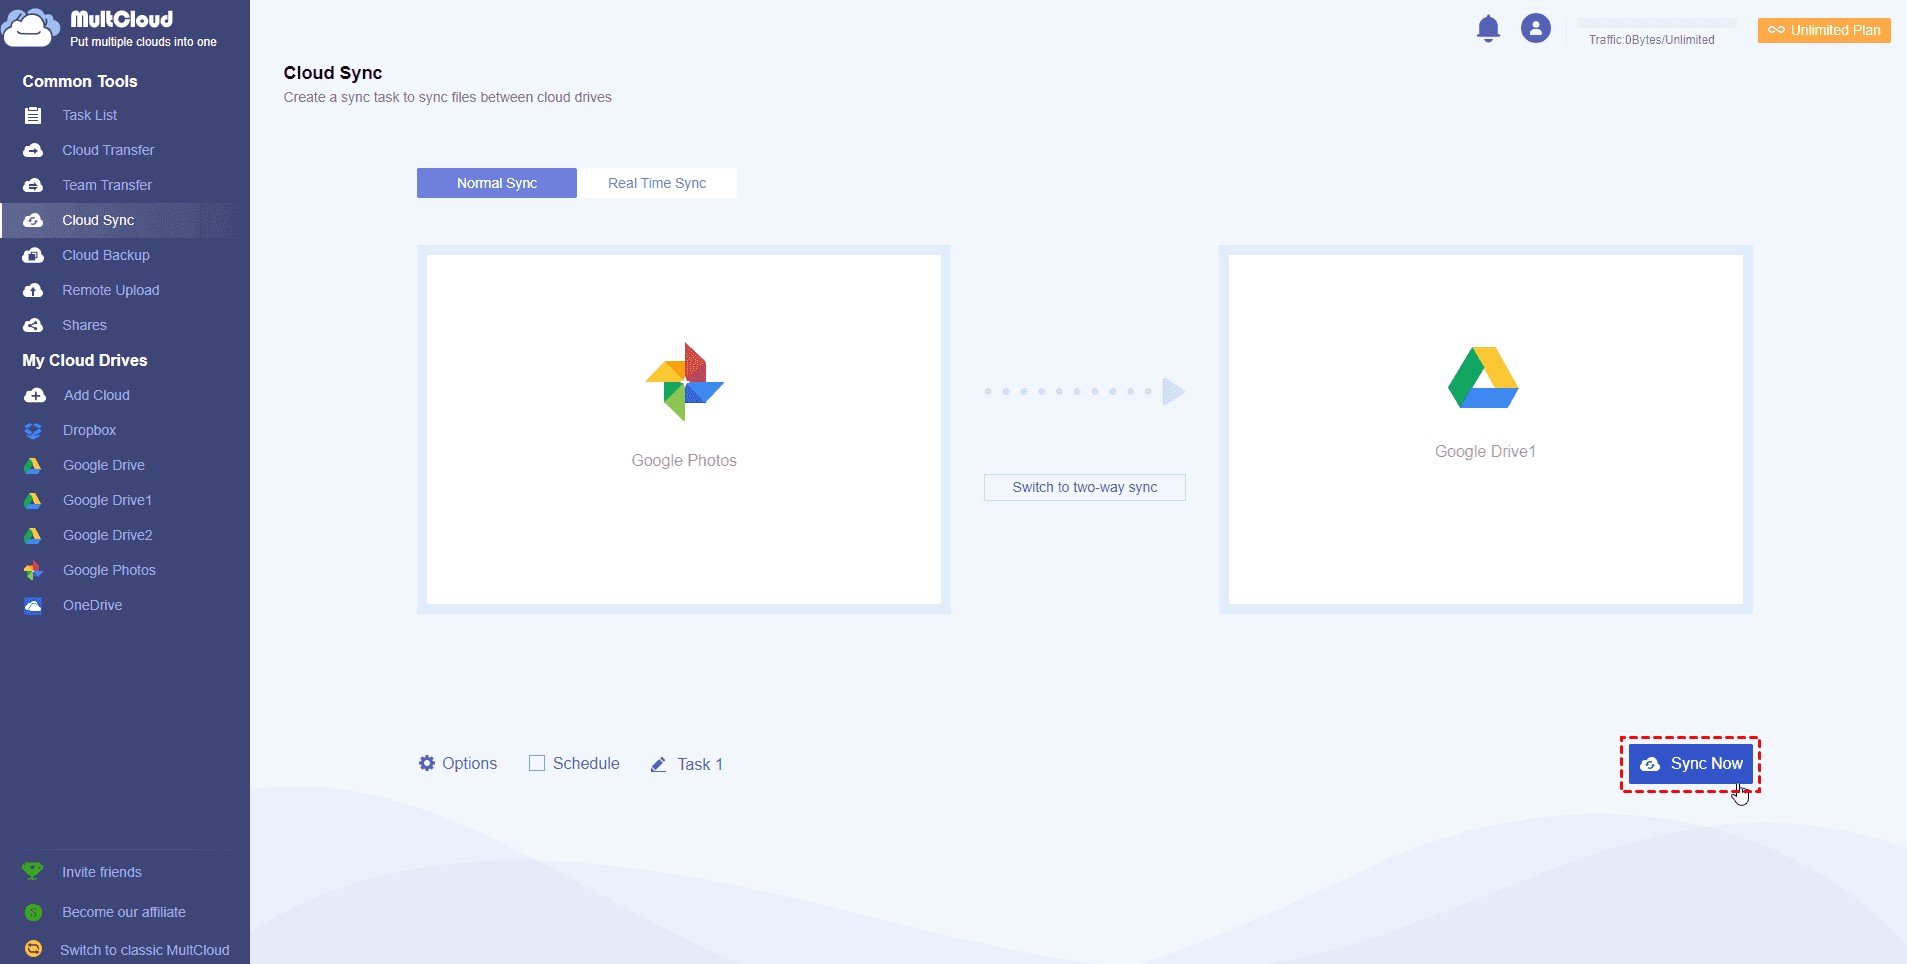
3. Select Cloud Sync from left menu, and then select the folder in Google Photos you need as the source folder and choose a folder in Google Drive as the transfer target. And then, click “Sync Now”.
Way 3. Show Google Photos in Google Drive [Not Avaiable]
Actually, there is a feature in Google Drive that can help you view, download, delete, share, tag, and rename your photos in Google Photos after setting, please follow the steps below to enable this feature.
1. Go to the website of Google Drive and sign in to your Google account.
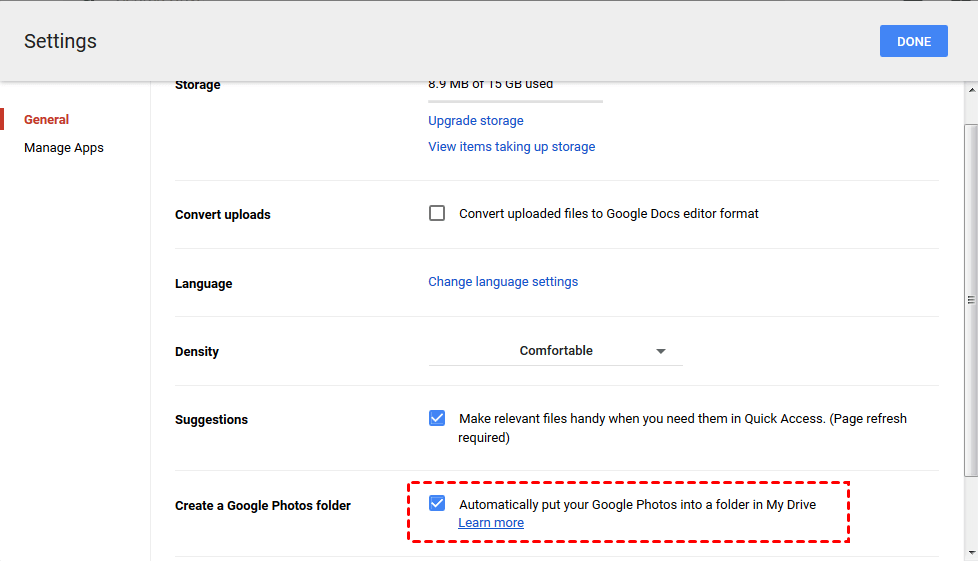
2. Click "Settings". Turn on “Automatically put your Google Photos into a folder in My Drive” next to "Create a Google Photos folder”.
Update: This way is not available for you any more, you could just skip this information.
Bonus tip: How to get more Google Drive storage for photos?
As we all know, Photos are very memory intensive, especially photos in original quality. In addition, Google ends the unlimited storage service on June 1, 2021. In other words, after this date, even if you upload pictures in high-quality mode, it will take up your Google Drive storage space. So, if you worry about the insufficient storage problem, you can expand the Google Drive storage with CBackup.
CBackup is a professional cloud backup service that can help you add and merge Google Drive accounts. In this way, you can combine your Google Drive cloud storage into one and then back up files or photos to this combined cloud. Thus, you can enjoy the huge backup space and protect as many photos as you have. In addition, it has a clean interface and user-friendly design so that you can easily figure it out even for the first time.
1. Download CBackup, create a CBackup account and log in.
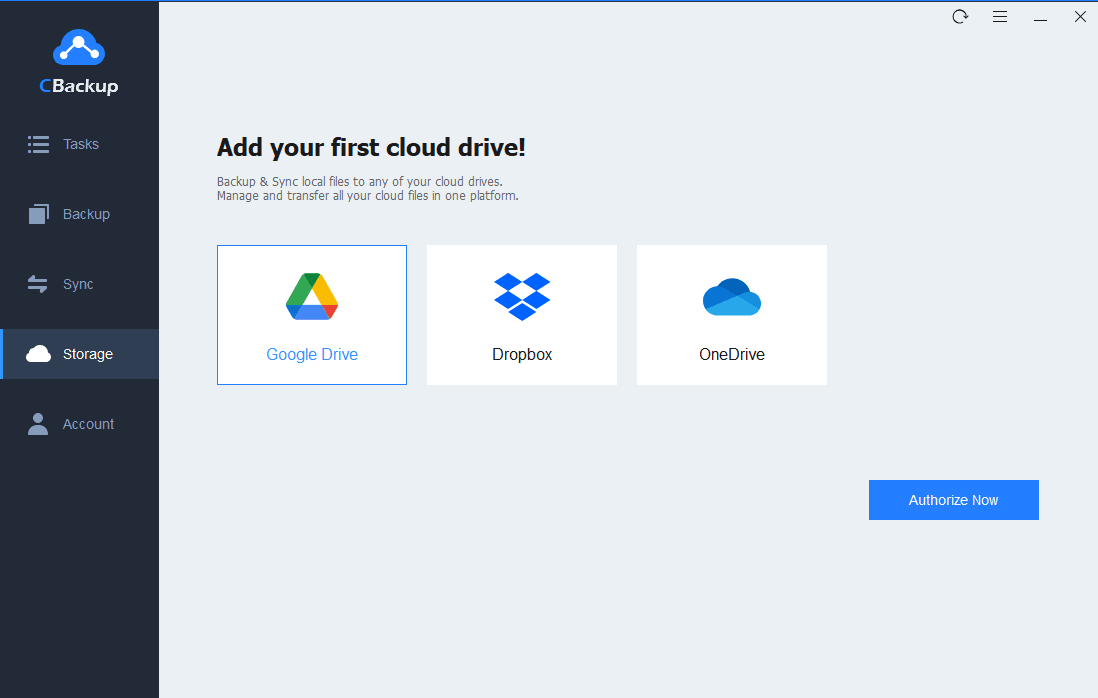
2. Click "Storage" on the left side, then choose "Google Drive" and hit "Authorize Now". Then follow the on-screen guide to allow CBackup to access your Google cloud storage. Repeat the process to add all your Google Drive accounts.
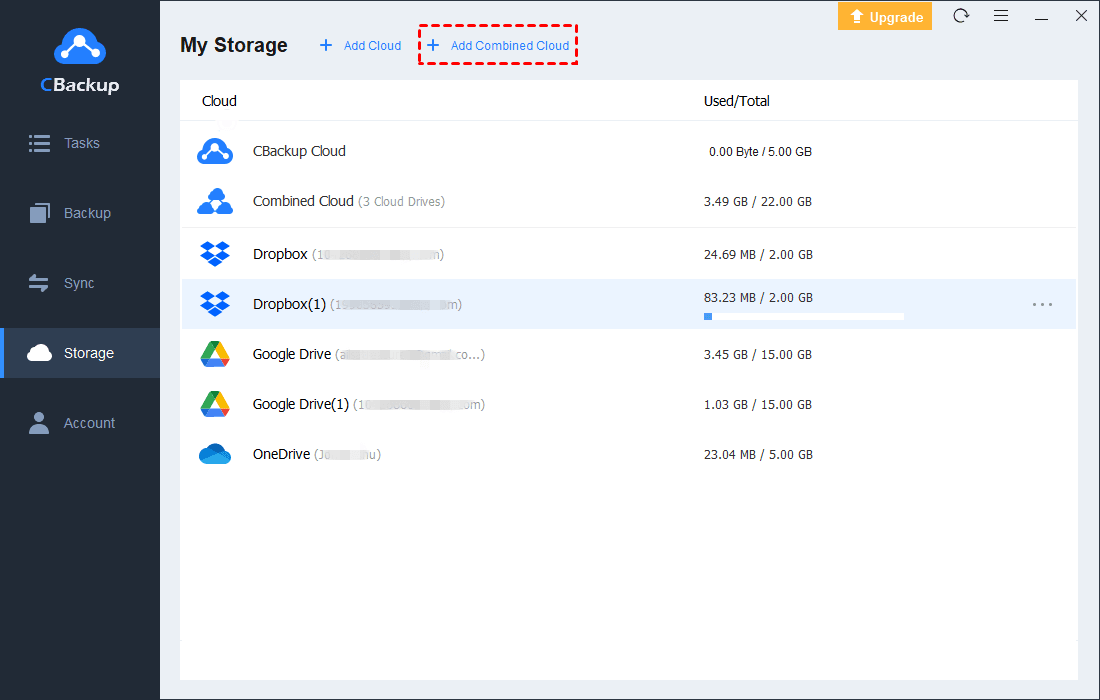
3. After adding, all your Google Drive accounts are listed here. Click the "Storage" button, you will see an "+ Add Combined Cloud" option in the menu. Click it.
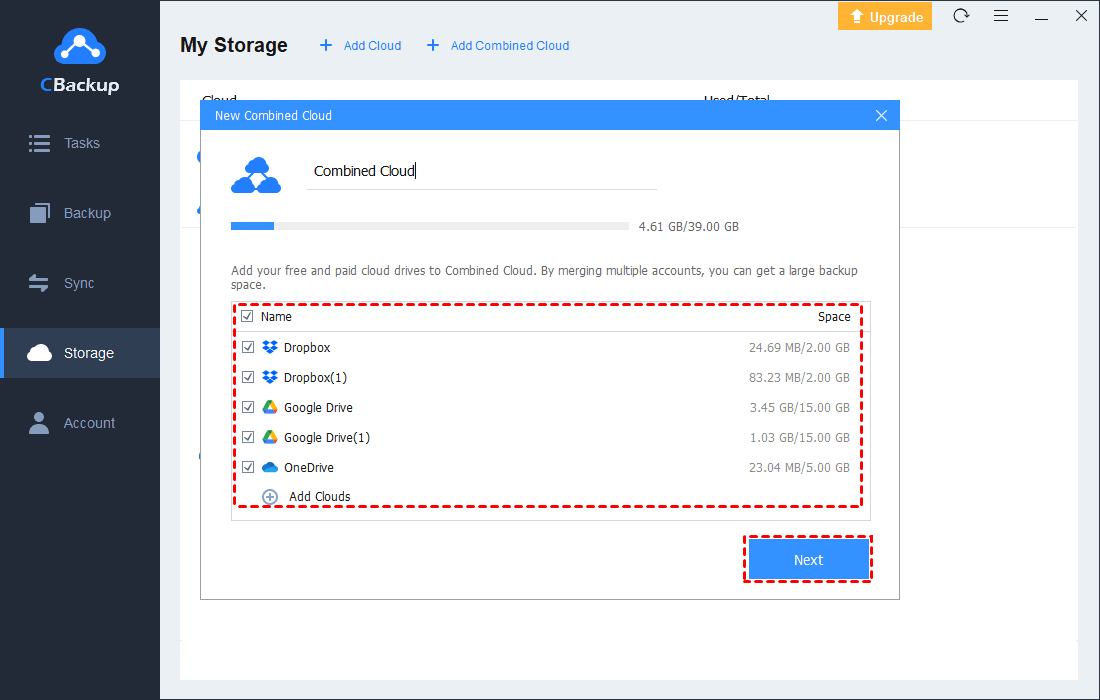
4. Tick the box next to all the Google Drive accounts that you want to combine. After checking, click on "Next". Choose backup order for all Google accounts, then press Combine.
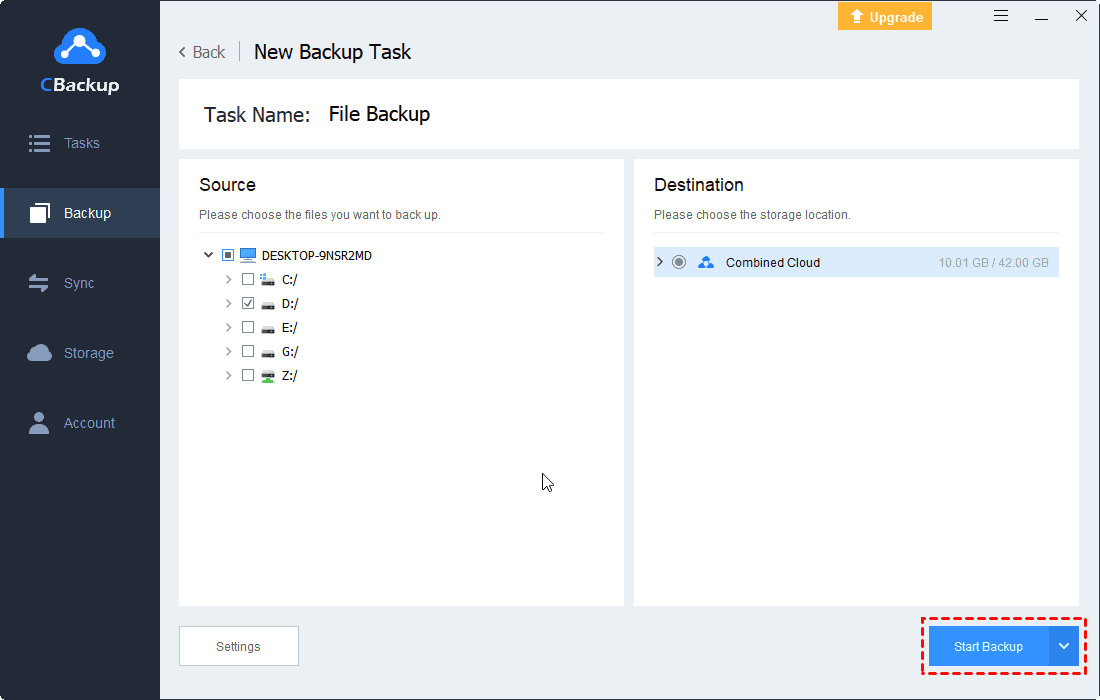
5. Then, you will have a "Combined Cloud" in your clouds list. You can choose the "Backup PC to Combined Cloud" option in the Backup section to upload files to the combined cloud.
- Notes:✎...
- You could enjoy cloud to cloud sync to move everything from one cloud to another directly.
- Backup cloud data to another easily with powerful features, like schedule backup, email notification, file filter, etc.
- Backup files to Google Drive, Dropbox, OneDrive, cloud, even the combined cloud to protect files as many as you have.
- Offers 10 GB free cloud storage space or more, like 1 TB or 5 TB as a gift for you if you get CBackup advanced plan.
Conclusion
As we can see, it is not hard for most users to create an album and move photos to the album in Google Photos. After reading the contents above, you may already know how to achieve it with simple steps. In addition, Google Photos doesn’t have a merge feature, if you want to merge photos and videos from one Google Photos album into another, you’ll need to copy one album’s contents into the other and then delete the original album.

Secure & Free
