
How to Create System Backup in Windows Easily
Creating a system backup is the process of making an exact copy of system drive including the OS, drivers, configuration settings, and system files, etc.
by PublicOwin Lasted Updated March 20, 2026
System crashes can occur due to various reasons such as hardware damage, virus attacks, or system updates. However, reinstalling the operating system, along with all applications and configurations, can be a time-consuming and troublesome process. Fortunately, by implementing a proactive system backup strategy, you can mitigate these challenges. With a reliable system backup in place, you can easily restore your entire system and quickly resume normal operations.
CBackup is an excellent solution that offers a user-friendly system backup feature for all Windows operating systems, including Windows 11, 10, 8.1, 8, 7, XP, Vista, and server systems. This powerful tool focuses on creating an image of the C: drive and other system-related partitions, encompassing critical system and boot files, installed applications, and user profiles stored on system partitions.
Create System Image Backup in Windows 10 step by step
Prerequisites for system backup:
- The bootable computer that you want to back up from.
- A target drive (with enough free space) that you can save backup images to. A local path and Share/NAS devices are supported.
- Download and install CBackup on the computer. The basic system backup is a free feature; you can download and use the freeware on the computer.
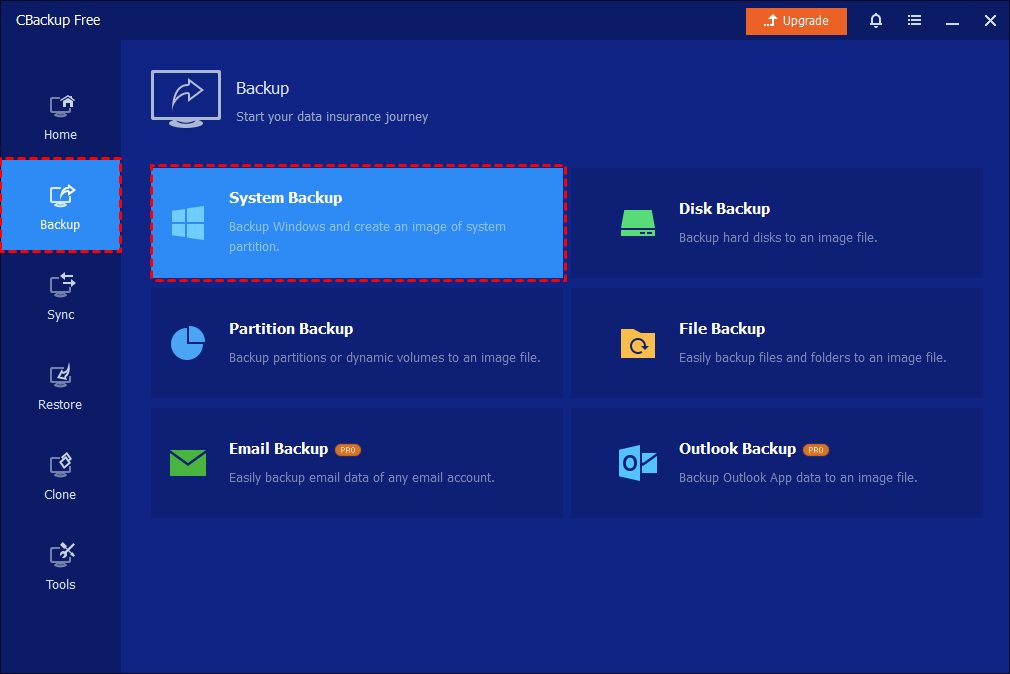
Step 1: Initiate System Backup
Run CBackup, click "Backup" in the left tab, and then select "System Backup". It will automatically detect and list system partitions as a source.
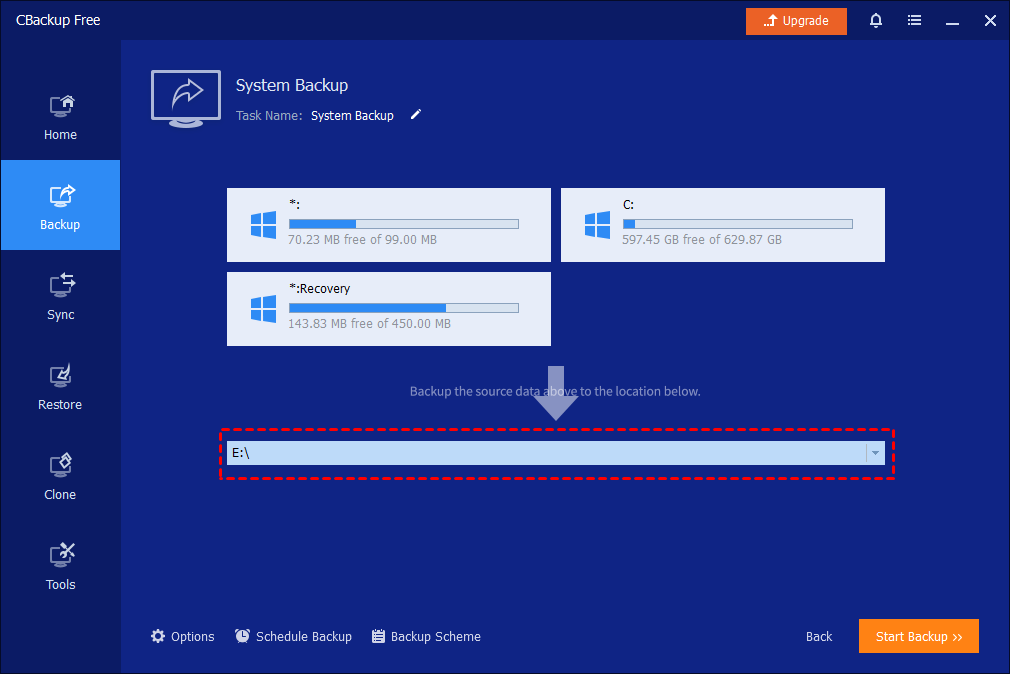
Step 2: Select Destination
Please click the destination box to select a destination path. Supported destinations include local drives (internal/external), DVDs, and network-attached storage (NAS) or shared folders.
Tips: You can click the "Task Name" field to rename the backup.
Step 3: Additional Backup Settings
In addition to the aforementioned options, system backup offers additional features to further enhance functionality and convenience:
Options: There are various settings to enhance functionality and customization. These options include:
- Compression Level: Choose the desired compression level to optimize storage space usage while maintaining backup integrity.
- Encryption: Secure your backup by enabling encryption, which protects the backup from unauthorized access.
- Splitting Image: Split large backup files into smaller segments for easier storage and compatibility with Different Storage Devices.
- Email Notification: Receive email notifications to stay informed about the status and completion of backup tasks, ensuring peace of mind and proactive monitoring.
Schedule Backup: Since systems and data are constantly changing, you can set up scheduled backups to automatically back up the system at specified intervals. You have the flexibility to choose from daily, weekly, or monthly backups. In the paid version, you can also utilize event triggers or initiate backups upon USB plug-in.
Backup Scheme: With backup schemes, you have the option to choose between incremental and differential backup methods. Incremental backup captures only the changes made since the last backup, while differential backup captures the changes since the last full backup. This flexibility allows you to efficiently manage backup storage. Additionally, the paid edition can automatically delete older backup images to free up disk space, ensuring optimal utilization.
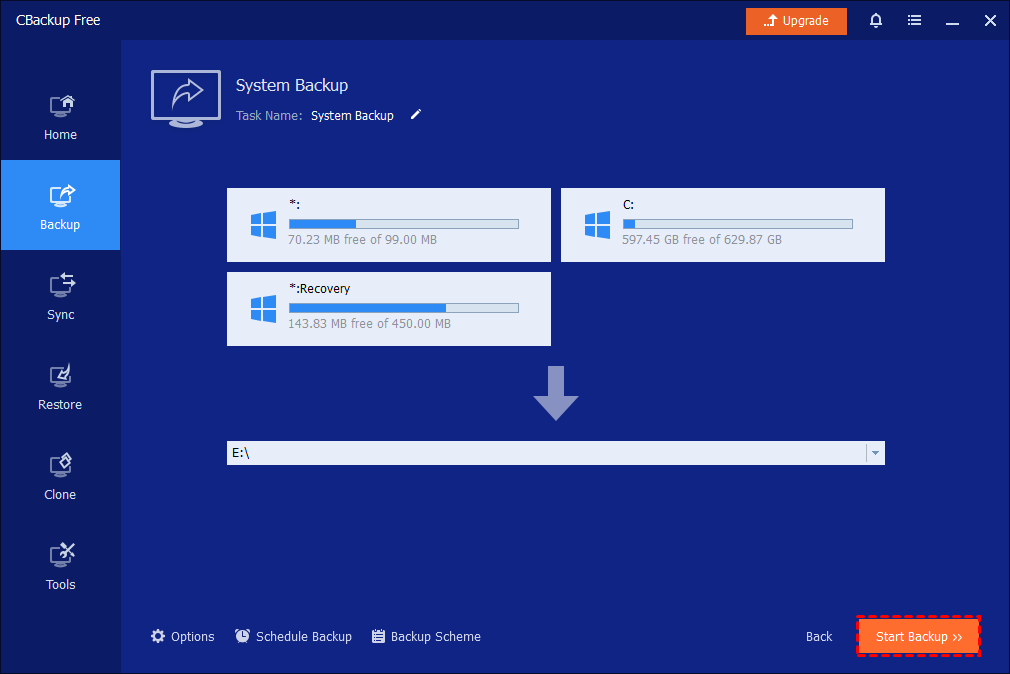
Step 4: Start Backup
Click "Start Backup" to run the system backup task.
Step 5: Monitor/Complete Backup
1. When the backup is processing, you can click the underlined sentence to check the backup process in detail.

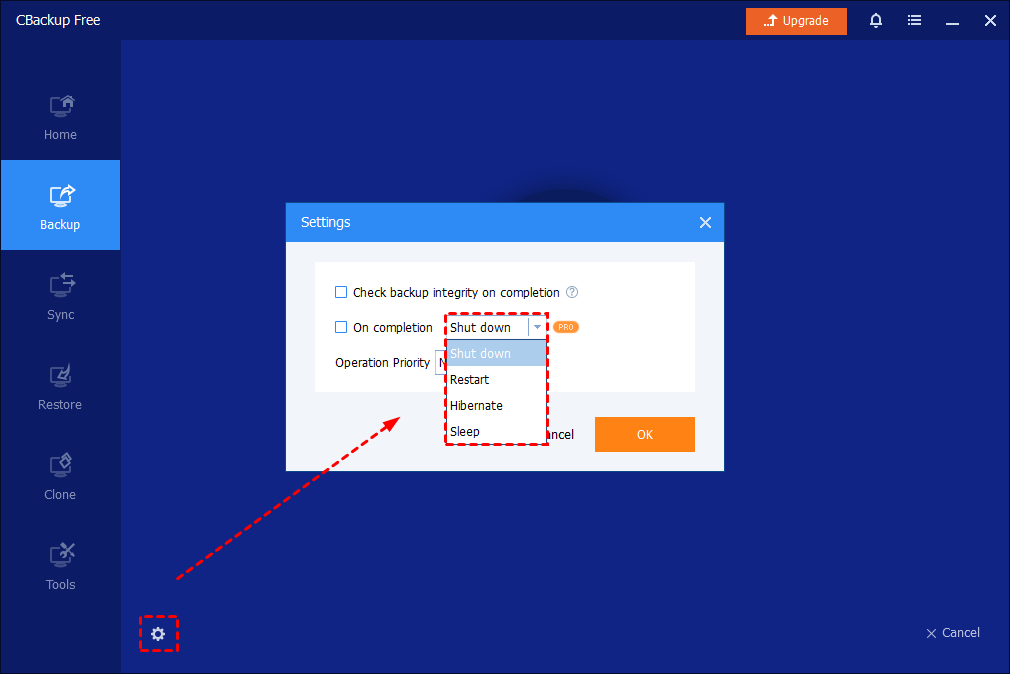
Tips: In the lower-left corner, you can set the computer to Shut down, Restart, Hibernate, or Sleep automatically after the backup is completed.
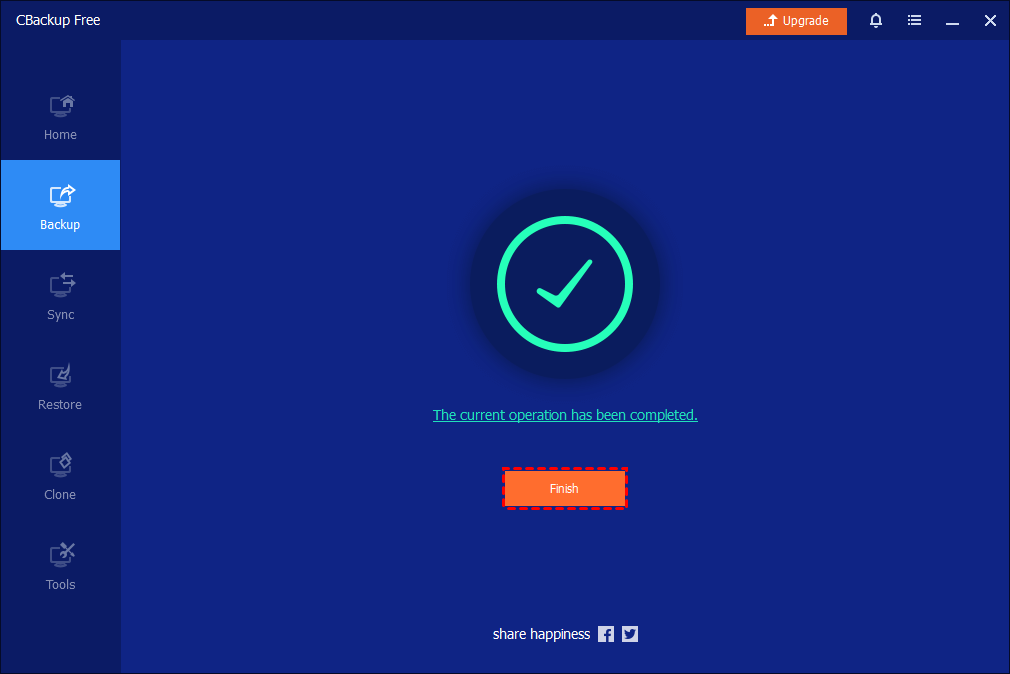
And, please kindly wait for the backup process to complete and then click the Finish button.
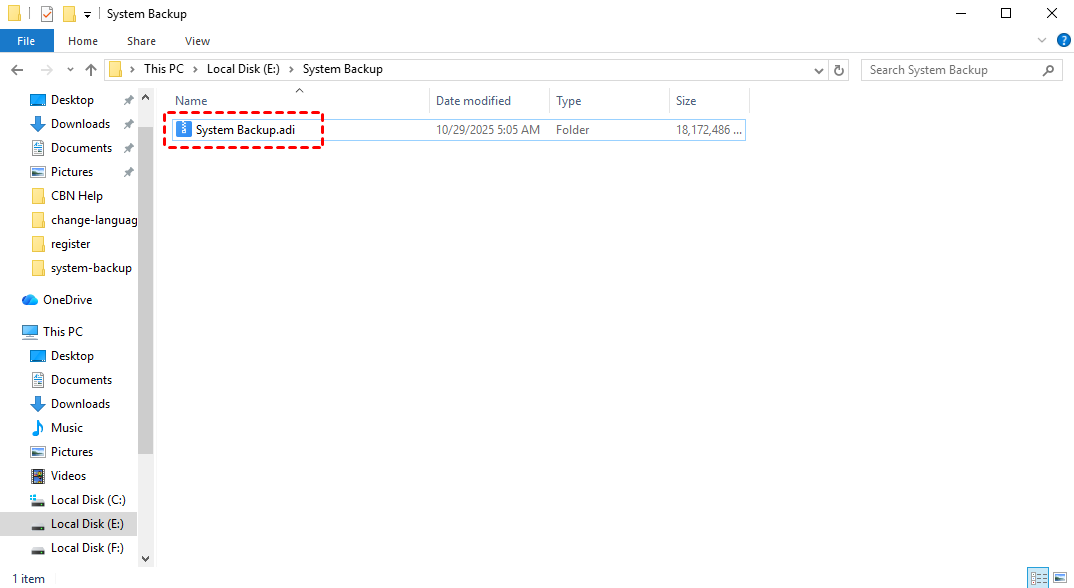
3. After the backup is completed, it generates an xxx.adi backup image file in the destination. After completing the system backup, you can easily restore your system in the event of a system crash. For more details about restore steps, please access System Restore.
Important Notes
-
Image Accessibility: Allows to double-click the *.adi image files to directly view and copy backed-up files from Windows Explorer without restoring the whole backup image, or using the "Explore Image" feature to mount the image as virtual partitions.
-
MBR disk backup: System Backup will back up the system reserved partition ("system" partition) and C: drive("boot" partition) of the MBR disk. For some environments, there is only the C: drive as the system partition, which includes "System" and "Boot" files.
-
GPT disk backup: System Backup will back up the EFI partition, C: drive, and system recovery partition of the GPT disk.
-
Running System Requirement: CBackup can only detect and perform a system backup of the currently running operating system. If the system doesn’t run, it can’t do the system backup.
-
Dynamic Volumes: CBackup currently doesn’t support backup for GPT dynamic system volumes.
Conclusion
By reading this guide, you will gain comprehensive knowledge about system backup and master the essential steps to perform system backup. Remember to consider factors such as backup frequency, storage capacity, and the retention period for your backups. Regularly test the restoration process to verify the integrity of your backups and make any necessary adjustments to your backup strategy.
If you have any questions or issues, please refer to the Frequently Asked Questions section or seek relevant technical support. We wish you success in completing your system backup and safeguarding your data!
FAQs
Q: When you do the system backup, it shows the error message: The program did not find the system partition. Please reboot the system and try again.
A: System Backup will detect the system partitions as the source automatically. But it failed to find the system partition. In this situation, please check if the system disk failed to be listed. You can click Disk Clone, and then the disk list to see if it lists the system disk.
If it doesn't list your disks, please check:
1. Please check if the system disk is 4096 bytes/sector. You can press Win+R, type "msinfo32" in the Run box, then open Components-->Storage-->Disks-->check the Bytes/sector of the drive. CBackup currently can't list a 4096 disk. So, it can't back up for a 4096 disk.
2. If the disk is 512 bytes/sector, but it also failed to be listed, please try to uninstall CBackup, reboot the computer, and then reinstall it to check.
3. If you are using the WinPE environment of CBackup, it might be that the WinPE environment lacks the drives of disk drives. So, WinPE can't read the disk. You might need to recreate the WinPE and manually add the drivers.
If CBackup can list the system disk, but the system partitions fail to be read correctly (display them blank), it might be that some other applications are protecting the system partition from being read by other software. Currently, we found that RollBack Rx, Reboot Restore Rx, and Drive Cloner Rx software will protect system partitions and prevent CBackup afrom ccessing system partitions. In this case, you might need to uninstall the software so that CBackup can do the system backup.

Free Get CBackup Now
Secure & Free
