
Backup Management
Backup Management can help you manage backup tasks you have created and you can make a backup/restore or edit this task, etc.
by PublicOwin Lasted Updated February 6, 2026
Select Home on the left tab page to list image files with built-in shortcut options to start or manage backups. There will be different options available in the following two situations:
Situation 1: You haven't created a backup
New Backup: After clicking this button, a wizard will guide you to create the backup you want.

Situation 2: You have created a backup
1. Backup: Click this button and you can select which backup type (full backup, incremental backup or differential backup) you wish to perform following a full backup. An incremental or differential backup can be performed in the future based on the full backup. For a step-by-step guide, please refer to the "Incremental/Differential Backup".

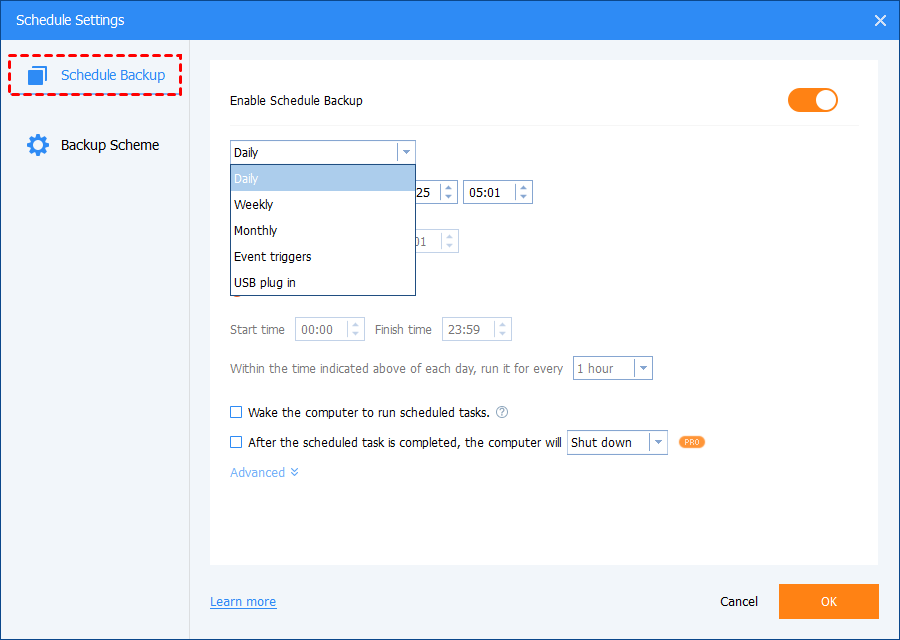
2. Schedule: CBackup supports scheduled backup tasks with Daily, Weekly and Monthly Modes and for a scheduled backup task, CBackup will run it as an incremental backup by default.
-> Schedule Backup: Display general schedule settings, including schedule modes, schedule timepoints, intervals, and so on.
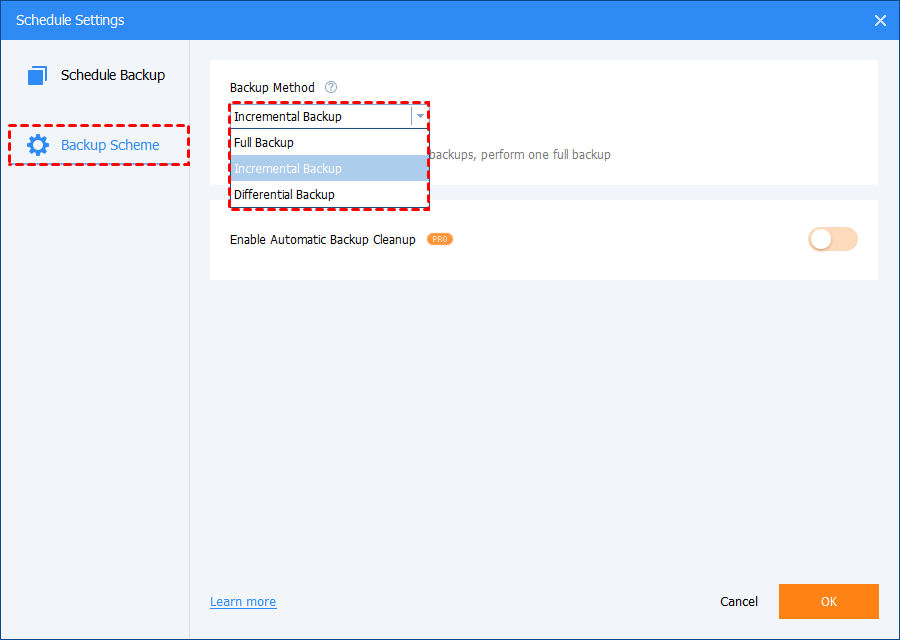
-> Backup Scheme: Display advanced schedule settings, including backup methods and cleanup rules.
3. Edit Backup: This option allows you to edit the task name, enable email notification, enable Backup Scheme, etc.
4. Explore Image: This option enables backup images to be mounted in a similar way to the way an external drive is mounted when it is attached to your computer. Once a destination drive letter has been assigned, you will have access to the contents of the image file via the destination drive letter. This can be useful if you want to peruse the contents of a backup image.
Notes:
- To access the contents of the image file, go to your My Computer/This PC app/icon to find the newly assigned drive letter along with your regular drives. You can then access them in the way you do it on a normal drive.
- Exploring images that contain multiple partitions will present multiple drive letters in order to mount each partition.
5. Check Image: Selecting this option will take you to a list of image files. Choose the one you want to check and the integrity checking of that image will commence.
NOTE: It is recommended that you check image integrity after the backup process via the tick box option in the backup wizard.
6. Locate Image: Selecting this option will open a new window listing the backup image files associated with the selected backup task. Simply close the window using the "X" icon in the top right of the window when finished.
7. Delete: You can delete this backup task in the "Home" tab, or you can delete both the backup task and associated image files in the destination location.
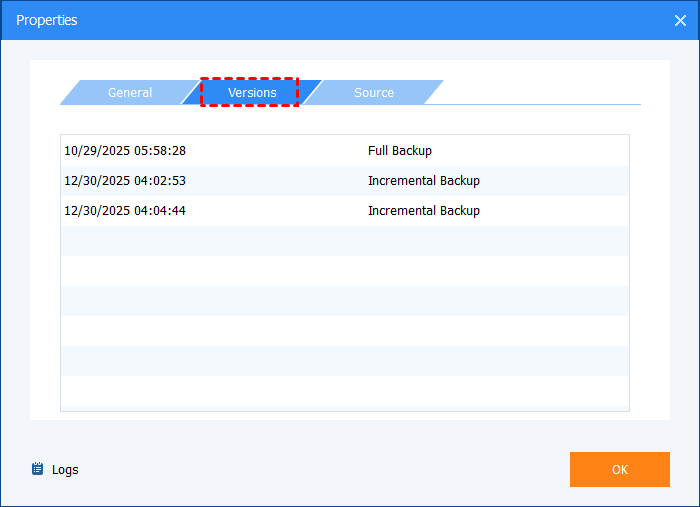
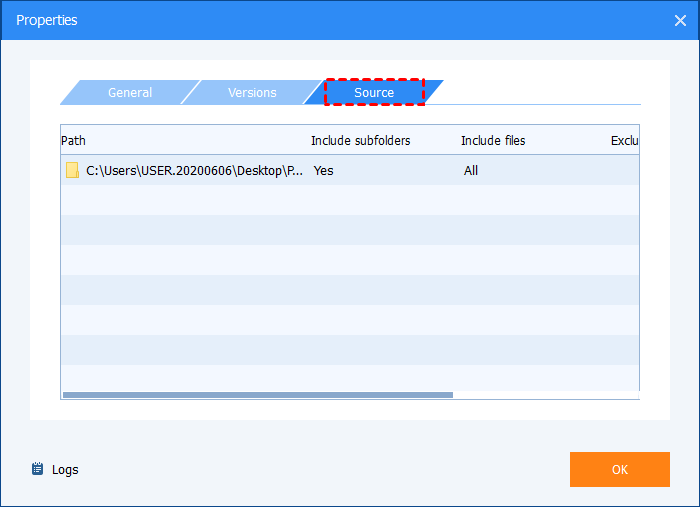
8. Properties: Show more detailed info about this backup.
General: Display general info of the backup task, including task name, created date, last backup date, destination path, and comments.

Versions: Display backup versions and the corresponding date under the same backup task.
Source: Display the backup source and the task filter settings.
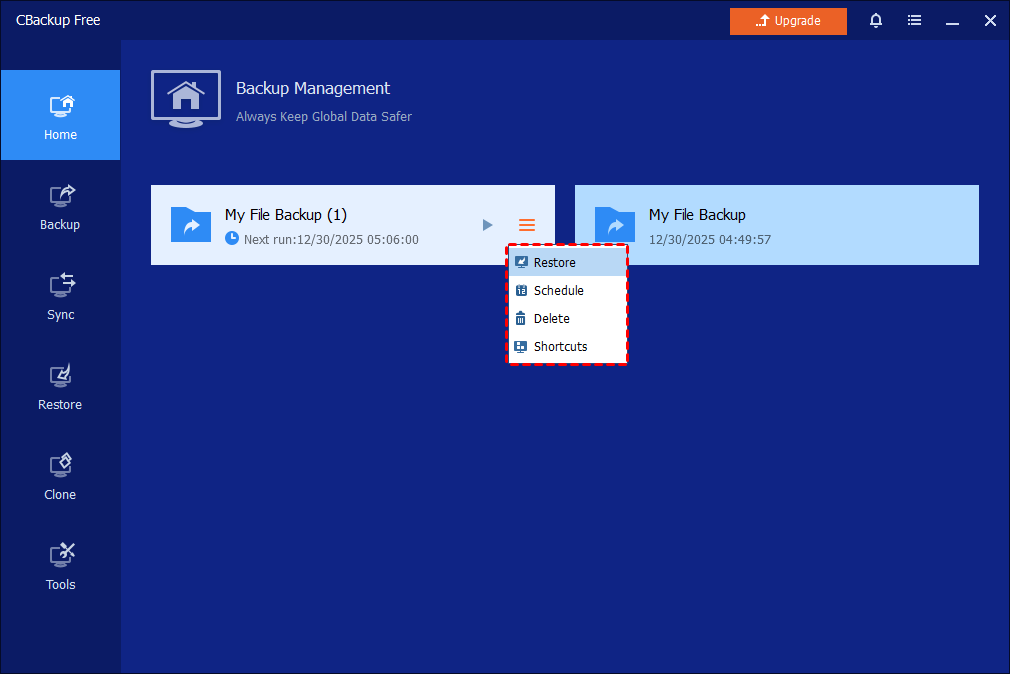
Tips: There will be no so many buttons displayed (as screenshots above) in the backup management interface if you select "Only add the schedule" when you create a schedule task, because no backup image has been generated yet.

If you select "Only add the schedule", only 4 buttons will be available: Restore, Schedule, Delete, and Shortcut.
Notes:
- There might be a yellow mark displayed in the backup management page. The possible cause is that the backup source/destination path has been changed or is unable to be accessed, especially when you select NAS as the destination.
- When editing the backup task, there might be a pop-up message "Unable to get the backup information. The reason may be that the image file does not exist, has been damaged or cannot be accessed". In this case, please check if the backup image is deleted or the target path has been changed or has become inaccessible. You can find the backup image in the target path and then manually check if the image file is valid and able to mount with the tools "Check Image" and "Explore Image".

Free Get CBackup Now
Secure & Free
