
System Restore with CBackup
The system backup image can be used to restore system to a correct configuration when the computer crashes. It can avoid system reinstallation.
by PublicOwin Lasted Updated January 21, 2026
In our daily life and work, our systems may crash due to virus attacks, hard disk corruption, etc. If your system crashes, restoring the system from a system backup is a better solution rather than reinstalling the OS.
System restore can be used in the following scenarios:
- System malfunction: When the computer encounters severe errors, crashes, or fails to start properly, system restore can restore system settings and configurations to fix the system issues.
- Software conflicts: If there are compatibility problems with other programs or the system after installing new software or updating existing software, system restore can revert the system to a state before the installation, eliminating conflicts.
- Malware infection: When the computer is affected by viruses, malware, or ransomware threats, system restore can bring the computer back to an uninfected state, removing malicious software.
- Accidental operations or data loss: If important files or directories are accidentally deleted or system settings are changed, leading to data loss, system restore can roll back to the previous state of files and system settings, recovering lost data.
- Test environment restoration: When you need to conduct experiments, install new software, or make configuration changes on the computer, you can perform a system restore to back up the current environment. After completing the operations, you can restore the system to its state before the testing.
How to Restore System with CBackup in Windows Step by Step
Prerequisites for System Restore
Before restoration, there are some things you need to know.
-
CBackup system restore is based on CBackup system backup. You should already have at least one system image made by CBackup (whatever the source system is, the current crashed one or a system on another computer). Even if you have several Windows backup points, it won't work. CBackup does not recognize OS images made by Windows or other software.
-
If you haven't created a system backup with CBackup, you can create one based on another working system. However, after restoration, the system of the recovered computer will be a copy of the system you just backed up, not the crashed one. You can choose this method if viable.
-
Nominally, users should recover using the system Backup image created on their current failed operating system. If the PC fails to boot or has crashed, you can create a WinPE bootable media using CBackup on another healthy computer and then boot the crashed PC from the WinPE bootable media to run the system restore under WinPE.
We strongly recommend that users create a WinPE bootable media once they start to use CBackup. Such bootable media should be created and kept in a safe place in order to boot a failed computer. Otherwise, not having the required bootable media might result in not being able to recover your computer at all.
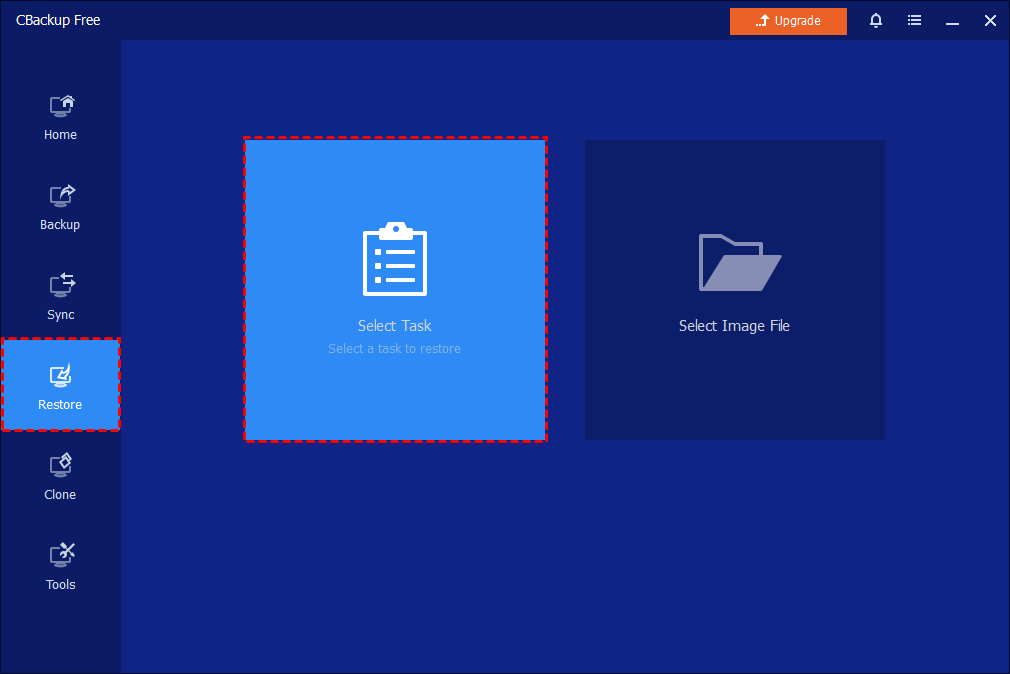
Step 1: Initialize Restore
In the left tab, select Restore and then click Select Task or Select Image File. Here, I take "Select Task" as an example.
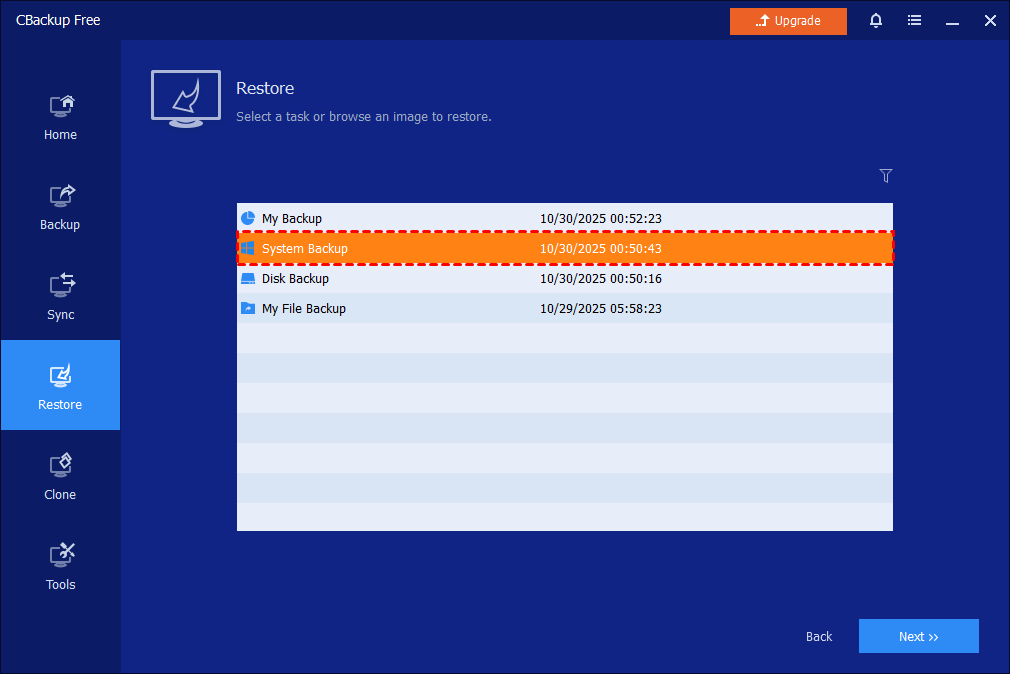
Step 2: Select Task and Source
1. Select a backup image and click the Next button to recover your system to the point in time the backup was taken.
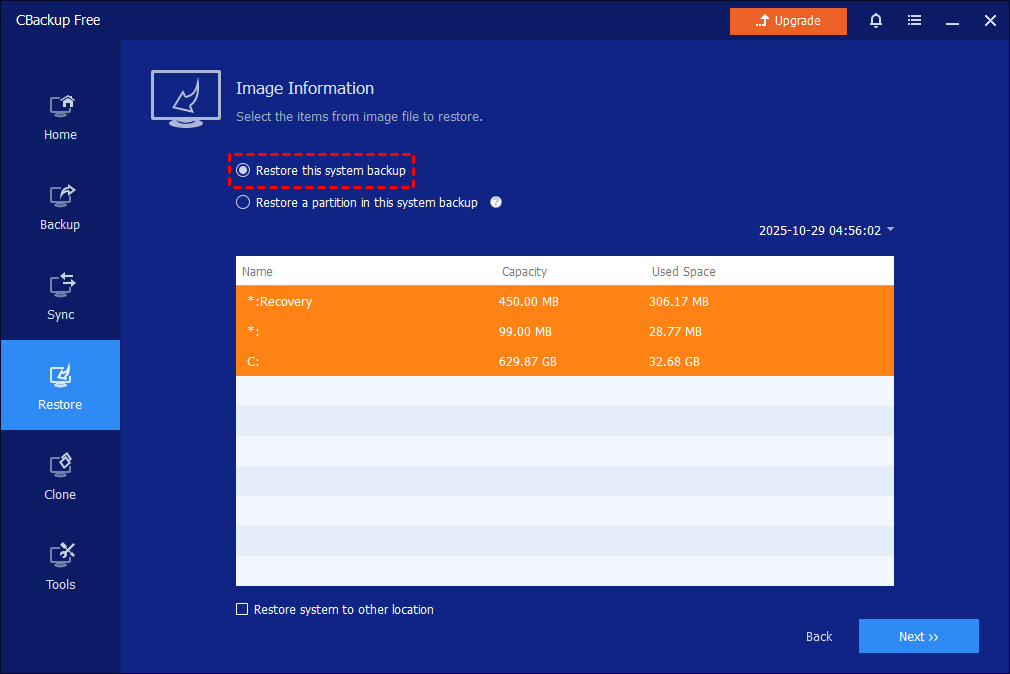
2. Choose to restore the entire image or part and click Next.
Tips: To do a bootable restore, please select the first "Restore this system backup" option.
Step 3: Select Destination Partition
Select a destination partition or unallocated space for system restore.
If you select the "Restore this system backup" option, it will restore it to your original system partition.
If you would like to restore another path, you can tick "Restore system to other location" so you can manually select another partition or unallocated space for system restore.
Step 4: Start Restore
In the "Operation Summary" page, preview the operation that will be executed. Then, click Start Restore. Wait for the process to complete, and then click Finish.
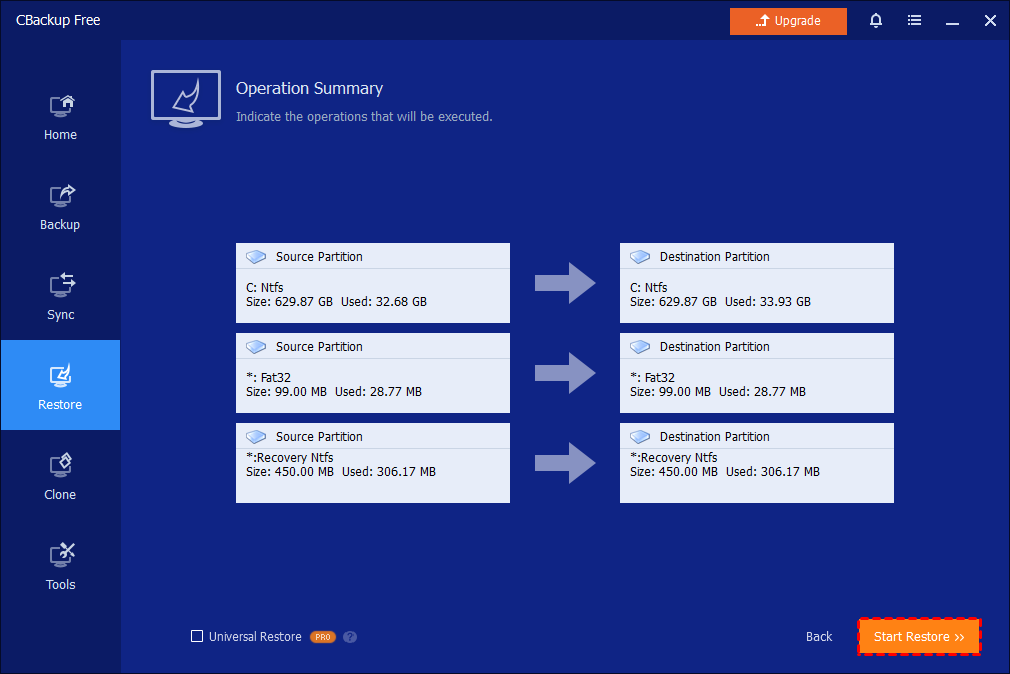
- Tips: If the system image is taken from another computer, you should tick "Universal Restore" (paid function) to ensure the system is bootable after recovery.
For further details with screenshots, see: How to Do System Restore.
How to Restore System under WinPE
If the PC fails to boot or has crashed, you need to create a WinPE bootable media with CBackup and boot your PC into WinPE to run the system restore.
Step 1: Create Bootable Media on Working PC
Please create a WinPE bootable media using CBackup on another healthy computer.
Step 2: Boot the Failed PC
Insert the bootable media into the failed computer and boot from it. (You may need to change the boot sequence and boot mode in the PC's BIOS/UEFI Setup Utility.)
Step 3: Restore System in WinPE
When the PC boots up successfully, CBackup (already installed on the bootable device) will run automatically, allowing you to start the system recovery just as the process under Windows.
Step 4: Boot after Successful Restore
Remove the bootable media and restart your PC after the system restore is finished successfully. (You may still need to change the boot sequence and boot mode in the PC's BIOS/UEFI Setup Utility.)
Notes:
-
If you regularly back up your system, each backup will generate an image at a given point in time, so there may be multiple backup points to choose from.
-
The destination disk/partition will be totally overwritten. If the destination contains any essential data, it should first be copied to another location.
-
During a system restore, the program will prompt you to restart the computer and then enter into "Restart Mode" for the restore operation.
-
If your system uses an "EFI partition + system partition + recovery partition" layout, there may be more than one EFI partition after restore. In this situation, the restored system may not be bootable. You could try to delete the extra EFI partition and only keep one. Then, it will boot up normally.
-
If you can’t boot into Windows to run the program for the restore, you can create a WinPE bootable media using CBackup in advance, and then boot from the WinPE media to perform the restore operation.
-
System restore will restore the entire system to a specific point in time. Therefore, it is recommended to back up important files and data before executing a system restore.
Conclusion
System Restore can restore our system to its original state in the event of a crash, which can save us the hassle of reinstalling the system and save us time.
FAQs
Q: You received the message: "Because the image file exists in a share/NAS network, you need to make a bootable CD..." when you do a restore operation.
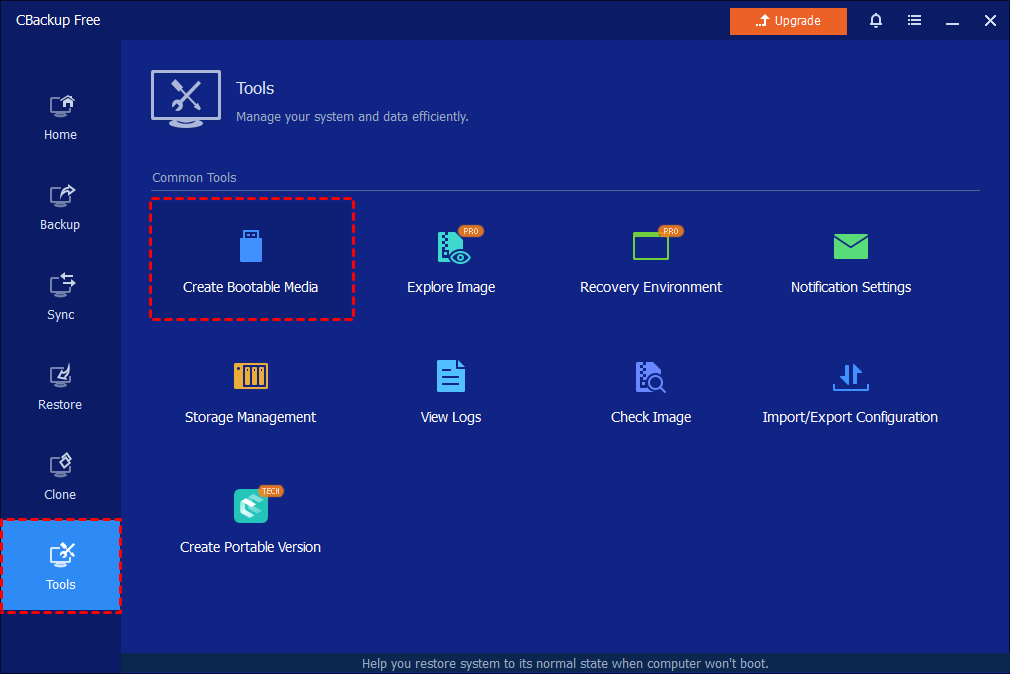
A: If the image file is saved in a shared folder or a NAS device, you will receive the above message if there are programs still running in the target partition that cannot be closed. To solve the problem, you only need to click Tools -> Create Bootable Media to create a bootable media. Then, boot your computer from the bootable media to complete the restore process.
Q: You get the message: “Unable to get the backup information because the image file does not exist, or it can’t be accessed...” when you click the Restore or Advanced button on a backup task of the Home screen.
A: The problem might be that the task can’t locate the backup files for unknown reasons. You need to delete the task and then re-import the backup task by browsing the backup files under Tools-->Import/Export Configuration. After that, the task will be listed on the Home screen again.
Q: The restore process needs a reboot into WinRe mode. But the PC always fails to enter WinRe mode, so it is unable to restore. What can I do to restore the system?
A: The computer might not have the WinRe environment. You can create a bootable media and then manually boot the PC into WinPE to restore the system.

Free Get CBackup Now
Secure & Free
