
Rescuezilla vs Clonezilla: Which Free Disk Cloning Tool Should You Choose?
This Rescuezilla vs Clonezilla guide compares two top open-source disk cloning tools. Powered by Partclone, Rescuezilla offers a user-friendly GUI, while Clonezilla provides command-line power for IT admins.

By Ellie Updated July 23, 2026


Upgrading your SSD or creating a full system backup often comes down to two legendary open-source utilities. When comparing Rescuezilla vs Clonezilla, users face a clear trade-off between graphical simplicity and raw command-line performance.
Both tools create bit-for-bit drive images and handle disk cloning efficiently, but their workflows appeal to very different technical skill levels. This comprehensive guide breaks down their core differences, performance metrics, and ideal use cases so you can select the right utility for your data migration needs.
Key Takeaways (Quick Verdict)
- Rescuezilla is the "GUI version of Clonezilla." It runs on an Ubuntu Live desktop with a user-friendly, point-and-click interface. It is ideal for beginners, home users, and standard SSD upgrades.
- Clonezilla is a text-based (ncurses) command-line utility with enterprise-grade capabilities. It excels in headless environments, advanced script automation, and PXE-based mass network deployment.
- 100% Interoperability: Rescuezilla and Clonezilla use the same underlying engine (Partclone). Backup images created by Clonezilla can be restored using Rescuezilla, and vice versa.
- Zero-Downtime Alternative: If rebooting into a Live USB sounds tedious, CBackup provides a completely free, Windows-native alternative for automated system backups, disk cloning, and cloud storage integration.
What is Rescuezilla and What is Clonezilla?
To make an informed decision, it helps to understand the origins and architecture of both applications.
What is Clonezilla?
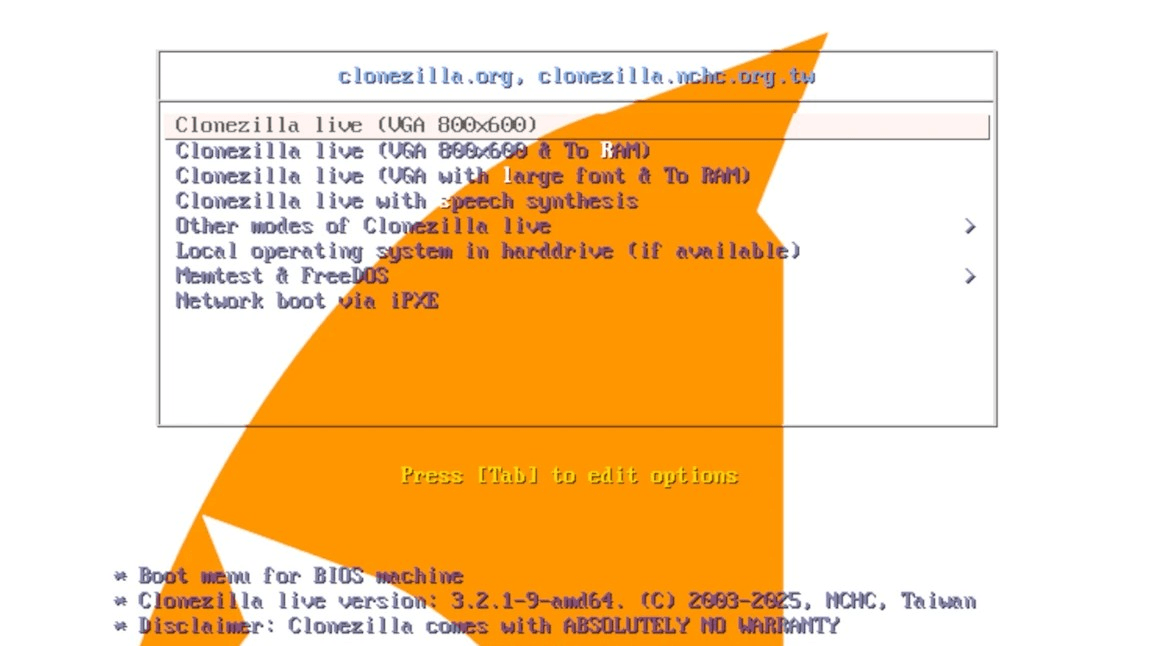
Clonezilla is a bare-metal disk imaging and cloning program created by NCMHC's Free Software Lab in 2004. It operates entirely within a text-based menu environment (ncurses). Because it bypasses heavy graphical drivers, Clonezilla boasts exceptional hardware compatibility and extremely low resource overhead.
It comes in three main editions:
- Clonezilla Live: Designed for single-machine backup and recovery from a bootable USB drive or CD.
- Clonezilla Lite Server: Allows a single machine to act as a temporary server to clone multiple client machines over a local network.
- Clonezilla SE (Server Edition): An enterprise-scale solution capable of cloning over 40 computers simultaneously via PXE boot.
What is Rescuezilla?
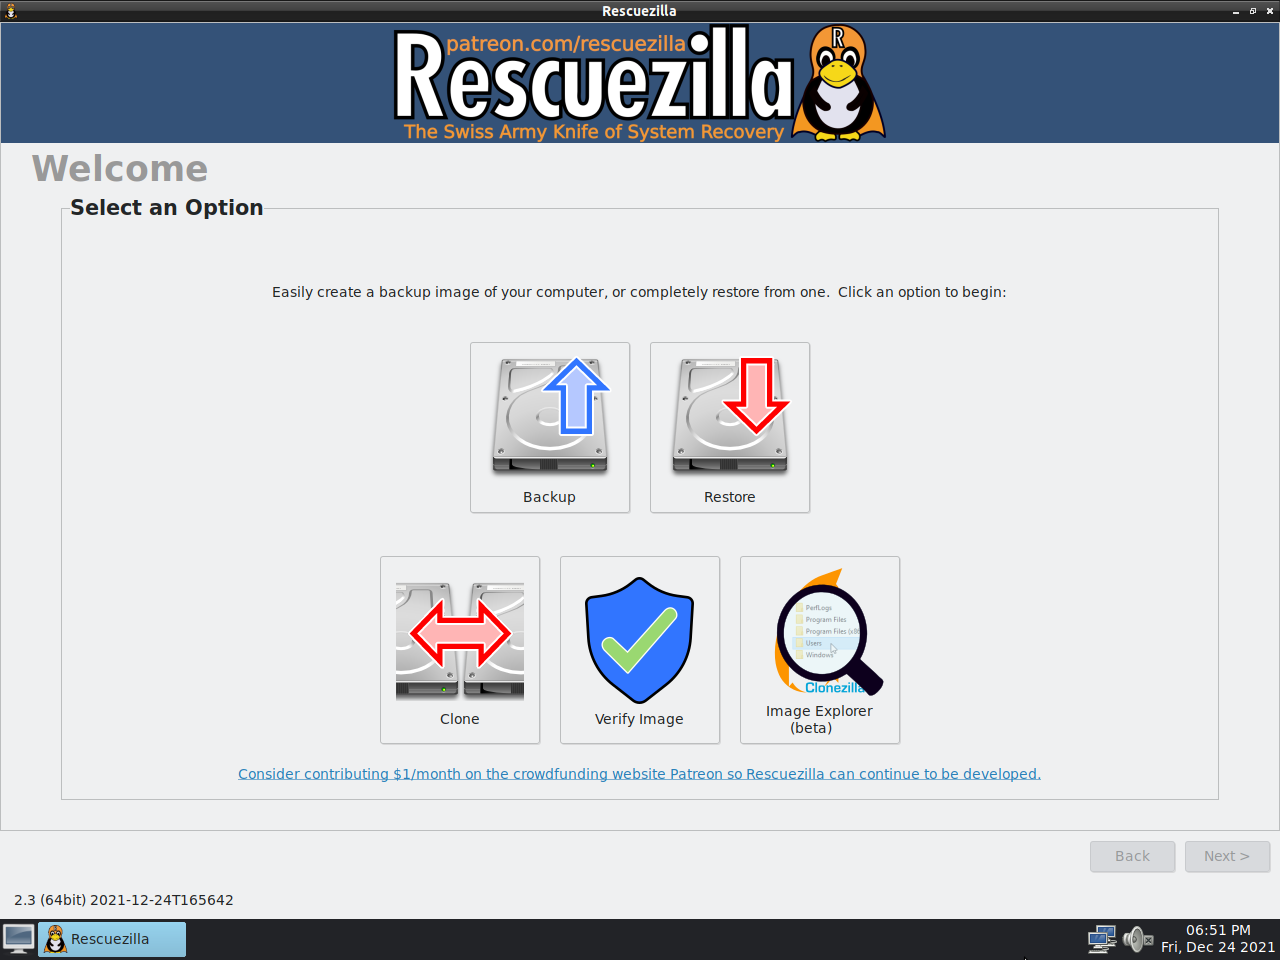
Rescuezilla (formerly known as REDO Backup & Recovery) was created to eliminate the steep learning curve associated with Clonezilla. It is an open-source bare-metal restore solution that boots into a fully functional Ubuntu Linux desktop.
Instead of navigating complex terminal menus, Rescuezilla guides users through a clean, 3-step wizard. It includes a mouse-driven environment complete with a web browser, file manager, and disk partition manager.
The Fundamental Relationship: Full Interoperability
Despite their visual differences, Rescuezilla is effectively a graphical user interface (GUI) wrapper built on top of Clonezilla’s underlying technology stack.
Both utilities rely on Partclone to back up and restore only used blocks within a file system, rather than copying empty storage space. Because they share the same compression formats and image structures, Rescuezilla is 100% compatible with Clonezilla backup images. You can capture an image with Clonezilla and seamlessly restore it using Rescuezilla without converting files.
Rescuezilla vs Clonezilla Comparison: Key Differences At a Glance
The following Rescuezilla vs Clonezilla comparison table highlights how these two tools match up across crucial operational metrics:
|
Feature / Metric |
Rescuezilla |
Clonezilla |
|
User Interface (UI) |
Graphical (GUI) /Ubuntu Live Desktop |
Text-based (ncurses) Menu System |
|
Ease of Use |
Very High (Point-and-click wizard) |
Moderate to Low (Keyboard-only navigation) |
|
Underlying Engine |
Partclone / Ubuntu Base |
Partclone / Debian / Ubuntu Base |
|
Disk Resizing Support |
Manual (via integrated GParted) |
Automated proportionally or manual |
|
Network Mass Deployment |
No (Single-target operations) |
Yes (Clonezilla SE supports 40+ targets) |
|
Bundled Utilities |
GParted, TestDisk, Firefox, Terminal |
Standard Linux CLI utilities |
|
Image Interoperability |
Reads & writes Clonezilla images |
Reads & writes Rescuezilla images |
|
Boot Mode Support |
UEFI & Legacy BIOS |
UEFI & Legacy BIOS |
|
Target Audience |
Home users, desktop builders, beginners |
System administrators, IT staff, power users |
Key Rescuezilla vs Clonezilla Differences Explained
Examining the core Rescuezilla vs Clonezilla differences reveals how each tool handles specific hardware setups and technical workflows.
1. User Interface and Risk Mitigation
The most obvious distinction lies in the user interface.
- Rescuezilla presents a visual desktop showing drive volume labels, file system icons, drive model numbers, and exact capacities in gigabytes. This visual feedback dramatically reduces the risk of accidentally selecting the wrong drive as a target, a mistake that permanently erases data.
- Clonezilla identifies storage devices using Linux block device designations (such as "/dev/sda", "/dev/sdb", or "/dev/nvme0n1p2"). Users unaccustomed to Linux terminal nomenclature must double-check drive sizes and serial numbers to avoid overwriting critical drives.
2. Integrated Rescue Tools
Rescuezilla functions as a full system recovery toolkit beyond mere cloning:
- It includes GParted, allowing you to resize, create, or delete partitions before or after a cloning job.
- It includes TestDisk for recovering lost partition tables and Photorec for undeleting files.
- It provides a web browser (Firefox) so you can research error codes or download network drivers while working inside the Live environment.
Clonezilla, by contrast, is a dedicated image utility. While you can access a Linux shell from Clonezilla's main menu, it lacks pre-installed graphical partition editors or desktop utilities.
3. Disk Resizing Capabilities
When migrating data from a small SSD to a larger drive, or shrinking a large HDD to fit onto a smaller fast SSD, disk resizing behavior becomes critical:
- Clonezilla includes built-in parameters ("-k1" and "-r") that automatically expand or scale partition tables proportionally during the restore process.
- Rescuezilla restores partitions to their original size by default. If you clone a 500GB SSD to a 2TB NVMe drive using Rescuezilla, the remaining 1.5TB will show up as "Unallocated Space." You must launch the built-in GParted app to manually slide and expand the partition after cloning.
4. Network Deployment and Automation
For IT operations, Clonezilla remains unmatched:
- Scripting: You can feed custom boot parameters to Clonezilla via GRUB configurations, allowing for completely automated, unattended system restores.
- Multicasting: Clonezilla SE can push a single 100GB system image to 50 workstation computers simultaneously over a Gigabit LAN switch using multicast protocols, taking roughly the same time as cloning a single machine.
Rescuezilla does not support multicast network cloning or automated unattended execution.
Pros and Cons: Rescuezilla vs Clonezilla
While both applications are powerful open-source utilities, weighing their strengths and weaknesses helps clarify which tool fits your specific workflow.
Rescuezilla: Pros & Cons
Advantages (Pros)
- Zero Learning Curve: Intuitive point-and-click interface requires no prior command-line experience.
- Visual Drive Safety: Clear disk labels, volume icons, and exact capacities prevent catastrophic mistakes like overwriting the wrong drive.
- Multi-Tasking Recovery Environment: Includes a pre-installed Firefox browser, file manager, and terminal so you can research issues or manage files while backups run.
- Integrated Drive Utilities: Comes with GParted for partition management and TestDisk/PhotoRec for file and partition recovery.
- Broad File System Support: Native support for NTFS, FAT32, ext2/3/4, Btrfs, XFS, and unformatted raw block storage.
Disadvantages (Cons)
- Higher Hardware Overhead: Loading a full Ubuntu/LXDE graphical desktop requires more RAM and can cause GPU black-screen issues on older or niche hardware.
- No Mass Network Deployment: Lacks multicast server tools; limited to cloning one machine at a time.
- Manual Partition Expansion: Restores original partition sizes 1:1 by default, requiring you to manually open GParted to expand unallocated space on larger destination drives.
- Slower Initial Boot: Takes slightly longer to load into the desktop workspace compared to lightweight terminal tools.
Clonezilla: Pros & Cons
Advantages (Pros)
- Minimal Hardware Overhead: Boots reliably on legacy systems with low RAM or minimal graphics support where heavy GUI environments crash.
- Advanced Customization: Offers granular control over compression algorithms ("gzip", "zstd", "lzop"), block sizes, and partition table recreation.
- Enterprise Scalability: Clonezilla SE (Server Edition) supports multicast network cloning to deploy system images to dozens of PCs simultaneously.
- Automated & Headless Execution: Can be fully scripted via command line or executed over SSH remote sessions without a local monitor.
Disadvantages (Cons)
- Steep Learning Curve: Text-based (ncurses) menus rely strictly on keyboard navigation and can intimidate beginners.
- Higher Risk of User Error: Displays drives using Linux block identifiers (e.g., "/dev/sda", "/dev/nvme0n1"), making it easier to select the wrong target disk.
- No Built-in Desktop Tools: Lacks a graphical web browser or mouse-driven partition manager within the live environment.
- Overwhelming Setup Options: Dozens of configuration prompts can stall users who just want a quick 3-step disk clone.
When to Choose Rescuezilla or Clonezilla?
Deciding whether to use Rescuezilla or Clonezilla comes down to your technical skill level and deployment context:
Choose Rescuezilla if:
- You are replacing a laptop HDD/SSD with a larger capacity NVMe SSD.
- You want a visual confirmation of source and target drives before execution.
- You prefer using a mouse over navigating terminal options with arrow keys.
- You need an all-in-one bootable rescue kit to repair partition structures and salvage data.
Choose Clonezilla if:
- You need to deploy a standardized OS build across a classroom or office network.
- You are comfortable working with Linux block storage identifiers (e.g., "/dev/nvme0n1").
- You are backing up an older machine with low system RAM or legacy graphics drivers.
- You want to automate backups using custom shell scripts or command-line flags.
How to Clone a Disk with Rescuezilla and Clonezilla
Here is how to execute a basic disk-to-disk clone using both utilities.
How to Clone a Hard Drive using Rescuezilla
Step 1: Create a Bootable Media
Download the Rescuezilla ISO file. Use a utility like Ventoy or Rufus to flash the ISO onto a USB flash drive (at least 4GB capacity).
Step 2: Boot into Rescuezilla
Insert the USB drive into your target computer. Power on the system and access your boot menu (typically by pressing F12, F11, or Del). Select the USB drive and boot into the graphical desktop.
Step 3: Run the Clone Wizard
- Click the Clone icon on the welcome screen.
- Select Source Drive: Choose the drive containing your operating system and files. Verify the disk model and size.
- Select Target Drive: Choose your new destination drive. Warning: All existing data on this drive will be overwritten.
- Select the partitions to copy (or choose all partitions for a full drive clone).
- Review the summary page and click Next to begin cloning.
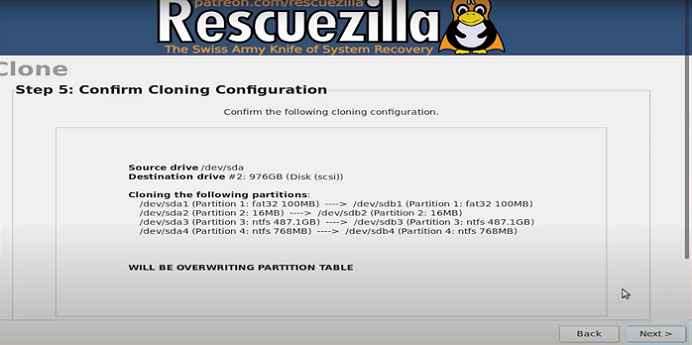
Step 4: Expand Partition Space (If upgrading to a larger drive)
Once finished, open GParted from the desktop menu. Right-click the newly cloned partition on the target drive, select Resize/Move, drag the slider to occupy the unallocated space, and click Apply All Operations.
How to Clone a Hard Drive using Clonezilla
Step 1: Prepare the Live USB
Download the Clonezilla Live ISO (Debian-based recommended) and write it to a USB drive using Rufus.
Step 2: Boot and Configure Language
Boot your computer from the Clonezilla USB. Select Clonezilla Live (Default settings). Choose your language and keymap layout when prompted.
Step 3: Select Working Mode
- Choose Start Clonezilla.
- Select "device-device" (work directly from disk to disk) or "device-image" (save the disk as a backup image file).
- Select Beginner Mode to accept default partition parameters.
- Choose disk_to_local_disk (local disk-to-disk clone).
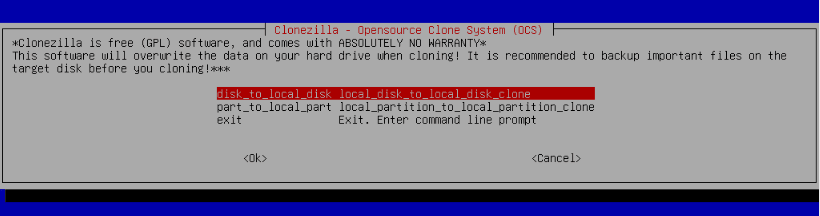
Step 4: Confirm Target and Source Block Devices
Select your source drive (e.g., "/dev/sda"), then select your target drive (e.g., "/dev/sdb"). Clonezilla will display a terminal confirmation message displaying the drive serial numbers.
Type "y" and press Enter twice to confirm that you understand the target drive will be wiped. The Partclone interface will display the overall progress and real-time data transfer rate.
The Easiest Windows Alternative: CBackup (No Bootable USB Required)
While both Rescuezilla and Clonezilla are powerful tools, they require you to create a bootable USB drive, interrupt your workflow, and reboot your computer into a Live environment. For many users seeking routine backups or simple Windows migrations, this process can feel overly complicated.
If you want a simpler approach, CBackup provides a completely free, Windows-native alternative that eliminates the need for bootable media. By operating directly within your active Windows environment, CBackup lets you back up, sync, and clone your drives silently in the background, so you can stay productive without ever rebooting your computer.
Why Consider CBackup Over Live USB Tools?
- Zero Boot Management: Perform system, partition, or file backups directly within Windows while you continue working.
- Disk & OS Migration: Clone hard drives or move your live Windows installation to an SSD without reinstalling the operating system.
- Automated Cloud Backup: Back up local data automatically to secure cloud destinations like Google Drive, OneDrive, Dropbox, or CBackup Cloud on custom schedules (daily, weekly, or event-driven).
- Cloud Storage Combination: Combine the free storage limits of multiple cloud accounts into one unified, virtually unlimited cloud storage pool at no extra cost.
- Security & Compliance: Built using 256-bit AES encryption standards and OAuth authorization protocols, ensuring full GDPR compliance and data privacy.
How to Clone or Back Up Windows Easily with CBackup
Step 1. Download & Install: Download the free CBackup desktop application on your Windows 11/10/8/7 PC.
Step 2. Select Backup or Clone: Open CBackup, click the Backup or Sync tab, and choose whether to back up your system, entire disks, specific partitions, or individual folders.
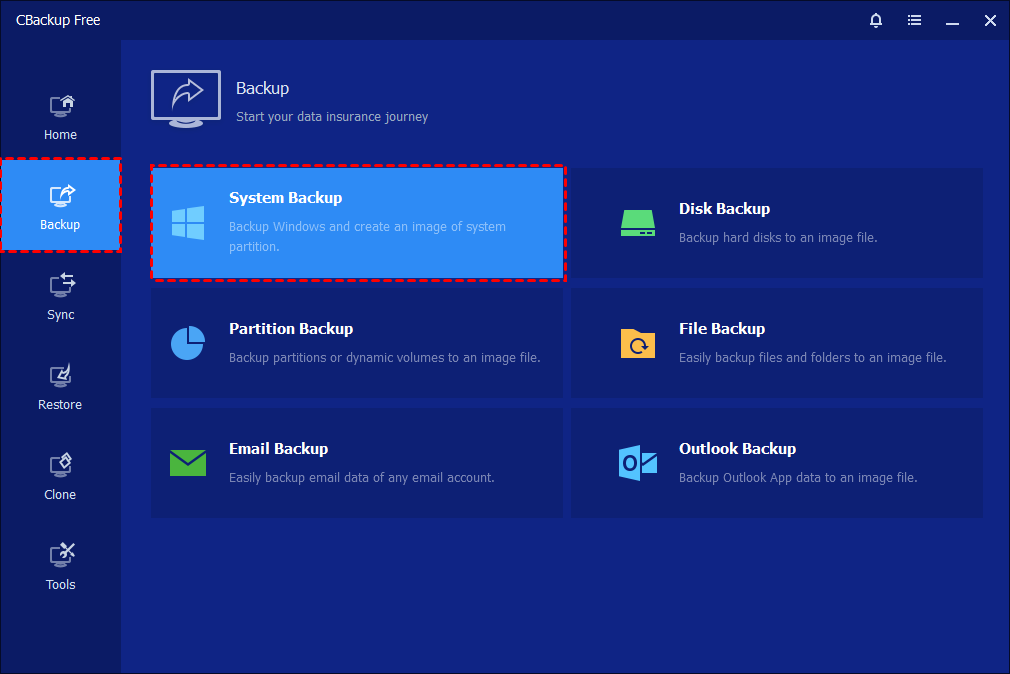
Step 3. Choose Destination: Select your target storage, whether it's an external hard drive, NAS drive, local partition, or a combined cloud storage space.
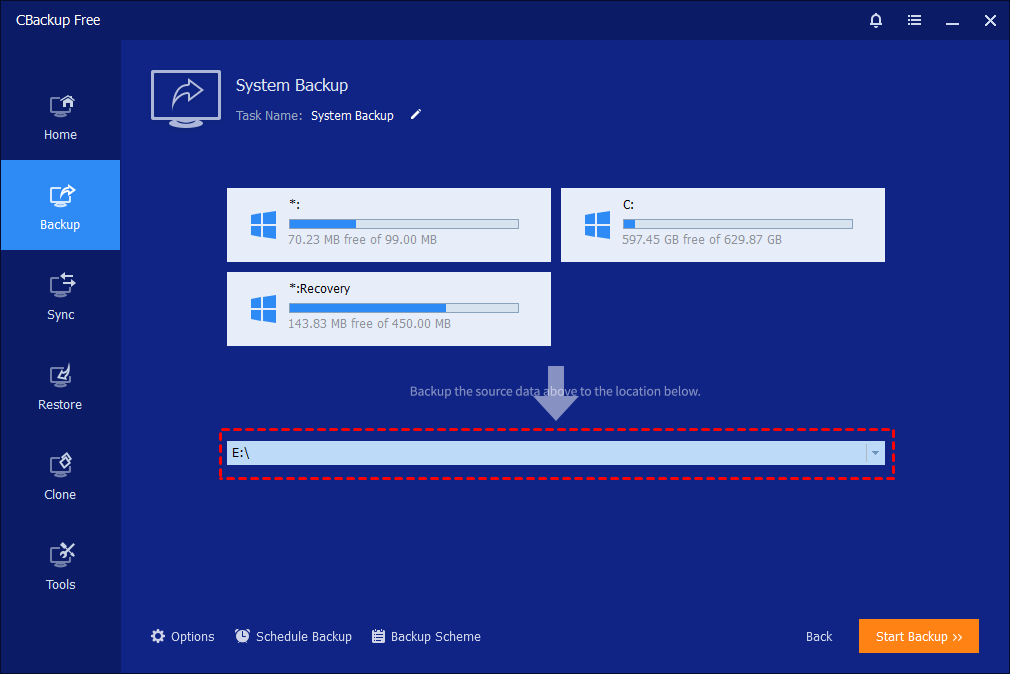
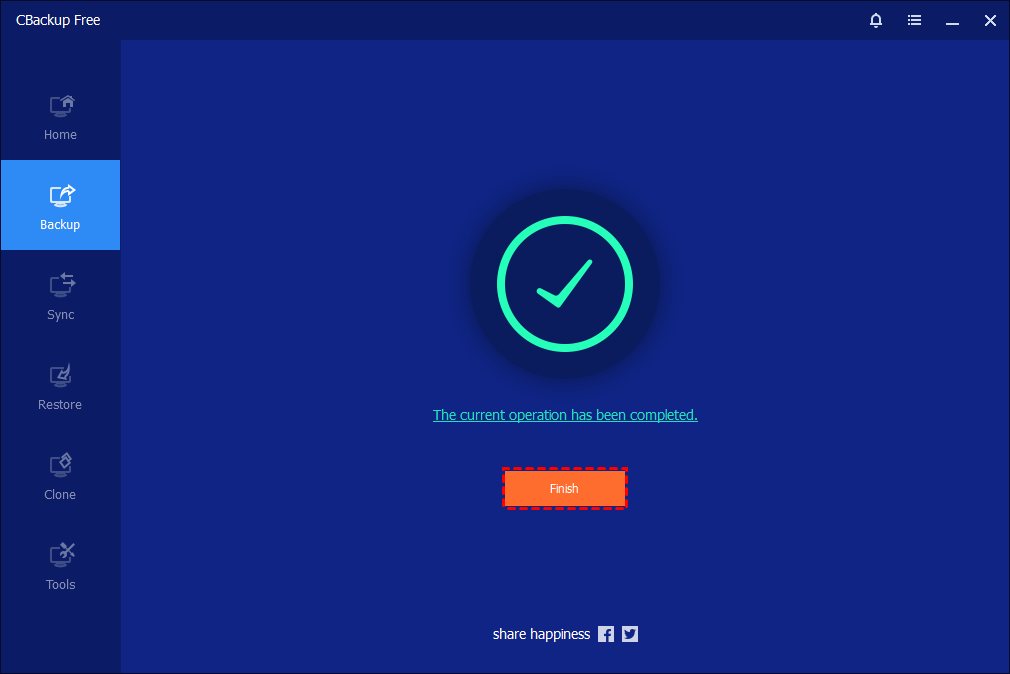
Step 4. Start Operation: Click Start Backup. The process runs silently in the background without requiring a system reboot. After completing, click Finish.
Conclusion
Choosing between Rescuezilla and Clonezilla comes down to balancing operational control against user convenience:
- Use Rescuezilla if you want an easy, mouse-driven backup experience on a single PC with safety features to prevent accidental data overwrites.
- Use Clonezilla if you manage enterprise hardware, need automated network deployment over PXE, or require lightweight text-based execution.
- Use CBackup if you prefer to back up or clone your Windows PC directly within your active workspace without managing bootable USB drives or rebooting your system.
FAQs
Is Rescuezilla fully compatible with Clonezilla backup images?
Can Rescuezilla or Clonezilla clone a larger HDD to a smaller SSD?
Yes, but with caveats. If the actual used data on the larger drive is less than the total capacity of the smaller SSD:
- Clonezilla can handle this in Expert Mode by enabling the "-icds"(ignore disk size) parameter.
- Rescuezilla allows you to shrink the original partitions first using its integrated GParted tool before initiating the cloning wizard.
Is Clonezilla faster than Rescuezilla?
Can I run Rescuezilla or Clonezilla inside Windows without a USB drive?
What should I do if Rescuezilla boots to a black screen?
Do Rescuezilla and Clonezilla support BitLocker-encrypted drives?
Free Get CBackup Now

Secure & Free