
How to Set Up Windows 11 System Backup for Free
On this page, you will get some information of Windows 11 system backup and know the detailed steps to get it.
by CBACKUP Lasted Updated February 2, 2023
Importance of Windows 11 System Backup
Today, lots of users choose to store important data on their Windows 11 computers. Windows computers carry the risk of being attacked or crashing and if your data is not backed up then they could be lost or corrupted, or even unrecoverable.
Currently, many Windows users have chosen to upgrade their computers to Windows 11 operating system. We recommend that you set up Windows 11 full system backup in advance to avoid losing data in the process. Therefore, we have summarized for you 2 useful ways to back up your Windows 11 system, as well as a tip for protecting your Windows 11 files for free.
How to Backup Windows 11 System
To back up Windows 11 system on your computer, there are 2 different methods - using Windows built-in tool or using a third-party PC backup software. Please keep reading and pick one that suits you better.
Way 1. Use Windows Backup and Restore
Windows Backup and Restore is a built-in tool in Windows operating system. It supports backing up computer files, folders, and system images so that it can help you to create a Windows 11 system image backup. You can follow these steps to set up a Windows 11 system backup without downloading the extra applications:
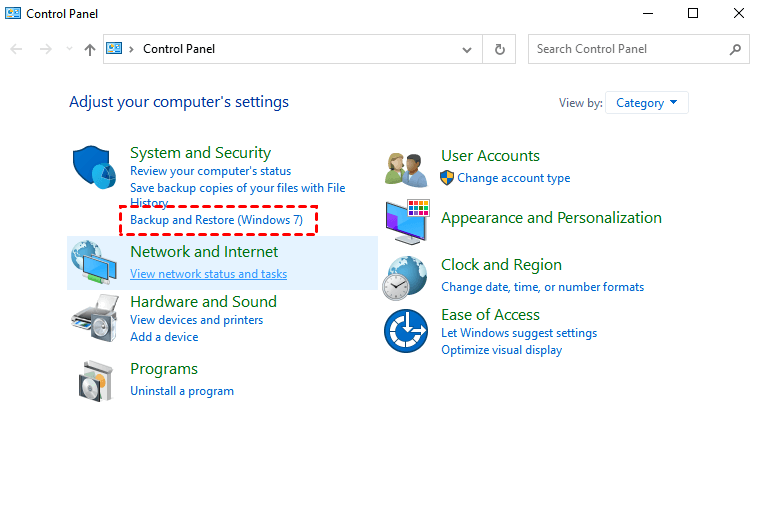
1. Find the Backup and Restore (Windows 7) option in the Control Panel window. It belongs to the System and Security section.
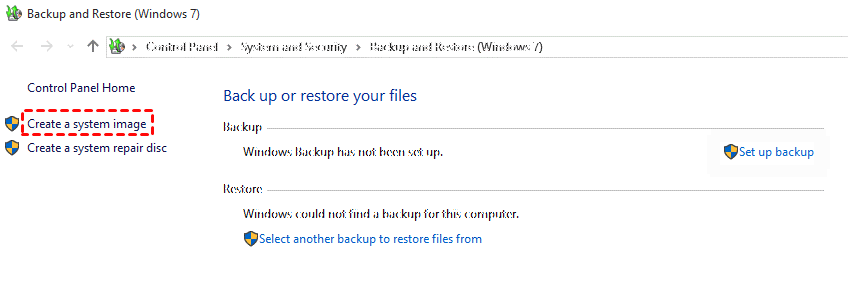
2. Then, select the Create a system image option in the left menu.
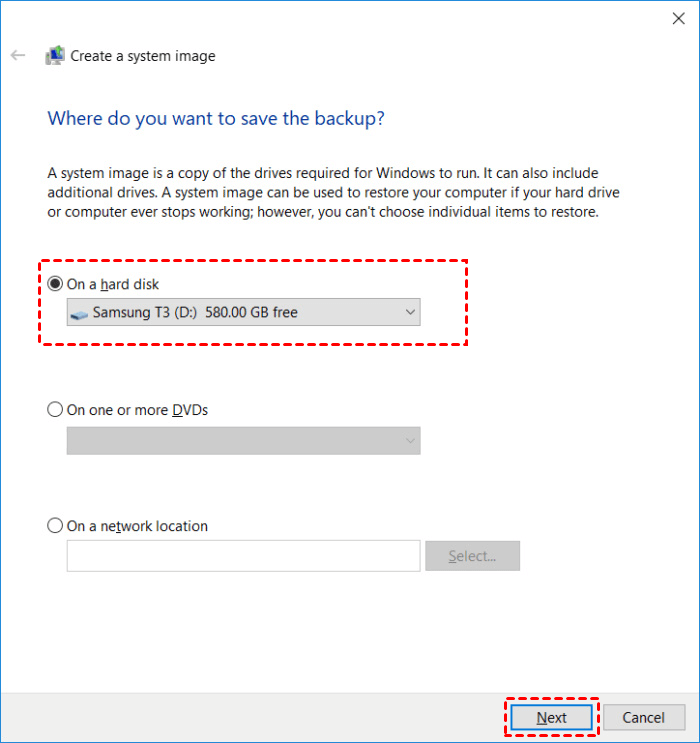
3. And you need to choose a location for your Windows 11 system backup. The options contain a hard disk, a DVD, a network location. You can select one location as your backup destination according to your need.
☛ Tip: Way to Restore Backups from Windows Backup and Restore
Once you have finished backing up with Windows Backup and Restore, you are able to restore your Windows 11 system backup directly. Here are the simple steps:
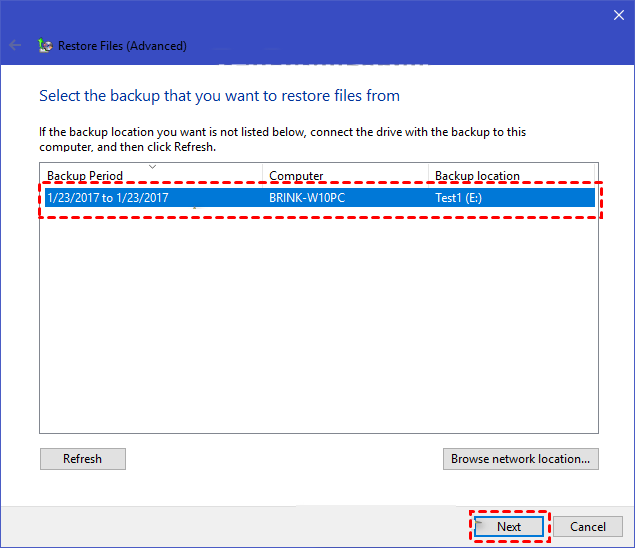
1. Go to Windows Backup and Restore (Windows 7), click on the Restore my file button in the right-down corner.

2. Then you can select the files you want to restore.
Way 2. Use AOMEI Backupper Standard
AOMEI Backupper Standard is a professional PC backup software, providing system backup, file backup, disk backup and many useful features for free. You can create Windows 11 system backup to cloud, NAS/Network drives, external hard drives with these steps:
1. Download and install AOMEI Backupper Standard on your computer, run it.
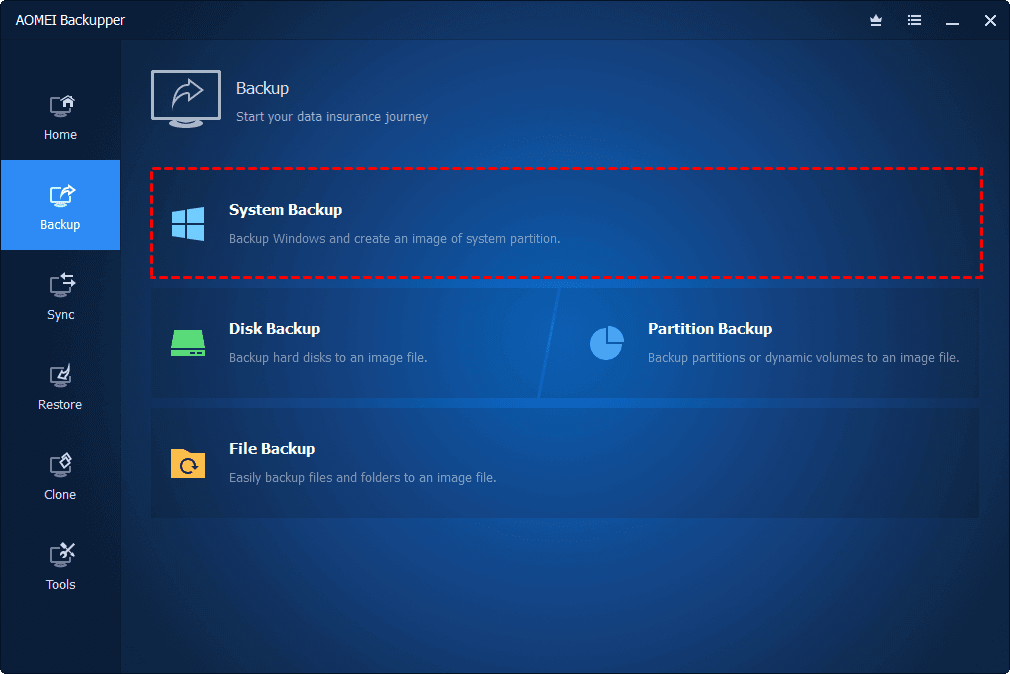
2. On the Backup page, click the System Backup option.
3. The system partitions will be chosen by default. And you can select the backup destination path. You can copy operating system to flash drive, local drive, or NAS/Network drive.
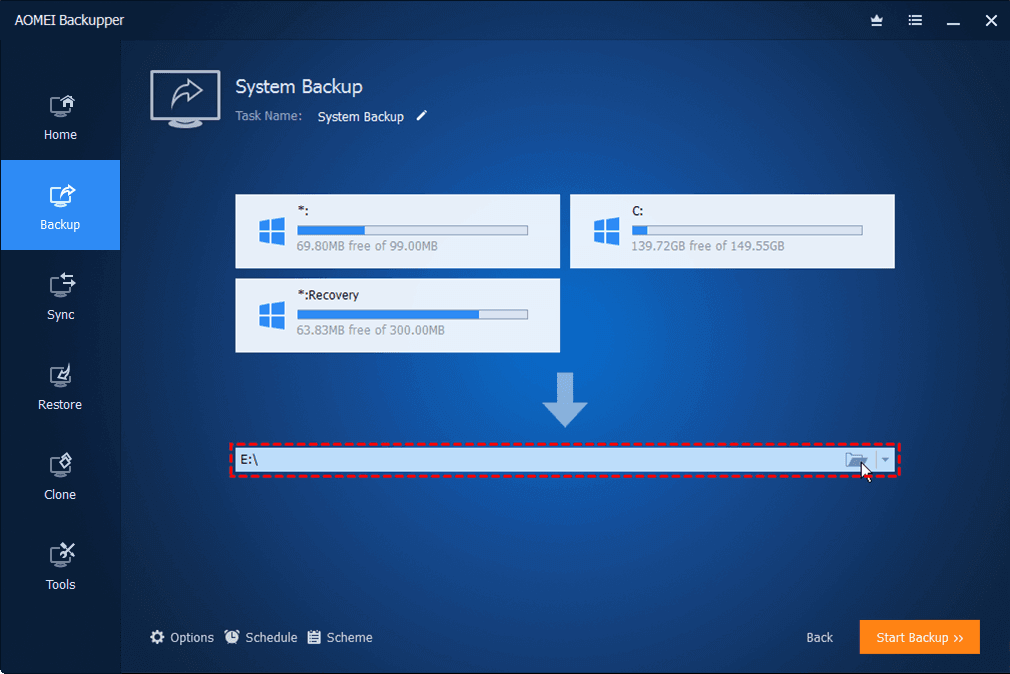
4. Finally, click on the Start Backup button to begin the Windows 11 system backup.
How to Protect Windows 11 Files
In addition to system backup, file backup is also of importance for users. If you want to back up your files in Windows 11, here we recommend a professional cloud backup software - CBackup. CBackup is a free cloud backup service, providing a stable PC to cloud backup feature.
Each account will get 10GB of free cloud storage space called cloud. Then you can select cloud as your file backup destination and set up a backup for files of unlimited size. If you want to choose other cloud drives as your backup target location, you can use CBackup to back up to OneDrive, Dropbox, and Google Drive for free as well.
1. Download and install the CBackup desktop app on your Windows 11 system computer. Open it and sign up for an account.
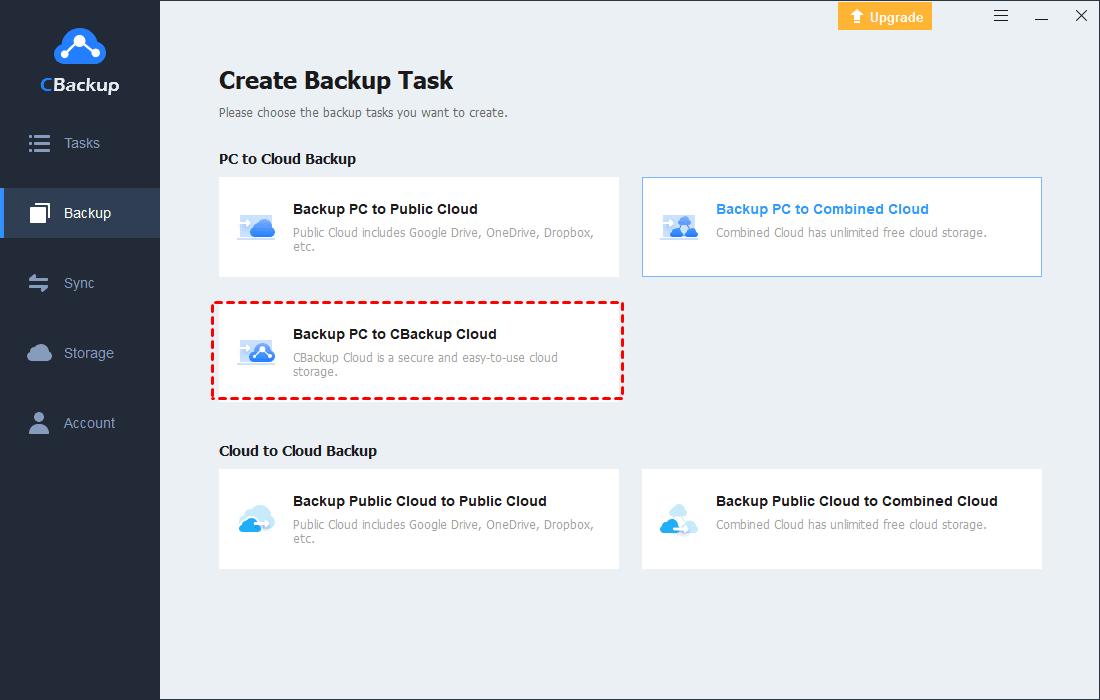
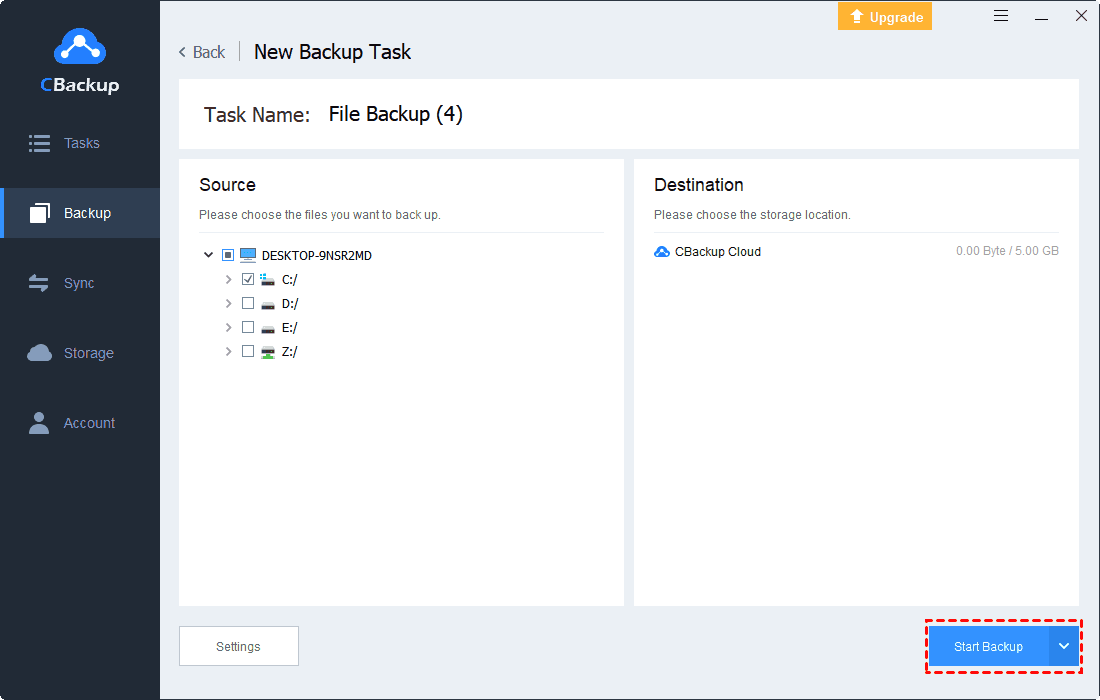
2. Select the Backup tab, and press the Backup PC to cloud button to create a new Windows 11 file backup.
3. Select files that you want to back up. Finally, click on the Start Backup button to begin the new Windows 11 file backup.
Note: Besides, you can use some useful features offered by CBackup to make your backups more convenient.
Scheduler
CBackup provides 4 different Scheduled Modes including one time only mode, daily mode, weekly mode, and monthly mode. You can select one backup mode and then your files will be backed up with the selected frequency automatically.

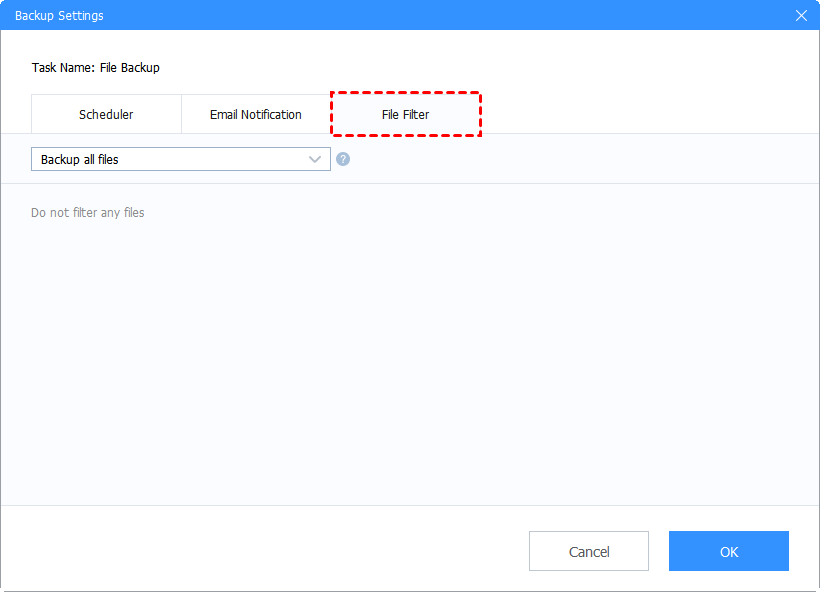
File Filter
File Filter allows you to choose certain types of files to back up. You can backup all files, exclude selected file types, or contain the selected file types.
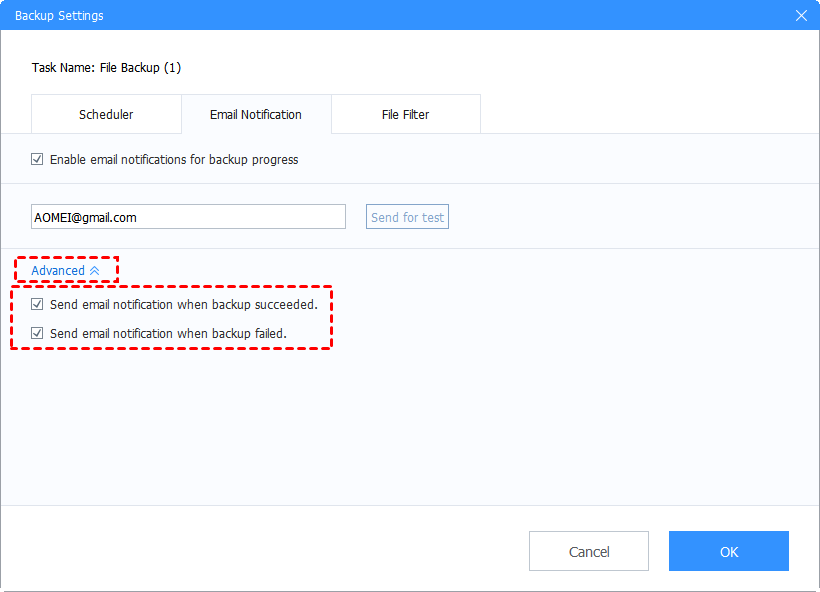
Email Notification
Type your email address first, and you are able to receive the notification the backup task is successful/failed.
Conclusion
If you want to set up a Windows 11 system backup to protect your data, we hope this article will be helpful for you. What’s more, if you need professional cloud backup software to back up files, why not try CBackup?

Secure & Free
