
[2 Ways] How to Create Windows Server File Backup Easily
This page describes 2 effective ways for Windows server file backup. We will show you how to backup Windows server files with a native Windows tool and free Windows server backup software.
by Jonna Lasted Updated June 28, 2023
How do I backup Windows file server?
I need to make a backup for my Windows server file for administration. How can I set up a Windows server file backup? Do you guys have any suggestions?
For server files, backups are the most effective safeguard against possible unexpected situations such as data loss or corruption. If you are interested in how to backup Windows server files, you have come to the right place. This article describes two ways to complete Windows Server 2022/2019/2016/2012/2008/2003 file backup hassle-free.
Two efficient methods for Creating Windows Server file backup
The following is a detailed tutorial on the two methods of creating free Windows server file backups.
Way 1. Use Windows Server Backup
Windows Server Backup is a backup and recovery component that comes with the Windows system, introduced from WinSer2008. With Windows Server Backup, you can back up the entire Windows server, selected volumes, or specific files or folders. You can follow the steps below to install this Windows server file backup software and know how to backup Windows Server 2019 files and other system files easily..
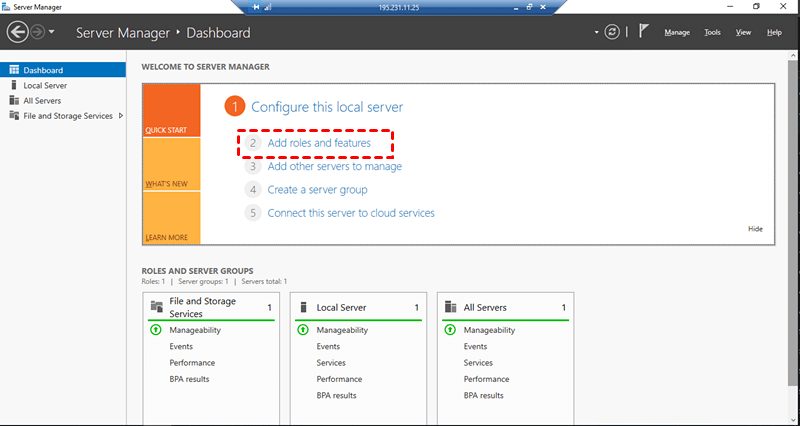
Part 1. Install Windows Server Backup
Step 1. Open Windows Server Manager and click on Add roles and features.
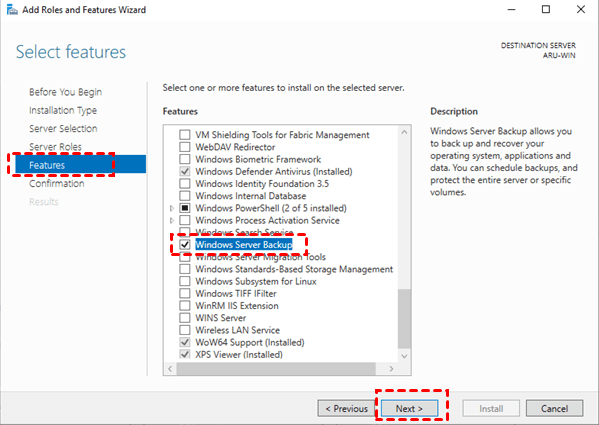
Step 2. Scroll to find Windows Server Backup in the Features list and click Next.
Step 3. Then, hit Install on the Confirmation screen to wait for the installation.
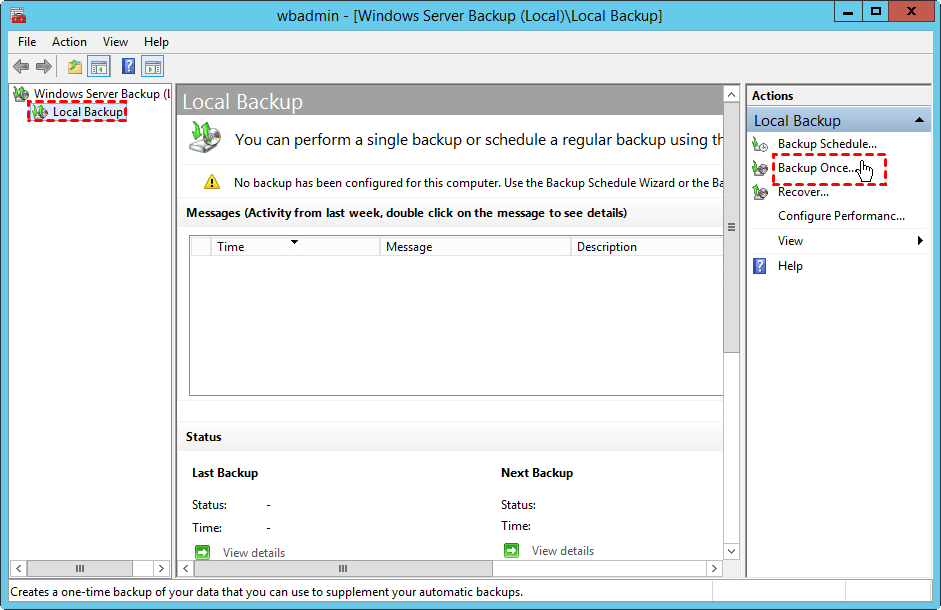
Part 2. Create server file backup
Step 1. Open Windows Server Backup and click on Local Backup and select Backup Once. And then, click Next in the Getting Started window.
Step 2. After that, select Full server to do backup for the whole system in Select Backup Configuration and tap on Next.
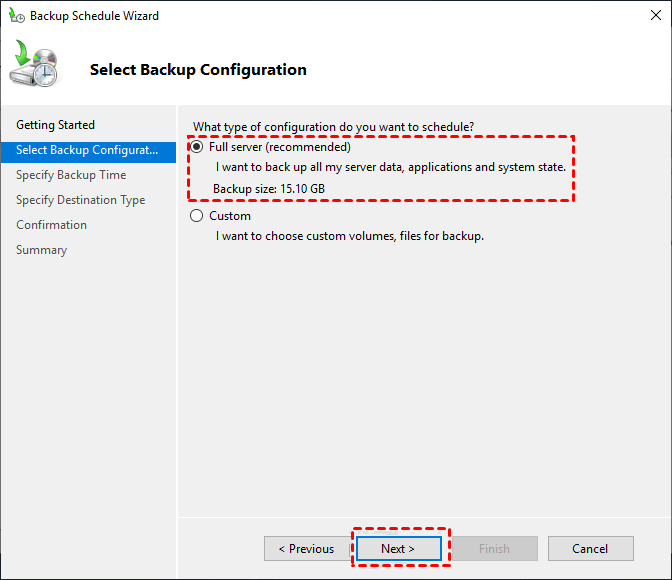
◆Note: You can also choose the Custom option to select specific volumes, files, or folders for backup.
Step 3. Choose Specify Destination Type to decide where to save your backup file.
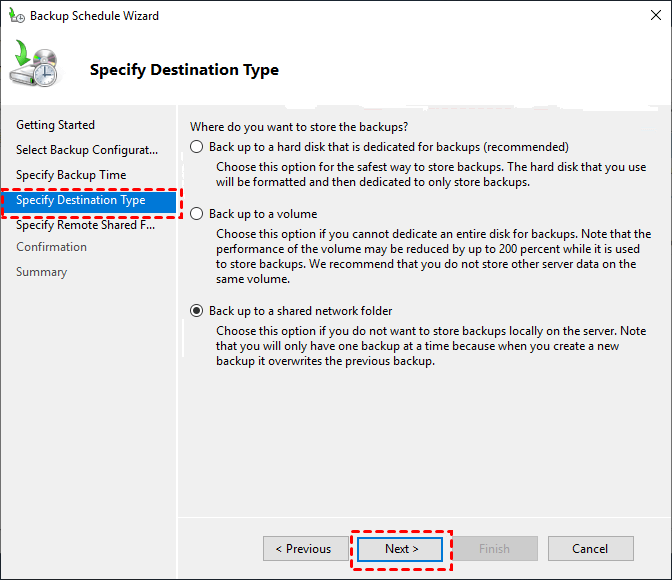
Step 4. Press Finish on the Confirmation section to begin the Windows Server file backup process.
Way 2. With free Windows server backup software
However, since Windows Server Backup is complicated to set up, we recommend using an alternative free file backup software for Windows servers. AOMEI Backupper Server is the go-to server backup application for many users, with which you can set up Windows server backup to OneDrive easily.
This software provides one-click Windows server file backups and allows you to set automatic backups with a frequency of daily, weekly, monthly, and so on. It also provides different backup schemes such as incremental backups and differential backups. In terms of storage devices, it supports external hard drives, discs, network-attached storage devices, etc.
Now, follow the guide below to do Windows Server backup best practices with this free Windows server file backup software.
Step 1. Download and run AOMEI Backupper.
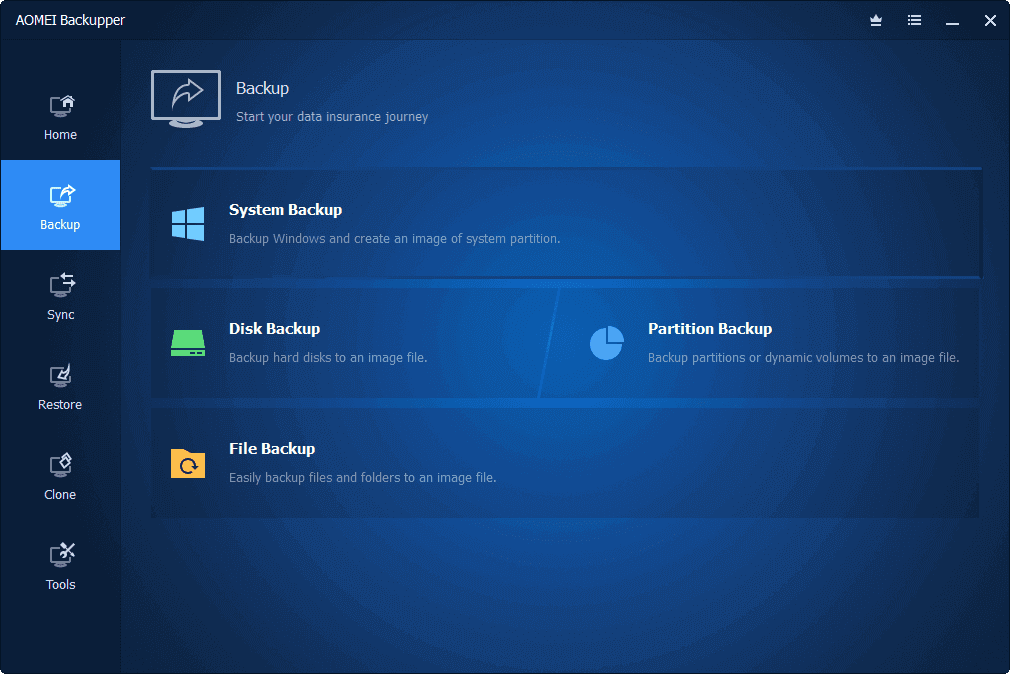
Step 2. Select File Backup on the Backup tab.
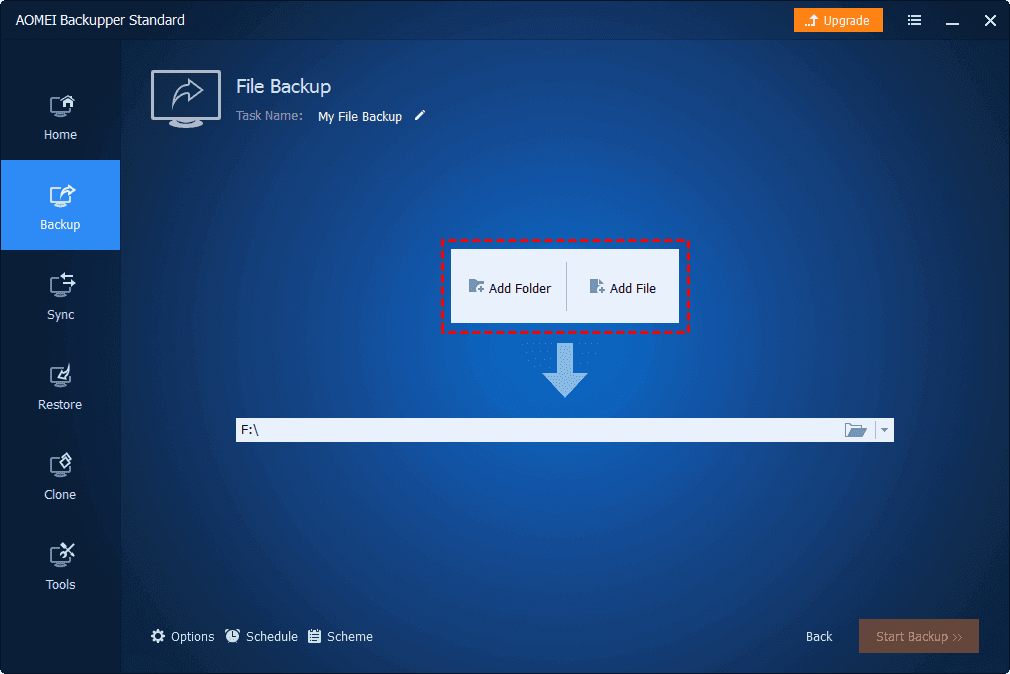
Step 3. Edit the name of the backup task for distinction. Click Add File or Add Folder to locate documents that you need to backup.
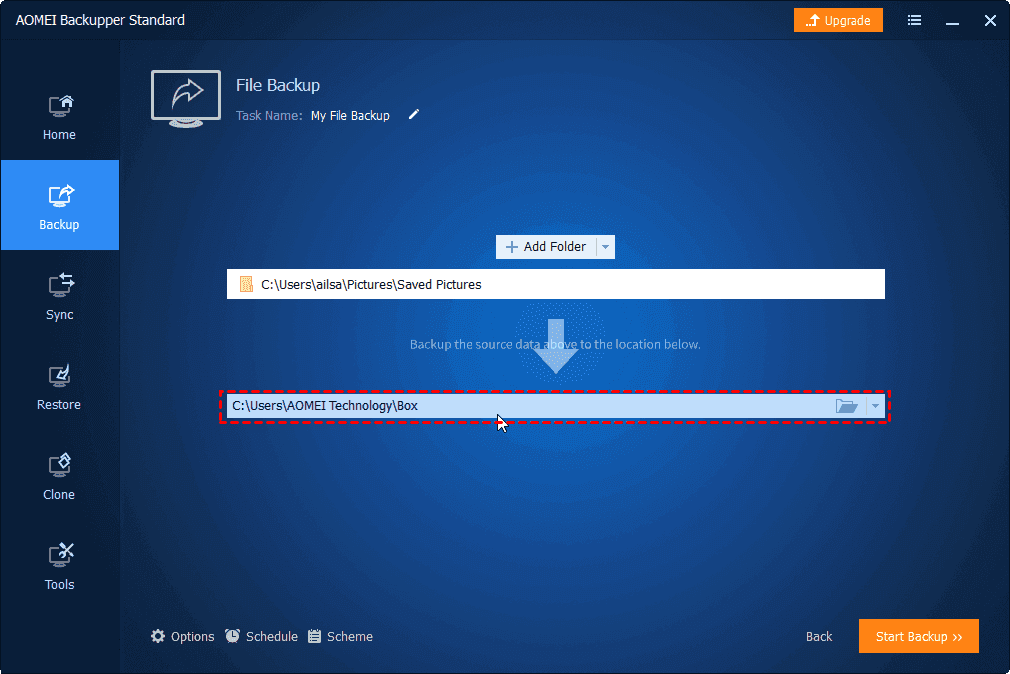
Step 4. Add the destination for storing file backups from the Windows server. Then, click Start Backup to set up a backup for server files.
Best workaround to backup Windows PC for free
Although it is important to backup Windows server files, it is also essential to backup your Windows PC. Here, we would like to introduce you to a free Windows computer backup tool - CBackup.
CBackup is a professional cloud backup service that lets you backup any type and size of files to cloud, which has 10GB of free space and scalable huge backup space. You can also use this software to:
- Backup files to Google Drive, OneDreive, Dropbox, and other third-party cloud storage services for free.
- Create automatic backups of files to cloud drives, like performing OneDrive auto backup for any folder and file.
- Transfer files from one cloud drive to another with one click, at no cost.
- Combine cloud storage from various platforms to get unlimited cloud storage space for free.
Next, let’s see how to backup Windows PCs with CBackup!
Step 1. Click the Download CBackup below to launch CBackup on your computer.
Step 2. Apply for an account for CBackup and sign in to the CBackup desktop app with your credential.
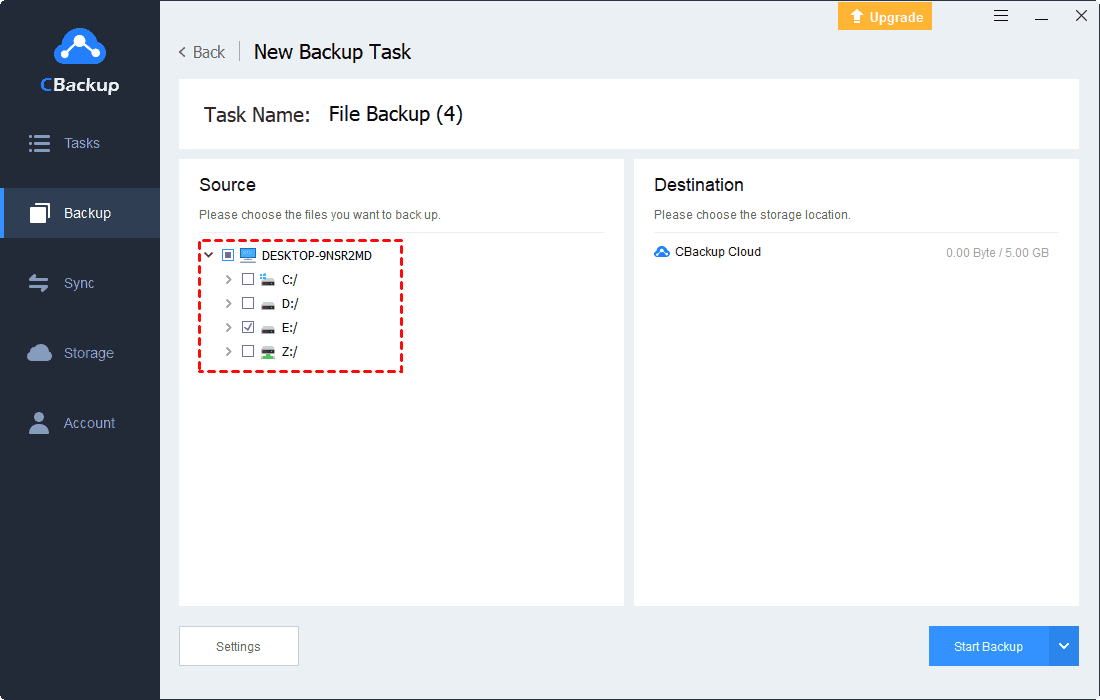
Step 3. Click on the Backup section on the left sidebar and tap on Backup PC to cloud.

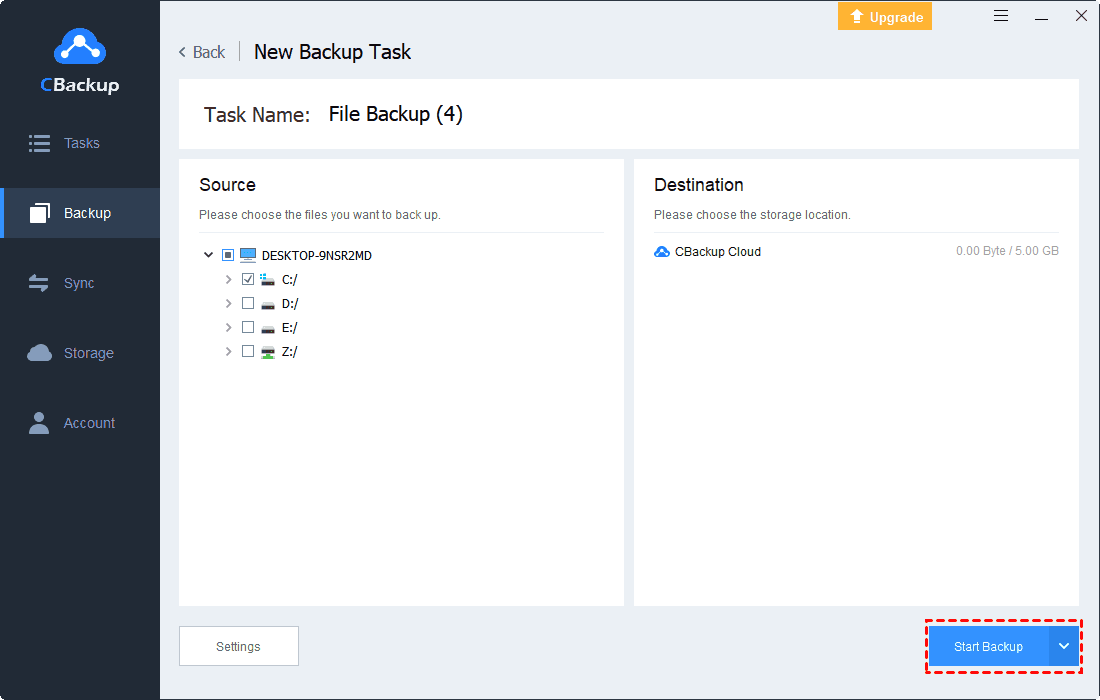
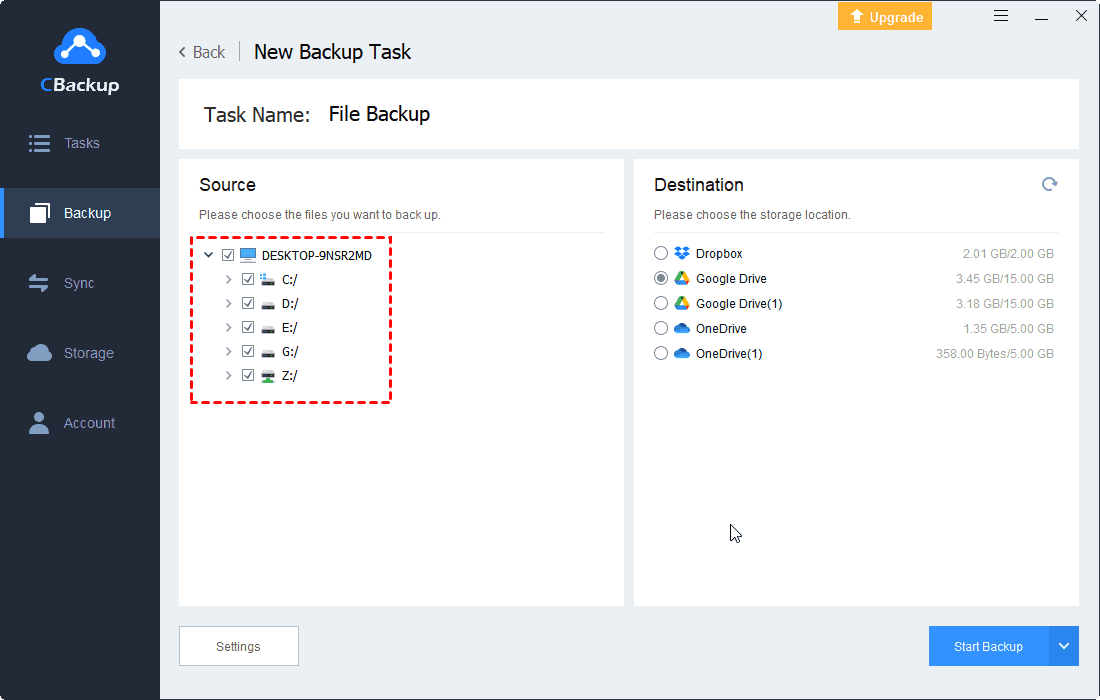
Step 4. Specify a task name. On the Source section, choose your entire computer, whole hard disks, or certain files for backup.
Step 5. Finally, click on Start Backup to perform a backup for your PC simply.
✎Other backup destinations: You can click on Storage > pick a cloud drive to complete the authorization of granting CBackup to access the cloud storage space. Then, you can select the Backup PC to Public Cloud option when you add your backup destination.
To sum it up
This article provides two methods to complete Windows server file backup with step-by-step guides. If the Windows built-in backup tool does not meet your requirements or you think it is too complicated to use, you can turn to the second method for using professional third-party server backup software. In addition, we show you a free solution to backup Windows computers with ease.

Secure & Free
