
3 Easy Ways to Windows 11 Local Backup | Quick Guide
Don't know how to protect important data with Windows 11 local backup? There’re 3 solutions that guide you step by step to backup files, OS, and entire computer to local devices or even the cloud.
by Jonna Lasted Updated September 30, 2024
How do you backup your computer Windows 11?
As more and more users switch to Windows 11 for use, the need to back up computers Windows 11 is gradually increasing. Local backup is still the preferred backup method for many users, that is, using local storage devices such as hard drives, external hard drives, flash drives, optical disks, etc. to save backup files.
Traditional backup devices provide private security, and choosing Windows 11 local backup protects your data and ensures that critical information is not lost. Read on to learn about the benefits of backing up Windows 11 locally and how to perform a Windows 11 backup and restore.
Benefits of Windows 11 local backup
Windows PC Local Backup is still loved by many users in the backup market, precisely because the solution has many irreplaceable advantages:
☛Cheap
In most cases, users purchase a local storage device that is large enough to meet the needs of data backup. You can simply connect the device to your computer and run the free local backup software to upload your files to your drive without paying a penny.
☛Fast data access
Windows 11 local backup schemes don't require an Internet dependency, and users can quickly back up their data and access it even without an internet connection.
☛Data is self-managed
The biggest advantage of local backup is a high degree of control over information, which protects your data from third-party servers and makes important data more secure.
How to local backup Windows 11: 3 free ways
You may not be sure how to back up Windows 11 to your local device, or you may only know the slow and cumbersome way of dragging and dropping files to your hard drive. Don't worry, we've put together 3 free and simple Windows 11 local backup solutions. If you want to be able to back up your Windows PC quickly and securely, you can jump right to the best third method.
Way 1. Backup Windows 11 with Backup and Restore
Windows 11 offers a built-in backup tool, Backup and Restore, which supports backing up your desktop and files from default Windows files to local devices like external hard drives. Read below to learn the specific steps for Windows 11 backup and restore files.
Step 1. Navigate to Control Panel > System and Security > Backup and Restore (Window 7).

Step 2. Click the Set up backup button as shown in the figure, select the backup destination where you want to store the files, and click Next.

✎Note: If your local backup device is not found, recheck that it is properly connected to Windows 11.
Step 3. In the next window, select what you want to back up:
-
Let Windows choose (recommended): Windows 11 backs up files about users, such as libraries, desktops, and files in the default Windows folder.
-
Let me choose: Windows 11 will back up folders of user choice.

✎Note: You can go ahead and click Change schedule to set the local backup task to happen automatically.

Way 2. Backup Windows 11 with File History
File History, another major backup tool for Windows systems, can also help users back up Windows 11 locally, and unlike Backup and Restore, it's designed to let users back up their personal files instead of creating a system image.
Step 1. Navigate to the Settings > System > Storage > Backup options and click Add a drive under the Back up using File History section.

Step 2. Go the Automatically back up my files button to On and the backup task will proceed automatically.

Step 3. After finishing setting up the automatic backup, click Save and exit. Then click Back up now to complete.
Way 3. Backup Windows 11 with auto backup tool
Although the above two ways can make Windows 11 backup to external drives and other devices, they are inconvenient: you can't specify any files, File History can't recognize external hard disks, etc. are all problems that can't be ignored. In order to get Windows 11 local backups in place at once, we recommend that users use a simpler third-party automated backup service.
AOMEI Backupper Standard is a professional free backup service that supports various storage devices such as external drives, USB, SSDs, HHDs, etc. as backup destinations. Users can easily back up any type of file from Windows 11, start experiencing Windows 11 auto backup now.
Step 1. Download AOMEI Backupper Standard for free to your desktop, install, and launch the program. Navigate to Backup > File Backup.

Step 2. On the next interface, click Add Folder/Add Files and select the data you need to back up in the pop-up window.

Step 3. Click on the location shown below to select the local backup device that you are the backup destination for.

✎Note: Click on the Schedule option in the lower left corner, you can set the file backup task to run automatically at a fixed time frequency, such as daily\weekly\monthly.

Step 4. Click Start Backup to local backup Windows 11.
Bonus tip: Turn to Windows 11 cloud backup
Compared to local backup, cloud backup solution offer the benefits of scalable storage, rapid disaster recovery, and easy access to information. If you prefer to be able to access your backup files at any time and want to quickly recover lost data when you are concerned about external temporaries, then we recommend that you use the Windows 11 cloud backup solution.
CBackup is a professional online backup service that focuses on backing up Windows PCs to secure cloud servers. CBackup supports multiple cloud storage destinations, CBackup provides a stable and large cloud backup space - cloud, each registered account can enjoy free 5GB cloud storage, in addition, cloud storage service users can also add their accounts to CBackup, Google Drive, OneDrive, Dropbox and other cloud drives as local backup to cloud targets.
Try using simple CBackup for automatic cloud backup of your Windows PC now.
Step 1. Download and install the CBackup desktop app for free and log in with your registered CBackup account.

Step 2. Click the Backup tab and select Backup PC to cloud.
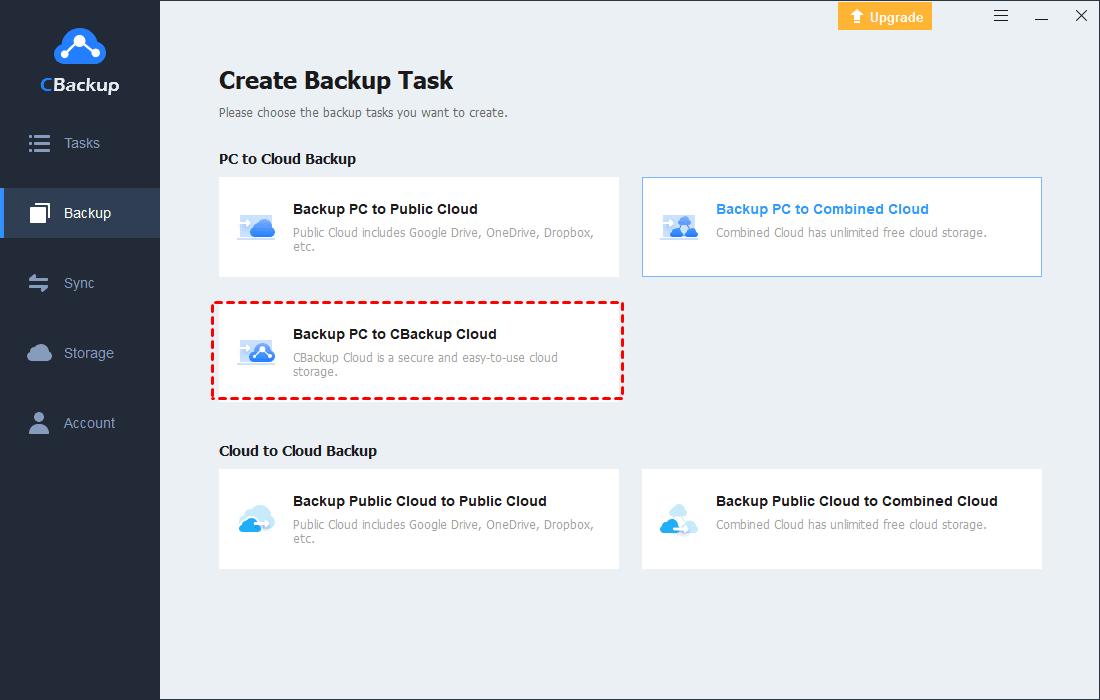
Step 3. In the next interface, select any file or folder that you want to back up to the cloud. Tap Start Backup to back up Windows 11 to the cloud.

✎Note: If you wish to back up your Windows PC to a public cloud drive, you can click Storage > select your drive type, and hit Authorize Now and authorize to CBackup.
Before starting the backup, you can click the Settings button in the lower-left corner and use several free features, Scheduler, FileFilter, and Email Notification.
Final words
You can use any of the methods in the article to perform a Windows 11 local backup, the easiest way is to use the professional backup tool AOMEI Backupper Standard, which can quickly back up any file to a variety of local devices, and provides a lot of free features to make the backup process easier.

Secure & Free
