
How to Get Windows 11 Backup with File History [Beginners Guide]
If you want to learn Windows 11 Backup with File History, you have come to the right place. In this article, you will figure out step-by-step tutorials to turn on File History. And you could also learn another easy way to backup Windows 11 items freely.
by Jonna Lasted Updated June 10, 2025
What is File History?
File History is a backup utility, first introduced in Windows 8, that features backing up local files in your Windows Libraries, Contacts folders, and on your desktop. Only if you turn on File History will it automatically back up your data to a connected external hard drive or a network location on a schedule.
In the following sections, we will introduce how to get a Windows 11 backup with File History. And we will show you how to restore backups from File History below. Please continue reading.
Ultimate Guide to Enable Windows 11 Backup with File History
When you decide which folders to backup with Windows 11 File History, you can exclude unnecessary files and include important ones to save space on your device. And you could modify the backup frequency and the time to save backup files as required.
Part 1. Turn on File History on Windows 11
You can follow the step-by-step guides below to turn on File History:
Step 1. Click on Start > Settings, go to the Update & Security tab.
Step 2. Go to the Backup tab, and hit Add a drive in the Backup using File History tab to search for drives (If you want to backup files to an external hard drive, please plug it into your device in advance).

Step 3. Choose your backup destination. After your File History is on, click Run Now to do a backup.
Part 2. Configure File History Settings
To help you backup Windows 11 files with File History smoothly, here we propose some important backup settings for you. Just click on the More options button under Add a drive to open the BACKUP OPTIONS window.
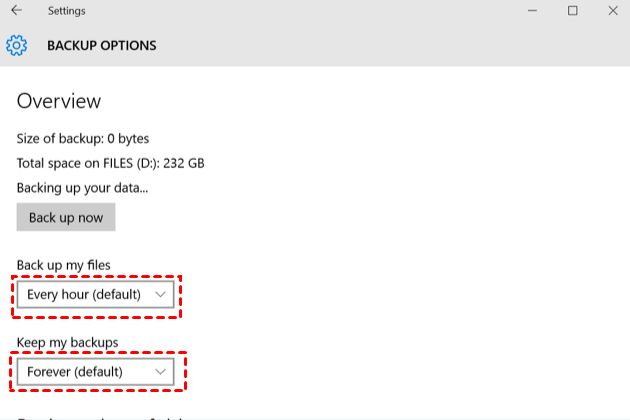
1. To customize the frequency of backing up data, you could click on the inverted triangle icon to open the drop-down menu of Back up my files, and then select one. By default, it is every hour.
2. Likewise, open the drop-down menu of Keep my backups to choose the length of time to save the backups, which is defaulted to be Forever.
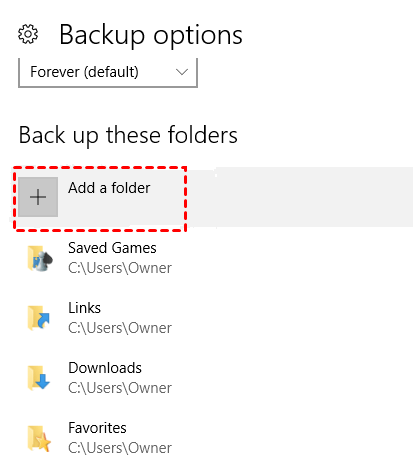
3. Under Backup these folders, you could click on Add a folder to add more folders to back up according to your needs.
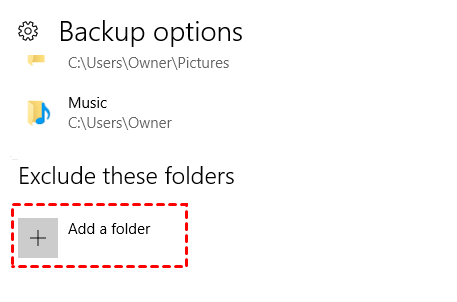
4. Under Exclude these folders, click on Add a folder to erase the folders you don’t want to backup.
Frequently Asked Questions about File History
If you want to know what files File History backs up, or how to restore backed-up files from File History, you can find answers in this chapter.
#1. What Files Does Windows File History Backup?
File History is set up to continuously back up files in the Documents, Music, Pictures, Videos, and Desktop folders. To make other files backed up, you can add them to the Documents library or other folders.
✎Note: Some OneDrive files will be backed up with your File History device. But it will only backup these available offline on your computer.
#2. How Do I Restore Files from Backup History?
You are able to recover File History backups when your original files are deleted by mistake or under any emergency circumstance.
Step 1. Tap on Restore personal files on the left panel of the File History window.
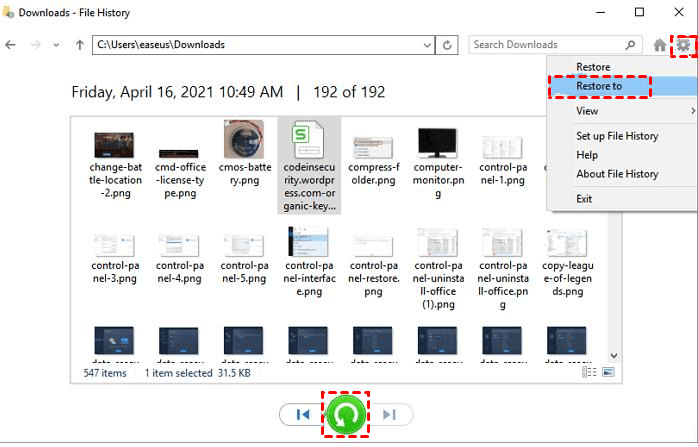
Step 2. In the pop-up window, you can switch back or forward to a different backup version using the left and right arrows at the bottom of the window.
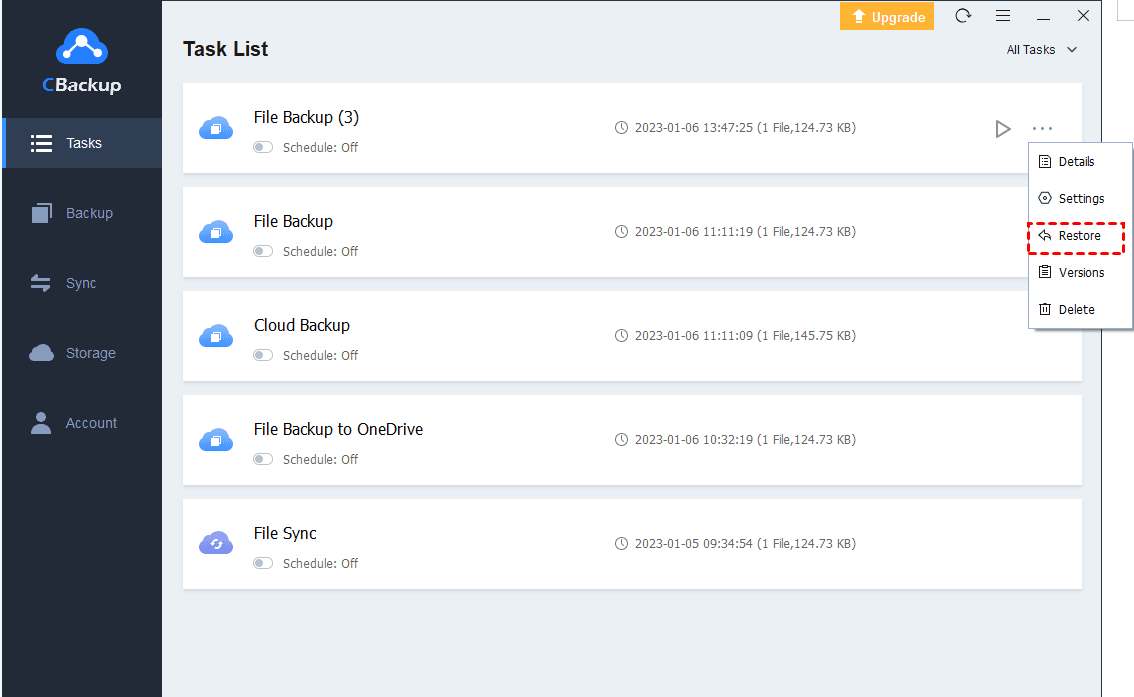
Step 3. After you find the version you want to restore, click the green refresh button to restore it to the original location. You can also click on the gear icon in the upper right corner to hit the Restore to button to restore your files to a new location.
Better Way to Backup Windows 11 Files for Free
Getting Windows 11 backup using File History is convenient, but storing backups in external cloud drives could be risky since there are times when accidents and cyberattacks can cause your files to be lost and damaged. Therefore, you could choose to back up files with cloud storage services.
Compared with storing backup in external cloud drives, backing up data to cloud drives is much safer. Another good point for cloud storage data is that it is available from any Internet-connected device. To make your data backup to cloud storage smoothly, CBackup could help you out.
This professional cloud backup and sync software is free to get Windows PC files backed up to its cloud and some public clouds, such as Google Drive. It is armed with first-class security technologies, and you can get full control of your data with ease.
Some features of CBackup:
☛Support backing up PC files to multiple cloud drives on the same interface.
☛Available to make PC backup automatically to the cloud on Windows 7/8/8.1/10/11.
☛Provide file filters to exclude unnecessary backup files or include important files to back up.
☛Support to combine cloud storage to obtain more free backup space for free.
☛Offer 5GB of free cloud storage for the cloud, and its paid storage space is cost-effective.
Step 1. Download CBackup, install, and launch it. Create a CBackup account and log in to its desktop application.
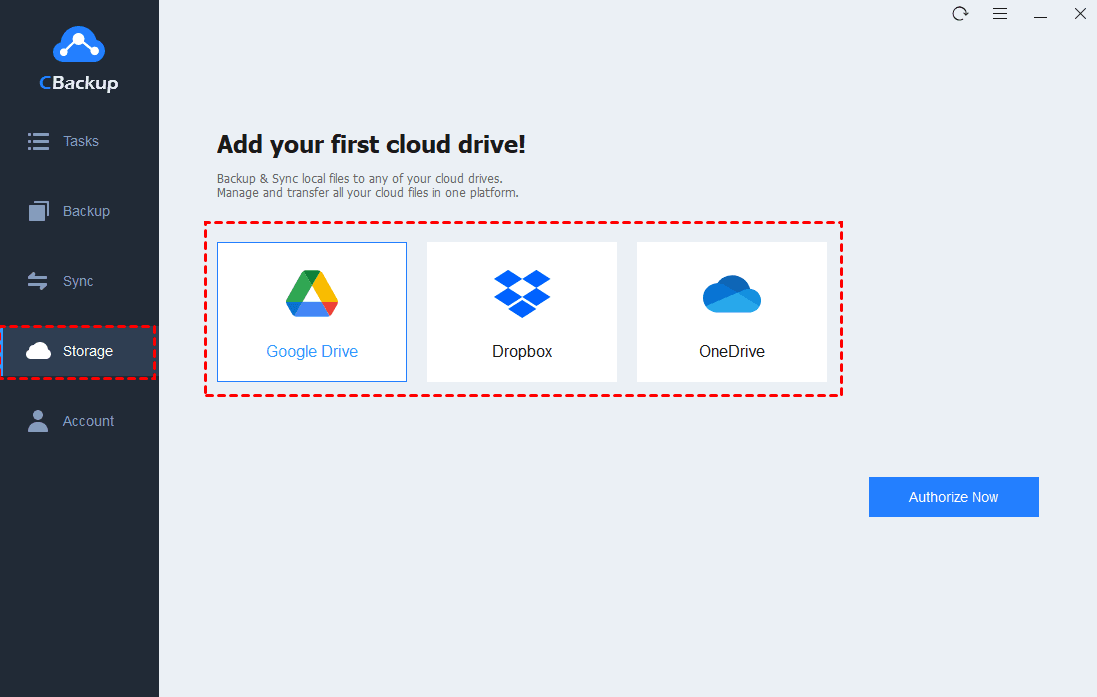
Step 2. Select Storage > choose the cloud storage you want to backup files (for example, OneDrive), and click on Authorize Now. Then, complete the authorization to connect CBackup with OneDrive storage.
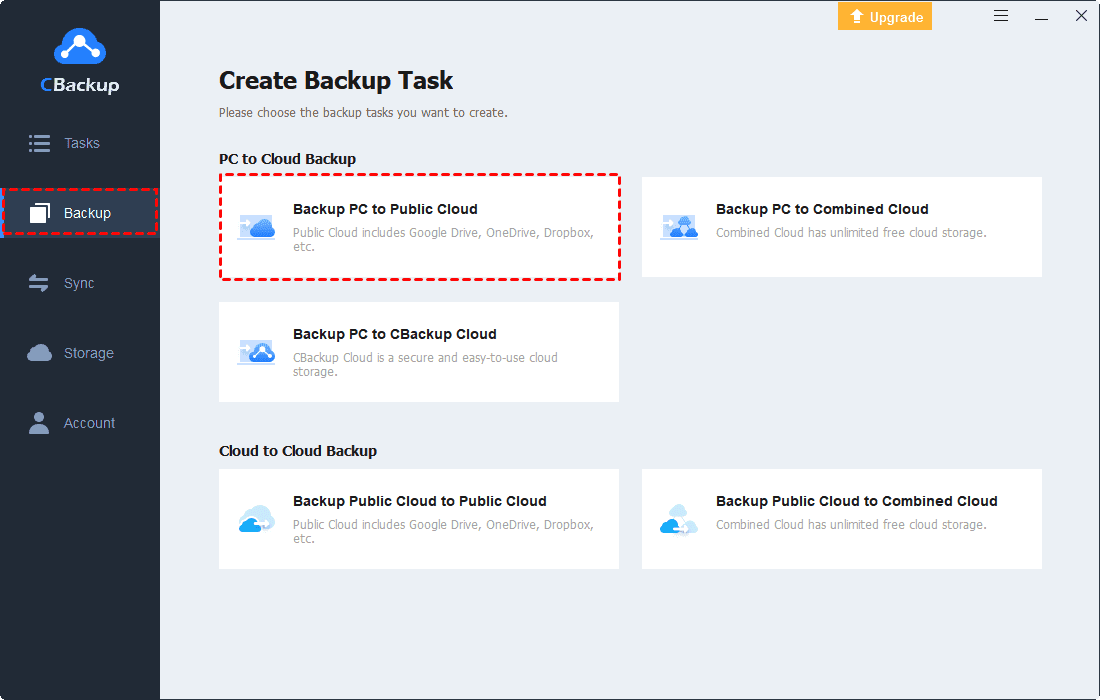
Step 3. Select Backup, and hit Backup PC to Public Cloud.
Step 4. In the newly opened window, rename your task. Select the PC files you want to backup to the cloud, and pick OneDrive as your backup destination, and press the Start Backup button to Backup Windows 11 files to OneDrive.

Conclusion
We've given you the detailed information in this article to figure out how to get a Windows 11 backup with File History. We hope that this will be helpful.
Besides, we provide one more method that could help you backup data with fewer risks. With the help of CBackup, you can back up Windows 11 files to Google Drive, Dropbox, and OneDrive without switching accounts. And you can rely on its cloud-to-cloud backup feature to move files between cloud storage with ease.

Secure & Free
