
How to Use Dropbox Capture | Ultimate Guide
How to use and set up Dropbox Capture, please find the following detailed instructions to create screenshots, video and audio recordings, and more.
by CBACKUP Lasted Updated July 14, 2025
What is Dropbox Capture?
Dropbox Capture is a service designed by Dropbox, which allows you to create and share screenshots, screen recordings, and video messages, which is available for Windows and macOS. With Dropbox Capture, you can share screen recordings, GIFs, and screenshots, and add audio to explain more easily so that others can watch them on their own time to avoid lengthy meetings. Besides, with Dropbox capture, it’s much more flexible to share ideas, a software guide video, or give feedback to save your precious time.
Now we will show you how to use Dropbox Capture with detailed steps, just find it out.
Is Dropbox Capture Free?
Dropbox offers a Capture service, which varies from Dropbox plans. Therefore, every Dropbox user can use Dropbox Capture for free to record something, but it has some differences:
- You can only record up to 2 hours in total with Dropbox Basic, Plus, and Family plan. And there is no limit on individual recordings.
- Unlimited recording time is applied to Dropbox Professional, Standard, Advanced, and Enterprise. If you hit the Dropbox storage limit, you cannot record anymore.
- ★Tips:
- To get more Dropbox Capture recording time, you can invite people to sign up for Capture, and you get an extra 20 minutes for every successful invitation, the same as the receiver.
- If you delete the videos, the used time will be removed from your recording time.
How to Set Up Dropbox Capture?
To use Dropbox Capture, you have to follow the below steps to set up Dropbox Capture:
1. Please go to the Dropbox website, and sign in to your Dropbox account.
2. Hit the thumbnail icon at the top left.
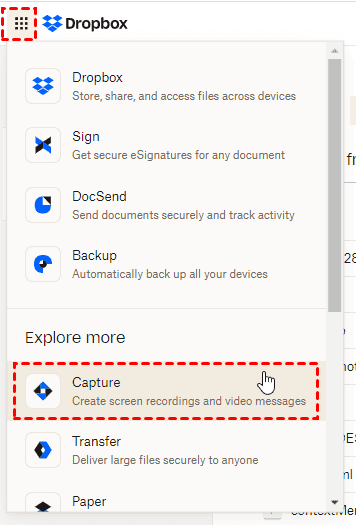
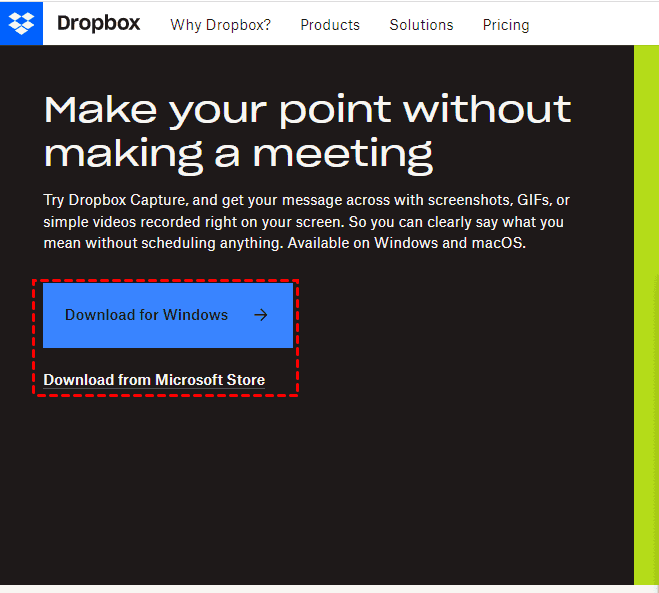
3. Hit the Download for Windows button or Download from Microsoft Store (or Download for Mac) to download Dropbox Capture in the new window.
4. Double-click the Dropbox Capture app to install, wait for a moment, it will be finished quickly.
5. It will start automatically Dropbox Capture, and sign in to your Dropbox account right away.
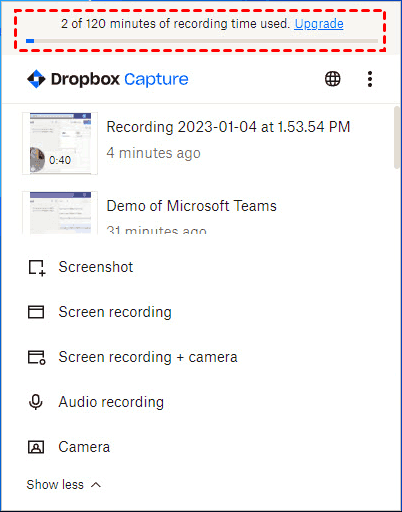
6. Then you will find the remaining recording time will show up, and the used recording time on the top of the window.
How to Use Dropbox Capture on the Desktop app?
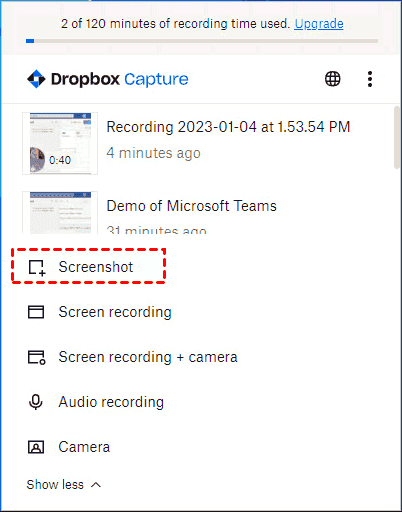
First of all, Dropbox Capture offers 5 options for you to record your opinion:
- Screen recording + Camera (Shortcut: Shift+Alt+C)
- Screen recording (Shortcut: Shift+Alt+R)
- Screenshot (Shortcut: Shift+Alt+S)
- Audio recording (Shortcut: Shift+Alt+V)
- Camera (Shortcut: Shift+Alt+F)
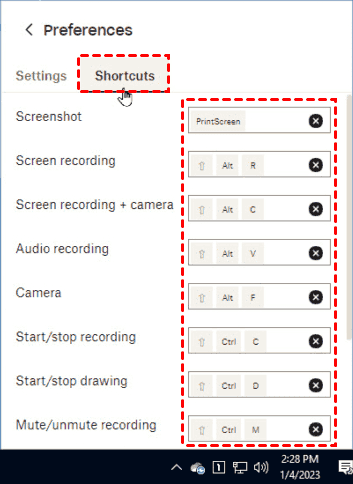
If you don’t see them all, hit Show more to find all the options. Or click Show less to hide some options if you’d like. You’re allowed to edit the shortcut by hitting the Dropbox Capture icon > vertical three-dots icon > Preferences > Shortcuts, and edit what you like.
To explain how to use Dropbox Capture to save your ideas, you can do the following things.
Create Recording for Screen and Camera
In this way, you can record your screen and camera, as well as your microphone.
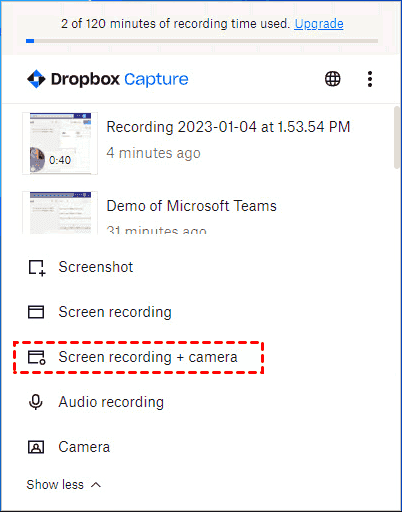
1. Open your Dropbox Capture desktop app.
2. Choose Screen recording + Camera. If you hover over the option, it will show the Shift+Alt+C shortcut to open it immediately.
3. You can record your screen with 3 options: click any location or hit enter to record the entire screen; use the mouse to select the part of your screen to generate a part of the screen; hit the Spacebar to record a certain window.
Create Screen Recording
You can use this way to only record your screen and microphone on the Dropbox Capture desktop app and dropbox.com.
On Dropbox Capture Desktop App:
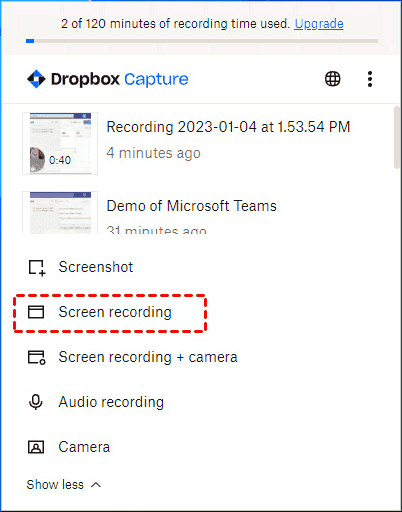
1. Open your Dropbox Capture desktop app.
2. Click Screen recording (Shift+Alt+R) to start the record.
3. Use the 3 ways to capture the content you want:
- Click any location or hit enter to record the entire screen.
- Use the mouse to select the part of your screen and record.
- Try pressing the Spacebar to record the specific window.
Use Dropbox Capture On Dropbox.com
1. Please log in to your Dropbox account. Located where you want to save the recording.
2. Hit Create > Screen recording subsequently.
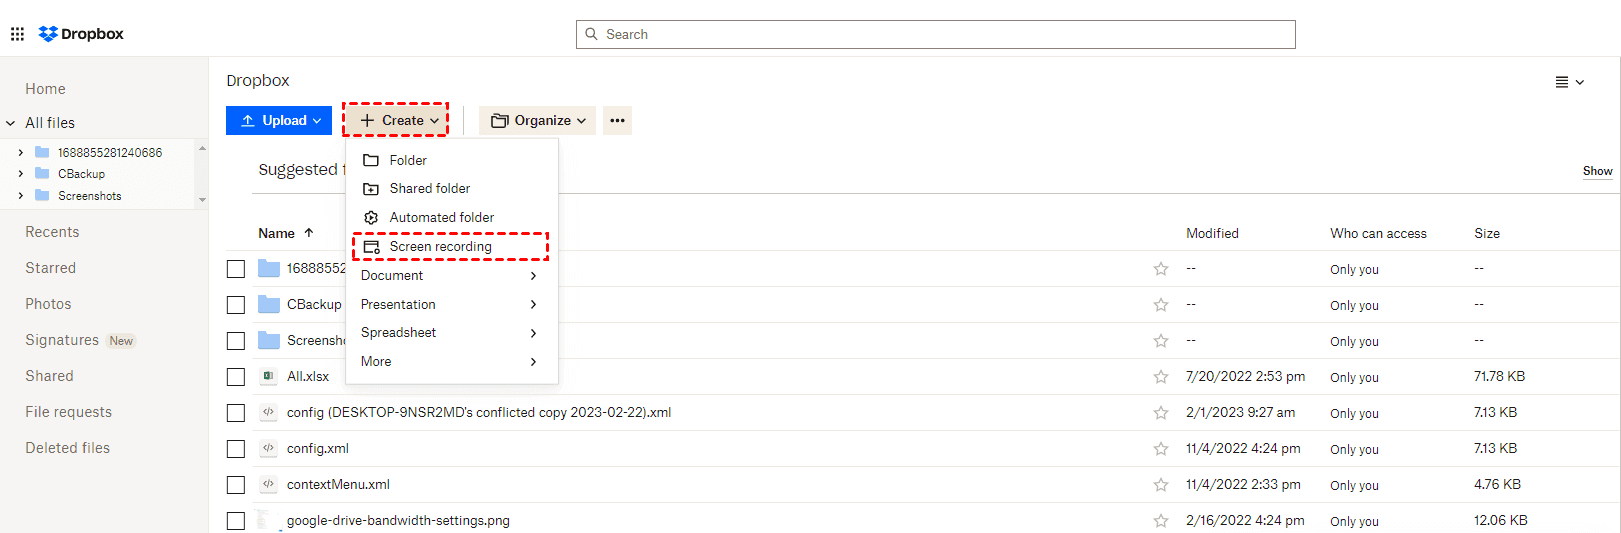
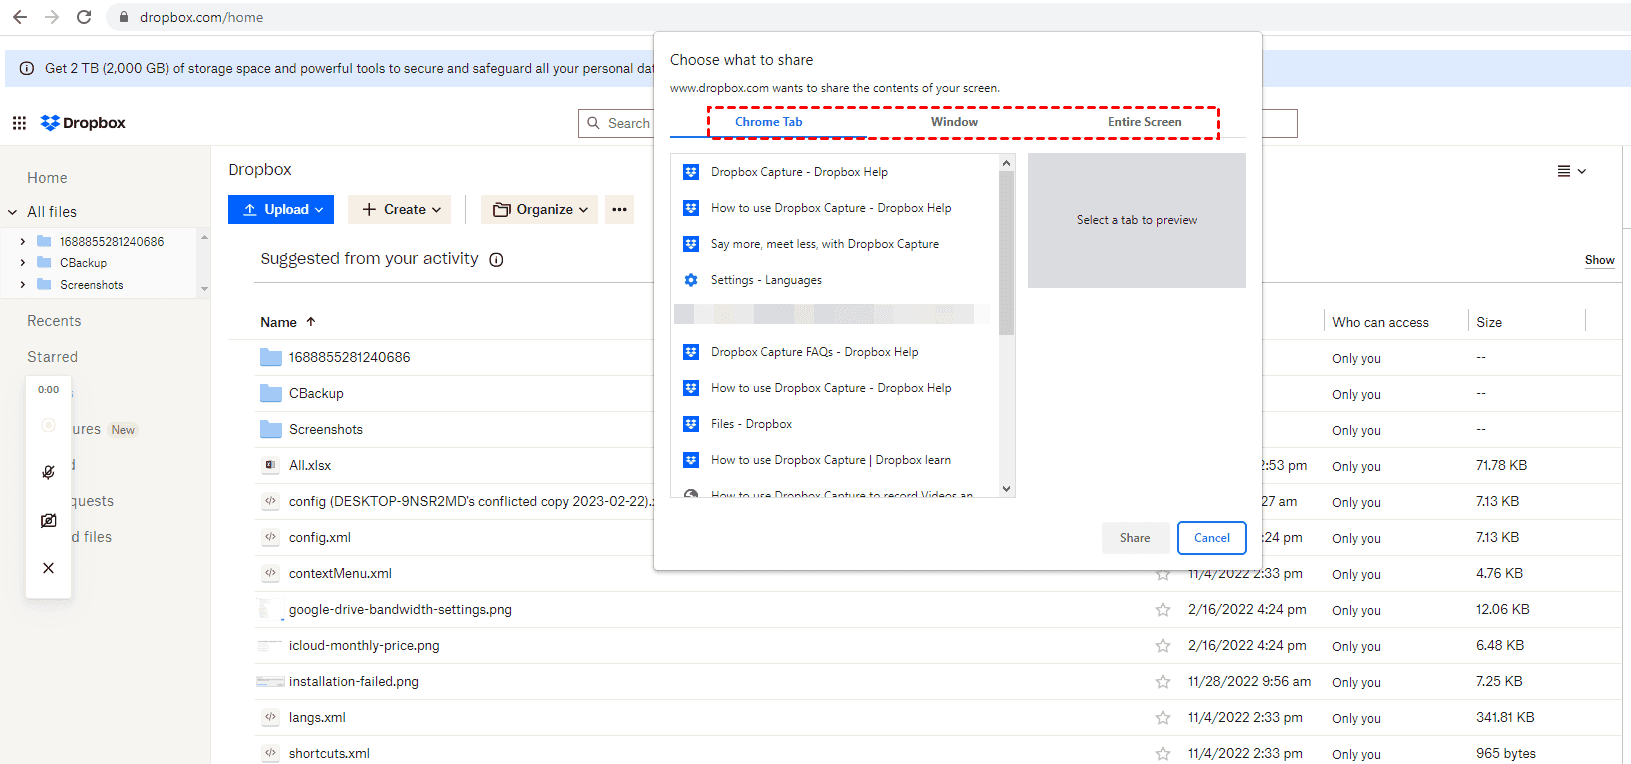
3. Choose Chrome Tab, Windows, or Entire Screen to share the content, and hit Share.
4. It will show you the left panel, and hit the Start icon to record.

- ★Tips:
- The microphone or camera the system cannot detect will be displayed with slashes.
- If you want to cancel this action, hit the X on the left panel to exit.
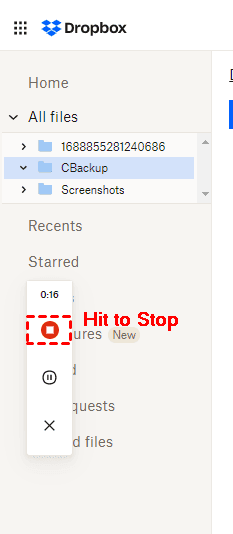
5. Press the Stop icon to stop recording.
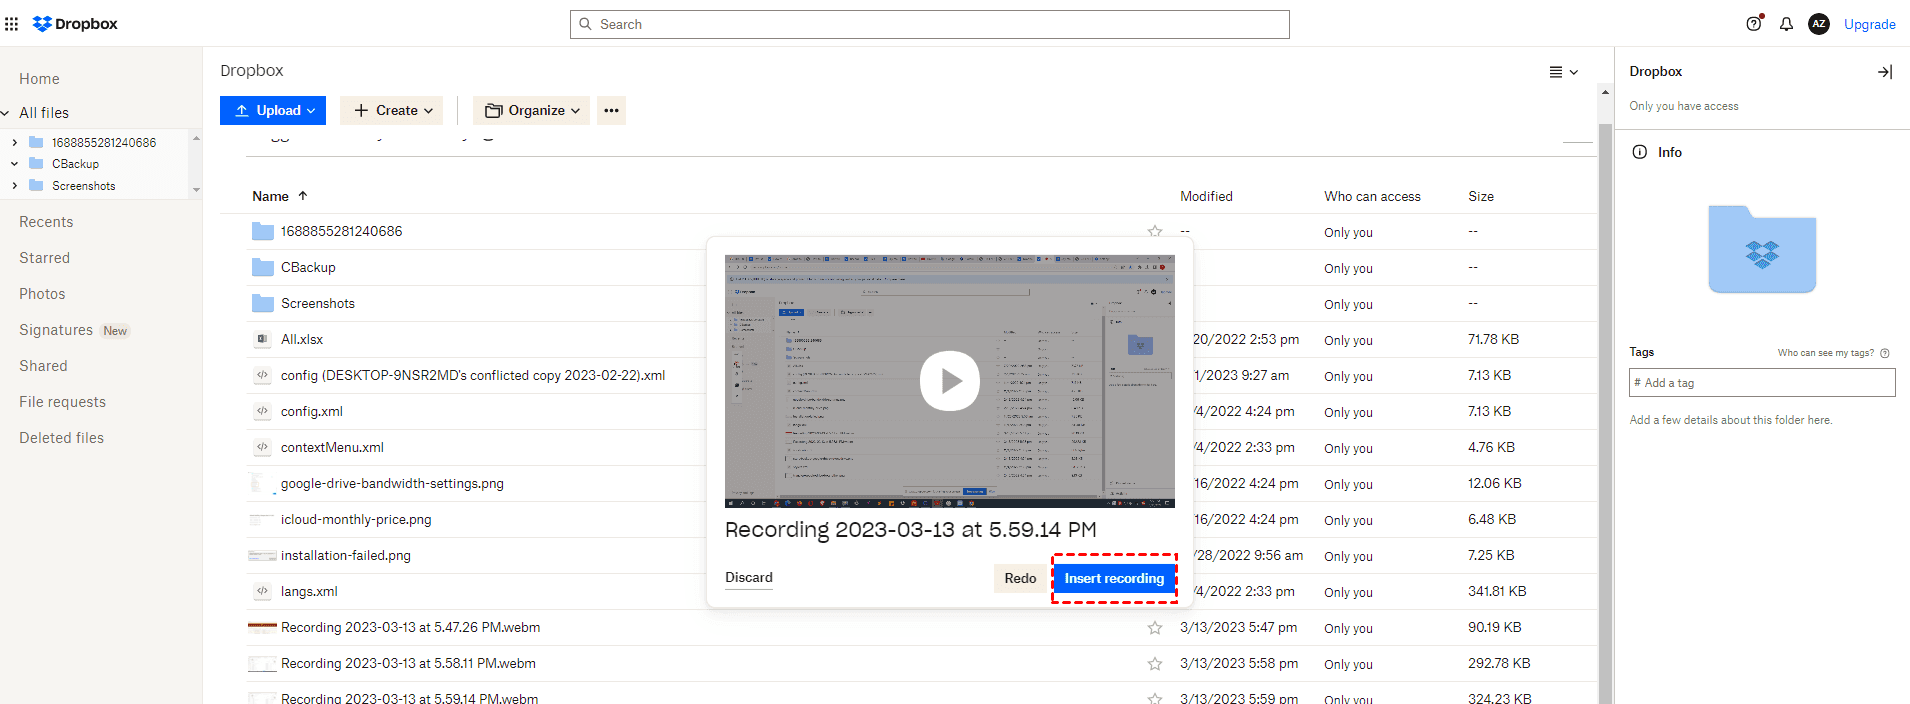
6. When you finished the recording, hit the Insert recording button to save it to the Dropbox folder where you’re located.
Create Screenshot
You can create a Dropbox screen capture for your computer screen. Here you can create a Dropbox account capture:
1. Please log in to your Dropbox Capture desktop app.
2. Click Screenshot from the options.
3. You can create your screenshot with 3 options: click any location or hit enter to record the entire screen; use the mouse to select the part of your screen to generate a part of the screen; hit the Spacebar to record a certain window.
All of them will be saved to the Capture folder in your Dropbox account and copied to the clipboard.
Besides, you can copy a screenshot link:
1. Open your Dropbox Capture desktop app.
2. Hit Vertical ellipsis > Preferences > Select Copy Link under When screenshot is ready.
3. You will see a notification after taking a screenshot in the bottom right corner, and shows Preview, Markup, and Delete.
Record your Camera
1. Open the Dropbox Capture desktop app.
2. Click Camera from the menu.
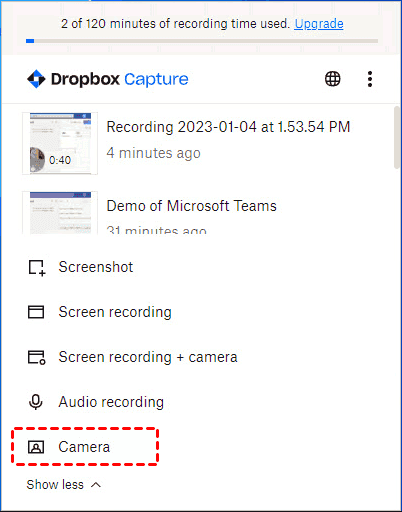
3. Click the red circle icon in the left-side panel to start recording, and click it again to stop recording.
Then upload video to Dropbox automatically, and then you can play it on the website.
How to record your Microphone?
Recording your Microphone is the best way to share your ideas about anything you want to share with others. To record your microphone with Dropbox Capture, please install Dropbox Capture first on your computer:
1. Open the Dropbox Capture desktop app after installing it and logging in.
2. Choose Audio recording from the menu.
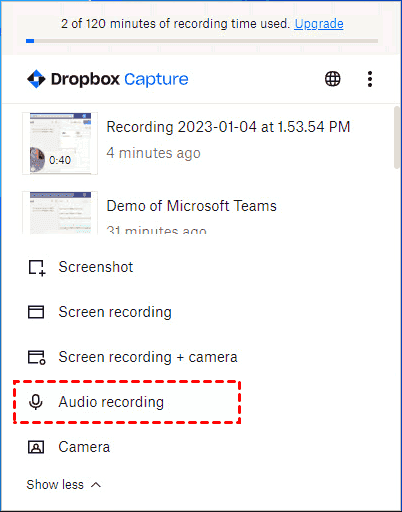
3. Hit the red circle icon in the left-side panel to start recording, and click it again to stop recording.
There are 4 options to use on the left panel while recording: Draw, Pause, Redo, and Cancel.
- Click the Draw icon to draw something you want on your recording.
- Click the Pause icon to pause or resume recording.
- Click the Redo icon to stop the recording and start over.
- Click the Cancel icon to stop and cancel the recording.
How to use an external microphone or camera
1. Please plug in the external microphone or camera.
2. Then tap the Dropbox Capture icon to open.
3. Click the vertical three-dots icon in the top-right corner.
4. Select the device you want to use from the dropdown menu next to Camera and Microphone.
How to Use Dropbox Capture in dropbox.com?
Besides the Dropbox Capture app, you can also do this on the Dropbox capture website. Here it is:
1. Please go to the Dropbox Capture website. It will show you like this.
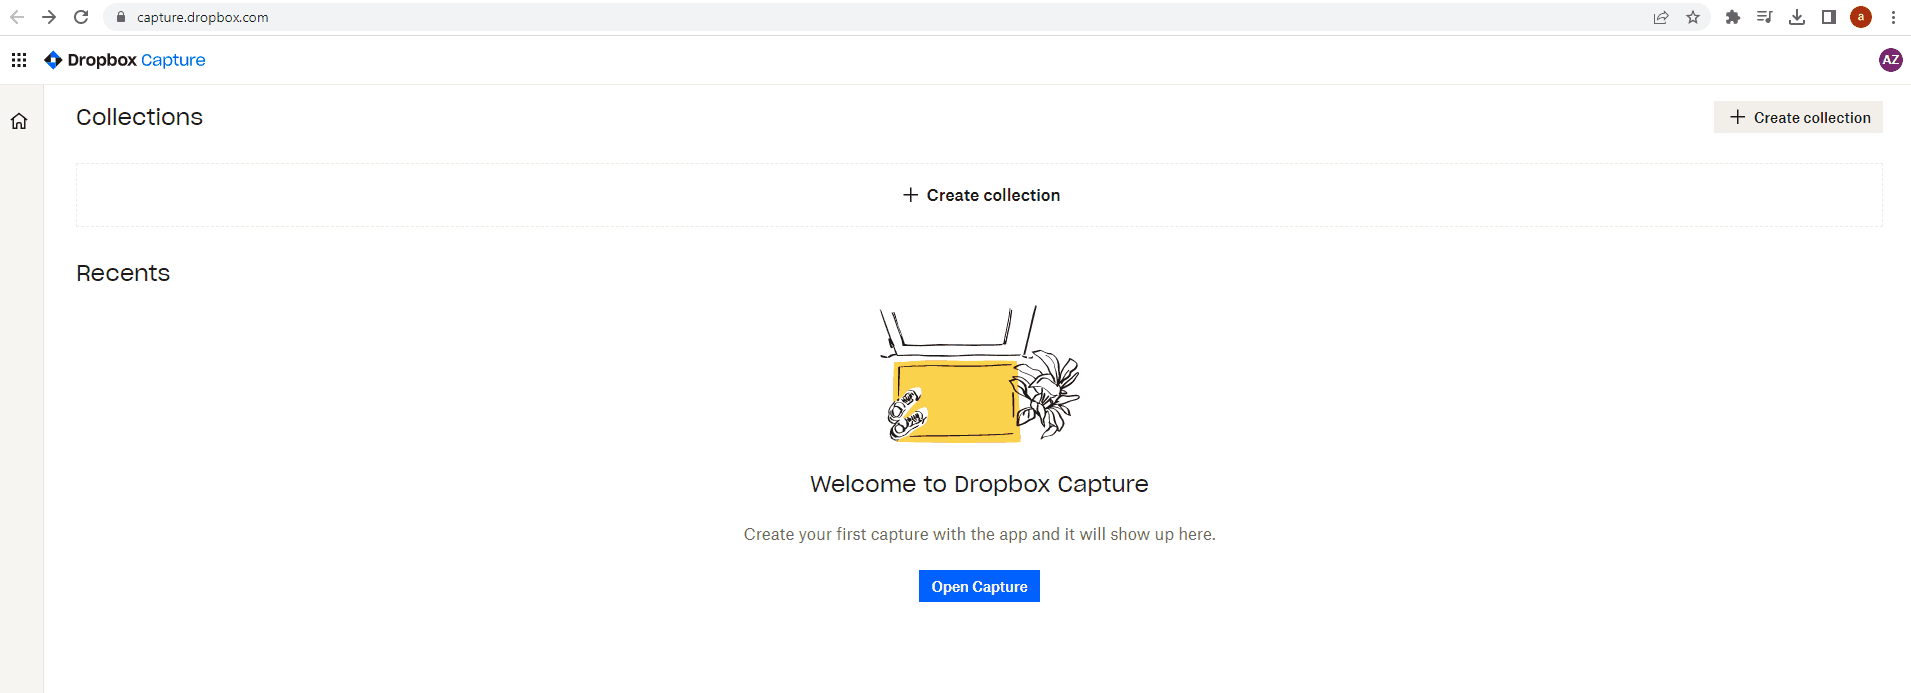
2. Hit the Open Capture button to open your Dropbox Capture desktop app. It will show you Opened Capture app message. Then you can use the Dropbox Capture desktop app as above.
3. You can hit Create collection button on the top right or the center button. Rename it to distinguish it from others.
4. Click the renamed collection, and hit the + Add Capture button. Choose the recordings to add.
How to Save Screenshot to Dropbox Automatically
Although you can use Dropbox Capture to record something important to share with others, you probably cannot sign in to Dropbox Capture even though you have logged in to your Dropbox account on your Dropbox desktop app. Besides, some users reported that they cannot upload any screenshots or records to Dropbox, after capturing, it shows Capture is uploading but can do nothing more. To record your screen, you can try the PrintScreenSysRq key to take a screenshot. If you want to save the screenshot to Dropbox, just follow the below steps to make it.
1. Please download and install the Dropbox desktop app and log in.
2. Hit the PrintScreenSysRq key to take a screenshot.
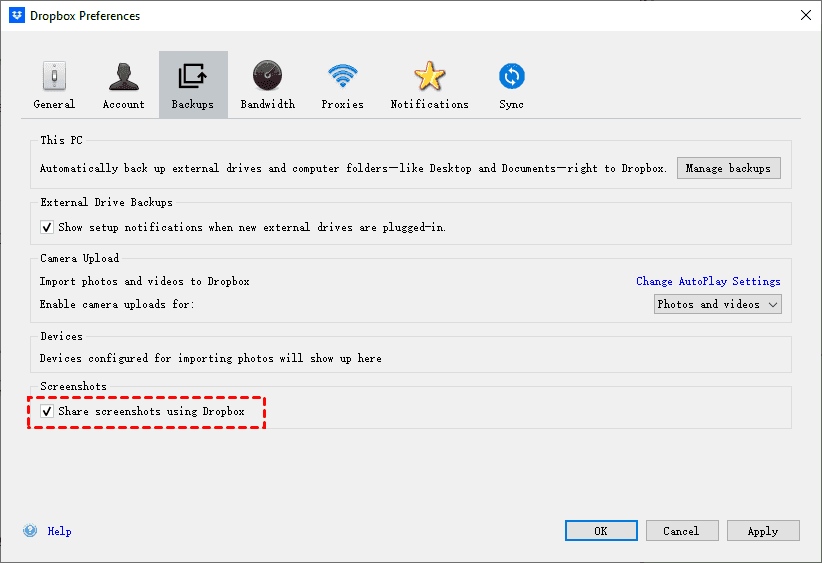
3. Dropbox will show you a window like this, hit Save Screenshots to Dropbox button.
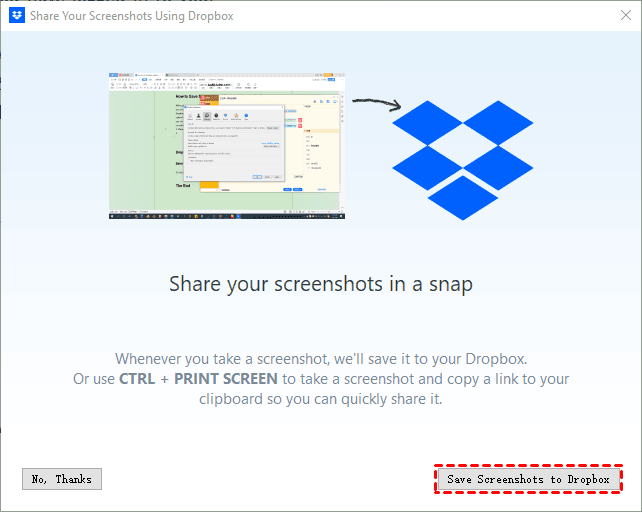
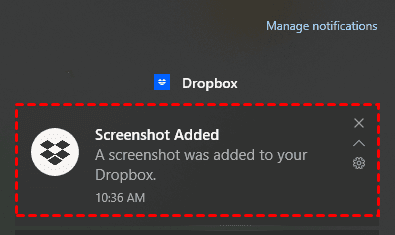
4. Then you will get a Dropbox notification: Screenshot Added.
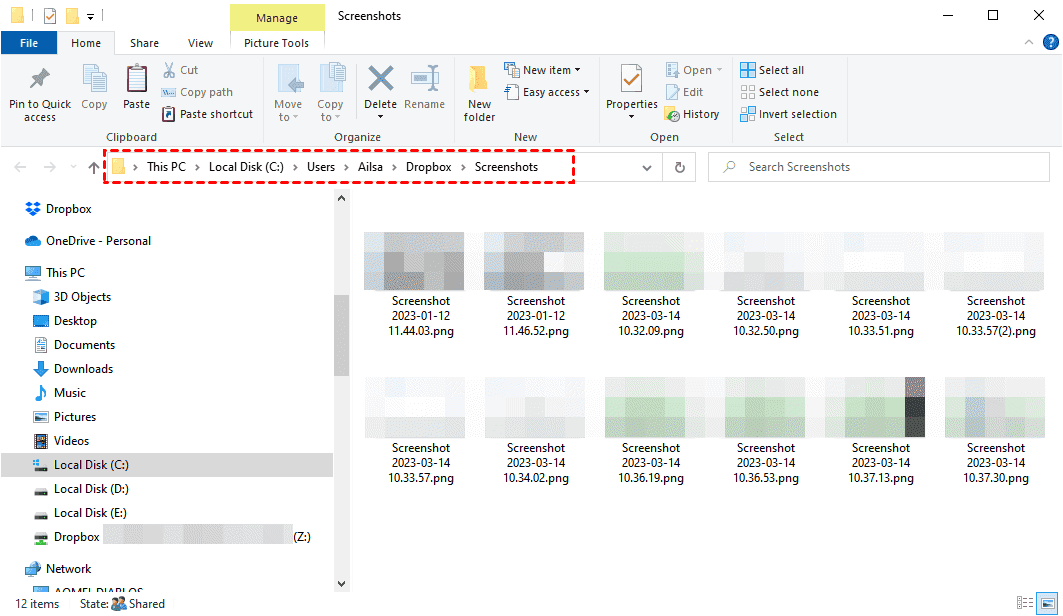
5. Hit this message, it will automatically open the Dropbox folder where the screenshots are located. Wait for a while, it will be uploaded immediately to Dropbox.
Increase Dropbox Storage Space for Free
Dropbox only provides you with 2GB of free cloud storage space, and many screenshots, video, and audio recordings may take up much storage space on your Dropbox account, you have to free up Dropbox space, by deleting unnecessary files, removing duplicate files, and shared folders that count towards your Dropbox storage. However, it is not the ideal solution. You can combine two or more Dropbox accounts to increase Dropbox storage space for free if you’re not ready to upgrade your Dropbox account.
The free cloud backup service - CBackup will do you a big favor. It allows you to combine all the spare space of two or more clouds, including Dropbox, Google Drive, OneDrive, and more, into a huge storage space, then you can back up more files to it.
The steps listed below show you how to merge Dropbox accounts with CBackup:
1. Please install the CBackup desktop app, and then create a free CBackup account and sign in.
2. Tap Storage > Dropbox > Authorize Now subsequently. Follow the guide to complete the authorization.

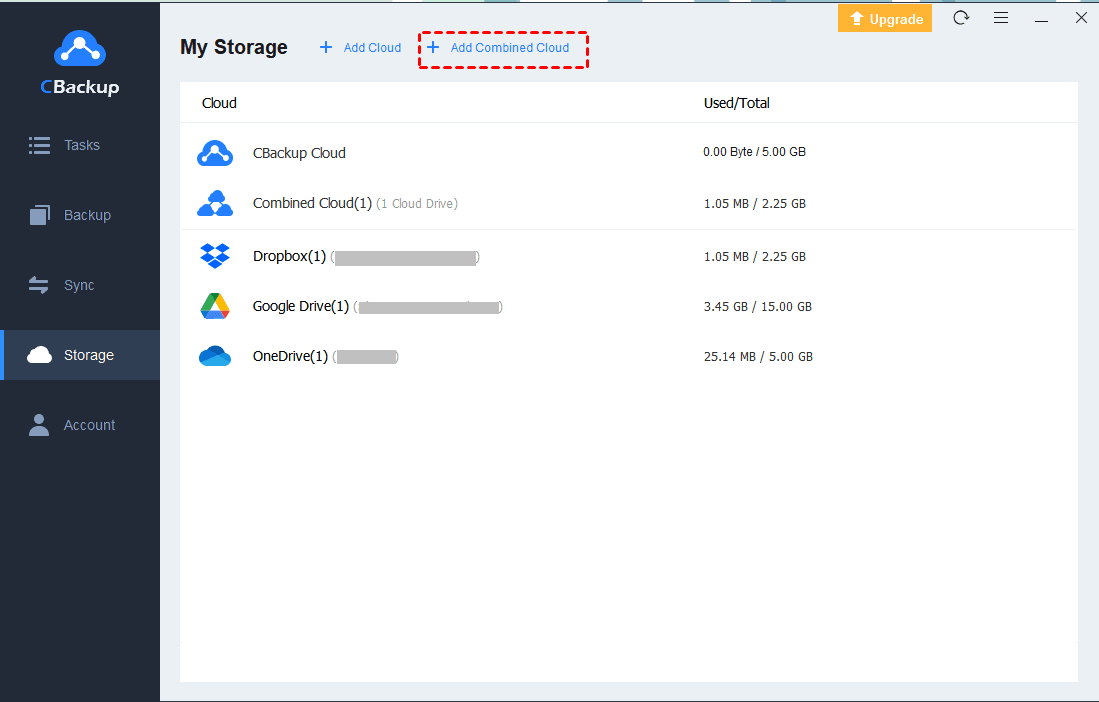
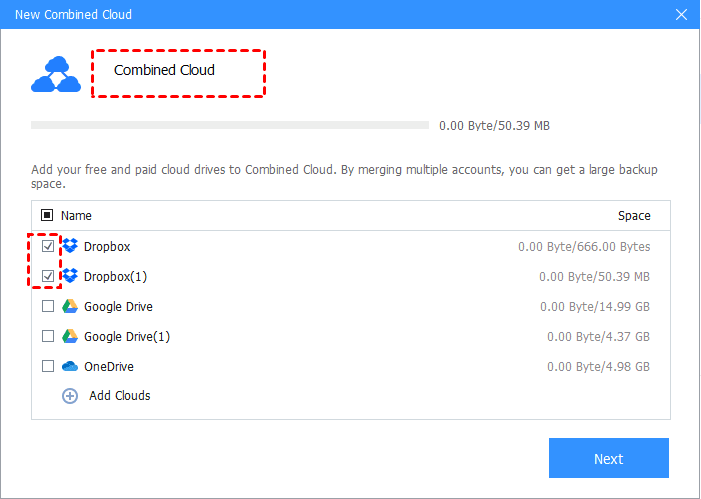
3. Select Storage > + Add Combined Cloud.
4. Tick all the clouds you added including Dropbox, and hit Next.
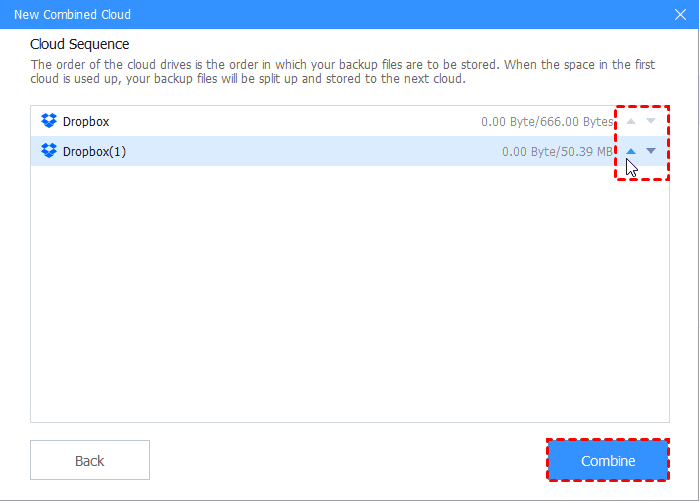
5. Choose the backup order for all the clouds, then press Combine. And you will get a combined cloud under Storage.
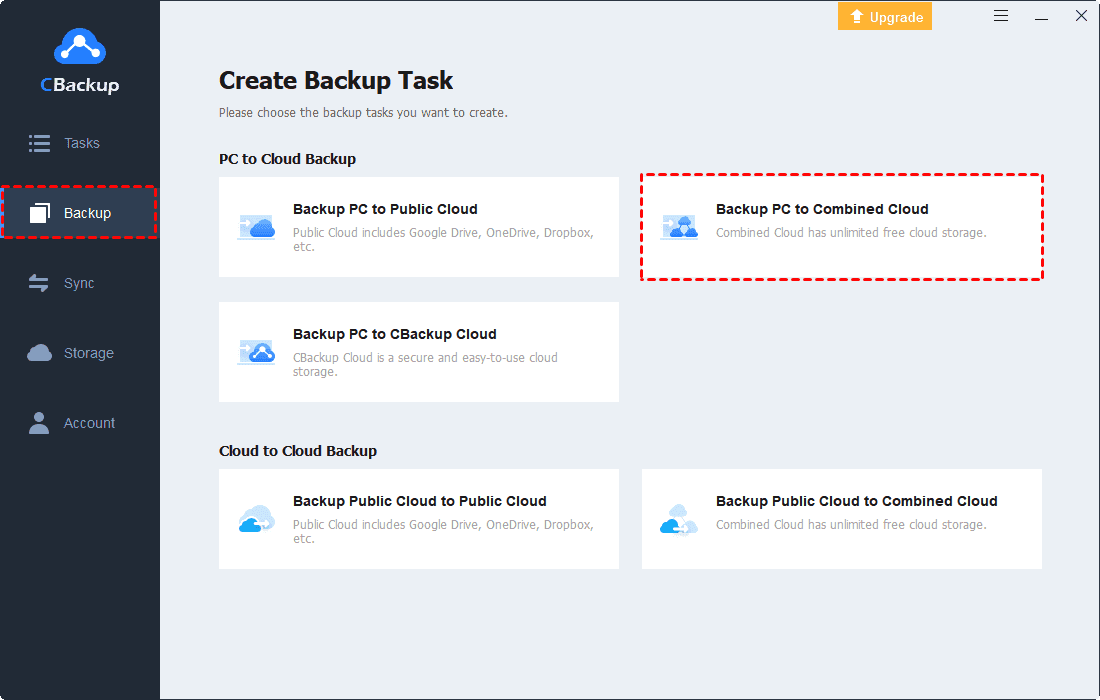
6. Tap Backup > Backup PC to Combined Cloud or Backup Public Cloud to Combined Cloud to protect files easily.
Moreover, there are many useful features of CBackup, which help you to backup or sync files online safely:
- You can backup or sync screenshots to Dropbox directly and automatically with a scheduler, which you can backup hourly, daily, weekly, or even monthly.
- There is no file size and transfer speed limitation while Dropbox does.
- Migrate Dropbox files to Google Drive, OneDrive directly without downloading and re-uploading.
- Every time you perform a scheduled backup, it creates an incremental backup to backup only the changed parts since the last backup. Saving time and cloud space.
The End
How to use Dropbox Capture has been listed in this article with detailed steps. Just follow the steps to create a recording for your screen, camera, microphone, or others that you want to share. If your Dropbox is full, you can try the best free cloud backup service - CBackup to increase Dropbox storage space for free.

Secure & Free
