
Full Guide to Create Computer Restore Point on Windows 10
Are you looking for a detailed tutorial on creating a computer restore point in Windows 10? Browse through this page to get a how-to guide and steps to restore from a restore point.
by Jonna Lasted Updated October 10, 2024
Does Windows 10 Have Restore Points?
I am on a Windows 10 laptop. There are some weird CPU issues on my gaming pc and I’ve been desperately trying to troubleshoot and find a fix these days, but nothing has worked so far. Some friends advised that creating a system restore point can fix the issue. Is it possible to create a computer restore point on Windows 10? How?
Case from answers.microsoft.com
If you're stuck on how to create a restore point in Windows 10, you'll find the answer here. On this page, we will figure out the following questions for you. What is a restore point and what's the point of it? How to create a restore point? How to revert to an earlier date? Let's get down to business.
What Is Restore Point and What Does It Do?
A restore point, also known as System Restore Point, is a backup of important system files stored by the windows system at a specific time. These system files usually contain all the system state data, i.e. your system settings and installed programs settings. In the event of a malfunction of the Windows system, the System Restore tool will use the restore point to recover deleted files and restore the computer to an earlier state.
The main purposes of restore points are: to provide protection when the system crashes or fails to update the system; to ensure the safety of Windows when the application is attacked by viruses; to retrieve accidentally deleted files or applications, and so forth.
But there are drawbacks for restore points. For example, with a system restore, due to Windows operating system incompatibilities and other issues, software installations and upgrades are not always fully restored. Windows restore points may not be created when your available hard disk space is not enough. In some cases, viruses may be recovered as well. Therefore, we recommend creating a restore point when the computer is safe (without viruses or other attacks).
How to Backup Computer before Creating Restore Point
As we mentioned above, there are some risks associated with using restore points. This is because newly added or modified data may be lost when restoring the system at a previous date. For data security and ease of use, we offer a free way to protect your computer data so that you can use backup files to restore non-system files and retrieve data more easily in case of data loss due to problems with system restore.
We highly recommend CBackup, a professional yet free cloud backup software.
▶ It allows you to create file backups to OneDrive, Google Drive, and other major cloud storage service providers, allowing you to access data anytime anywhere.
▶ It can not only back up system files but also personal files and folders can be easily backed up.
▶ It uses an incremental backup method to save your cloud storage space and backup time, and it applies 265-bit AES encryption for data transfer.
▶ It enables you to directly back up files to cloud, which gives 5GB of free space for each account and you can upgrade to 1TB or 5TB of backup space at an affordable price.

Moreover, CBackup has advanced functions like automatic file backup, backup task reminders, file filters, etc. that can help you get backups of files much easier. Next, let’s start to back up PC files with the instructions below:
Step 1. Install the CBackup desktop app on your Windows computer. Apply for an account for CBackup and sign in to the CBackup client.
Step 2. In the Backup section, click Backup PC to cloud.
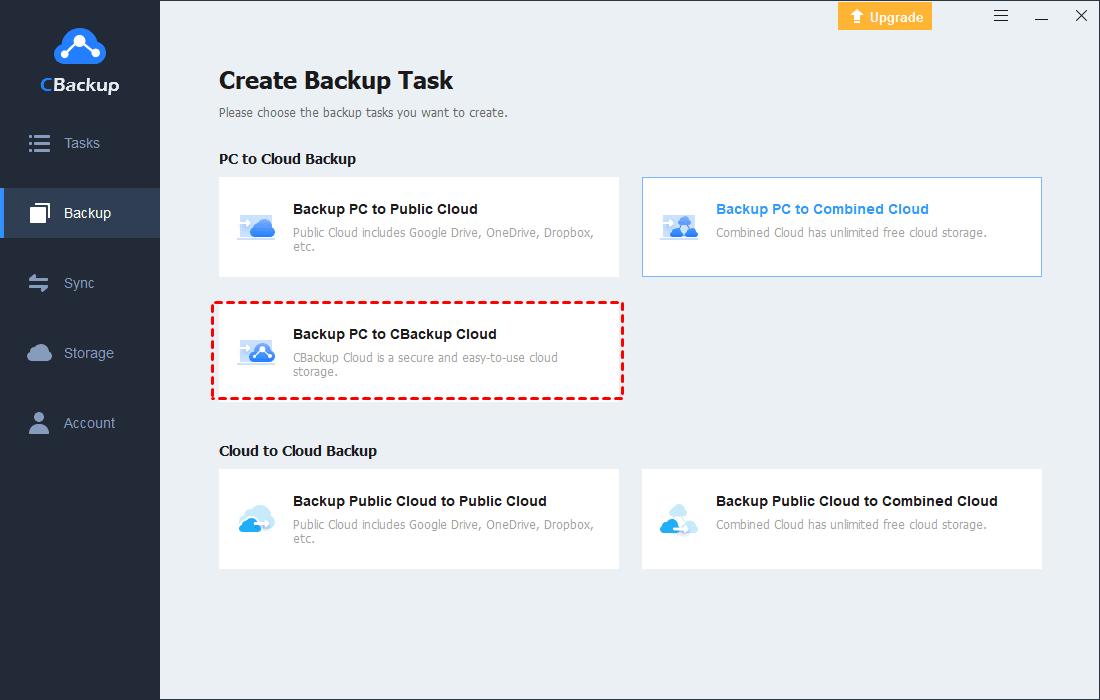
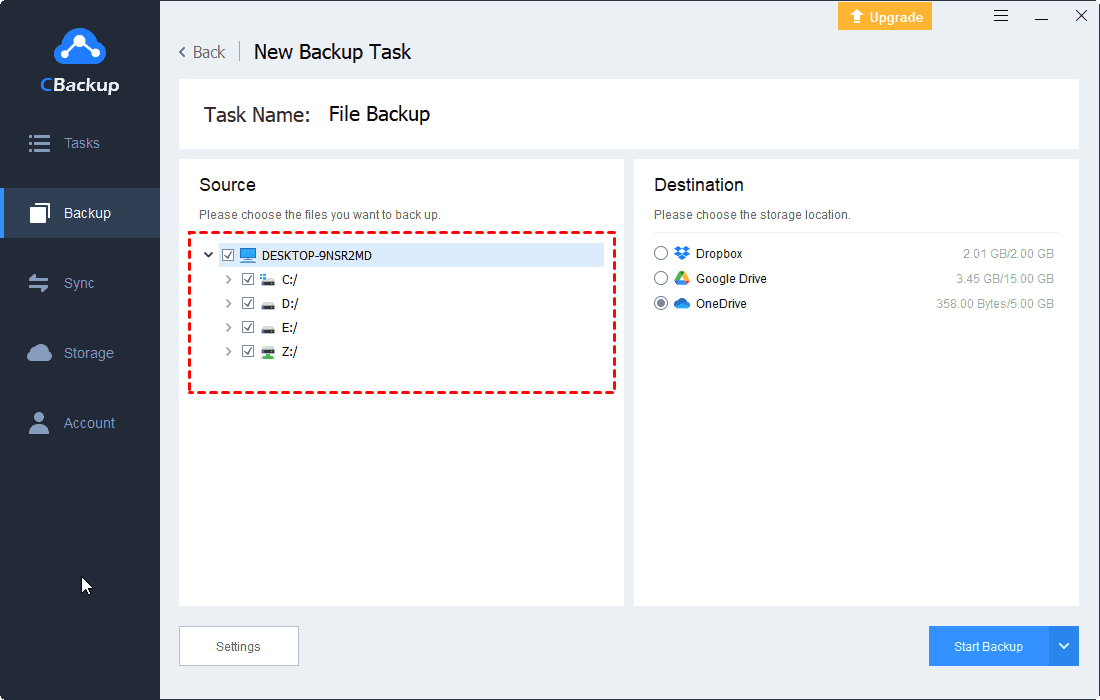
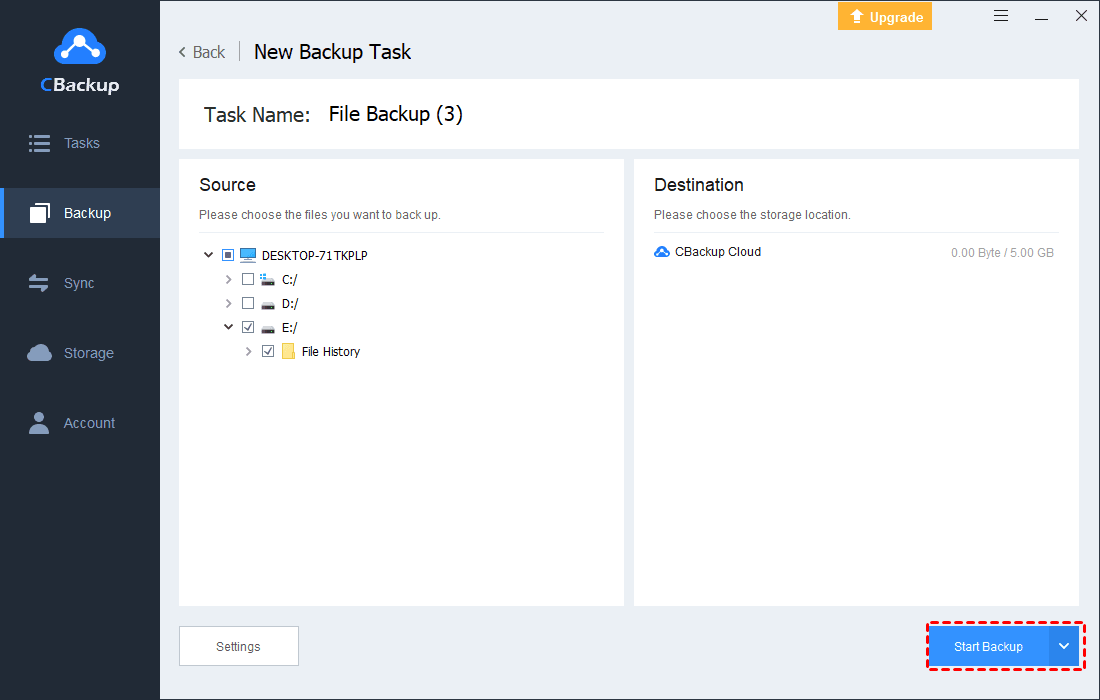
Step 3. Rename the task for distinguishment. Locate and choose the files that need to be backed up. Then press Start Backup to back up PC data to the cloud.
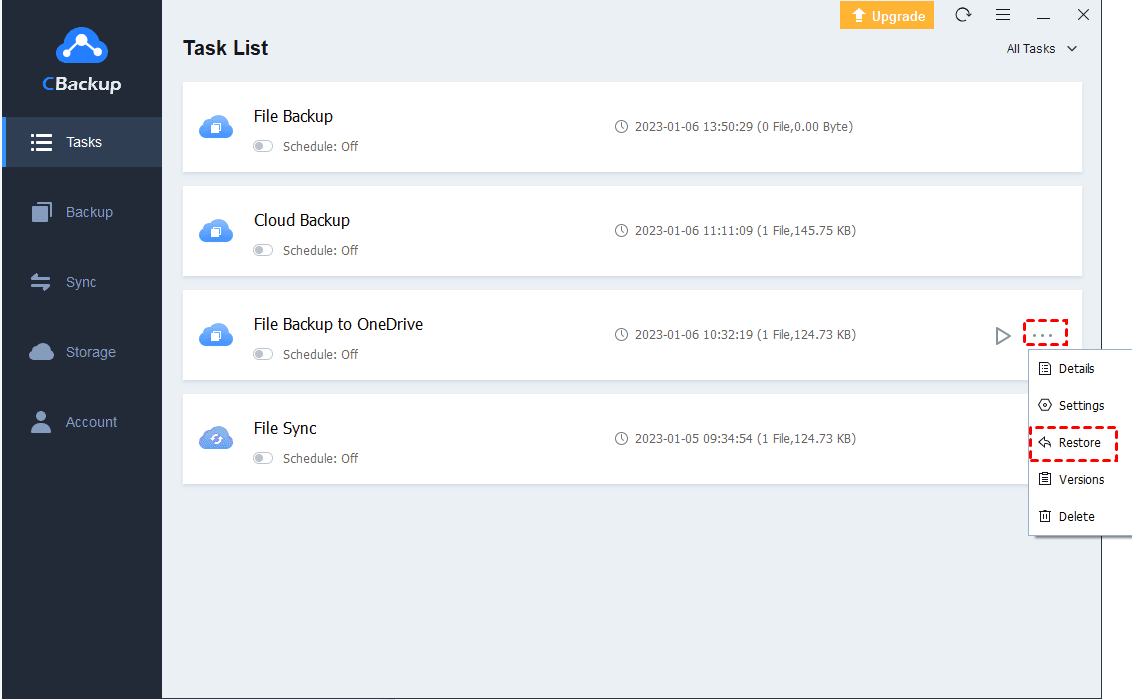
When the backed-up files get lost or corrupted, you can restore them by clicking the three-dot button of the backup task, selecting Restore, choosing files that need to be restored, and picking a restore location to get files recovered easily.
- More features of CBackup that may be helpful to you:
- File Sync: You can use it to sync files to Google Drive/OneDrive/Dropbox in one place.
- Cloud to Cloud Backup: It lets you backup files between clouds without downloading and uploading, like backing up OneDrive to Dropbox.
How to Create a Computer Restore Point on Windows 10
You can create a restore point for the Windows 10 computer by following the breakdown steps below, regardless of whether you are as a consequence of data loss or system update failure, or some other reason.
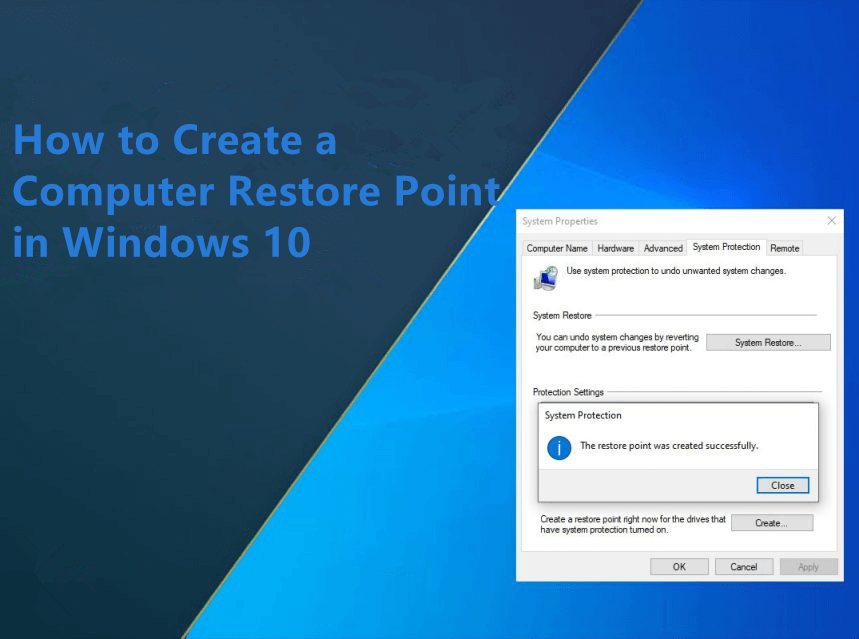
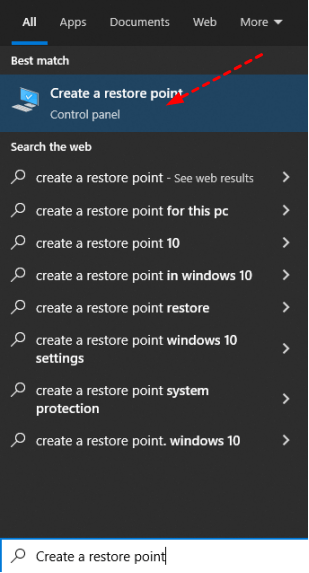
Step 1. Type "Create a restore point” in the Windows search box and click on the search result.
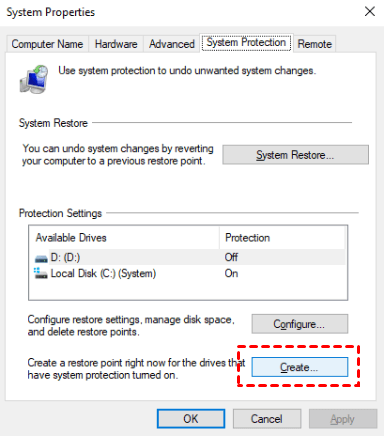
Step 2. Click on the Create button in the System Protection window.
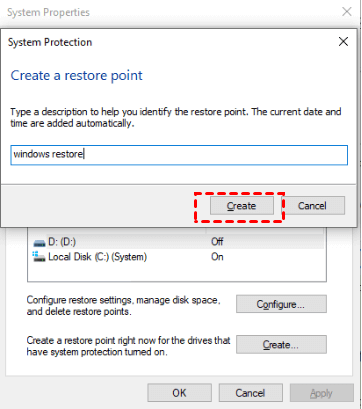
Step 3. On the pop-up screen, populate the restore point description so it can be distinguished, and hit Create.
Step 4. Then, when “The restore point was created successfully” is displayed on the screen, press Close.
Now, you have finished the process of creating a restore point and you can get the Windows system restored easily when something urgent happens.
How Do I Restore Windows 10 PC to an Earlier Date?
After completing the above steps, you can easily perform a system restore in Windows 10. You may be confused about how to restore to the previous date when you encounter an operating system crash or an accident after modifying the system settings. Below are the specific steps.
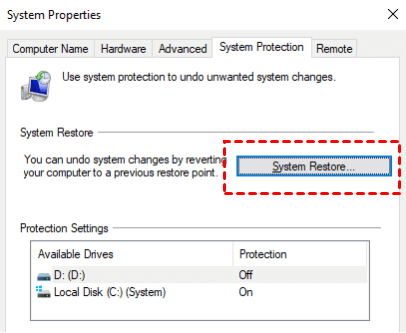
Step 1. Search for “Create a restore point” in the search box and click on it similarly. Then, click System Restore... on the System Protection tab.
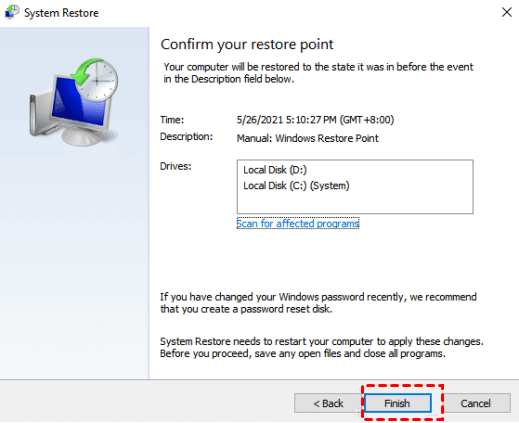
Step 2. Tap on Next. Opt for the right system restore point on Windows 10 and click Scan for affected programs.

Step 3. Click Close > Next > Finish in turn to restore computer to an earlier date in Windows 10.
Conclusion
Creating a computer restore point on Windows 10 can be an effective way to protect your system and program settings in the event of a system crash or virus attack. But turning to System Restore just because files get missing can be a bit of a chore. Using CBackup to backup your computer files to clouds can protect your data from loss and restore it in a minute effortlessly, and there is no risk to using it.

Secure & Free
