
3 Easy Ways to Backup Sticky Notes in Windows 10
This post will show you how to backup Sticky Notes in Windows 10 with ease. And all of them are for free. You can read on to learn more information about them.
by Jonna Lasted Updated September 30, 2024
Are Sticky Notes backed up in Windows 10?
Windows 10 Sticky Notes is an application that allows you to note down your thoughts and prompts. You can use it to record your important information. But it's not a text file, so it can't be moved and modified at will like a text file.
However, if you find the location of the file that holds your Sticky Notes information on your computer, then you can backup Sticky Notes in Windows 10 easily.
How to find the store location of Sticky Notes
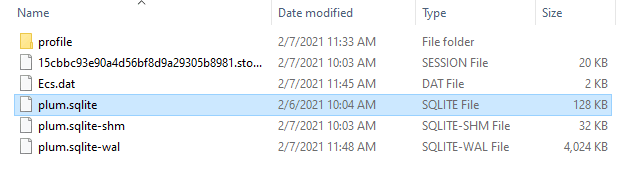
To set up a Sticky Notes backup in Windows 10, you need to find the files that store its information first. Unlike previous older Windows systems, in Windows 10 Anniversary Update version 1607 and later, the file that stores Sticky Notes information should be a .sqlite file.
We have provided some paths where you can try to find the file you want.
If your device is based on the system since Windows 10 Anniversary Update Version 1607, your Sticky Notes information will be stored in the plum.sqlite file, and you can go to the path:
- C:\Users\Username\AppData\Local\Packages\Microsoft.MicrosoftStickyNotes_8wekyb3d8bbwe\LocalState
If you use the system version before Windows 10 Version 1511, your Sticky Notes information will be stored in the StickyNotes.snt file. You need to go to the path:
- C:\Users\Username\AppData\Roaming\Microsoft\Sticky Notes
After locating the files storing your Sticky Notes information, you can create creating Sticky Notes backup in Windows 10 with the methods below.
How to backup Sticky Notes in Windows 10/11 easily
So, how to set up Windows 10 Sticky Notes backup in an easy way? Here we prepared 3 different solutions for you and you can refer to them.
Method 1. Copy and paste manually
Basically, you can use a manual method - copy and paste the files with Sticky Notes to any location, including local drives, USB flash drive, and so on to backup Windows 10 sticky notes. But if you want to copy and paste Sticky Notes between two different PCs based on quite different versions of the system, like Windows 7 and Windows 10, the files storing the information of Sticky Notes are different (StickyNotes.snt and plum.sqlite), so copy and paste will not work on them. And you can refer to other methods below.
Method 2. Sync Sticky Notes to the cloud
To backup Sticky Notes between any version of the system, you can consider cloud sync in Windows 10. Conveniently, Microsoft provides cloud sync for Sticky Notes in Windows 10 October 2018 Update and later versions. Thus, you can backup your Sticky Notes by following the easy steps below:
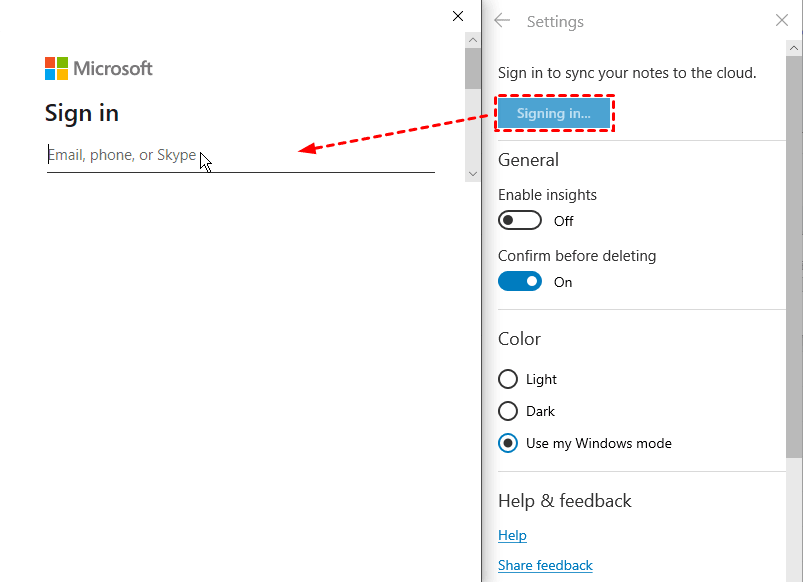
1. Launch Sticky Notes and choose Settings to click Signing in..., then you can sign in to your Microsoft account.
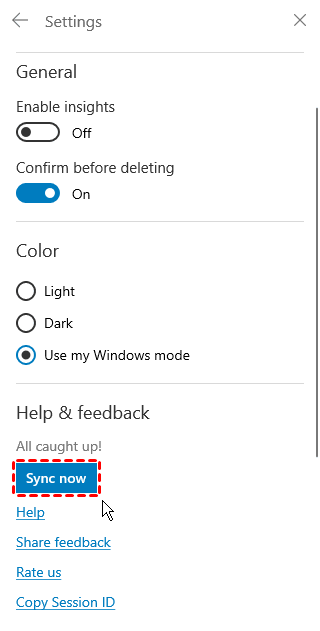
2. Then, go to Settings to choose Sync now under the Help & feedback section to backup Sticky Notes in Windows 11/10. And you can sync Sticky Notes to other devices with the same Microsoft account.
Method 3. Backup Sticky Notes with a free cloud backup service
To backup Sticky Notes in Windows 10 more easily, professional file backup software may be a great solution. For this, we provide an easy-to-use and free option - CBackup. CBackup is a cloud backup service for Windows 11/10/8.1/8/7/XP. It can help you backup and restore sticky notes in Windows 10 without manual copying and pasting.
What’s more, CBackup allows you to add different cloud drive accounts to it, including most mainstream cloud drives like Google Drive, Dropbox, OneDrive, etc. Then you can backup stickynotes to any cloud drive account. If your disk full in Windows 10, you can use CBackup to free up some local storage.
Now, let’s take Google Drive as an example, and see how to backup Sticky Notes to Google Drive easily via CBackup:
1. Download and install the CBackup desktop app on your Windows PC. Apply for a new CBackup account, then launch the application and log into it.
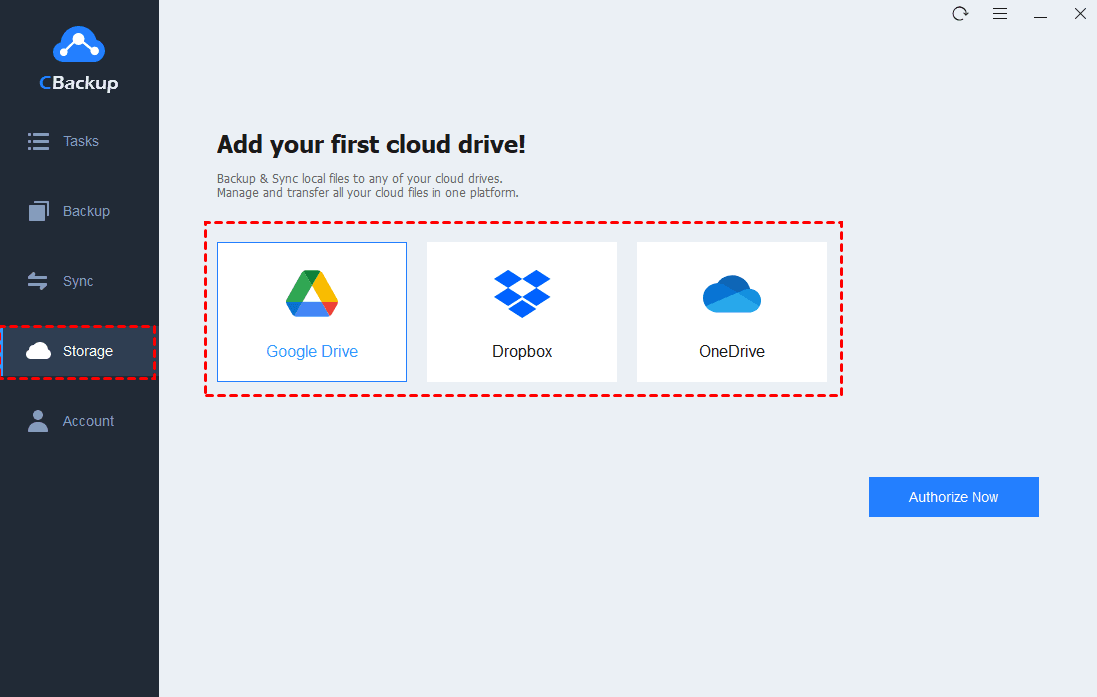
2. Click Storage first, then add the Google Drive account that you want to use as the backup destination for Sticky Notes backup and restore.
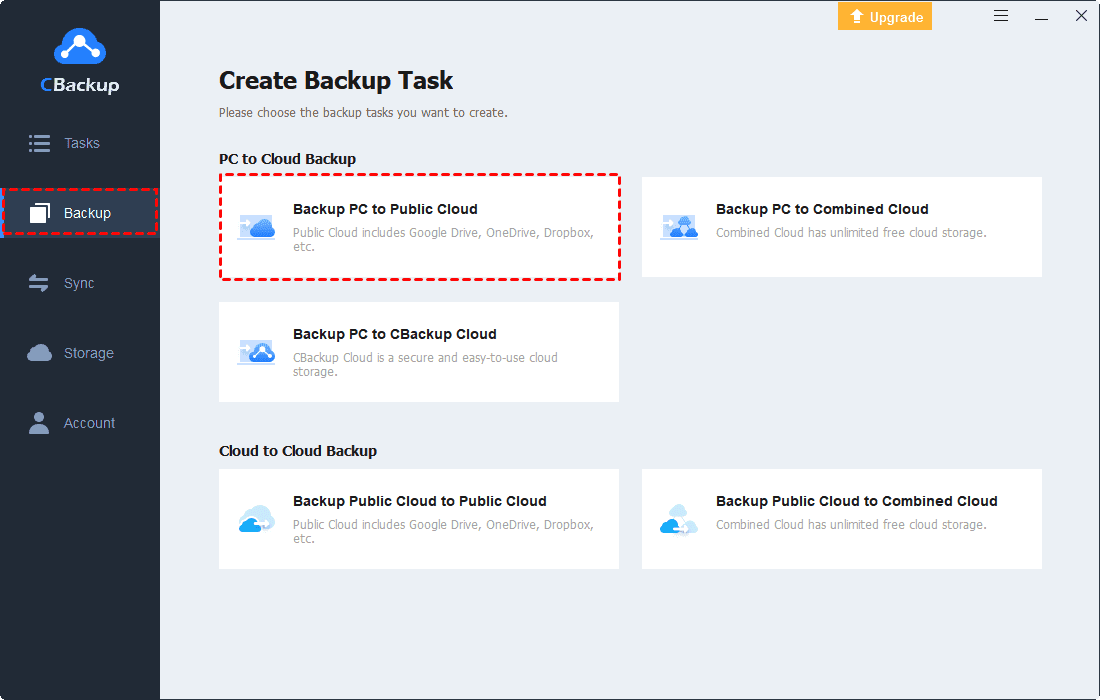
3. Select Backup > Backup PC to Public Cloud to create a backup task for Sticky Notes.
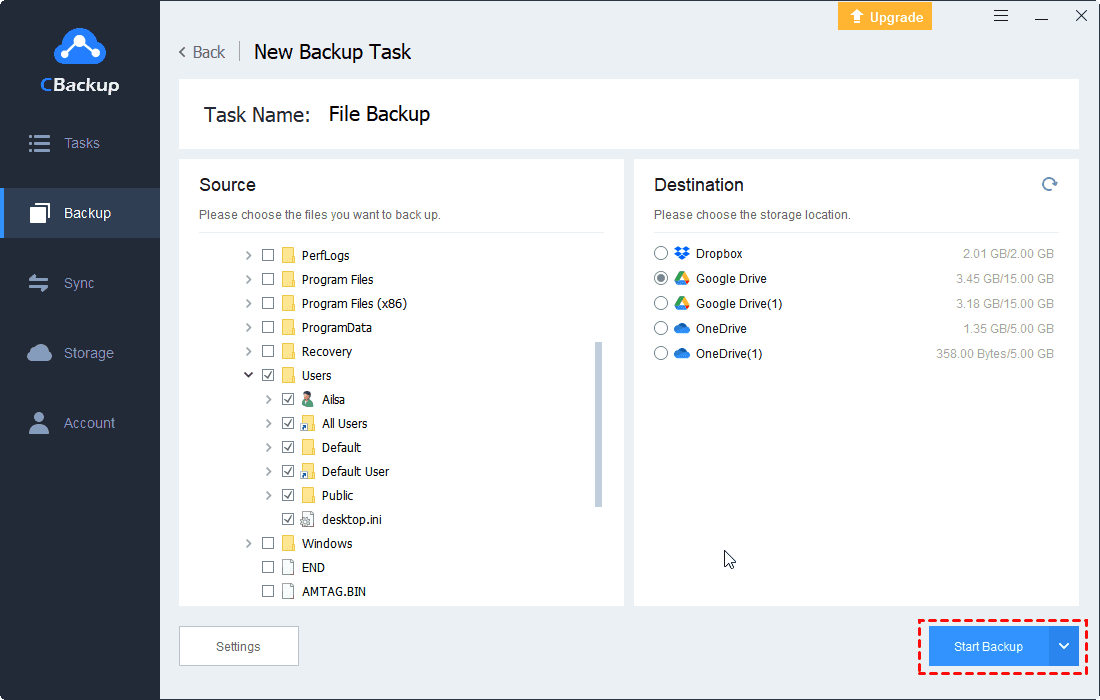
4. You can edit the Task Name then. And select the Sticky Notes files on your Windows PC, and select the Google Drive as the destination.
5. If you wanna an automated file backup, go to Settings, and you can choose one schedule mode from the 4 different schedule modes to make your backup tasks regular and automatic.

6. Finally, click the Start Backup button to backup Sticky Notes in Windows 10 with ease.
- In addition to the great PC to cloud backup feature, CBackup also offers some other useful features for free:
- Free cloud storage: CBackup gives each account 5GB of free cloud storage, and you can use the cloud as an alternative to your cloud drive.
- Restore files: If you create a backup task for Sticky Notes or other files, you will be able to restore files of any version in CBackup.
- Cloud to cloud sync: If you need to transfer files between different cloud drive accounts, you can try the cloud to cloud sync feature in CBackup for free. CBackup allows you to add different accounts of Google Drive, Dropbox, OneDrive, and FTP/SFTP to it and migrate files between any two of them easily.
Conclusion
After the above, we believe you have learned something about how to backup Sticky Notes in Windows 10 already. In addition to the traditional manual method, we also provide another convenient solution - using professional cloud backup software like CBackup. And you can try some other features in CBackup for free as well.

Secure & Free
