
How to Restore Outlook Backup with CBackup
In case of Outlook mailbox emails loss or corruption, you can easily restore an email backup to the original status with CBackup.
by PublicOwin Lasted Updated January 21, 2026
How to Restore Outlook Backup with CBackup
Before doing an Outlook Restore, please confirm that you have created Outlook Backup before and the related backup image files are intact.
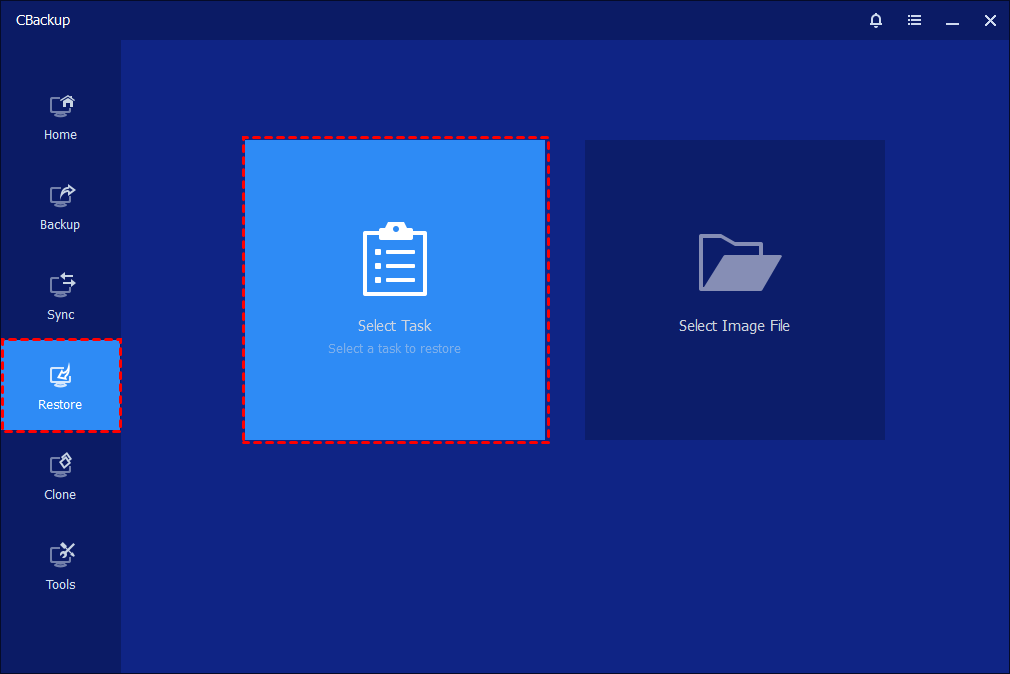
Step 1: Initialize Restore
In the left tab page, select "Restore", and then click Select Task. If the backup task is not listed, you can click Select Image File to manually select an image file in the destination path.
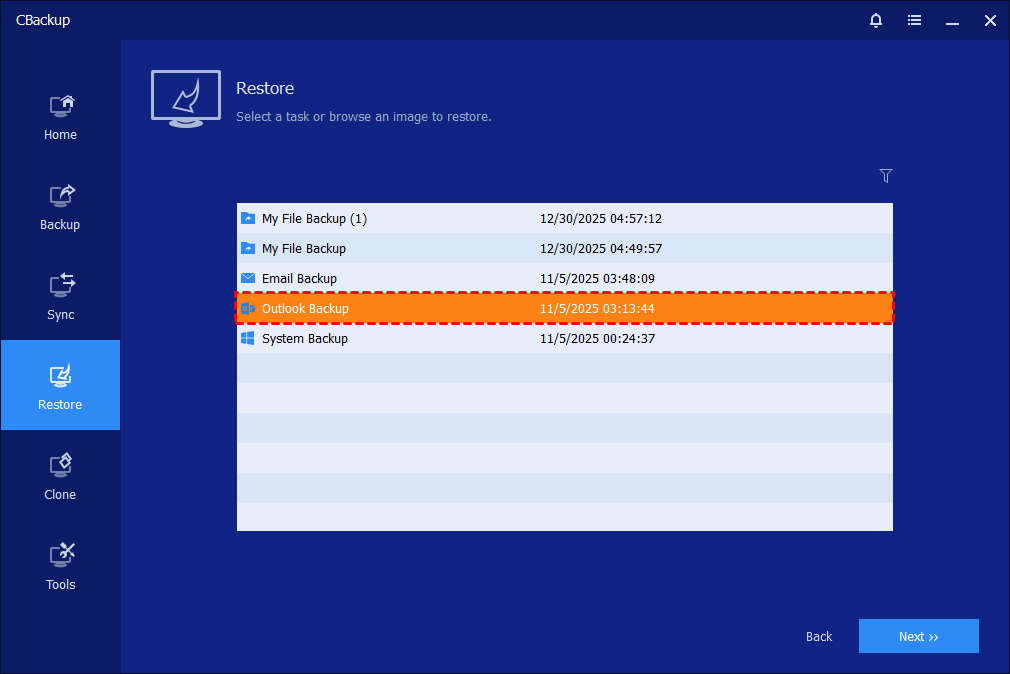
Step 2: Select Outlook Backup Task
Select the Outlook Backup task that you want to restore, and click "Next".
Step 3: Select Data to Restore
Select the whole backup and click the "Next" button. Or you can unfold the backup directory and select the part data that you want to restore. For example, you can restore email files only, or restore Outlook contacts, Outlook tasks, and so on.
Tips: If you have created multiple backups of the task, generally, it will select the latest version by default. You can re-select another backup version to restore if you want to restore older data.

Step 4: Select Destination and Start Restore
Select a destination path to save the mailbox files. You can choose whether to "Restore to original location" or "Restore to a new location".
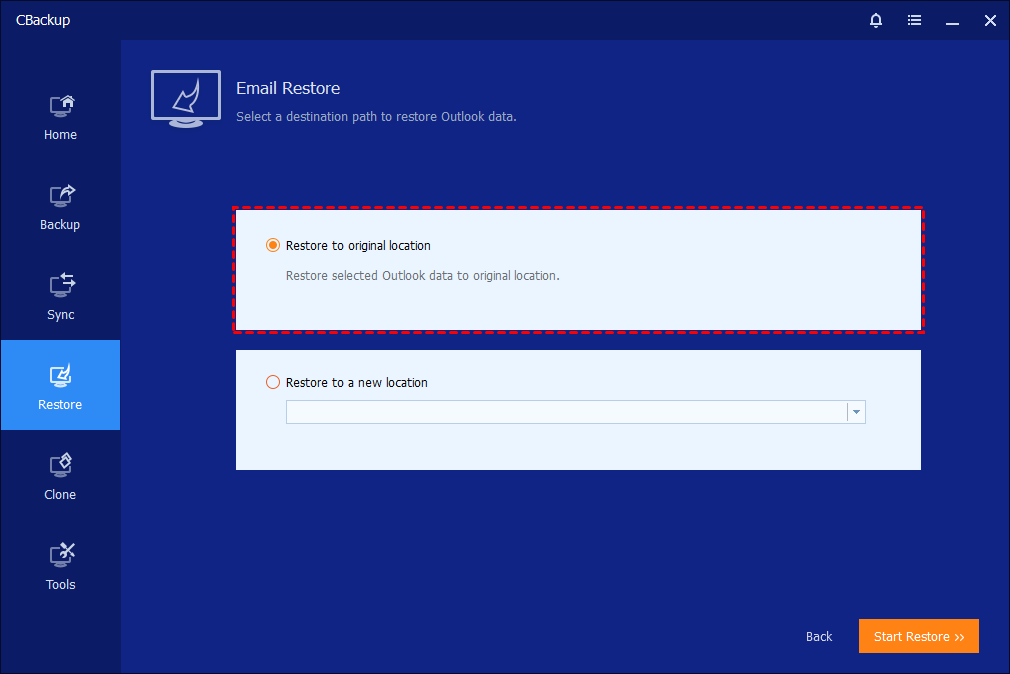
If you select "Restore to original location", it means to restore to the original mailbox location. If you choose "Restore to a new location", you need to select the target storage path to store the mailbox files. Then, select "Start Restore" to begin the restore.
Tips: If you select "Restore to a new location" and there are emails with the same name in the new location, the renaming operation will be performed.
Step 5: Finish Restore
Click "Finish" once the process has completed. Then, you can check your email data.
Conclusion
By diligently following the outlined steps, you can create comprehensive backups that stand ready to counteract any potential loss. Should unforeseen circumstances lead to email data depletion, this method empowers you to swiftly recover and reinstate your crucial email information. With data security at the forefront, the Outlook Backup and Restore process serves as an essential tool in maintaining the integrity and continuity of your email communications.
For more types of email backup and restore, you can use the Email Backup and Email Restore feature.

Free Get CBackup Now
Secure & Free
