
7 Easy Solutions to the System Cannot Find the File Specified
On this page, you can see 7 different solutions to “the system cannot find the file specified” error. You can refer to them according to the situation you meet.
by CBACKUP Lasted Updated June 10, 2025
Get the system cannot find the file specified message
“I got an unexpected error, 'The system cannot find the file specified' when I am using my Windows PC. How to interpret this error message? How to fix it easily? Any ideas?”
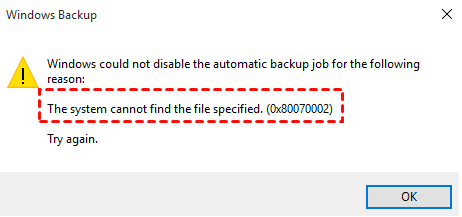
The error in the user case and the picture above is also called “0x80070002, the system cannot find the file specified,” and is a common error in Windows systems. When you back up your computer on Windows 11 or other Windows systems, you are likely to encounter such an error.
There are many different causes that can result in such an error: missing or corrupted system files, missing driver files, abnormal registry keys, incorrect file permission settings, etc. But don’t worry, there are different solutions for you to fix it easily.
How to fix the system cannot find the file specified
If you don't know the exact cause of the “the system cannot find the path specified” error, you can try these 7 different ways to fix it. Each of them is not very complicated, and we have provided detailed steps to follow.
Method 1. Access the libraries folder
If you meet “the system cannot find the path specified” in Windows 10, some Libraries folder is hidden by default. So, accessing the Libraries folder may help you find the file specified. Here are the steps to do so:
1. Go to This PC, and right-click on the empty space of the left menu, then click Show libraries.
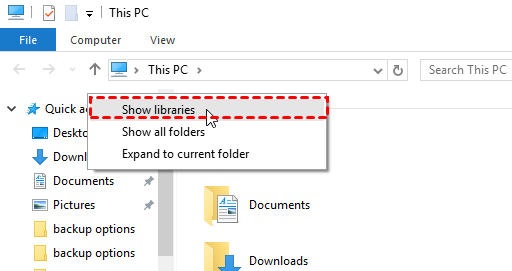
2. Then the Libraries folder will show on the left menu, you can try to find the file specified again.
Method 2. Use the RunOnce registry key
To fix “the system cannot find the file specified” in Windows 10 or other versions of Windows systems, you can use a certain registry key. Follow the easy steps below:
1. Press the Windows key and R key to launch the Run box. Then type regedit and click Enter.
2. Go to HKEY_LOCAL_MACHINE\SOFTWARE\Microsoft\Windows\CurrentVersion.
3. Open the key to find the RunOnce key. If there is no key, you can right-click on CurrentVersion to select New > Key to create one.
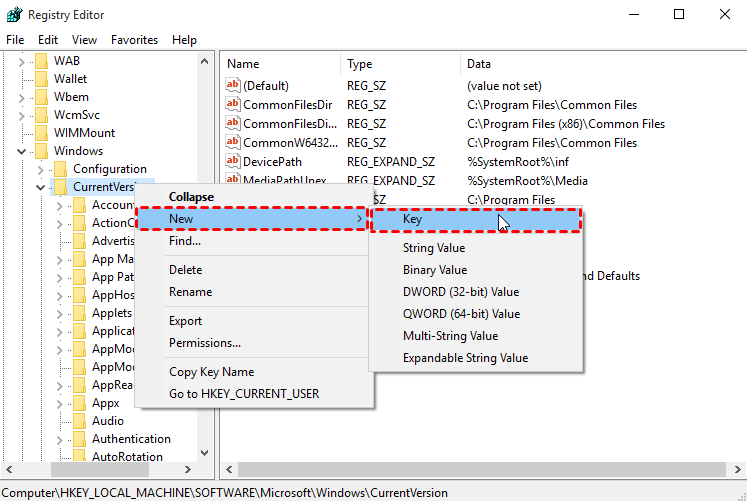
4. After confirming the key is there, exit Registry Editor and restart your computer to see if the error disappears.
⇒ Note: You can set up a Windows registry backup first to protect the data on your PC.
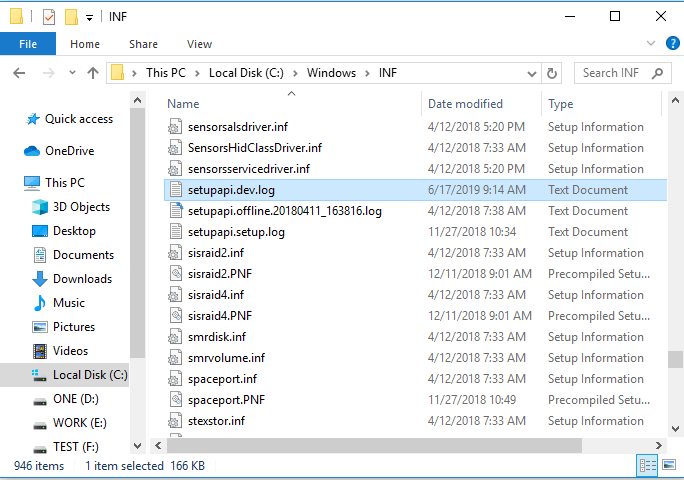
Method 3. Check the system log file
If you receive the error message when you are accessing your files, you can try checking the system log file to fix it. Here is the simple guideline to do it:
1. Go to the C:/Windows/inf directory to open the Inf folder, and find the setupapi.dev or setupapi.dev.log file to open it.
2. Press the Ctrl and F keys to type the file you cannot find, and press Enter to get the file.
3. Copy and paste the file into the Windows/inf folder.
4. After the above, reinstall the hard drive driver and restart the system.
Method 4. Check the RTHDCPL in the registry key
When you meet the “the system cannot find the file specified” issue, you can check the RTHDCPL in the registry key. Just follow these steps with ease:
1. Likewise, press the Windows and R keys to go to regedit.
2. Go to HKLM\Software\Microsoft\Windows\CurrentVersion\Run\ to find RTHDCPL. If there is no key, check the Run property, and set the Admin-users permission as Full Control. Then click OK.
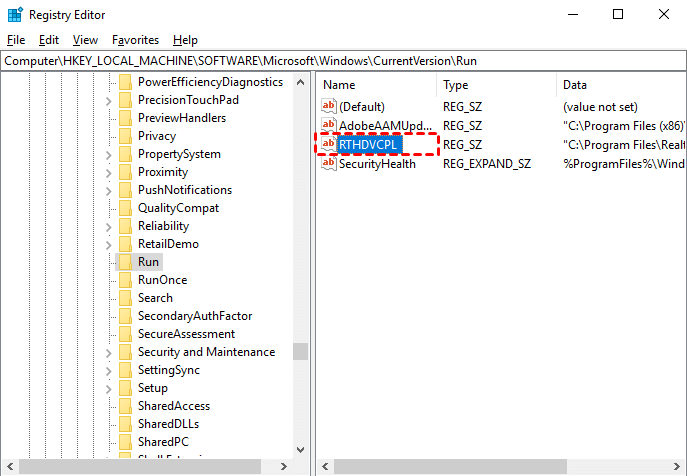
3. After checking, try looking for your files again.
Method 5. Update the hard disk driver
If you receive the error message when running programs, you can try updating the hard disk driver. Here are the detailed steps:
1. Go to This PC to find Manage, and click Device Manager.
2. Find the disk in the Disk drives section and right-click on it, then choose Update driver.
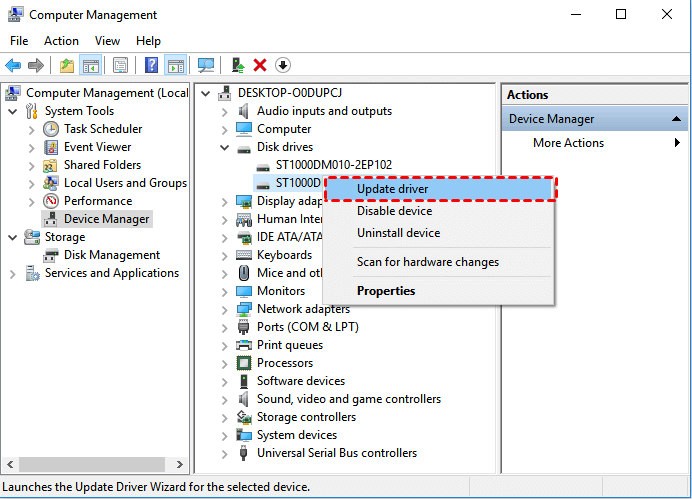
3. After that, maybe you will not encounter this error when you launch a program.
Method 6. Use System File Checker
Missing or corrupted files may lead to the error as well. You can use System File Checker to repair those files. Please follow these steps:
1. Search for Command Prompt and right-click it to run as an administrator.
2. Fill in the Command Prompt window with sfc /scannow, then press Enter.
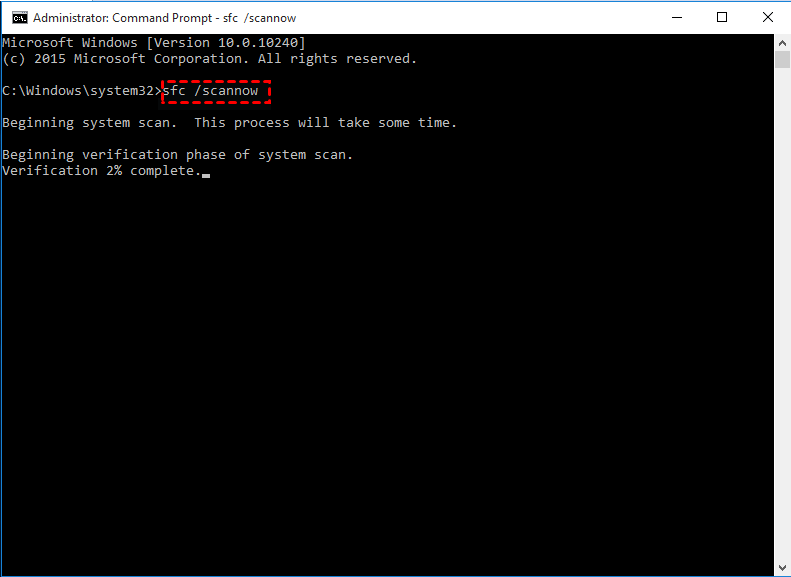
3. After that, type exit and press Enter. Your missing files may be repaired in this way.
Method 7. Update your Windows
If you are using an old system, you can check for updates because Windows updates may be helpful to fix hardware and software errors. So, follow the steps below to update your Windows:
1. Click the Start icon, then go to Settings > Update & Security, and click Check for updates to see if there is a new version to update.

2. If there is a new version available, download it to update your Windows system.
Protect your files on PC effectively
Although we have described 7 different ways to solve the “the system cannot find the file specified” error, if your files are really damaged or lost, the consequences will be terrible. To avoid such a loss, we recommend that you keep your files backed up in order to protect your data. For this, you can use a professional cloud backup service like CBackup.
CBackup provides great backup and sync features for Windows PCs:
• You can use CBackup to backup files to Google Drive, OneDrive, Dropbox, or cloud (which provides 5GB of free cloud storage) on the desktop directly.
• If you need more cloud storage, you can use the combined cloud storage feature to merge unlimited cloud drive accounts to get more cloud storage space for free.
• It is possible to transfer files between accounts from different cloud drives with the cloud sync feature in CBackup.
Now, let’s see how to use CBackup to back up your files on a Windows PC:
1. Download and install the CBackup desktop app on your computer. Create a new CBackup account, then launch the client and log in to it.
2. Go to the Storage section to add a cloud drive account to be your file backup destination.
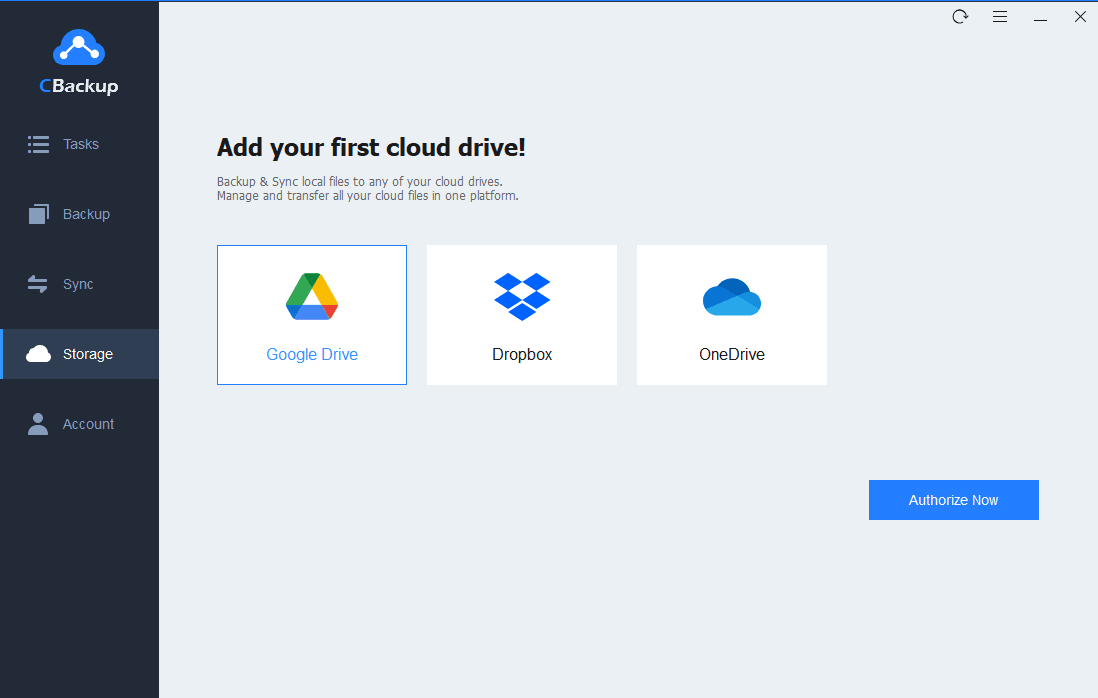
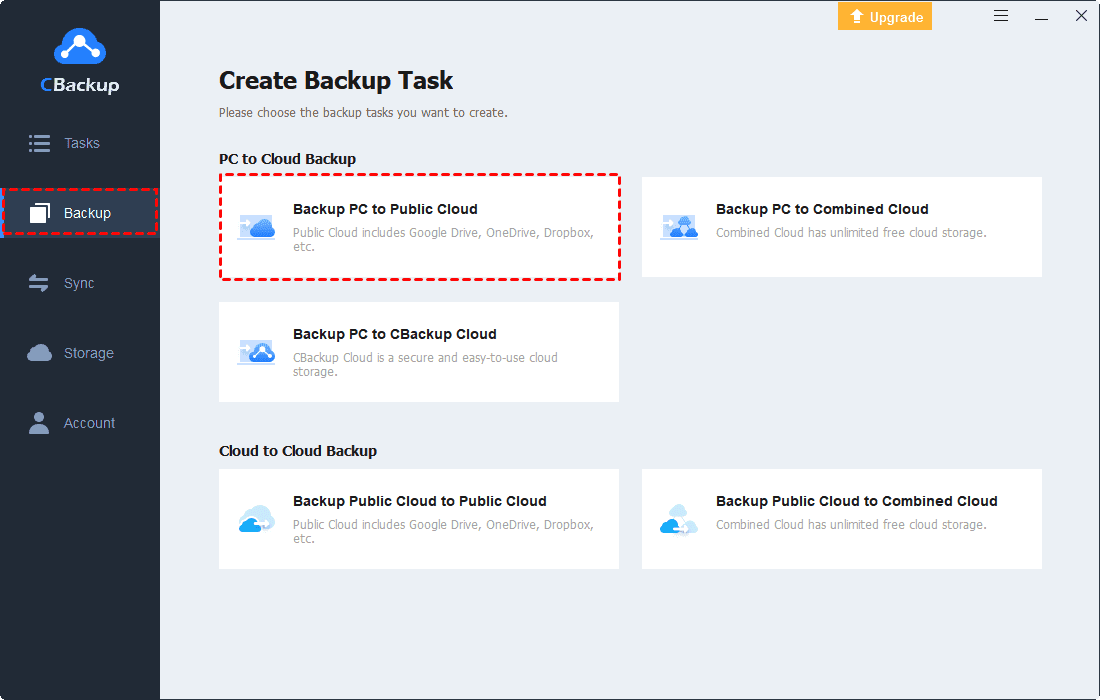
3. Next, select Backup to choose Backup PC to Public Cloud.
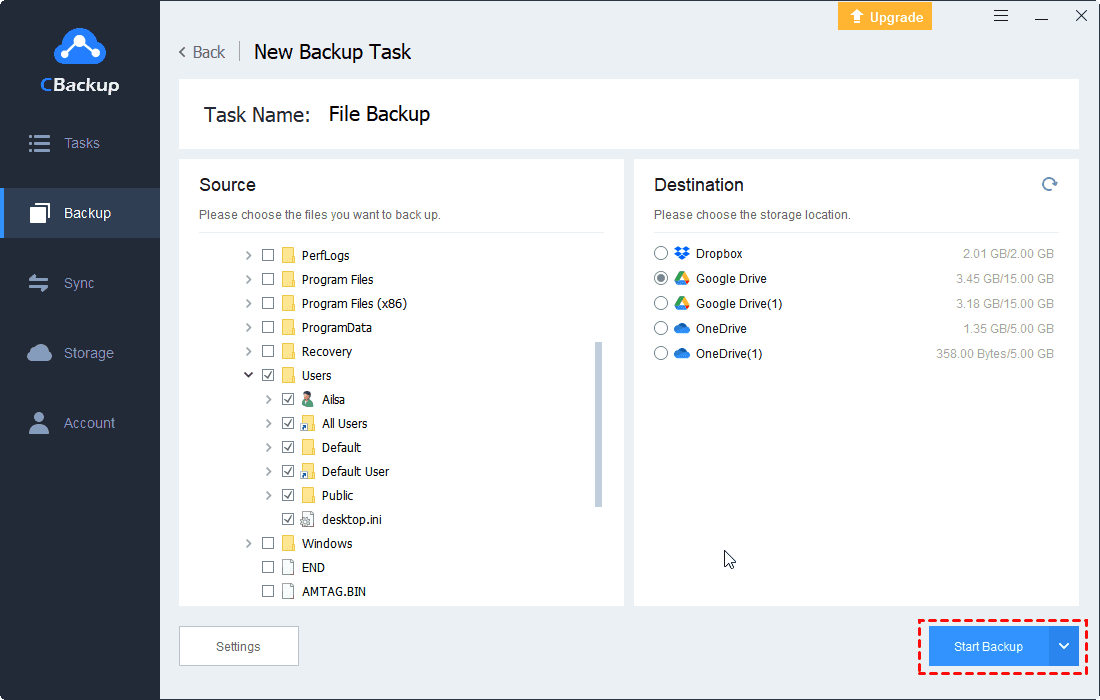
4. You can edit the Task Name. Then add your files to the computer as the backup source. Select the cloud drive account you just added and click OK. Finally, click the Start Backup button to back up your files from your PC to the cloud.
Conclusion
That’s all about how to fix the “the system cannot find the file specified” issue effectively. You refer to them and try one by one to solve your problem. Importantly, you should set up backup tasks regularly, and you can try the free cloud backup software - CBackup - to protect the security of your files.

Secure & Free
