
Best 2 Ways to Sync Synology NAS with Google Photos Efficiently
In this article, you will learn the top two ways to sync Synology NAS and Google Photos without Cloud Sync. Please read on to choose a suitable way and follow the detailed steps.
by Jonna Lasted Updated September 30, 2024
Quick Guide
About Synology NAS and Google Photos
Nowadays, storage space in your PCs and mobile devices fills up faster than ever. So, users need high-capacity storage that can store huge data remotely to free up local space. For users, NAS (Network Attached Storage) devices and cloud storage are both good choices because both of them offer huge storage space.
Meanwhile, since NAS and cloud storage can keep your data far away from your physical devices, you can avoid data loss in many cases like system crash, hardware damage, natural disasters, and so on. Therefore, more and more users prefer to store and protect their data within NAS or cloud storage. Among them, Synology NAS and Google Photos are both well-known products.
As we all know, Synology NAS can connect to your home or office network so that you and other users you designate can access your files from PCs and mobile devices without plugging into the drive, which is very useful for both individuals and organizations. Although the initial cost of NAS may bhe higher due to equipment, in the long run, NAS is a cost-effective data storage solution.

As for Google Photos, it is one of the most popular cloud storage for photos and videos that famous for its generous storage space and unlimited storage space service for high-quality photos and videos (but this service will end on June 1, 2021).
In addition, it offers multiple useful apps to help users backup and access their files across different devices. What’s more, the initial cost of Google Photos is very low. It provides each user with 15 GB of free storage space and a cheap monthly subscription plan for a few dollars.
Can I sync Synology NAS with Google Photos?
“Hello, today I made a decision. I will use Synology for photo backup/sync photos solution. I have about 3000 photos/videos in Google Photos and want to sync them to Synology. Is there any way to do that? Looking forward to your kindly reply.”
Although both Synology NAS and Google Photos can keep your data safely, they also have their own disadvantages. For example, NAS devices are connected via a private network, steps need to be taken to ring-fence backup files from common security threats, such as ransomware.
Meanwhile, cloud storage like Google Photos still faces the risks of malware infection, hacker attacks, etc. And if your provider suffers a security breach or closes their service, you will need to go elsewhere. Therefore, to apply an extra layer of protection to their data, users may choose to backup Synology NAS to cloud.
And users who use Synology NAS and Google Photos simultaneously and plan to sync files between them. In this way, even if there is something wrong with one backup solution, you will still have a backup version in another backup solution. If you have such requirements and looking for ways to achieve that easily, please read on to learn the detailed methods.
How to Sync Synology NAS with Google Photos securely
As we all know, to help users sync Synology NAS to Dropbox, OneDrive, or other public cloud storage, Synology released a professional tool called Cloud Sync. However, this Synology Cloud Sync doesn’t support Google Photos directly. So, you can check the workarounds below to solve your problem.
Way 1. Sync via Symbolic Link Subfolder
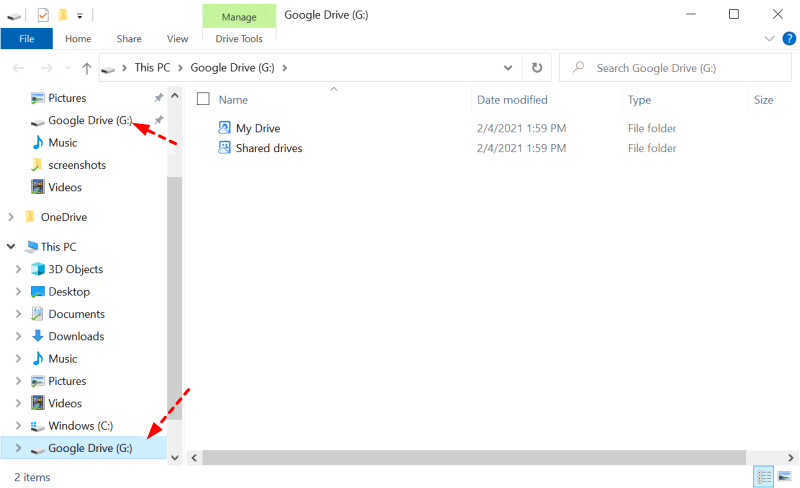
Users of Google Drive or Google Photos must be familiar with Google Drive for desktop (the original Backup and Sync), which is the official desktop app for Google Drive. Once you download this app on your computer and set up a two-way sync between cloud and local computer, you will have a Google Drive disk on your computer, which is synced with the cloud.
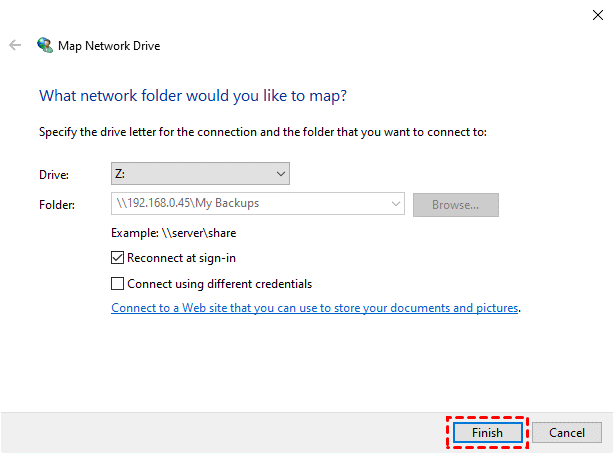
Therefore, you can set up the desktop app on your computer and let all your photos in Google Photos be synced to a local folder. Then, you can map the NAS device to a network drive on your computer and create a symbolic link and point it to the NAS drive. Then, all your contents will be synced automatically. Here are the steps to let Synology cloud sync Google Photos:
Step 1. Download and install the Drive for desktop app on your computer to have the sync folder on your computer.
Step 2. Map the Synology NAS to a network drive on your computer.
Step 3. Then you need to create a symbolic link of your Google sync folder and point it to the NAS drive that you mapped. Then, the Google sync folder will treat it as a normal folder and sync its content, which means that a folder is synced with Synology NAS data.
Way 2. Sync via a Third-Party tool
It is not hard to see that though the method above is feasible, it is also complicated. Therefore, if you want to sync Synology NAS with Google Photos in an easier way, you can rely on a third-party tool like MultCloud. It is an online cloud to cloud sync service that can help you achieve Synology and Google Photos sync easily. It covers more than 30+ leading clouds, including Google Photos, Google Drive, OneDrive, NAS, and so on.
Please follow the detailed steps to take Synology cloud sync Google Photos:
Step 1. Create one MultCloud account and it’s free of charge. Then, log in to your MultCloud account.
Step 2. Add your NAS account to MultCloud by clicking the Add Clouds button and then choosing NAS.
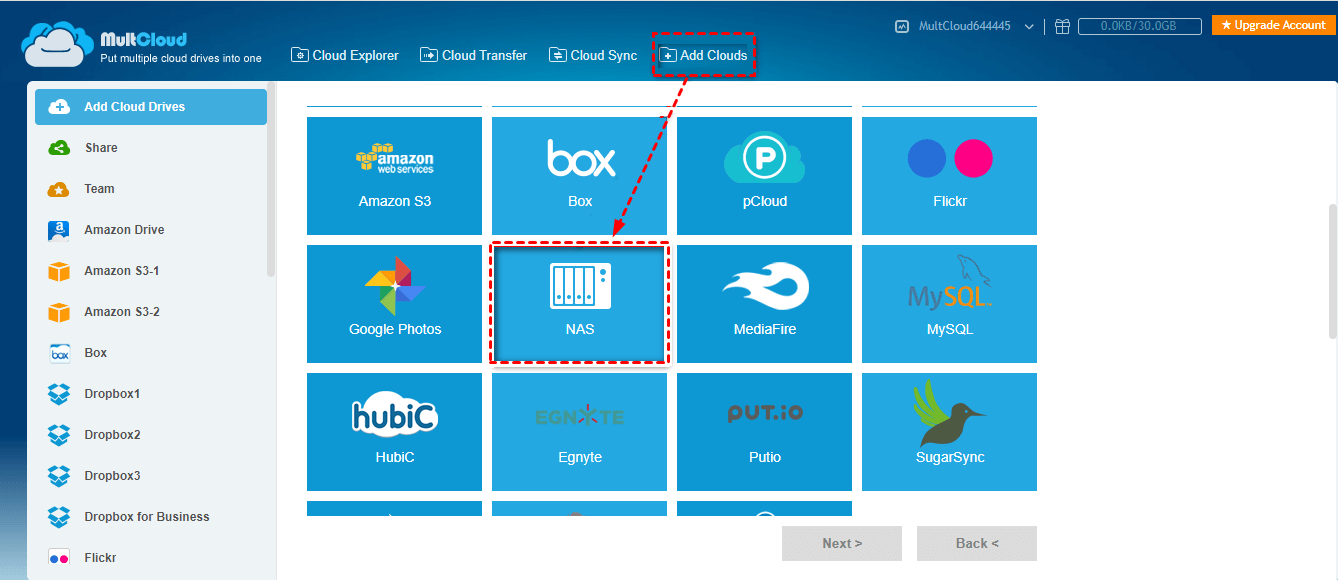
✎Note: You should enable WebDAV service on Synology NAS before adding it. After enabling the service, you need to select NAS among cloud providers listed below, click on the Next button, authorize MultCloud to get access to your NAS account.
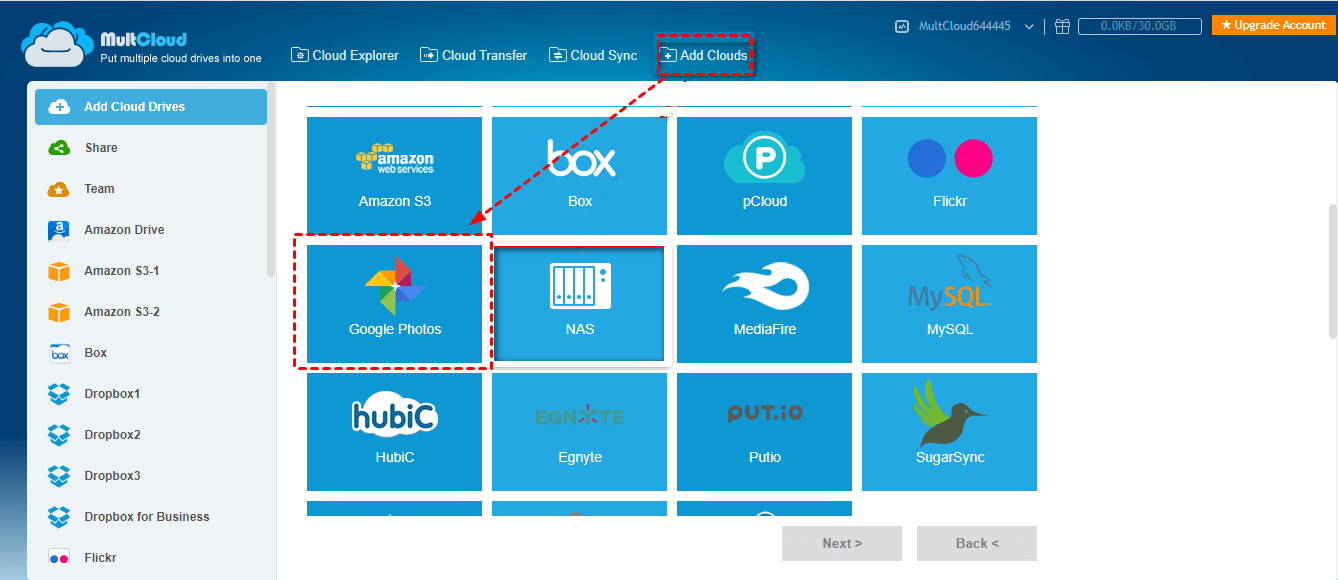
Step 3. Similarly, click on Google Photos and follow the instruction to finish adding your Google Photos to MultCloud.
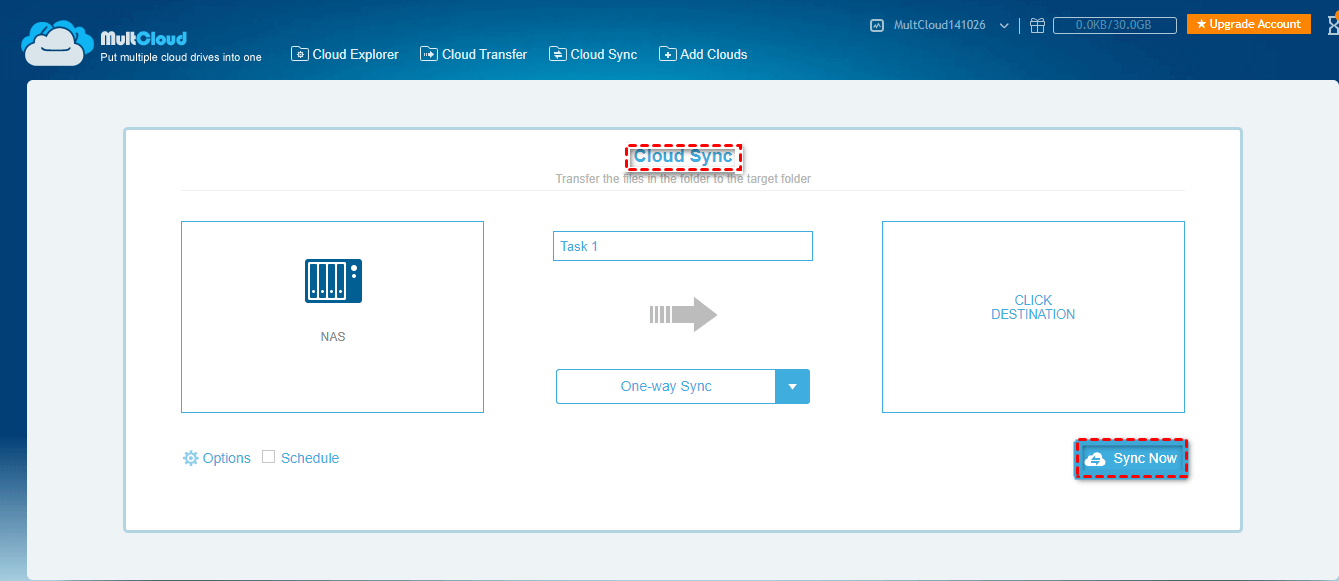
Step 4. Since you want to achieve NAS sync to Google Photos, tap on Cloud Sync, select your NAS as the source, select Google Photos as the destination, click on Sync Now and the process will start. You can also choose Google Photos as the source to sync Google Photos to Synology.
Protect your local files with a professional cloud backup service
According to the newest information, Google announces that they end the unlimited storage space service on June 1, 2021, the data you uploaded to Google Photos after that date will occupy your storage space of your Google Drive. Thus, if you need a backup solution instead of Synology NAS or Google Photos, you can consider CBackup, a professional cloud backup service for Windows PC.
With CBackup, you can easily take PC auto backup to a secure and stable cloud server called cloud . And besides its own cloud server, CBackup also allows you to backup files to public cloud storage like OneDrive, Google Drive, and Dropbox. In addition, it can help you set up a scheduled backup task to protect your files regularly and automatically.
What's more, since photos will take up a lot of space, you can expand your backup space with CBackup. CBackup offers a useful feature called combine cloud storage that can help you combine the storage space of multiple cloud storage accounts for free. And then, you can backup your photos to this combined cloud, which has huge backup space.
Here are the steps to use CBackup:
Step 1. Download CBackup and create a new CBackup account, and then sign in to CBackup desktop app.
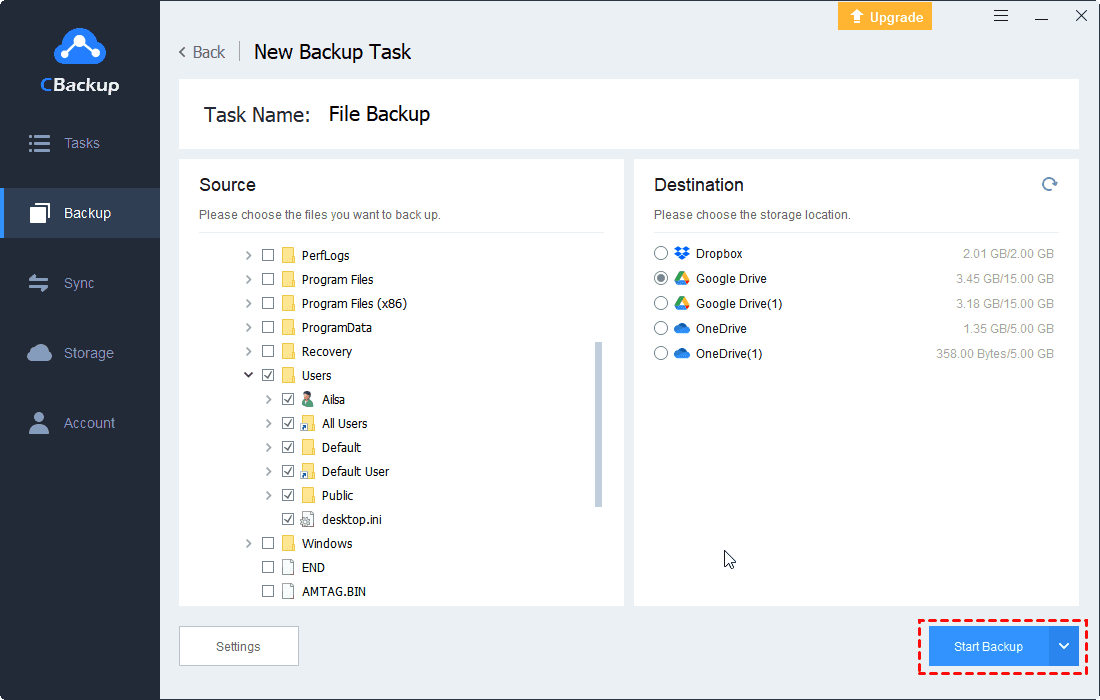
Step 2. Select the Backup tab on the left, and then select Backup PC to cloud.

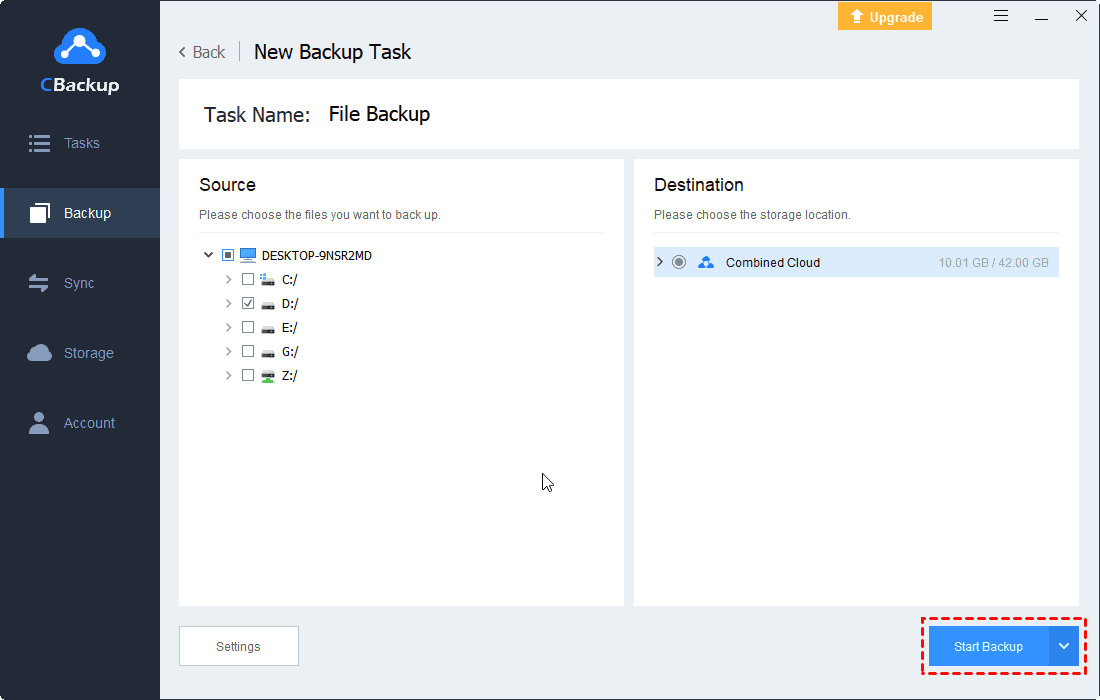
Step 3. Specify the Task Name, and choose folders you want to backup. Choose cloud as the target location. And then click Start Backup button.
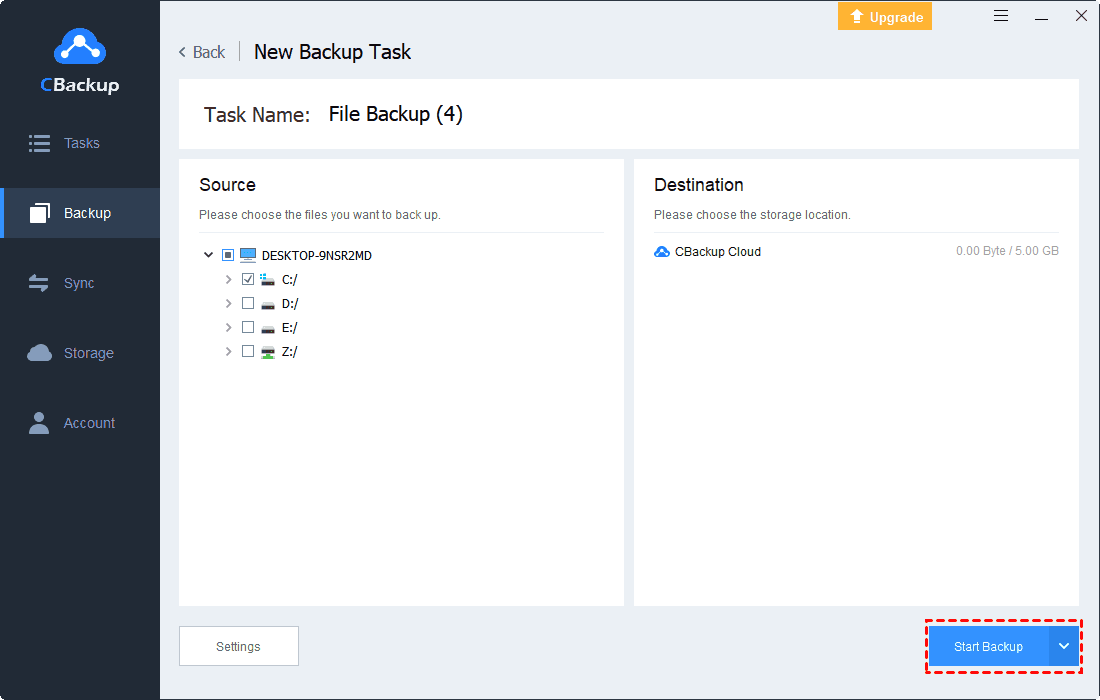
✎Note: You can tap Settings at the bottom of the window before starting back up, tick Set a backup schedule for automated backup option, specify the time you want to backup files to cloud, and click OK.

✿If you want to backup files to public cloud storage, follow the steps below:
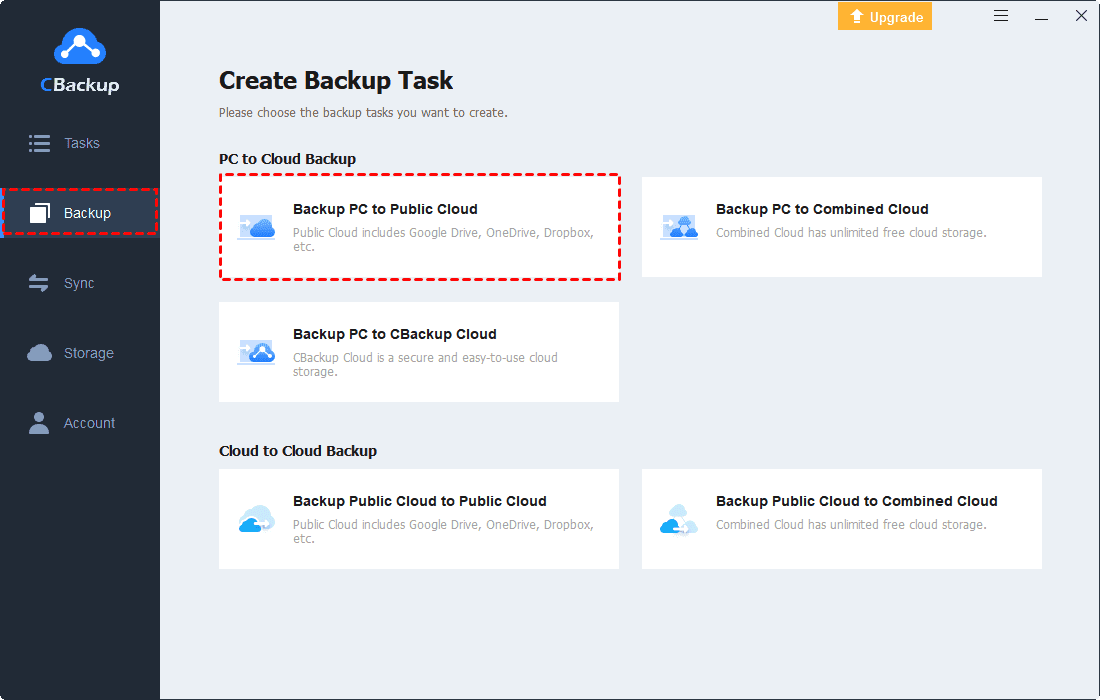
1. Click Storage on the left side, and click + Add Cloud button, then choose the cloud storage and hit Add. Then follow the on-screen guide to allow CBackup to access your public cloud storage files.
2. Click the Backup tab, and click Backup PC to Public Cloud to create your backup task.
- Note: If you want to sync your local files directly to your Google Drive account, go to the Sync tab and click Sync PC to Public Cloud.
3. Then select the files you want to backup, and tick Google Drive as the destination, click Start Backup to execute your backup task.
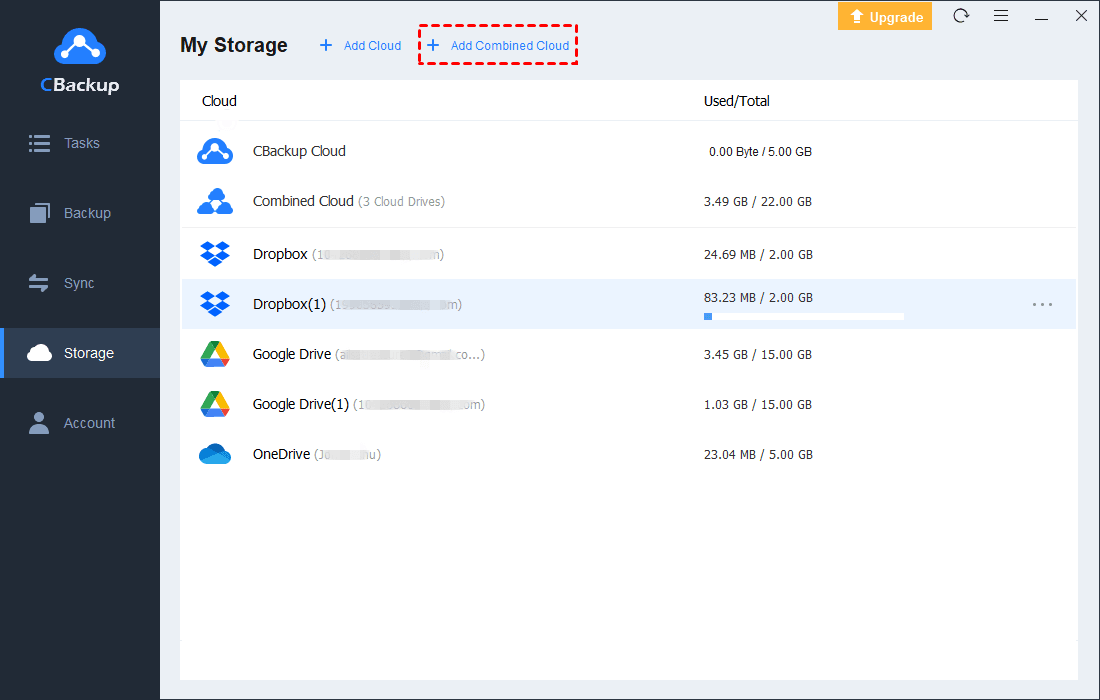
✿If you want to backup files to combined cloud storage, follow the steps below:
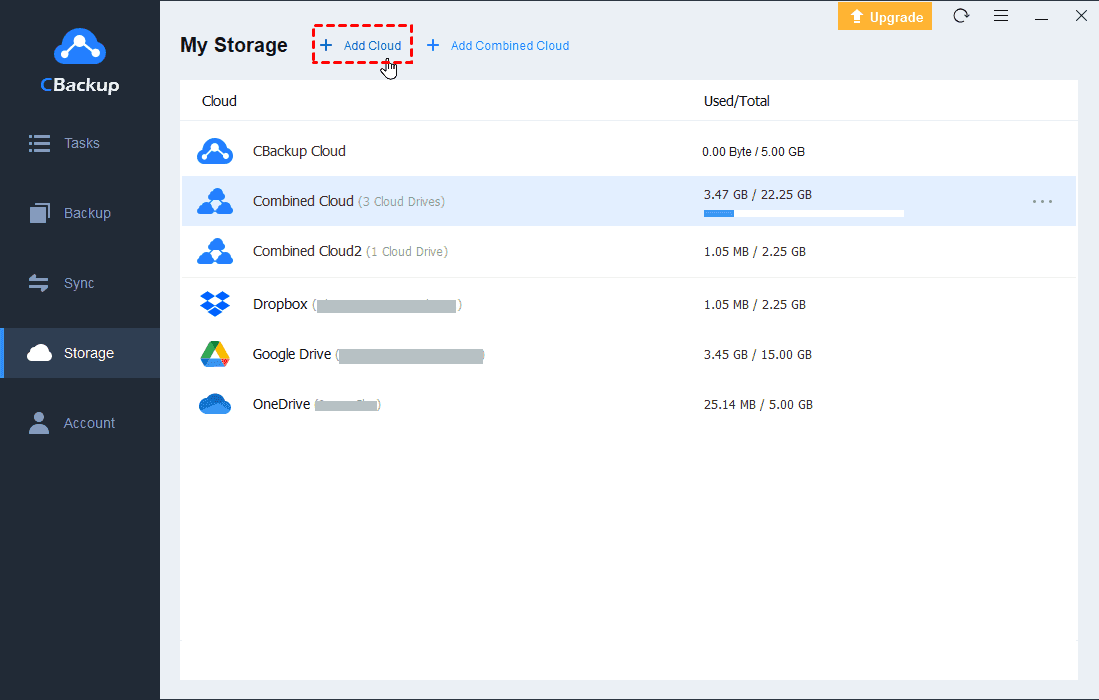
1. After adding your accounts, all your cloud drive accounts are listed here. Click the Storage tab, then click + Add Combined Cloud.
2. Then you could combine cloud storage, just tick the box next to the cloud storage account that you want to combine. After checking, click on Next > Combine.
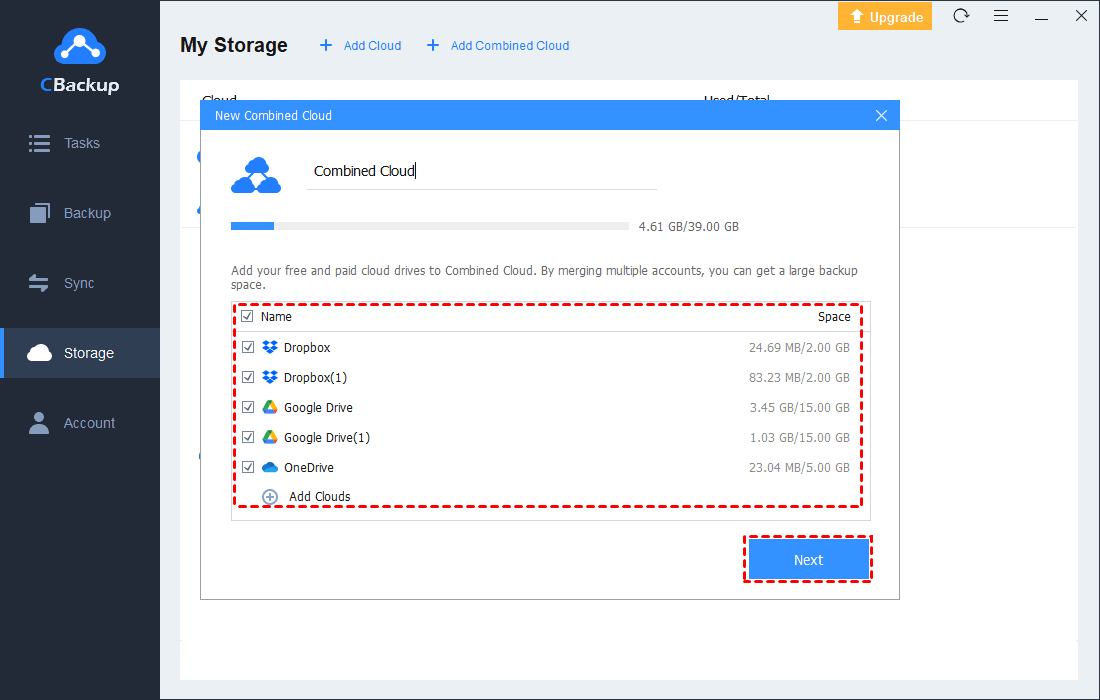
3. Then, you will have a Combined Cloud in your clouds list. You can choose the Combined Cloud as the backup destination to enjoy huge backup space while creating backup task.
Summary
Actually, syncing Synology NAS with Google Photos may be a little complicated because you can achieve that with Cloud Sync directly. However, it also can be easy if you follow the right method or rely on a useful tool like MultCloud. You can choose the way that suits you best. And if you need an alternative to NAS or Google Photos so that you can protect your data in an easier way, you can take CBackup into consideration.

Secure & Free
