
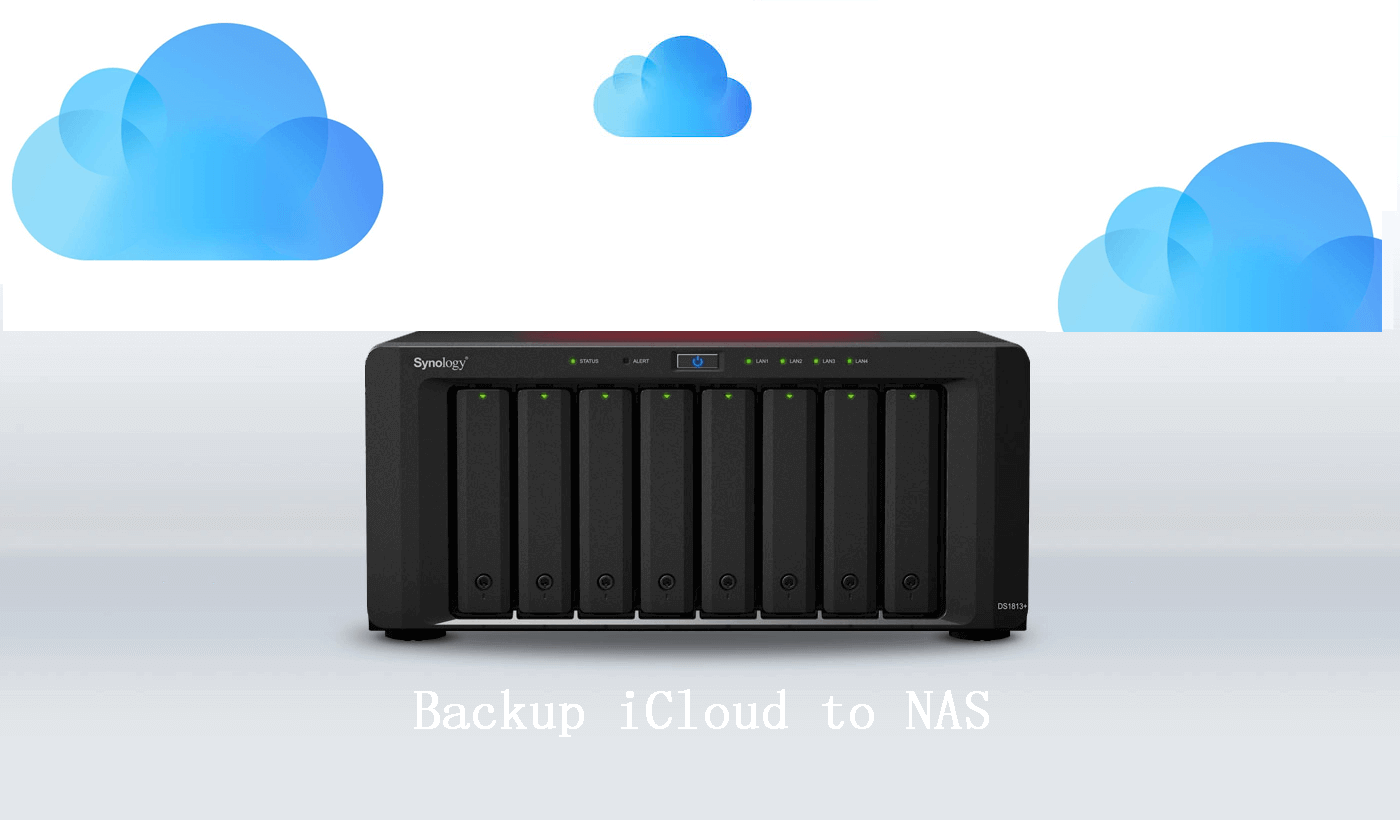
How to Backup iCloud Drive to NAS on Windows PC (Easy Way)
This article shows how to backup iCloud to NAS on computer with ease. And you will also learn how to protect your files with the most cost-effective tool. If you happen to need this, please read on.
by Jonna Lasted Updated September 30, 2024
Can I backup iCloud to NAS?
Hi, I am a new user of Synology NAS, operating in a Windows environment and having backed up all files to iCloud. I'd like to backup my iCloud drive to my Synology NAS because I need an additional backup that doesn't rely on Apple. Is there a way to backup my files in iCloud to my NAS? Any suggestions? Thanks for your help.
Why backup iCloud drive to NAS?
As we all know, developed by Apple, iCloud is online cloud storage that works seamlessly to sync and back up your files across all of your Apple devices. Every user with an Apple ID gets 5 GB of storage for free to back up and access messages, images, music, videos, apps, and settings on their iPhone, iPad, iPod and has paid options starting at $0.99/month for 50GB.
So, since iCloud is a backup solution, why you need another backup? Well, the data stored in iCloud is still facing the risk of loss. For example, you may lose access to your iCloud account. Or, Apple loses your data somehow? Both are unlikely, but they can happen. Therefore, if you're serious about keeping your irreplaceable data safe, you still need a secondary independent backup that doesn’t rely on iCloud.
How to Backup files from iCloud Drive to NAS
Since iCloud backup files can be downloaded to your PC, you can download any file you have backed up from iPhone, iPad, or iPod touch to iCloud, including Photos, Notes, Reminders, Contacts, and Calendar first, then backup these files to NAS again.
Part 1. Download the files from iCloud to computer
☛Way 1. Download files from iCloud via iCloud.com
1. Open a web browser on PC, type iCloud.com, and go to the website.
2. Enter your Apple ID username and password to log in to the main page.
3. Simply select the files you want to download to PC and click the download button on the top right corner on the screen.
✎Note: Except for photos, if you want to download other iCloud backup files, like notes, reminders, contacts, and calendars, you are only allowed to preview and copy the specific files as there is no download option for these categories.
4. Set the route to save downloaded iCloud backup photos.
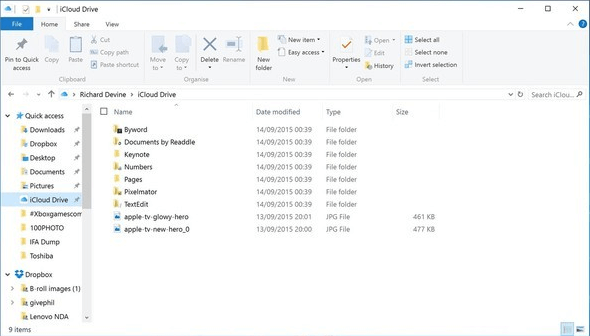
☛Way 2. Download files from iCloud via iCloud Drive folder
1. Download iCloud for Windows on your Windows PC.
2. After installing, you will have an iCloud Drive folder in your Windows Explorer. Find this folder, select files and directly backup them to NAS.
Part 2. Backup iCloud files to NAS from computer
☛Way 1. Use a backup or sync tool
Generally, the NAS you use will offer an official backup or sync tool to help you back up files from the computer to NAS easily, you can go to the official website of the NAS you are using to see if there is such a tool. If there is, download it on your computer and follow the instruction to use it.
☛Way 2. Manually backup files to NAS
1. Hit Windows Key + Q to bring up the search and type in “backup". Select Backup and Restore (Windows 7) from the search results.
2. Click on Set up backup on the top-right of the screen. Then, the Start Windows Backup pop-out will appear. Wait for a few seconds.

3. Choose Save on a network. Then, type your IP address in the blank space or click on Browse and choose a location on the NAS. Once done, click OK.
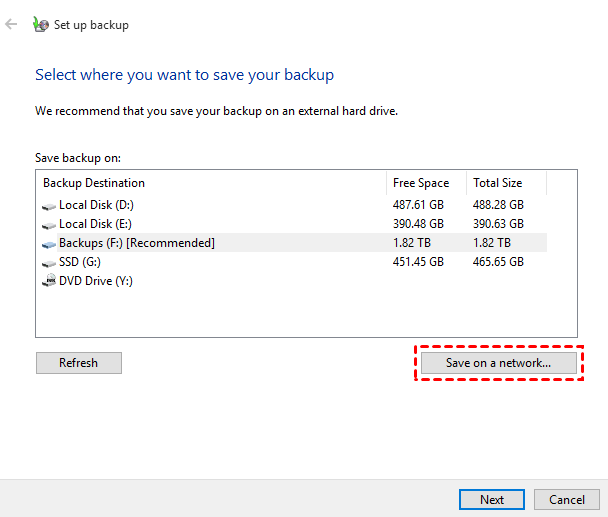
4. Confirm everything and choose Save settings and run the backup.
Protect your PC files with a more cost-effective tool
As we know, although iCloud and NAS is good backup solution for PC files. Actually, there is a more secure and cost-effective tool that Windows users can use to protect their PC files. I highly recommend CBackup, which is a professional cloud backup service for Windows 11/10/8.1/8/7/XP at a cheap price. You can try it to protect your PC without safety concerns.
-
CBackup offers 5GB of free storage per registered account, and if you need more backup space, the service offers the most reasonable subscription plan.
-
In addition to the large backup space cloud, you can choose multiple cloud drives as backup destinations, such as Google Drive/OneDrive/Dropbox, which manages multiple clouds with one click.
-
You can combine cloud storage on multiple drives to get more backup space for free for data storage.
1. Download and install the CBackup PC client on your Windows PC.
2. Run the software. Then, sign up for a CBackup account and sign in.
3. Click on the Backup tab and click on the Backup PC to CBackup Cloud button.

4. Find the files or folders on your computer that you want to back up. After selecting, click Start Backup.
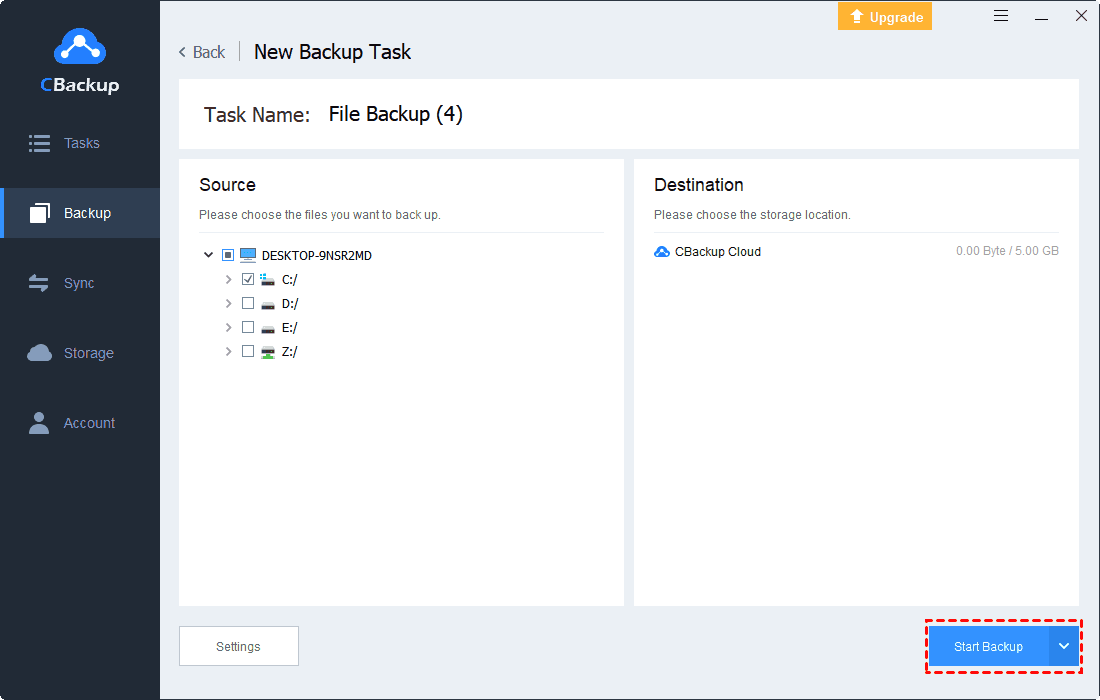
✎Note: There is a Settings button in the lower-left corner. You can click it to use the File Filter feature and Email Notification feature. The former can help you filter unwanted files, and the latter can set reminders of backup results.
Final words
According to the contents above, you can easily backup iCloud to NAS in Windows. Actually, if you want to keep your data safe, using a reliable and professional Windows cloud backup service like CBackup is a better choice. It has a clear interface and user-friendly design so that you don’t need to worry about anything. Just try it first.

Secure & Free
