
How to Backup and Restore Window Server 2019 | 2 Free Ways
Backing up Windows Server 2019 is an efficient method to protect your files from disaster. You can follow the step-by-step guide below to backup and restore your Windows Server with ease.
by Jonna Lasted Updated September 30, 2024
How do I backup my Windows server?
“I have a Dell server running Windows Server 2019 and I am struggling to find a backup service that can help me back up the server before modifying it. How can I backup Windows Server 2019 successfully? If the server doesn't start properly after modifying, could we restore those files? Please let me know.”
Backing up files is essential in everyday life or at work. On this page, we will show you how to configure and complete a backup and restore of Windows Server 2019 using the in-built Windows Server Backup service and a professional third-party Windows Server backup tool (the process also applies to other Windows Servers 2008, 2012, and 2022, including R2).
Way 1. Backup Windows Server 2019 with Windows Server Backup
Windows Server Backup is a data backup and recovery tool that comes with the Windows system. It supports you to create Windows Server backup on 2019 for specific files, folders, and a full server to hard disks, remote shared folders, tape libraries, and other types of storage devices. You can use it to create an instant data backup or set up scheduled backups to automatically back up data periodically.
Follow the step-by-step tutorial below to complete Windows Server 2019 backup and restore with no problem:
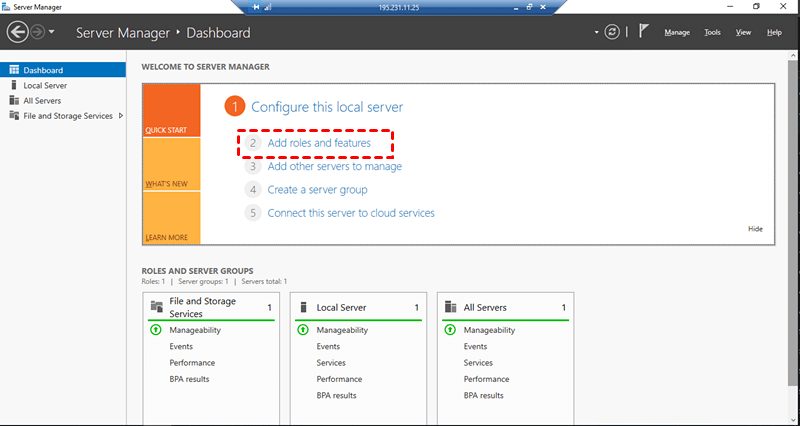
Step 1. Head toward Server Manager and select Add roles and features.
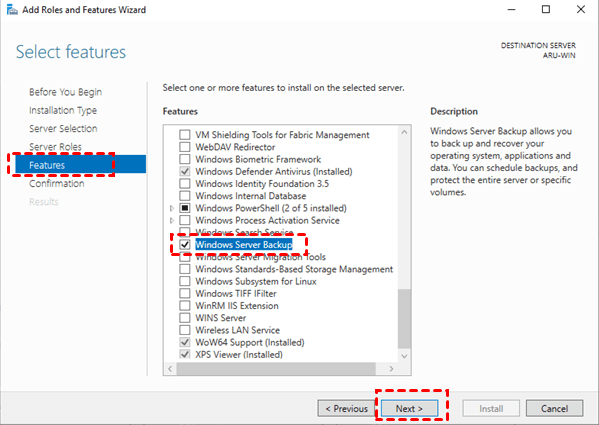
Step 2. On the Feature window, find and tick the checkbox next to Windows Server Backup and click on Next. Then, click Install under the Confirm section and wait for the installation of Server Backup to complete.
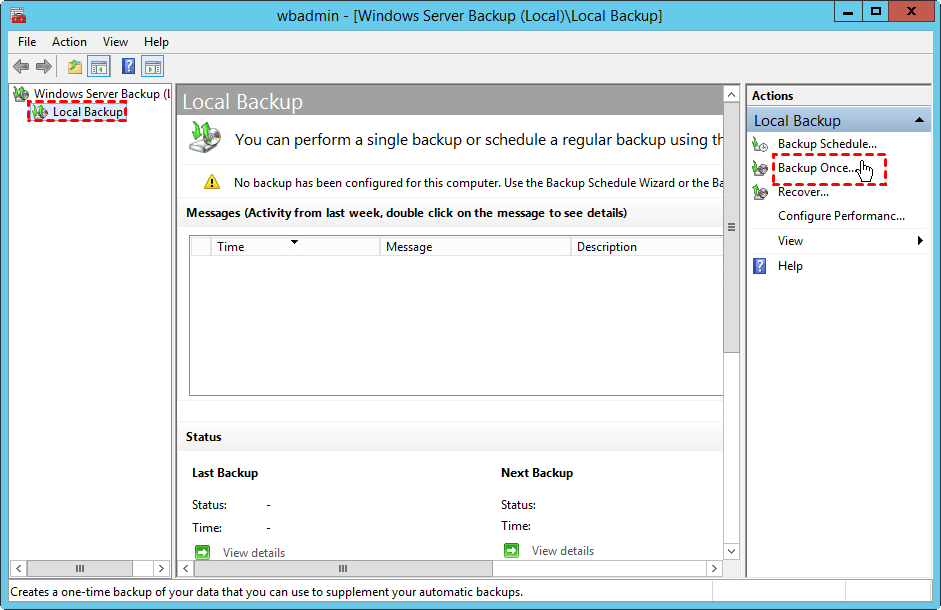
Step 3. When the Server Backup is installed, open it. Tap on Local Backup and select Backup Once or Backup Schedule (here we take Backup Once as an example).
Step 4. Select Different options under Backup Options, and then go on to select Full server (recommended) for a Windows Server 2019 system image backup on the Select Backup Configuration screen, then click Next.

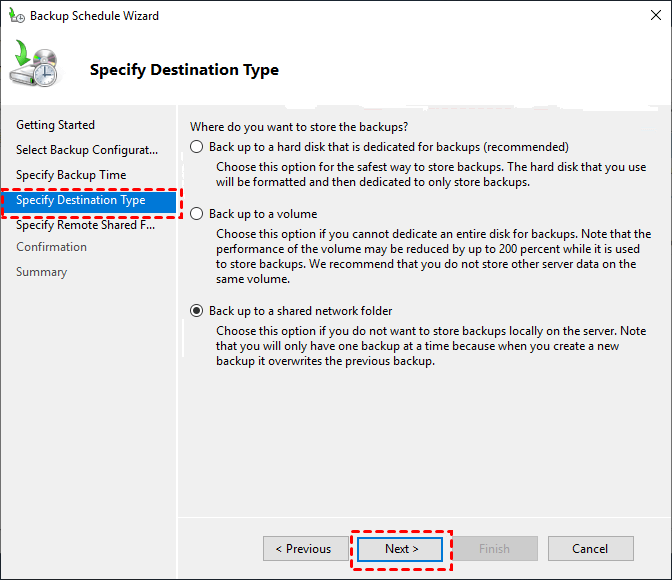
Step 5. Choose where you want to store the backups in Specify Destination Type and hit Next after configuration.
Step 6. Lastly, click on Backup under the Confirmation page to initiate a Windows 2019 Server backup.
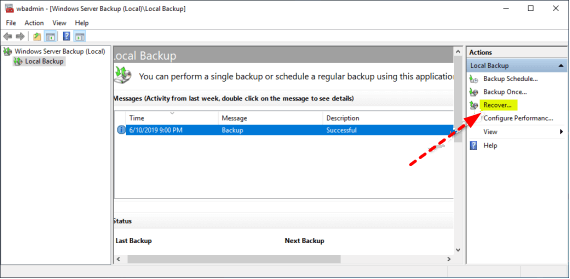
Step 1. Launch Windows Server Backup and click on Recover... in the right Actions pane.
Step 2. Specify where you are restoring files from This server or A backup stored on another location in the Getting Started window. And then, decide the location type under Specify Location Type.
Step 3. Then, continue to opt for the right location of the backup and select the date and the time of the backup you want to restore from. Select Files and folders in Select Recovery Type and click Next.
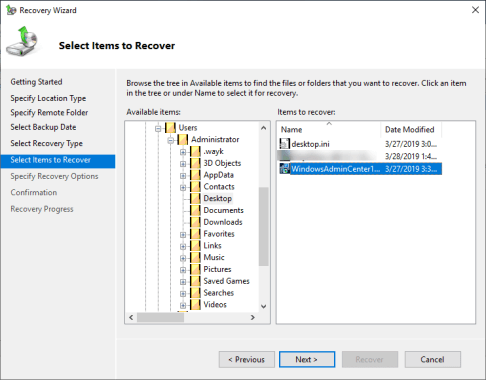
Step 4. Select folders to restore under Available items and then click Next.
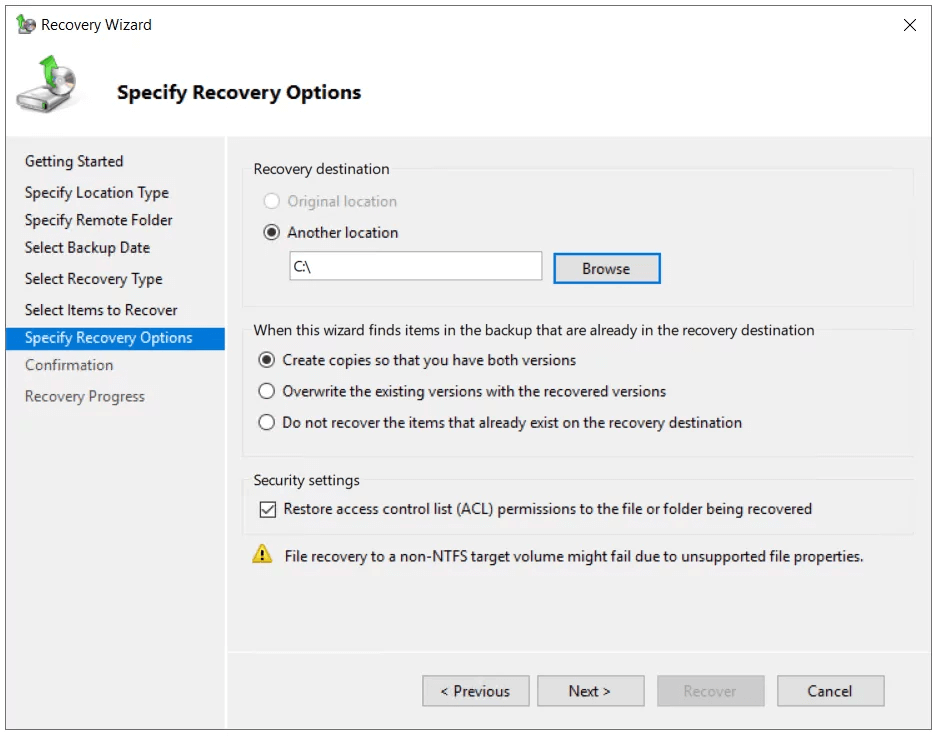
Step 5. Specify the Recovery Options and confirm the configuration options to click Next. Under Confirmation, click Recover to restore the selected items and wait for the recovery progress to be completed.
Way 2. Easier Way to Backup Windows Server 2019 Effortlessly
AOMEI Backupper Server is a powerful backup and recovery solution designed to reduce server downtime and protect your data. Whether you are a novice or a professional, you can use this application to easily complete Windows Server backup. It offers various backup options, including system backup, file backup, disk backup, and partition backup. Its automatic backups keep your files safe at all times.
Moreover, this backup software for Windows Server 2019 supports backing up data to local & external hard drives, cloud drives, network drives, NAS, etc. In addition to full backups, it also supports incremental backups and differential backups. Now, download the trial of AOMEI Backupper Server and use this backup software for Windows Server 2019 to backup your Server 2019 effortlessly.
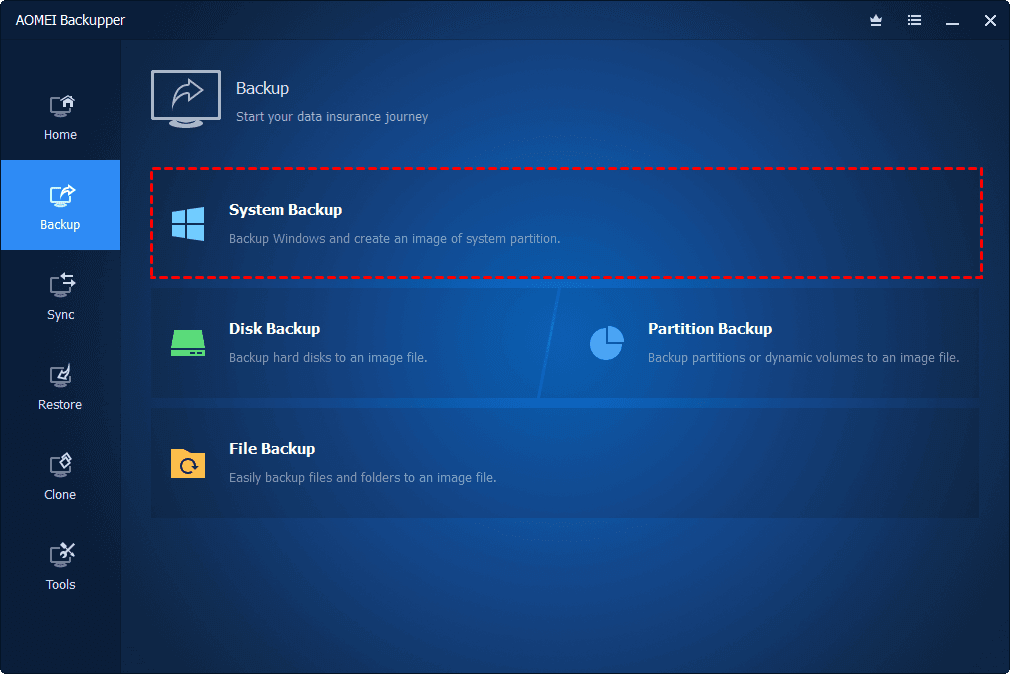
Step 1. Click on the Backup tab and select System Backup. You can also choose the File Backup option to create Windows Server file backup easily.
Step 2. Then, all files that are needed in the restoration of the Windows system will be selected by default. You can choose a destination path for your Windows Server 2019 backup. You can select to save backups to your local computer, external hard drive, and network drive here.
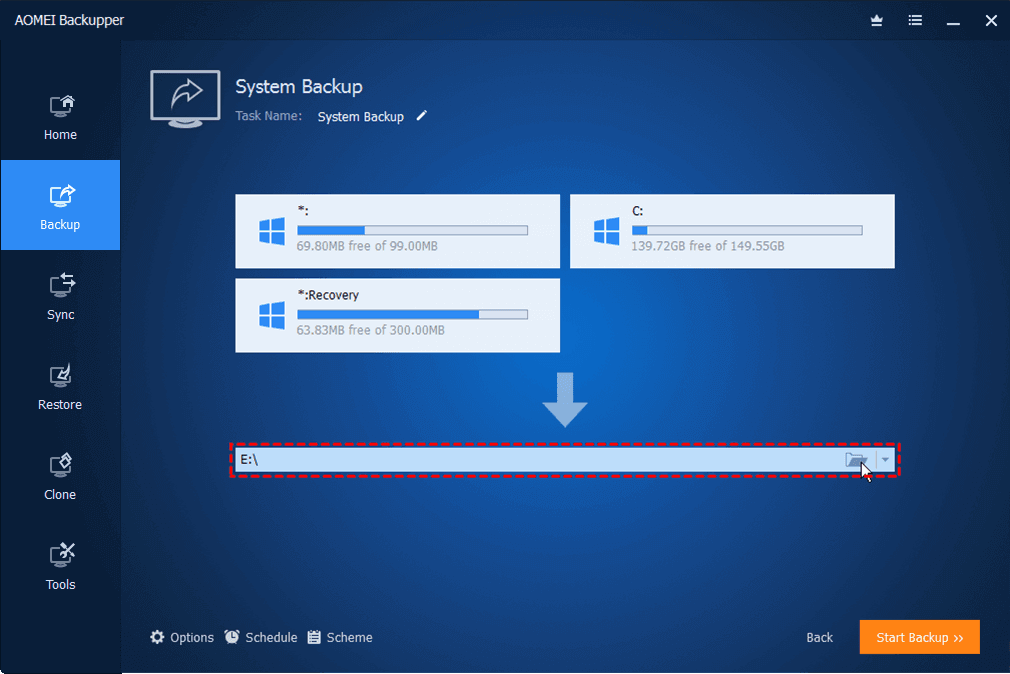
Step 3. Tap on Start Backup to initiate the backup of Server 2019.
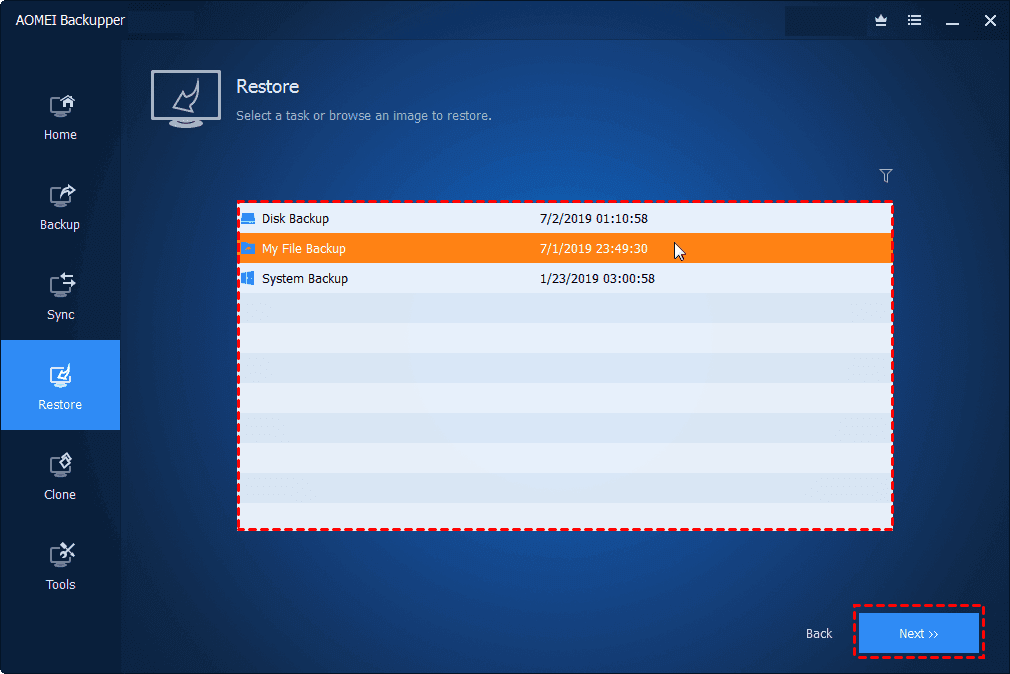
Just pick the Restore tab on the left sidebar and click Select Task or Select Image File to select the backup image for restoration.
Bonus Tip: Free Way to Backup Windows PC Files
Besides backing up Windows Server files, you can also secure your data by backing up your computer files. We recommend you use CBackup to complete the backup of your Windows computer.
CBackup is a professional Windows computer backup tool that provides mainly cloud backup services. It is designed to back up your entire computer, partitions of computer, and specified computer files to popular cloud storage services including Google Drive, OneDrive, Dropbox, etc for free. It also offers its own backup space, cloud, with 5GB of free space, as well as expandable backup space.

In addition, it offers cloud-to-cloud backup services that can help you easily complete data transfer between clouds. If you want to backup your computer files for protection via CBackup, please follow the guide below to get it.
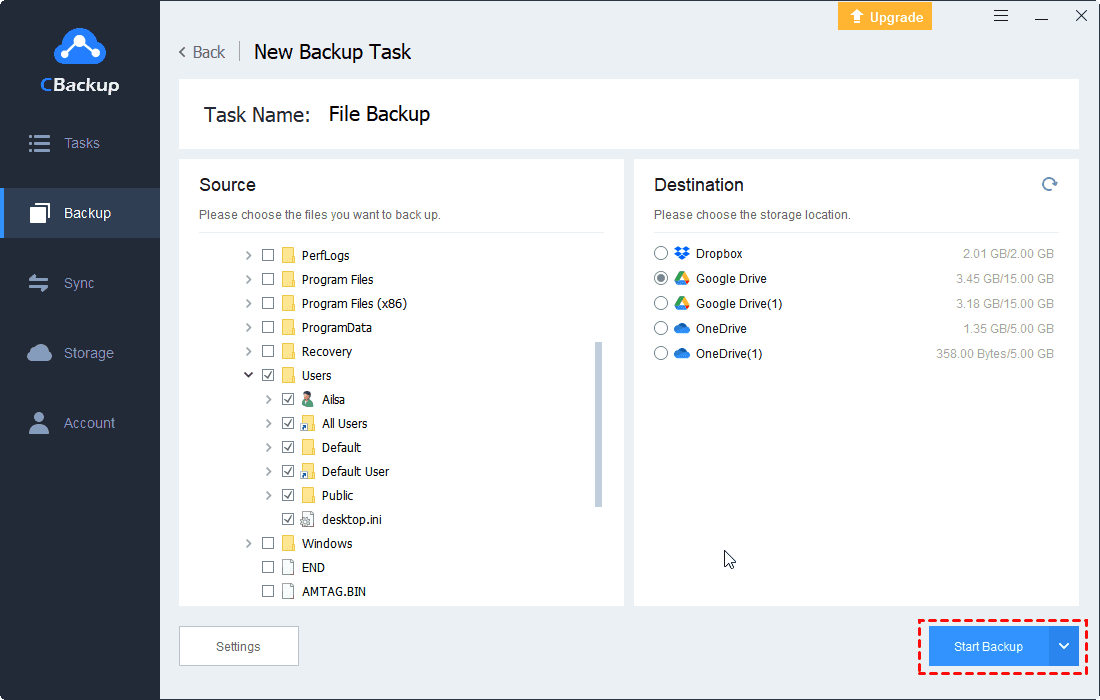
Step 1. Register a CBackup account for preparation. Run the CBackup application and log in to it.
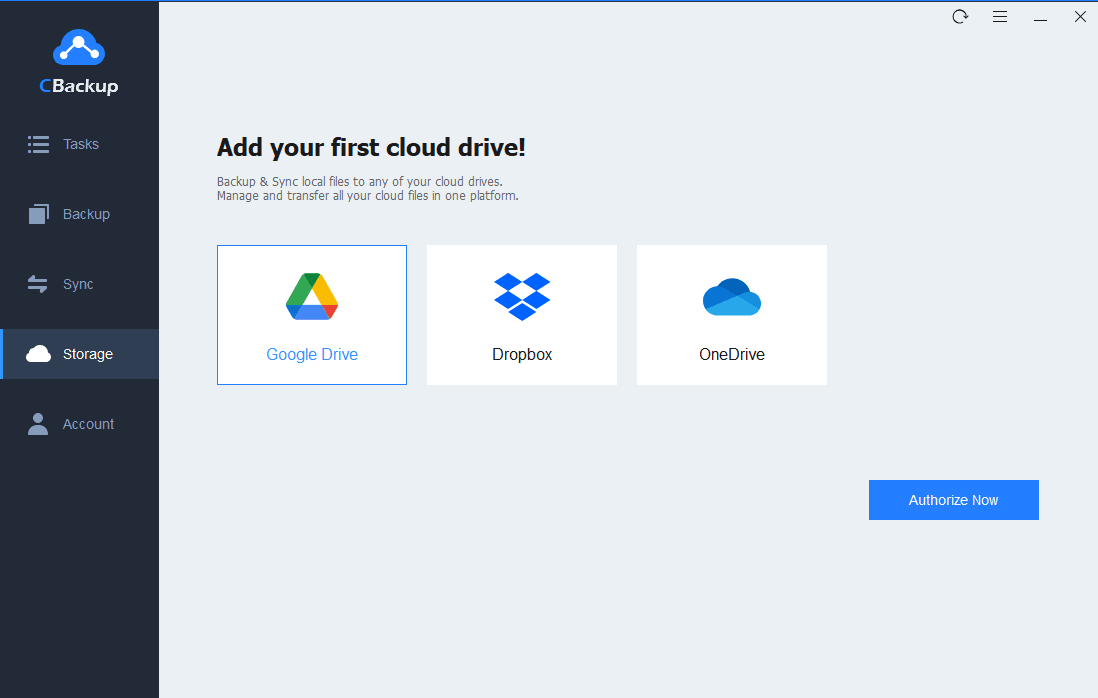
Step 2. Click on Storage and then select a cloud storage solution like Google Drive to click Authorize Now. Then, you need to warrant CBackup to get connected with it.
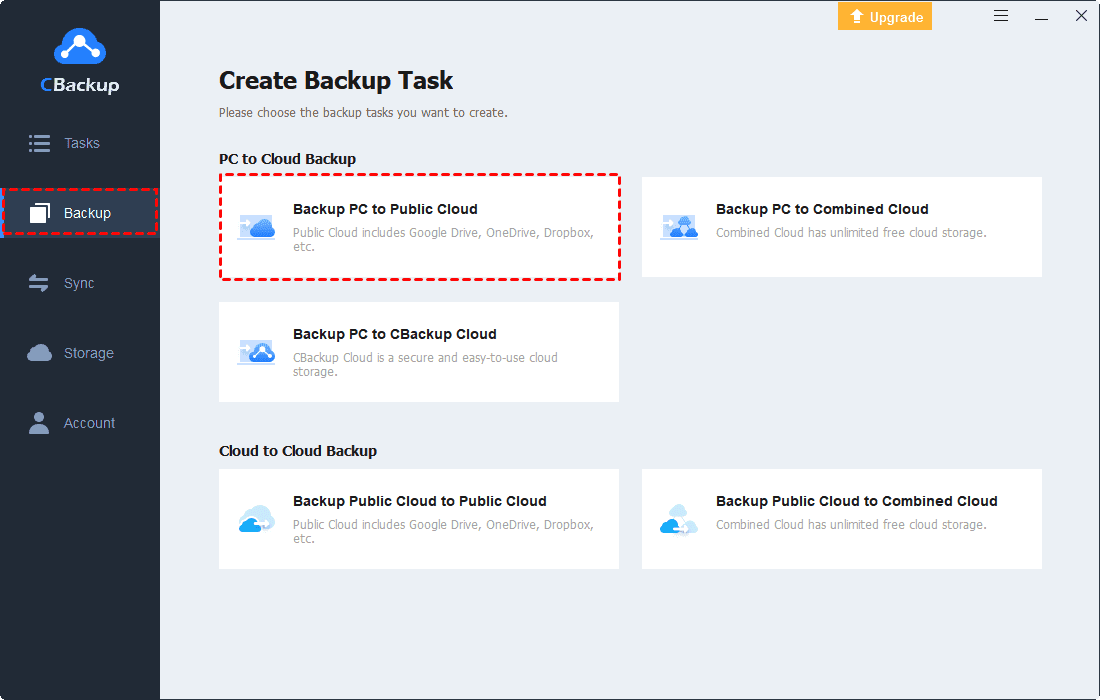
Step 3. After authorization, go to Backup, and tap on Backup PC to Public Cloud.
Step 4. Determine which files you want to backup. Select Google Drive as the backup destination. Then, click on Start Backup to backup computer to Google Drive for protection.
Final Thoughts
On this page, we provide you with a complete guide on how to backup Windows Server 2019 with Windows Server Backup and professional Server backup software AOMEI Backupper, and we also cover the restoration guide for Windows Server backups. With the help of either method, you can complete a full backup of your server and quickly restore files in case of accidents.
If you also want to backup some important files on your Windows computer, CBackup can help you to do this task easily.

Secure & Free
