
Perform Files and Folders Restore Step by Step
CBackup File Restore can help you to recover files and folders from the backed up image file when the original files or folders are missing or corrupted.
by PublicOwin Lasted Updated January 21, 2026
File restoration, also known as file recovery or file recovery software, is a process used to retrieve deleted, lost, or corrupted files from storage devices such as hard drives, USB drives, memory cards, or SSDs. It is commonly employed in the following scenarios:
- Accidental file deletion: When you unintentionally delete important files or folders, file restoration can help you recover those files. It scans the storage device, locates the deleted files, and restores them to their original or specified location.
- Formatting storage devices: If you accidentally delete files while formatting a storage device (such as a hard drive or USB flash drive), file restoration can attempt to recover those files. It scans the storage area of the device and recovers recoverable files.
- Storage device failure: When a storage device experiences a failure (such as a damaged hard drive or corrupted file system) that renders files inaccessible, file restoration can attempt to recover files from the faulty device. It utilizes professional data recovery tools to rebuild file structures and extract recoverable files.
- Virus or malware attack: After suffering from a virus or malware attack, files may be encrypted, damaged, or deleted. File restoration can attempt to recover these affected files, making them accessible again.
- Retrieving previous versions of files: Sometimes, you may need to revert to an older version of a file, for example, when you realize that changes made to the file were incorrect or unnecessary. File restoration can help you recover previous versions of files, allowing you to restore to an earlier state.
How to Restore Files or Folders with CBackup in Windows 10
Prerequisites for File Restore
Before restoration, there are some things you need to know.
CBackup file restore is based on CBackup file backup. You should already have at least one file image made by CBackup (whatever the source file is, the current crashed one, or a file on another computer). CBackup does not recognize file images made by Windows or other software.
Nominally, users should recover using the file Backup image created on their current failed operating system. If the PC fails to boot or has crashed, you can create a WinPE bootable media using CBackup on another healthy computer and then boot the crashed PC from the WinPE bootable media to run the file restore under WinPE.
We strongly recommend that users create a WinPE bootable media once they start to use CBackup. Such bootable media should be created and kept in a safe place in order to boot a failed computer. Otherwise, not having the required bootable media might result in not being able to recover your computer at all.
If you don't have these items, please download CBackup and prepare what you need.
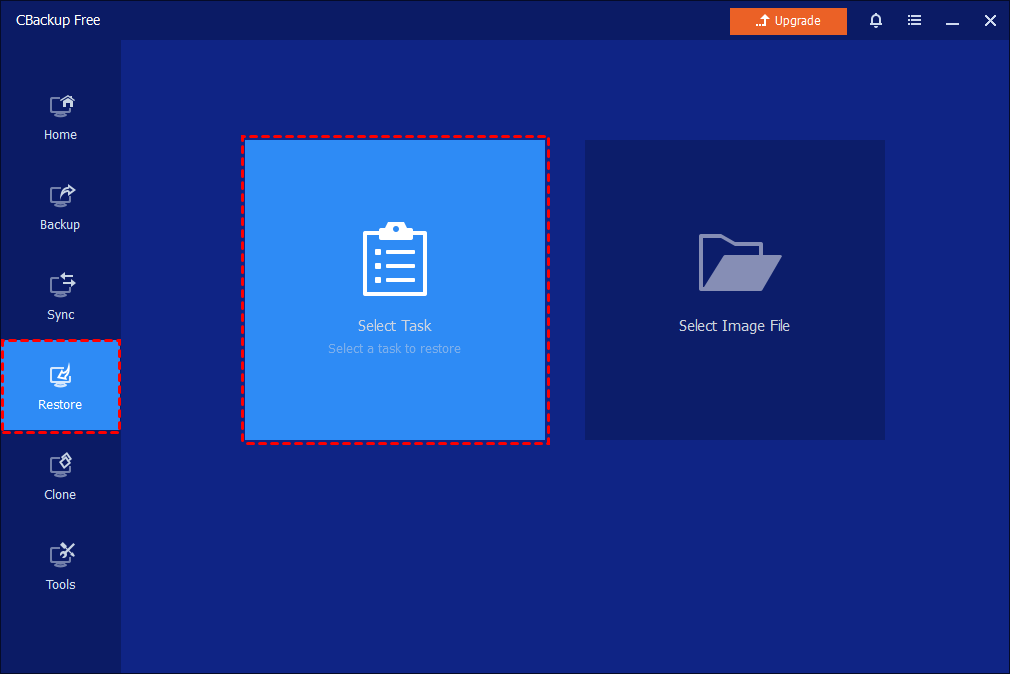
Step 1: Initialize Restore
In the left tab, select Restore and then click Select Task. If the backup task is not listed, you can click Select Image File to manually select an image file in the destination path.
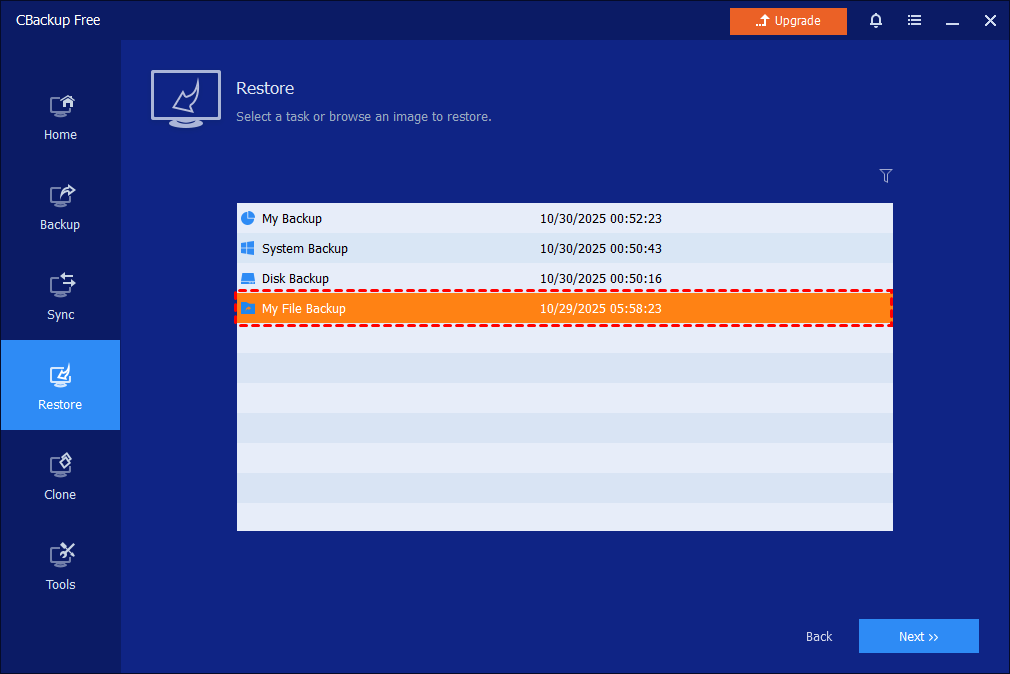
Step 2: Select File Backup
Select the file backup item that you want to restore from the list box, then click Next to continue.
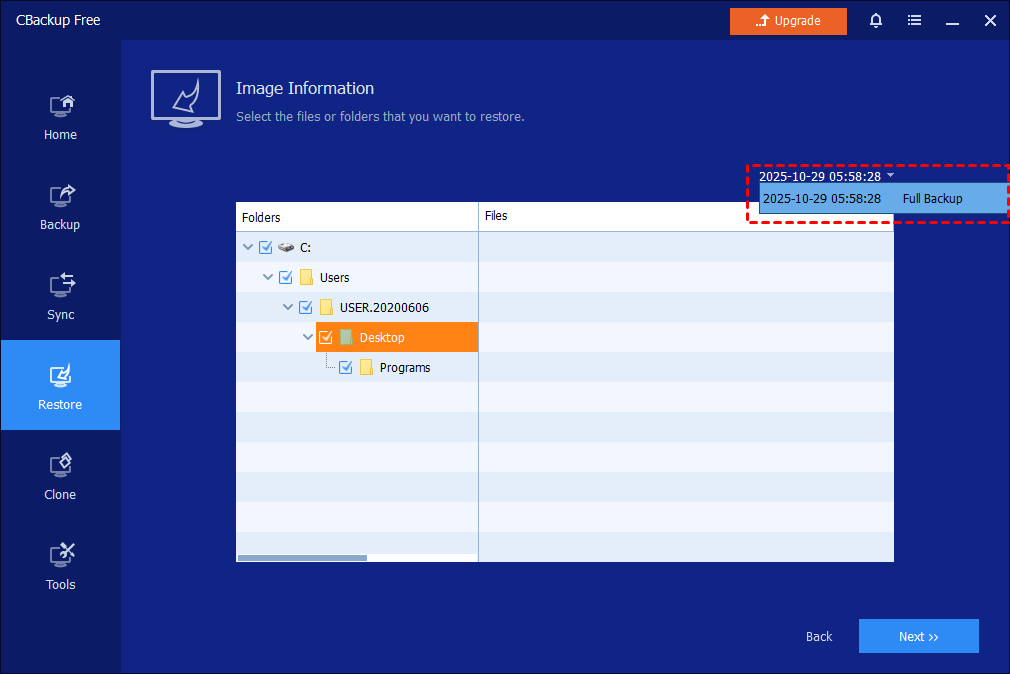
Step 3: Select Backup Version and Files to Restore
Choose the backup image version according to the backup time point, select the files or folders you want to restore, and click Next.
Tips: If there are different versions of incremental/differential backups, you can just select the right version of incremental/differential backup you need to restore. (There is no need to separately select full+incremental/differential backups to restore. Just select the right full/incremental/differential backup version to restore. )
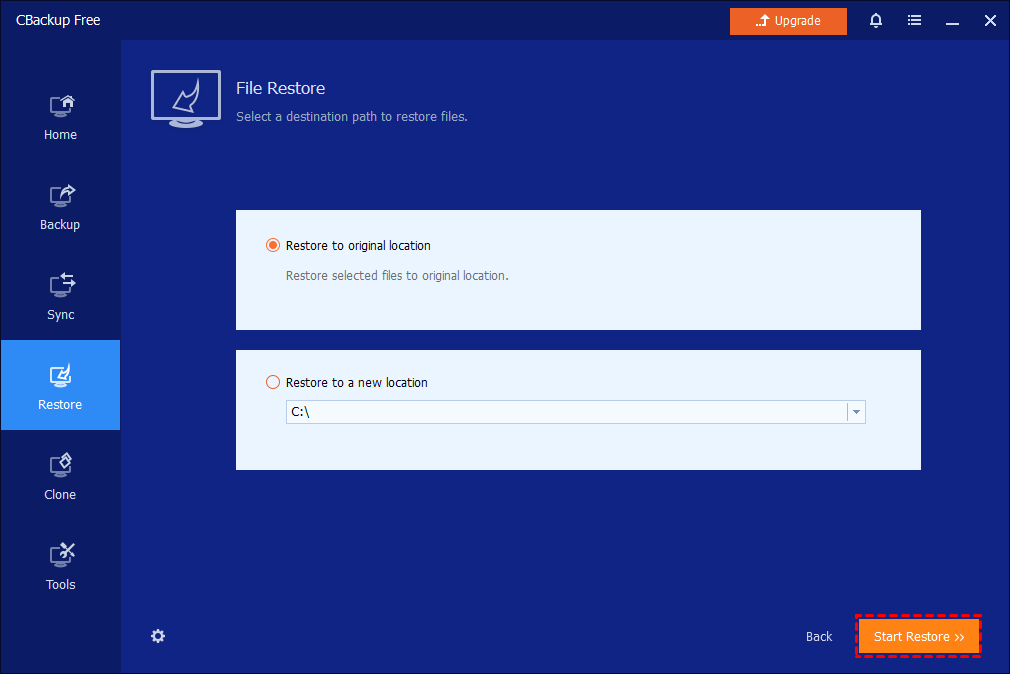
Step 4: Select Destination Path and Start Restore
Select a destination path to save the files. You can choose whether to "Restore to original location" or "Restore to a new location". You may also tick "Replace existing files" to overwrite existing files with the same name.
Click Start Restore to execute this task.
Restore Files and Folders under WinPE
If your system is unable to boot or you have to restore files under WinPE in some cases, you can first create a WinPE bootable media with CBackup on a working PC and boot your PC into WinPE to run file restore.
Restore files and folders from other backups:
If you don't have a file backup, you can choose to restore files from system backup, disk backup, or partition backup. You need to upgrade to the professional version first.
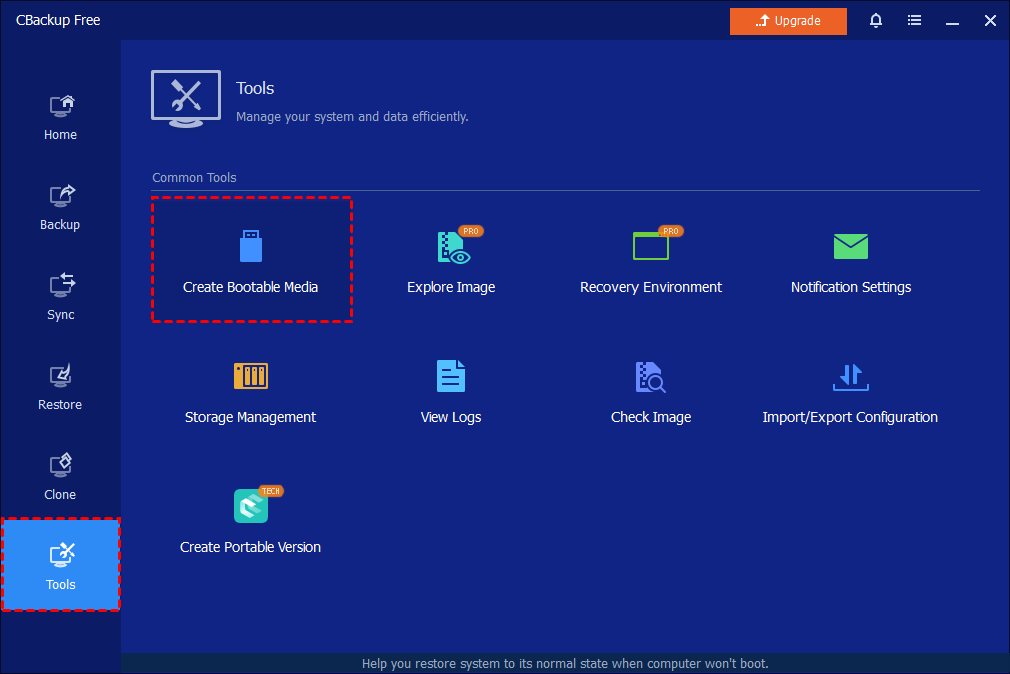
In the main page of CBackup, click "Tools" > "Explore Image". Then, select the backup image and point you want to restore files from, assign a drive letter for it, and click "Next".
Tips: You can directly double-click the backup image in Windows File Explorer to open the backup image file to view the backup files. There is no need to restore the backup.
After that, you can open the mounted virtual partition(s) and copy files you want to restore and paste them to another location, just like in Windows File Explorer.
Notes:
-
Some files may be in use by other programs and cannot be overwritten. In this case, CBackup will pop up a prompt window. You just need to follow the prompts. You could consider moving to a new location to solve the problem.
-
When backing up files, CBackup automatically backs up the NTFS permissions. This feature is mainly used to restore a file to the NTFS file system. You can check the "Restore NTFS Permissions" option in order to make it easier to set file permissions during the restore process.
-
When a restore is performed, the "Restore only files" option can be checked. In this case, the program will only restore those selected files not included in the original path.
Conclusion
In conclusion, the purpose of file restoration is to assist in recovering lost files and data, reducing the risk of data loss, and meeting legal and compliance requirements. It is crucial for both individual users and businesses to ensure the integrity, availability, and security of data.
FAQs
Q: You get the message: "Unable to get the backup information because the image file does not exist, or it can’t be accessed..." when you click the Restore or Advanced button on a backup task of the Home screen.
A: The problem might be that the task can’t locate the backup files for unknown reasons. You need to delete the task and then re-import the backup task by browsing the backup files under Tools-->Import/Export Configuration. After that, the task will be listed on the Home screen again.
Q: How can I restore files if there is only an .adi image file?
A: .adi Image files are generated by a system/partition/disk backup. It is unable to restore files directly from an .adi image file. To restore single files/folders from an .adi image file, you can use the"Explore Image" feature to first mount the backup image as virtual drives. And then, you can copy some files/folders from the mounted virtual drives.

Free Get CBackup Now
Secure & Free
