
2 Ways to Create NAS Backup Effortlessly [Full Guides]
In this article, you could find 2 different solutions to backup NAS with ease. At the same time, the best free way to expand your cloud storage is also provided step by step.
by CBACKUP Lasted Updated June 19, 2025
Is NAS Good for Backup?
As storage devices, NAS devices work for storing data, but some users regard NAS as a backup solution by mistake. It is not safe for your data if you just rely on NAS devices for backup. Because NAS devices are vulnerable to different kinds of threats, like disasters, physical damage, and equipment failure.
Thus, maybe you need some NAS backup solutions to keep your data secure. After backing up, you could recover the data if your devices are attacked.
2 Easy Ways to Create NAS Backup
Here we will introduce 2 different methods for NAS backup, and each NAS backup strategy is easy to use and will help you a lot. Please keep reading, and you could pick the most suitable one.
Way 1. Backup NAS with Synology Cloud Sync
If you want to run Synology NAS backups, some professional tools can help you, like Synology Cloud Sync. With Synology Cloud Sync, it will be easy for you to backup or sync data from your local Synology NAS to a public cloud service. For example, you can back up your NAS to Amazon Cloud Drive or other cloud drives (Dropbox, Google Drive, OneDrive, Baidu Cloud, Box).
Now, let’s see the detailed steps to back up NAS to a cloud drive:
1. Download the Synology Cloud Sync application on your computer.
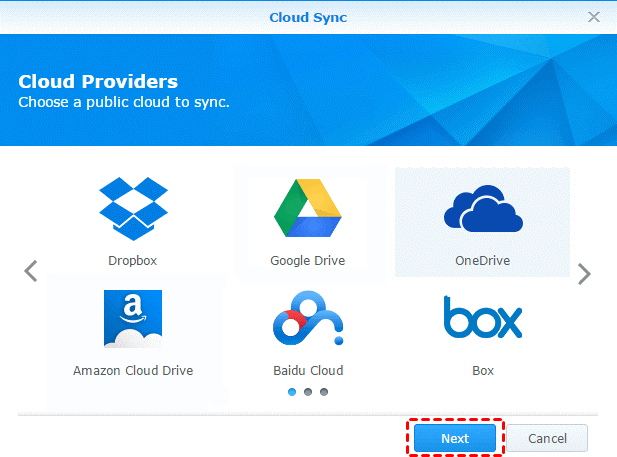
2. Press the + button at the bottom left corner. Choose your target cloud service among these cloud service icons. Sign in to your account and then authorize it to Synology. After that, click on the Next button.
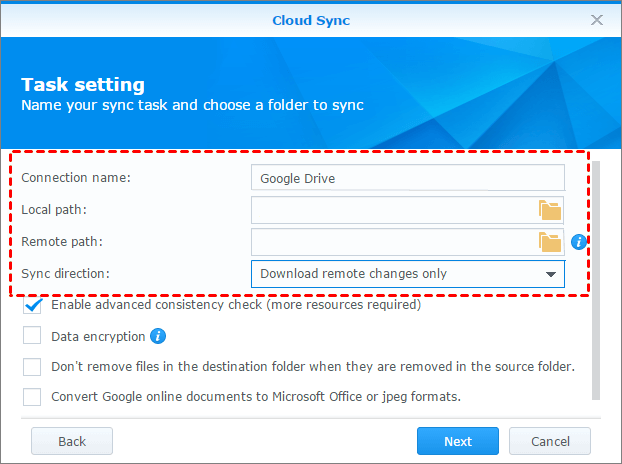
3. Next, you can set the Connection name, and choose the Local path, Remote path, and Sync direction. Then click on the Next button.
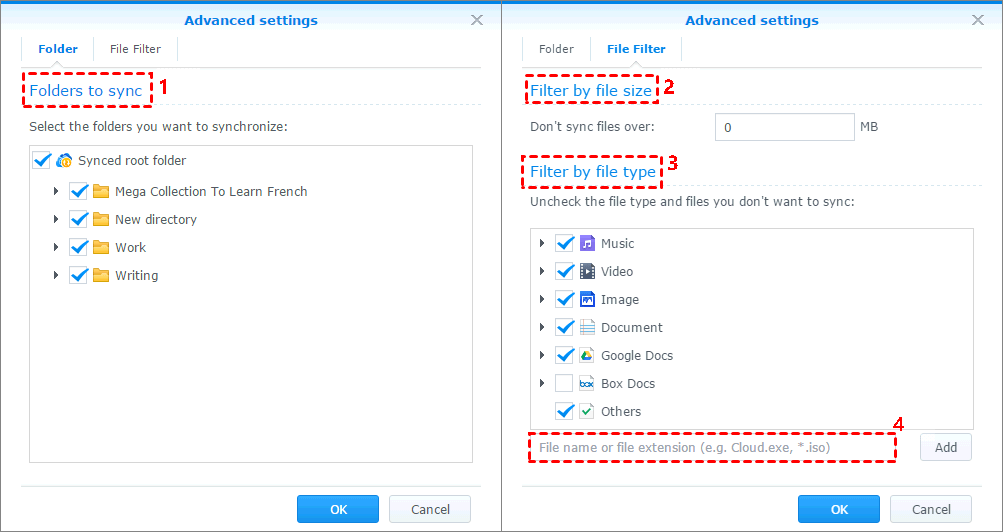
4. Then you could finish the settings for files and folders in the Advanced settings. Finally, select Apply to start the NAS cloud backup.
Way 2. Backup NAS with AOMEI Backupper Standard
And we want to introduce the NAS backup software called AOMEI Backupper Standard to you, which makes your backups easier and more convenient. You do not need to map your NAS device to your computer, and AOMEI Backupper Standard allows you to backup NAS to not only clouds, but also external hard drives, local disks, etc. Just follow these simple steps with AOMEI Backupper Standard:
1. Download the AOMEI Backupper Standard software on your computer.
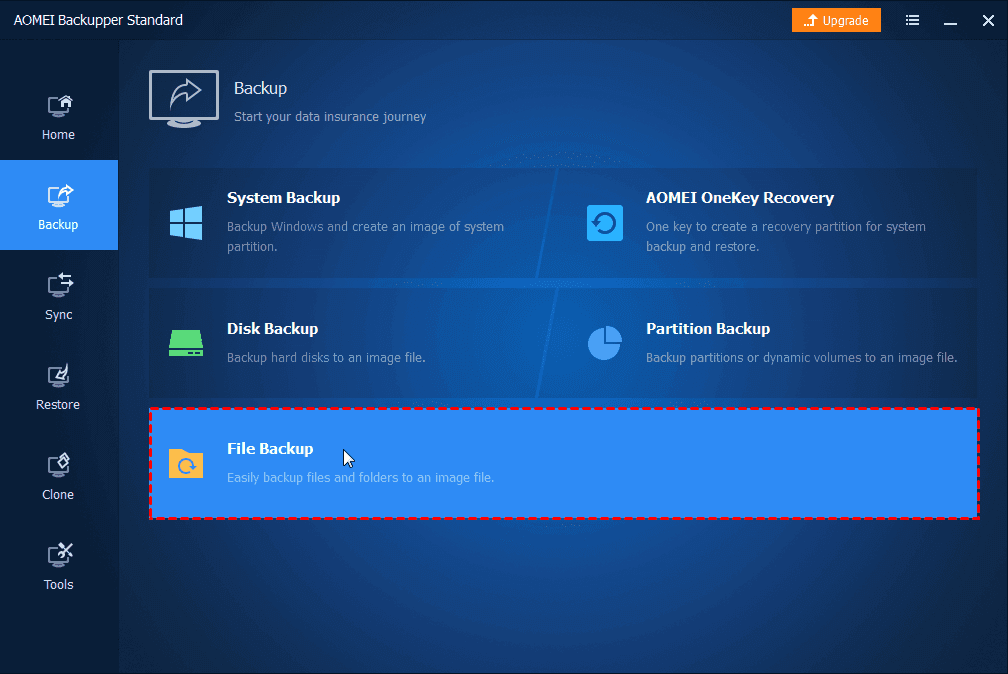
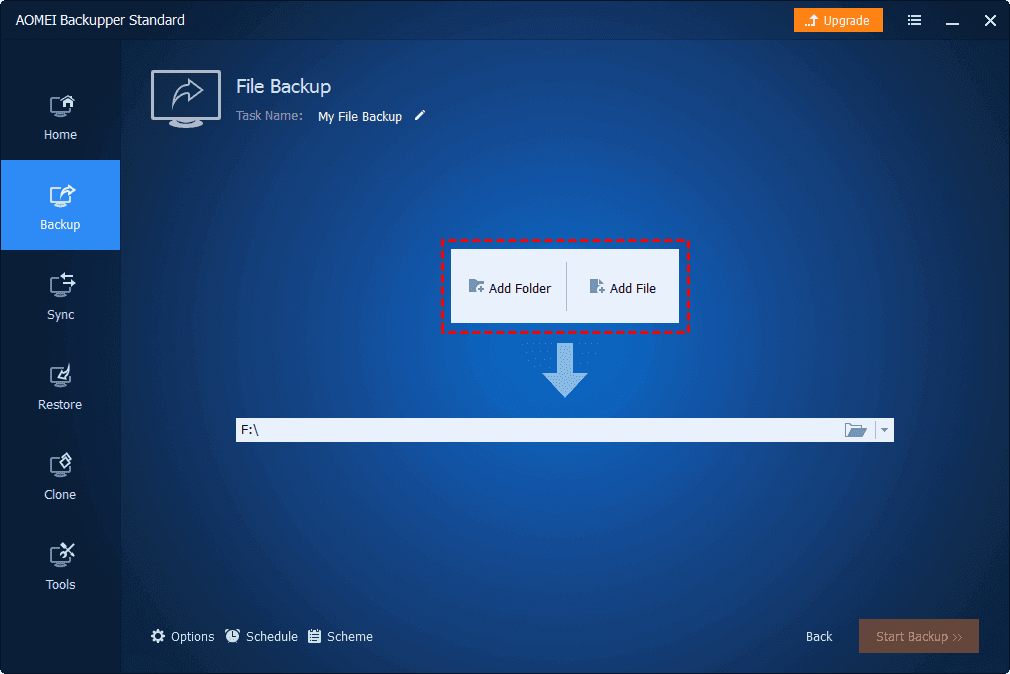
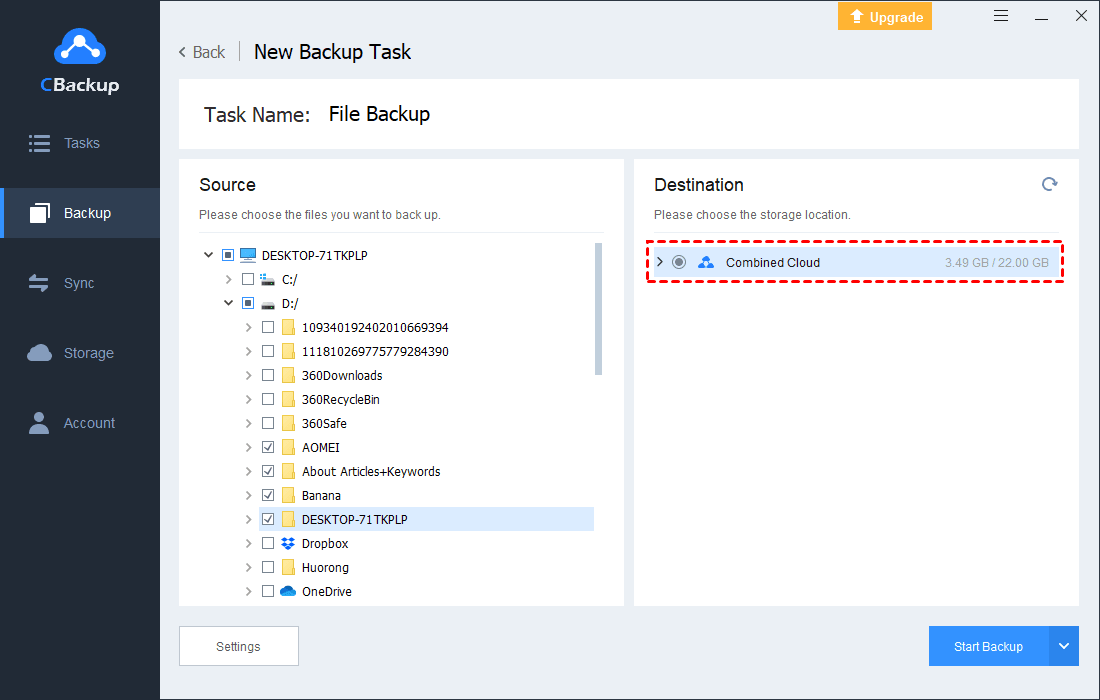
2. Click Backup in the left menu, then select the File Backup option.
3. Then you can click on Add File or Add Folder.
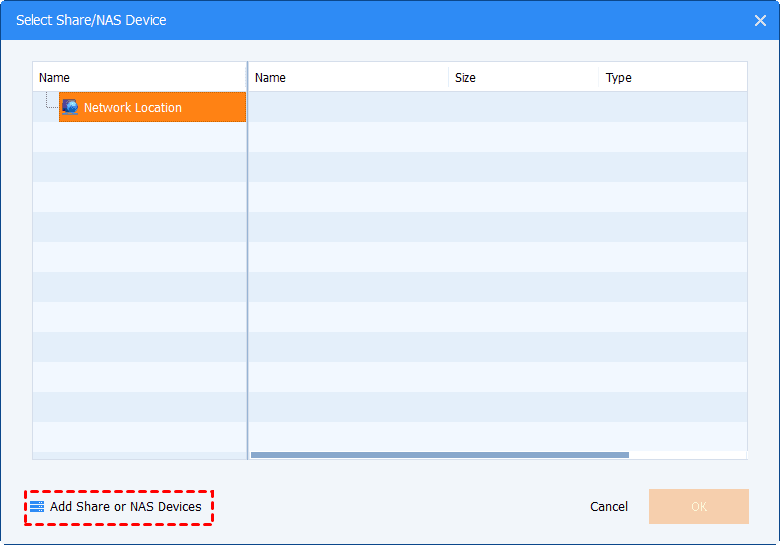
4. In the pop-up window, click on Share/NAS > Add Network Location to type the IP address. Then press OK to choose the folders you need to back up.
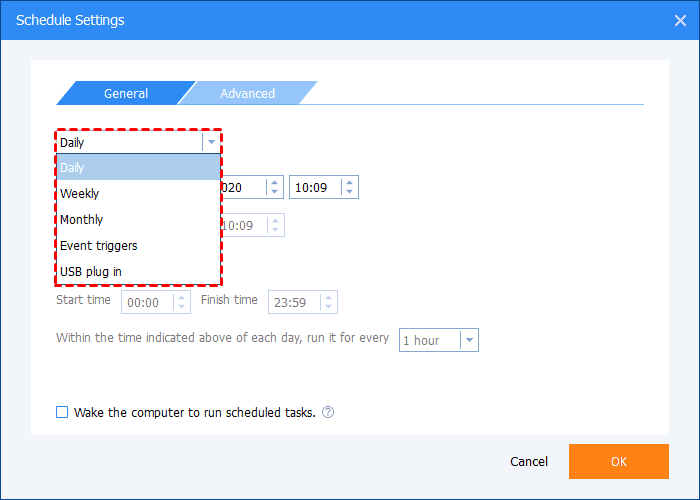
5. (Optional) You can use the Schedule feature to set up an auto-backup. Then AOMEI Backupper Standard will perform the backups automatically with the selected frequency.
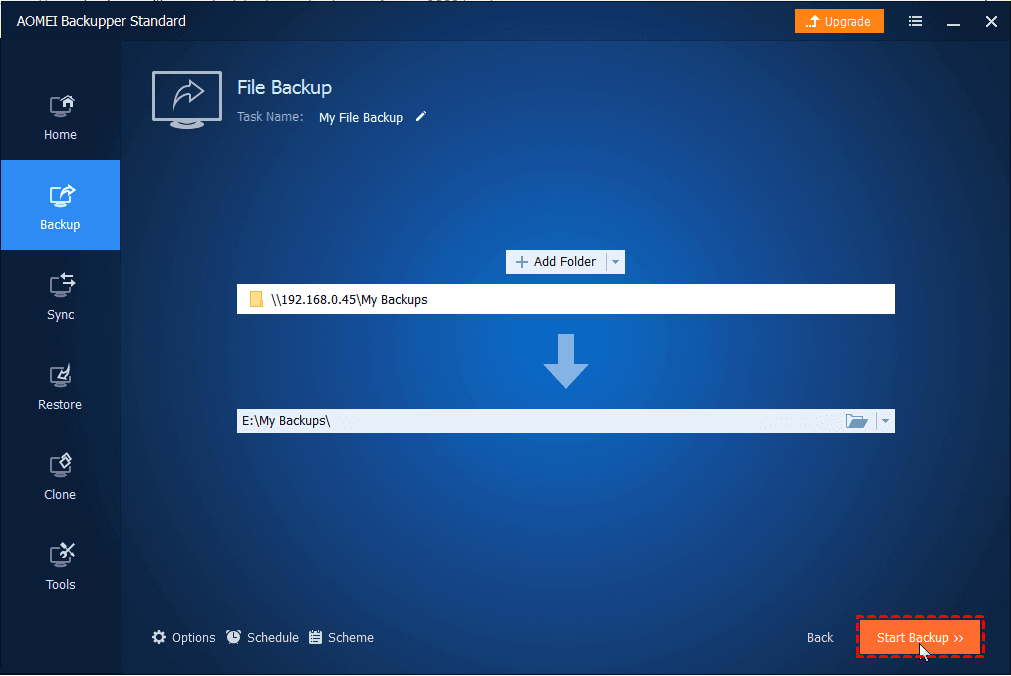
6. After choosing the backup destination path, you can click the Start Backup button to begin the NAS backup.
Bonus Tip: Free Solution to Expand Your Cloud Storage
All NAS users and cloud service users have limited cloud storage space to back up data. If you have a large amount of data that needs to be backed up, it will cost you much to expand your cloud storage space. But now, you can get a larger cloud backup space for free with a third-party service, CBackup.
CBackup is a professional cloud backup service. CBackup allows you to add your different cloud service accounts to it and then helps you to merge unlimited cloud drives into one combined cloud. Mainstream cloud drives on the market are almost fully supported to add, including Google Drive, OneDrive, and Dropbox. You can enjoy combined cloud storage for free.
After knowing something about different ways for NAS backup, let’s see how to expand your cloud storage space with CBackup for free:
1. Download the CBackup desktop application, sign up for a new account, and open the client to log into your account.
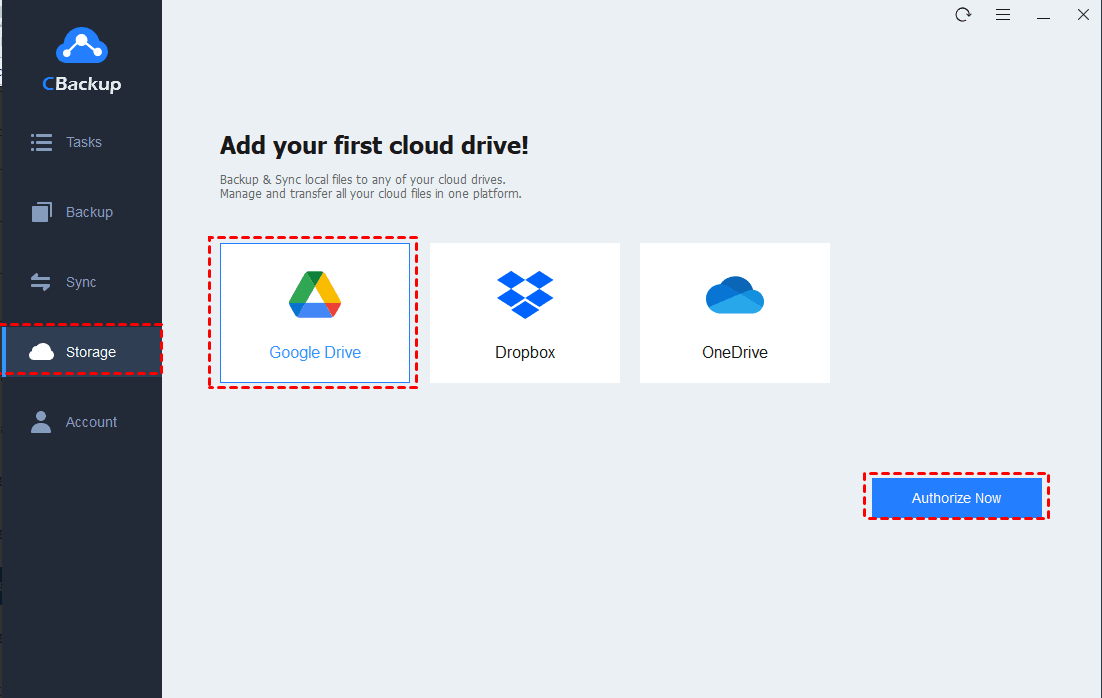
2. Click on the Storage. Here we take Google Drive as an example. Select Google Drive and click on Authorize Now. Then please follow the step-by-step instructions to grant CBackup access to your cloud drives. You can add as many accounts as you have.
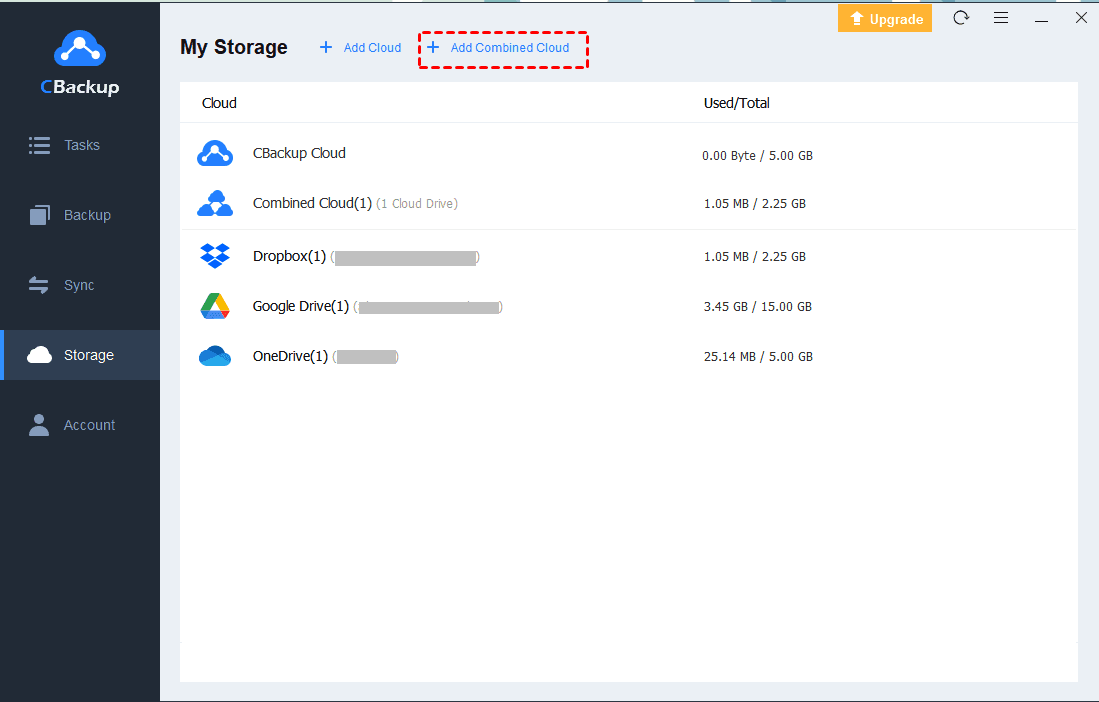
3. Next, press the Storage tab, and select the + Add Combined Cloud to merge different cloud drive accounts into one combined cloud.
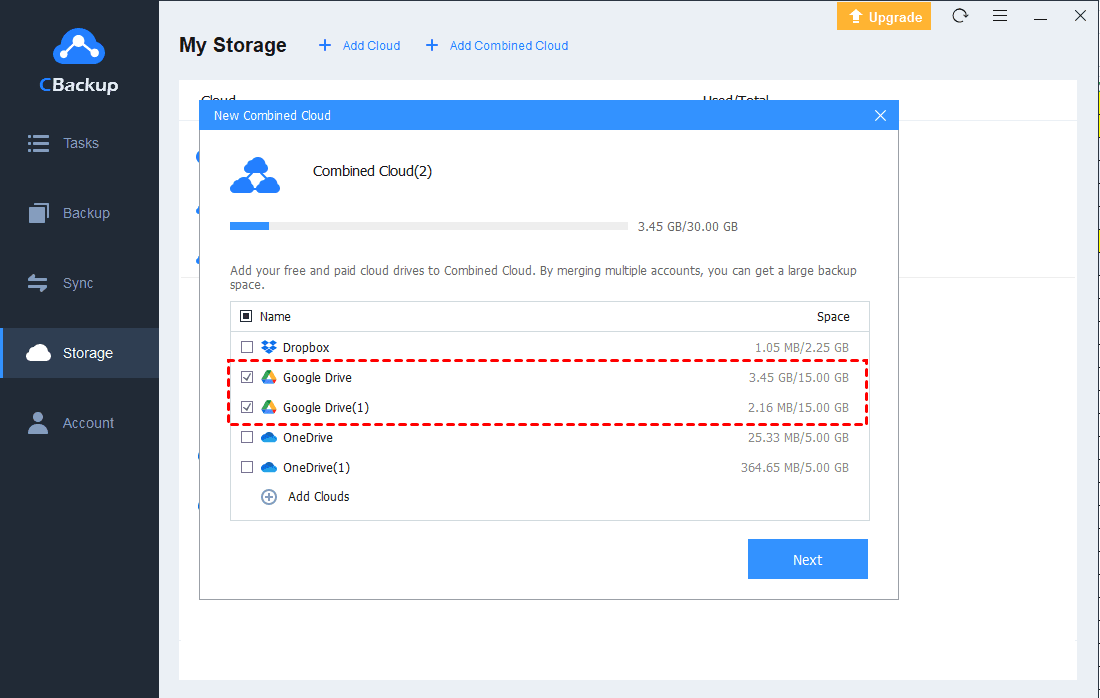
4. After checking all the cloud storage accounts that you want to merge, click on Next > Combine.
5. Finally, a Combined Cloud will appear in your clouds list. You can select the Combined Cloud as the backup destination to enjoy the unlimited cloud backup space.
Wrapping Things up
That’s all about NAS backup solutions. If you are searching for a way to protect your NAS data, we hope you have found the method that suits you best. And if your cloud storage is not enough, maybe you could try CBackup for free. CBackup allows you to add different cloud drives to it and helps you merge them into a combined cloud to get larger cloud storage.

Secure & Free
