
Best Windows 10 Incremental Backup Software & How-to Guide
This post covers the best free Windows 10 incremental backup software and how-to guide in detail. If you need to perform an incremental backup of your data, please read on to know more.
by CBACKUP Lasted Updated September 30, 2024
How do I make incremental backups on Windows 10?
How do I make incremental backups on Windows 10? If possible, I would prefer to make backups, and I just want to backup my files. I have been searching for how to do this for some time and I feel a little overwhelmed and lost. I normally work with Linux, but I am now using Windows for work and am completely lost.
If you need to create Windows 10 incremental backups, this post should give you a useful introduction. Here you can learn about the advantages and disadvantages of incremental backups, as well as the best free incremental backup software.
What is the difference between full backup and incremental backup?
Before you get to performing backup incremental in Windows 10, you can know something about differences between full backup and incremental backup.
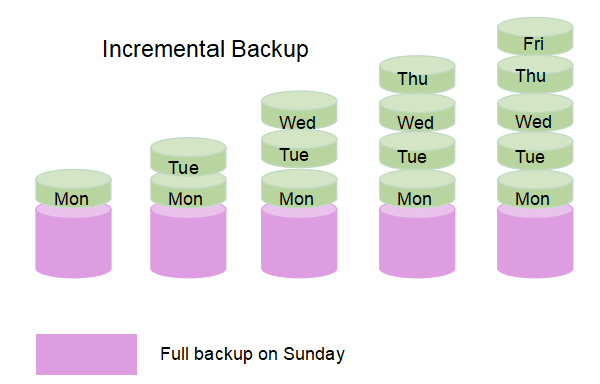
Full backup means creating backups of all your data, not just the changed part. While incremental backup is a backup method that just backs up data that is changed since the last backup.
|
|
Incremental backup |
Full backup |
|
Backup speed |
Fast |
Slow |
|
Recovery speed |
Slow |
Fast |
|
Used Storage space |
Less |
More |
|
Pros |
1. Fast backup speed 2. Little storage space requirement. 3. Manage data easily |
1. Fast recovery. 2. Able to restore all version of files. |
|
Cons |
Slow recovery |
1. Large storage space requirement 2. Too many duplicate data |
How to create Windows 10 incremental backup
After learning some basic information about incremental backup, you can read the following content to create a daily incremental backup of your data.
Way 1. Use the best free incremental backup software - CBackup
Among all backup services on the market, we prepare the best incremental backup software for Windows 10 - CBackup. In addition to Windows 10, it can work on Windows 11/8/7 perfectly as well.
Nowadays, cloud backup is the most popular backup. If you want to create an incremental cloud backup, many mainstream cloud drives cannot help you like Google Drive and OneDrive. They just provide the incremental sync feature instead of the incremental backup feature. But CBackup can help you to perform an incremental backup to public cloud drives directly including Google Drive, OneDrive, Dropbox, etc.
In addition, CBackup has many other useful backup features:
● Free cloud storage: CBackup gives each account 5GB of free cloud storage in its cloud to be a backup destination. You can back up data to it as well.
● Combine cloud storage: If your cloud storage space is not enough, you can try this feature to merge unlimited cloud storage accounts to one combined cloud with more cloud storage for free.
● Cloud to cloud sync: To transfer files between different cloud drive accounts, you use the cloud to cloud sync feature in CBackup for free. You are able to add different accounts of Google Drive, Dropbox, OneDrive, and FTP/SFTP to CBackup.
Now, you can click the Download CBackup button to download and install the desktop client on your Windows 10 PC. And here is a guideline to perform incremental backups in Windows 10 via CBackup.
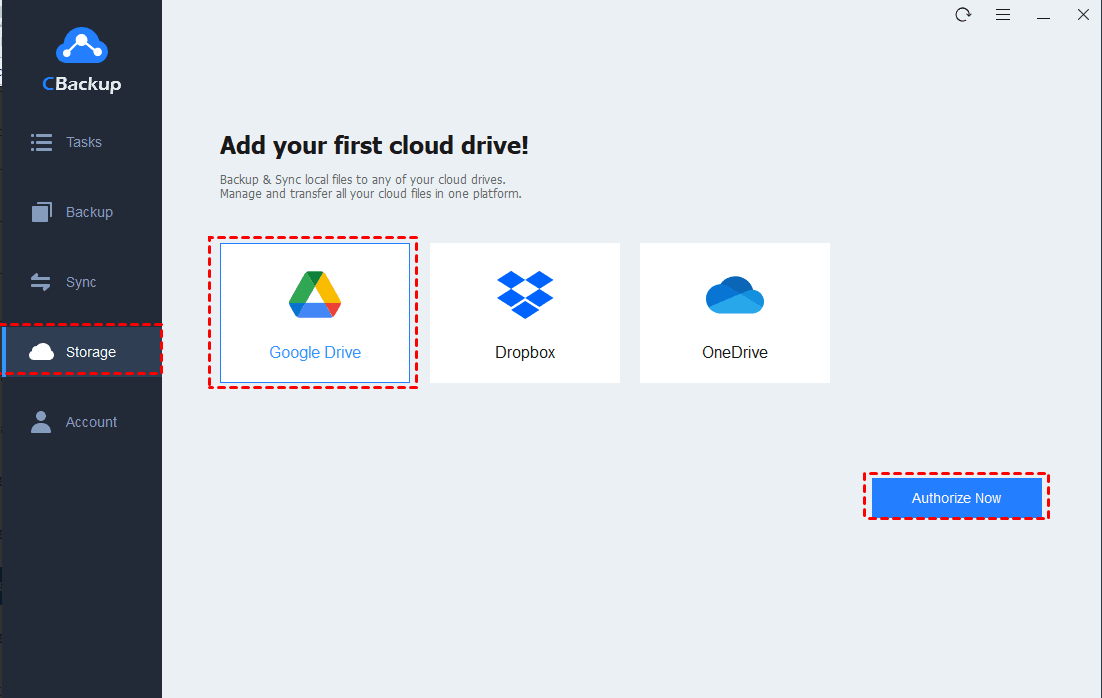
♦ Add cloud drive to CBackup
1. Sign up for a new CBackup account, then launch the CBackup desktop client to log into it.
2. Click on the Storage tab. If you want to create an incremental file backup in Windows to Google Drive, select Google Drive > Authorize Now.
♦ Create a Windows 10 incremental backup
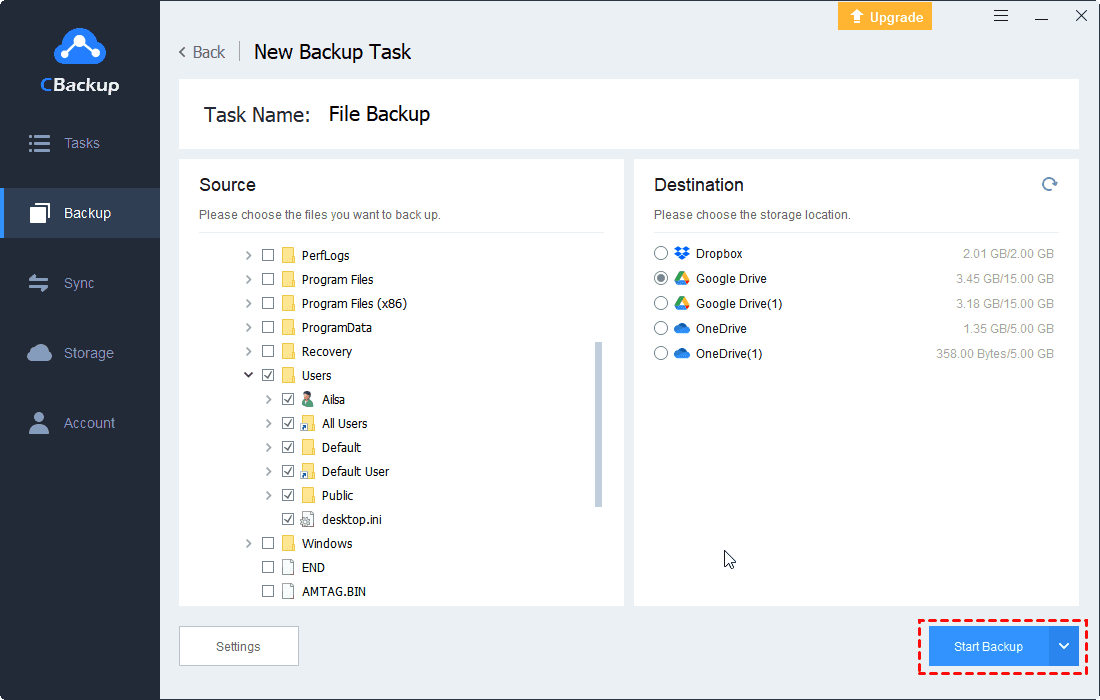
1. Click on the Backup button to choose Backup PC to Public Cloud.
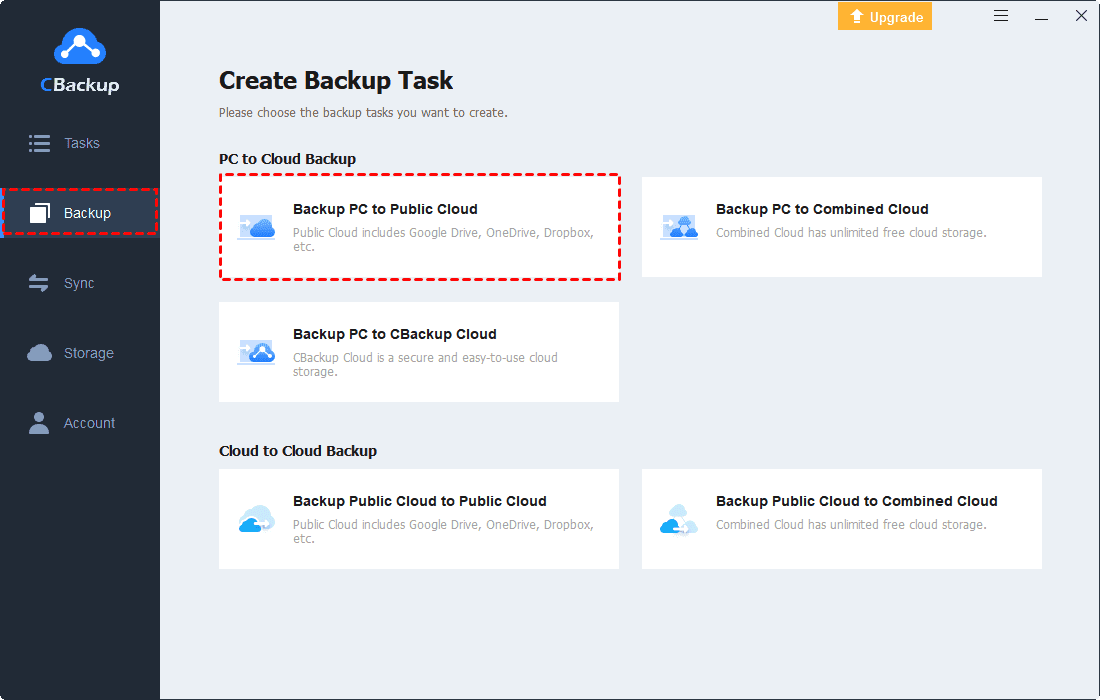
2. You can change Task Name for your Windows 10 incremental backups, then add Windows 10 files and folders, then click OK. Select the Google Drive account you just added to CBackup as the backup destination. Finally, click the Start Backup button to begin the incremental file backup in Windows 10 with CBackup.

Way 2. Use the built-in incremental backup tool
If you want to perform Windows 10 incremental backup to external drives, local drives, or network drives, the built-in Windows Backup and Restore tool may be suitable for you. You can follow the steps below to use the built-in incremental backup software in Windows 10.
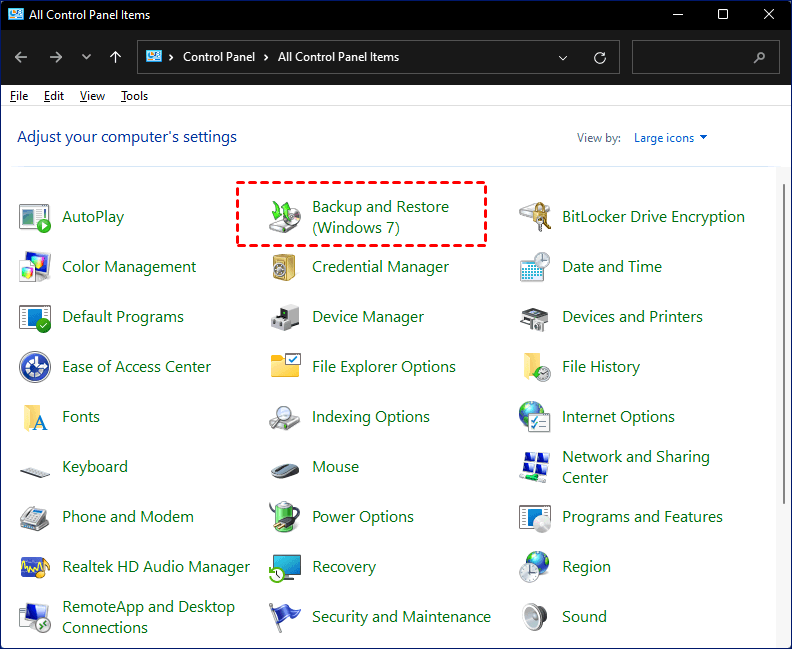
1. In the Windows Start menu, choose Control Panel, and select Backup and Restore (Windows 7).
2. Click on the Set up backup link. Then choose the back destination for your incremental backup task.
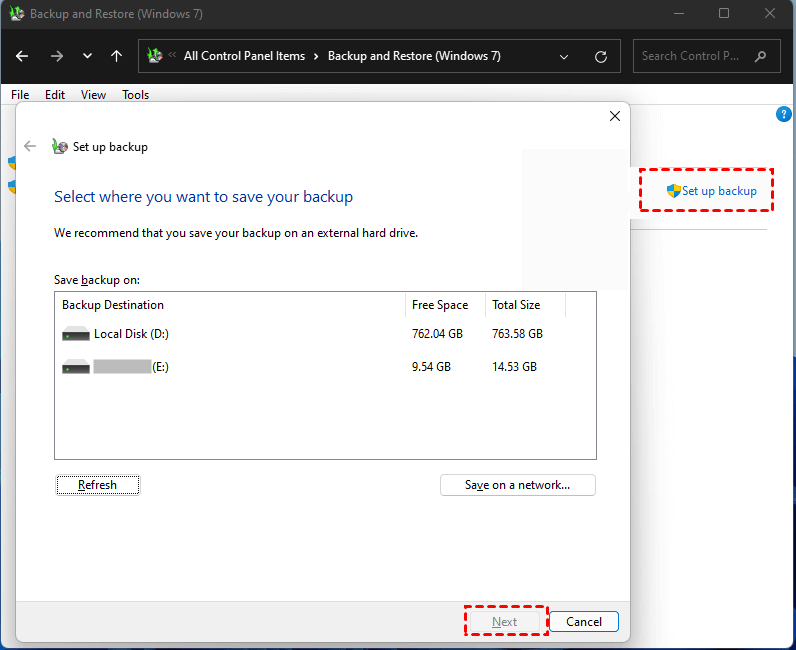
3. There are two backup methods you can choose: Let Windows choose or Let me choose. Then choose Next.

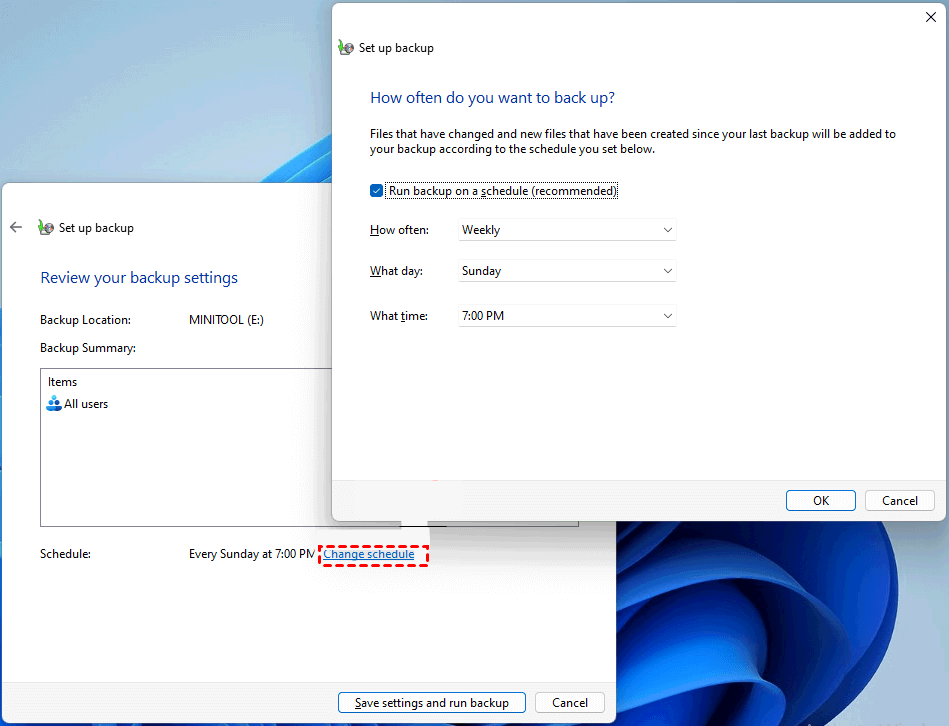
4. You can click Change schedule to set a schedule for the incremental backup. After configuring, choose Save settings and run backup to begin the incremental backup task.
Final thoughts
If you are looking for information about Windows 10 incremental backup, this article may help you in some aspects. Reading here, you can create an incremental backup in Windows 10 with a cloud backup service or a local backup tool. We highly recommend the best free incremental backup software CBackup and you can use it to back up to your own cloud drive account directly.

Secure & Free
