
Beginners Guide to Synology C2 Cloud Backup
Synology C2 cloud backup is an unlimited backup service worth starting. Continue to see below and learn more about it (step-by-step guide included).
by CBACKUP Lasted Updated June 10, 2025
What is Synology C2 Cloud Backup?
Synology C2 cloud backup is a backup service on Synology Cloud2 for both enterprise and home users. It provides users with flexible backup with a schedule, multiple file history, easy recovery, one-stop service, military-grade encryption level (with AES-256 and RSA-2048 technologies), etc. In addition, it supports multiple public clouds and online backup services, including Amazon S3, Google Drive, OneDrive, Dropbox, Backblaze, iCloud, and so on.
Synology C2 Cloud Backup Pricing
For home users: €9.99/year for 100GB; €24.99/year for 300GB; €59.99/year for 1TB or €5.99/month for 1 TB. For enterprise users: start at €69.99/TB/year or €6.99/TB/month and up to 99TB; For more storage, you need to contact Synology.
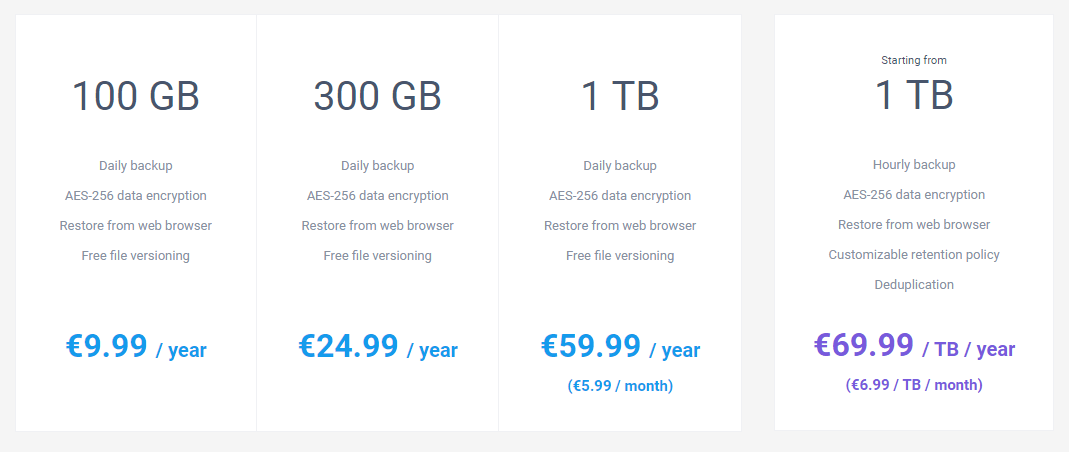
Synology C2 cloud backup pricing is cheap if you compare the cost of cloud storage, for instance, Amazon Glacier charge $4/TB/year, Amazon drive $59.99/year for 1TB, iCloud $120/year for 2TB, Google Drive $120/year for 2TB, and Microsoft (Office 365 Personal license included) $69.99/year for 1TB.
Step-by-step Guide: Synology C2 Cloud Backup
In this part, you will use the “Hyper Backup” feature in the following way. It provides an integrated backup and restore solution for users to protect their precious data, system configuration, and applications. And you are allowed to backup data to a local shared folder, external storage attached to your Synology, remote Synology NAS, file servers, and cloud storage.
Next, you will back up data to Synology cloud storage. Please make preparations first and then follow the detailed steps below.
Make sure your Synology NAS is running DSM 6.0 or above, log in and go to “package center”, then click “Backup” and “Hyper Backup”, click “Install” now and tap on “Open” later.
Step 1. Launch “Hyper Backup”, click “+” at the lower left corner, and then select “Data backup task”.
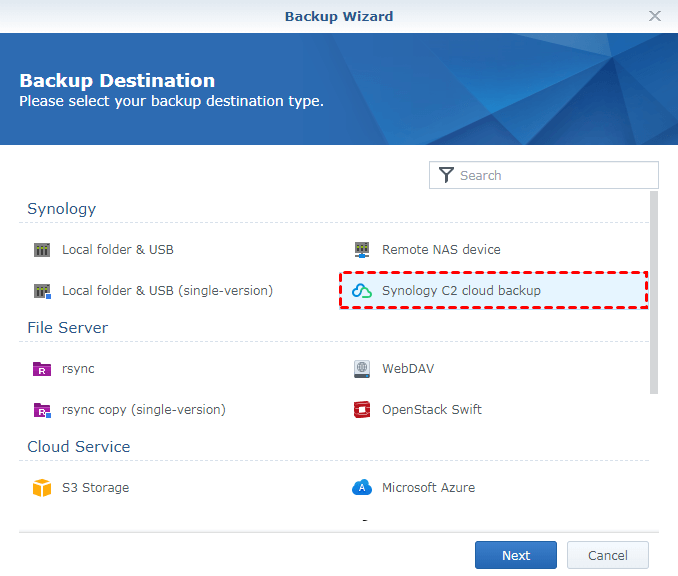
Step 2. In the “Backup Destination Window”, select “Synology C2 Cloud Backup" and click “Next”. Also, you can back up Synology to a public cloud by selecting third-party services, such as Amazon Glacier.
Step 3. Confirm the term and click “Yes” to move on.
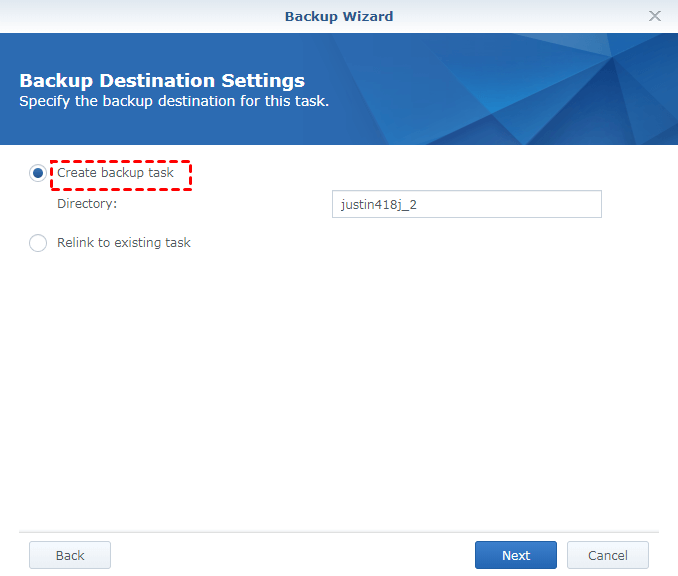
Step 4. Tick “Create backup task” and click “Next”. If needed, you can choose to change the directory.
Step 5. Select the data you want to back up and click “Next”.
Step 6. Select the applications to back up and click “Next”.
Step 7. Set backup settings for this task and click “Next”. For example, enable task notification, backup schedule, integrity check, etc.
Step 8. Enable rotation settings, such as “From the earliest versions”, and click “Apply”. Then, click “Yes” when you are asked “Back up now?”.
One More Thing: Backup Synology to Public Cloud
In the following, you will use “Cloud Sync”, another useful tool for Synology, to backup data on Synology to public cloud storage, such as OneDrive. This operation adds a new lock for your data and makes it more secure. If this is what you want, please keep reading below: make preparations first, and then sync your data.
Make sure your DiskStation is running DSM 6.0, then go to your “package center”, select “Backup” and “Cloud Sync”, click “Install”. After successful installation, click “Open” under Cloud Sync.
Step 1. In the “Cloud Providers” interface, select a cloud drive (here is Google Drive), then sign in with your account and grant access to Synology.

Step 2. In the “Task setting” window, select the local path, the remote path, and the sync direction. For sync direction options, you have 3 options, including “Bidirectional”, “Download remote changes only”, and “Upload local changes only”.
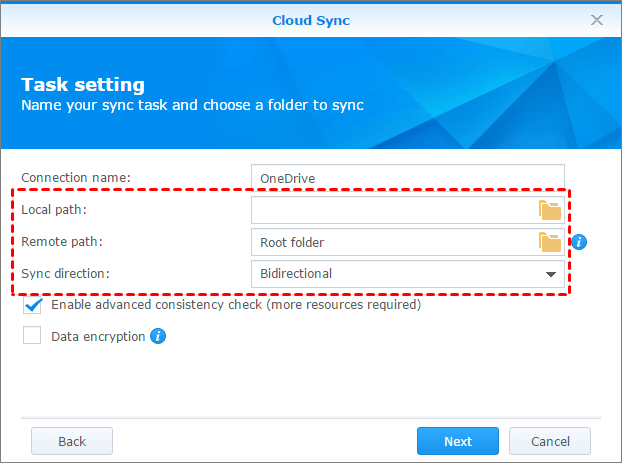
Step 3. Tick “Data encryption” or click “Schedule settings” to set up the settings.
Step 4. Click “Next” and “Apply” to start the synchronization.
Bonus Tip: Increase Public Cloud Storage Space for Free
If you have multiple personal cloud storage accounts, such as Google Drive, OneDrive, and Dropbox, you can consider using a third-party cloud backup service like CBackup to combine all the free cloud idle space. To take advantage of free or idle space in your clouds, you just need to connect your cloud drives to CBackup, and then it takes care of the rest. Detailed instructions are below.
1. Create an account for CBackup and sign in to the CBackup desktop app.
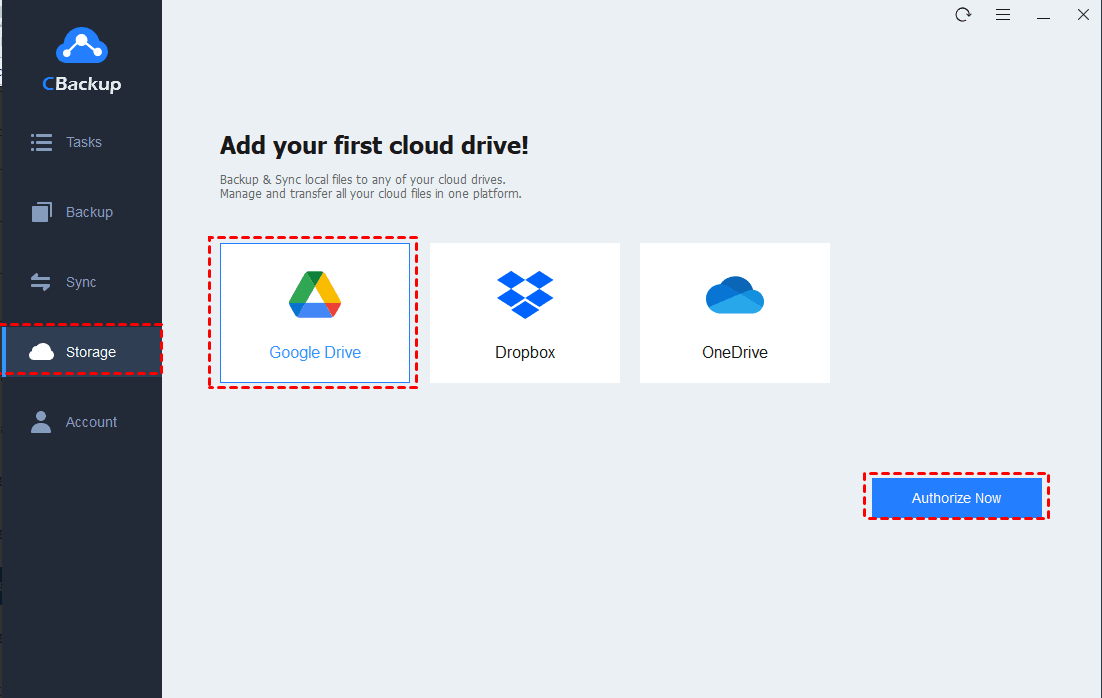
2. Add your clouds, even different accounts. Click the “Storage” tab, select your clouds (here is Google Drive), and click “Authorize Now”. Then authorize CBackup and allow it to see, edit, create, and delete all of your Google Drive files.
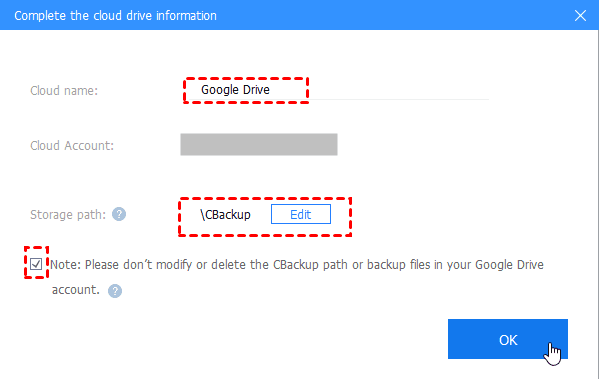
3. In the next window, modify the Cloud Name and Storage Path for Google Drive. Then, click the checkbox before “Note: Please don't modify or delete the CBackup path or backup files in your Google Drive account,” and click “OK”.
Now, you have completed the entire process of adding Google Drive. To add more clouds, even different clouds, like Dropbox, OneDrive, etc, you just need to repeat the above steps. In addition, you’d better change the default name to a unique one to distinguish.
After adding multiple cloud drives, you could do the following steps to fully use the cloud storage of your public clouds:
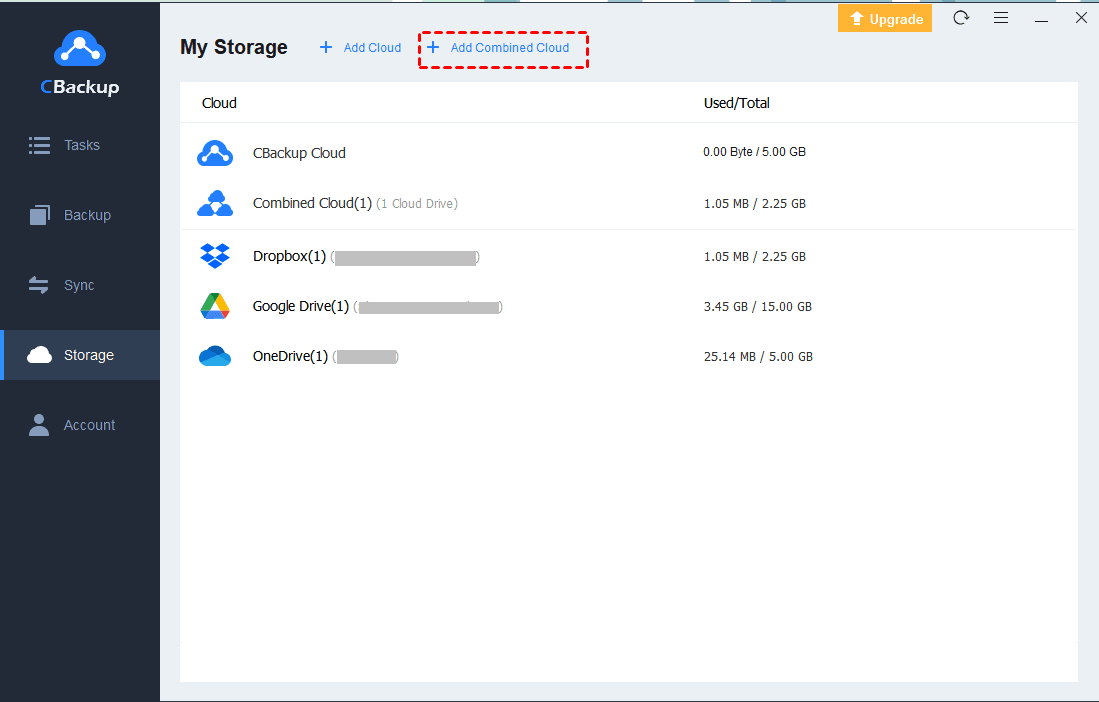
1. Tap the Storage tab, then press + Add Combined Cloud.
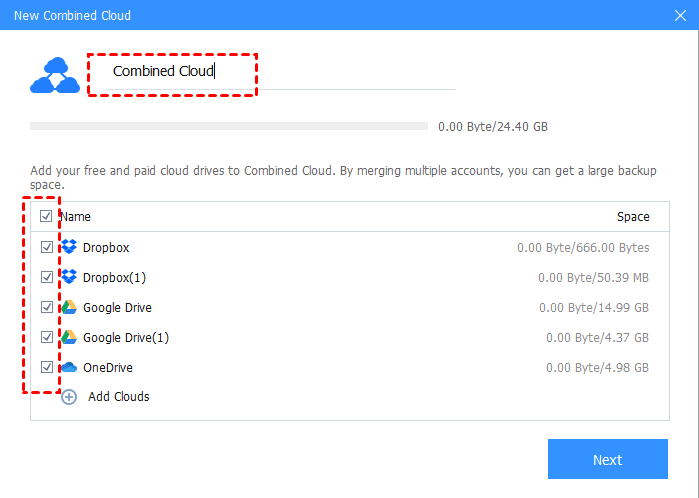
2. Edit the name for Combined Cloud if needed, tick all the cloud drives you added above, and click Next.
3. Determine the cloud drive order to store backup files using the up and down triangle icon, and click Combine.
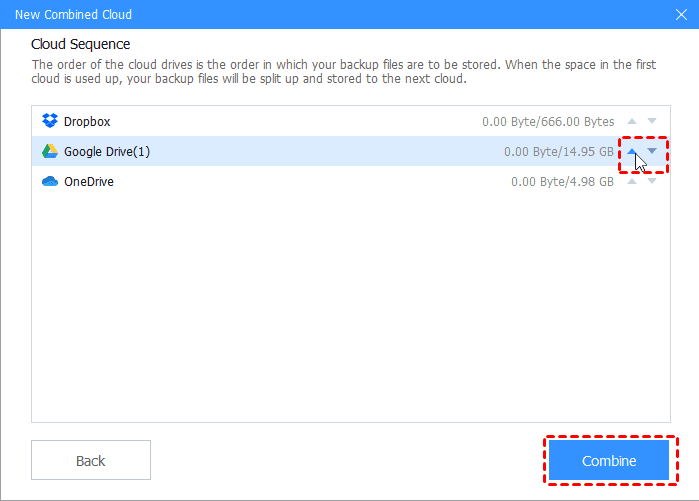
Now, your public cloud drives have been increased successfully. It's especially useful when you perform Synology C2 cloud backup to the public cloud, and there is not enough cloud storage space on the public cloud.
Note: If you want to move a file in Google Drive to another account, please try the web version of CBackup, then just go to the Backup Tasks tab and follow the steps in the given link. The steps are suitable for all cloud drives regardless of different clouds and different accounts of the same cloud.
Also, Cbackup supports the following useful features:
-
Backing up files to the cloud freely, therefore, you could backup files to Google Drive, Dropbox, OneDrive, and the cloud. And you could set up scheduled backups, like daily, weekly, monthly, enable email notification to get an email alert after the backup finishes, exclude or include the file types as you like, etc.
-
Transferring files between cloud storage. So you could transfer OneDrive to Google Drive directly, move Google Drive to Dropbox, etc.
-
Offering free 5GB cloud storage space of cloud, and even 10TB cloud storage.
Wrapping Things up
Synology cloud backup has different useful tools that make your data more secure. For example, Synology C2 cloud backup helps you backup & restore your data, applications, and system configuration.
It’s worth noting that making a copy of your important files is very important, because any unexpected disaster can damage your data. What’s more, your data may disappear forever. If you still don’t have a backup, please act now and start cloud backup to Synology or other clouds.

Secure & Free
