
Fixed: OneDrive Sorry There Was a Problem Displaying This Folder
If you are experiencing OneDrive "Sorry, there was a problem displaying this folder" error, the 5 solutions outlined in this article can help you resolve the issue effectively.
by PublicOwin Lasted Updated June 3, 2025
Why can't I view my OneDrive folder?
I cannot view my OneDrive folder on my laptop. When I type OneDrive from the start menu, and then log in, I get an error message: Sorry, there is a problem displaying this folder. Any solutions to view my OneDrive folder?
- User case from Microsoft Community
OneDrive, provided by Microsoft, is a cloud storage service that allows users to securely store and access files and documents from any device connected to the internet. Despite its usefulness, users may suffer from some OneDrive errors, like OneDrive not syncing errors, login errors, etc. A common problem faced by users manifests as the "Sorry, there was a problem displaying this folder" error when attempting to access OneDrive in File Explorer.

There could be various reasons why users experience "Sorry, there was a problem displaying this folder" in OneDrive. Most commonly, the issue stems from the application encountering a glitch. Don't worry, the solutions provided in this article will help you.
Fix OneDrive sorry there was a problem displaying this folder error in 5 ways
To solve "OneDrive sorry there was a problem displaying this folder" in Windows, you can learn several solutions we have described in detail to fix the annoying error. So keep reading!
Way 1. Relink OneDrive account
To make OneDrive sorry there was a problem displaying this folder fixed easily, you consider unlinking OneDrive from your computer and then relinking again. This process won't delete your OneDrive files. It only temporarily halts the synchronization to and from the cloud. Follow the steps below to unlink and relink OneDrive:
1. Click the OneDrive cloud icon in your taskbar.
2. Select the gear-shaped icon positioned in the top right corner and choose Settings.
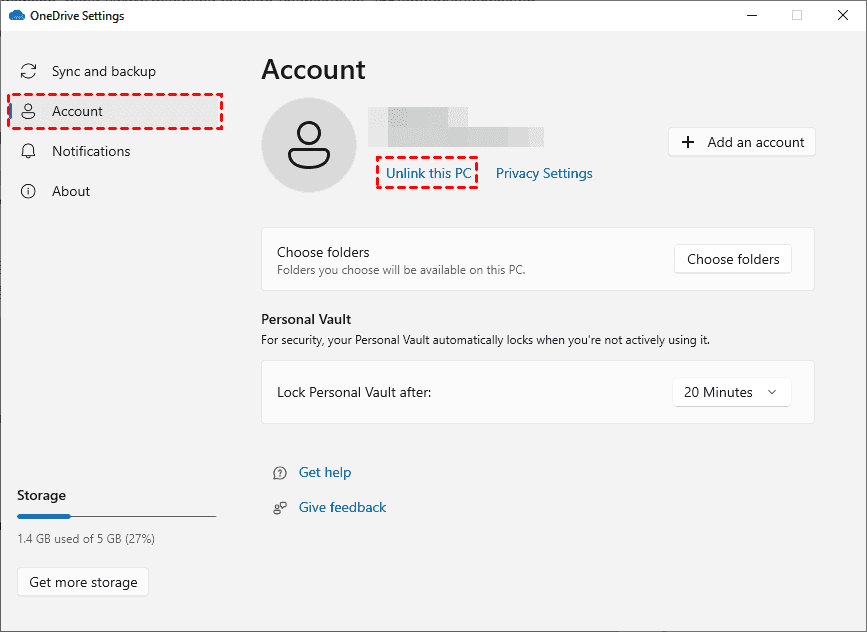
3. Navigate to the Account tab and then click on Unlink this PC.
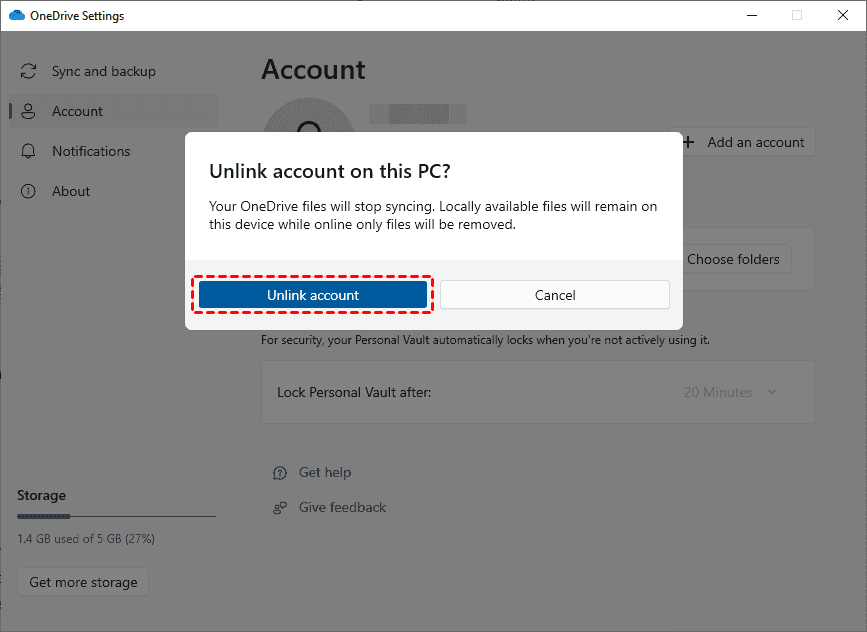
4. A confirmation prompt will appear. Proceed by clicking Unlink account.
Once OneDrive has been successfully unlinked from your PC, perform a system restart. Next, search OneDrive on your taskbar to access the OneDrive setup. Enter your Microsoft account details and reconfigure OneDrive on your system to check if your problem is fixed.
Way 2. Change the folder location of OneDrive
If the OneDrive issue "Sorry, there was a problem displaying this folder" persists, modifying the location of the OneDrive folder might offer a solution. Before changing the location, you should unlink your OneDrive account first as we discussed in the previous chapter.
OneDrive will take up space on C drive by default when you sign in OneDrive on your PC. This is because the default path for the OneDrive folder is C:\Users\username\OneDrive. And this folder stores all the files that you have saved within the OneDrive cloud. To change the OneDrive folder location, you can follow the guide below:
1. Restart OneDrive. Press Windows + R to open Run and input OneDrive.
2. Sign in OneDrive. Follow the prompts to log in and then the screen will show you "Your OneDrive folder" window.
3. Change location. In "Your OneDrive folder" window, you need to access the option labeled Change location and designate a folder located elsewhere. Once you've chosen the desired folder, proceed with the setup of OneDrive.
.png)
Way 3. Reset OneDrive
In the event that the previously mentioned solution fails to resolve the OneDrive unable to display folder issue, you can consider resetting OneDrive. If OneDrive is encountering errors or fails to launch properly, resetting it often serves as an effective solution. To initiate the reset process, follow these steps:
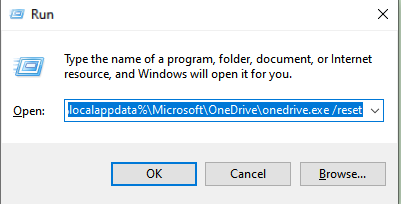
1. Press Windows + R to open Run dialog box.
2. Copy and paste the following command into the Run command box and press Enter:
%localappdata%\Microsoft\OneDrive\onedrive.exe /reset
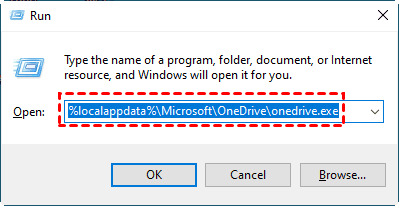
The process may take some time to complete. Once the reset is finished, OneDrive will automatically launch. If OneDrive does not automatically launch, you can launch it by inputting the following command in the Run dialog box, and hitting Enter:
%localappdata%\Microsoft\OneDrive\onedrive.exe
Way 4. Reinstall OneDrive app
If the solutions provided earlier fail to fix OneDrive "Sorry, there was a problem displaying this folder", you could also try uninstalling and reinstalling OneDrive to resolve it.
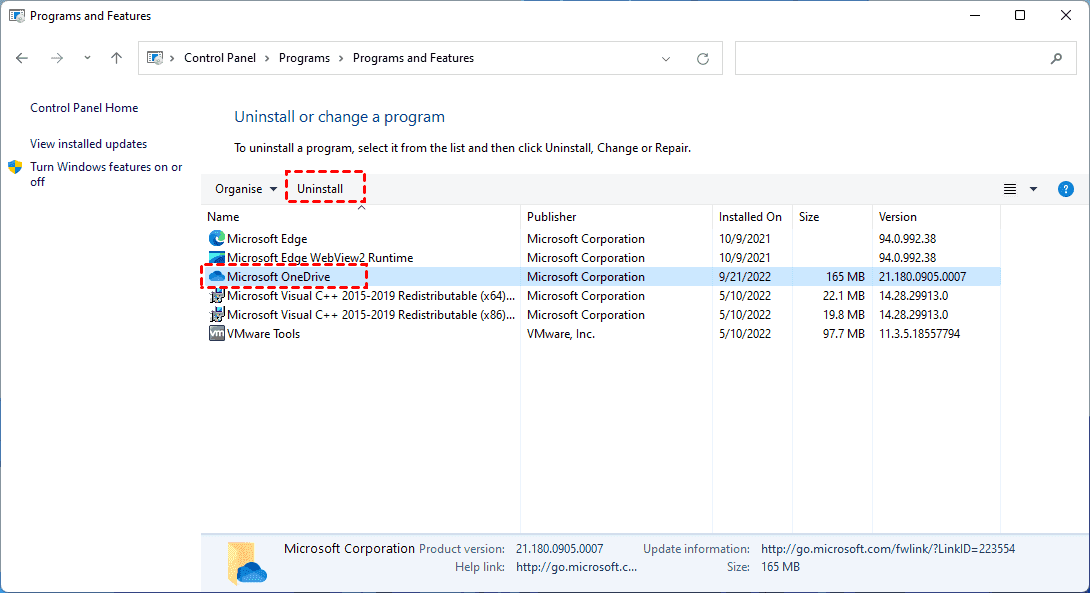
1. Press Windows + R to open Run > input appwiz.cpl and then hit OK.
2. Scroll down to find OneDrive in the list of installed applications.
3. Click on OneDrive and choose Uninstall.
After removing OneDrive, proceed to restart your computer. Subsequently, visit the Microsoft website to download the most recent version of OneDrive. Install the downloaded application on your system to complete the process.
Way 5. Perform a clean boot on your PC
If none of the previous troubleshooting ways have proven effective, attempting a clean boot on your PC might be the solution. Follow these steps to perform a clean boot:
1. Access the System Configuration by typing msconfig in the Windows search bar.
2. Switch to the Services tab.
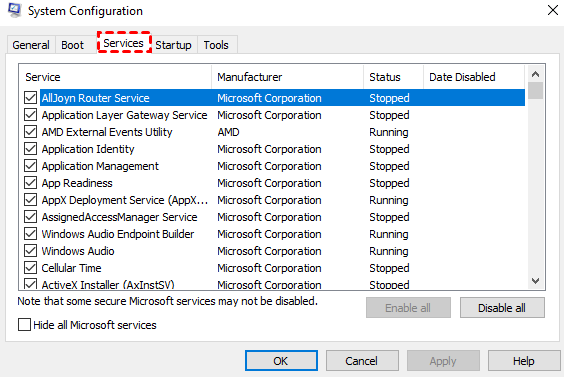
3. Check all services except those associated with Microsoft Corporation. Then, click OK and Apply to save your changes.
4. Restart your computer.
Further reading: How to upload files to OneDrive error-free
Although you can upload files via the OneDrive folder, you may encounter some issues like "Sorry, there was a problem displaying this folder", or "we couldn't find your OneDrive folder", etc., and you need to operate manually and repeatedly for file upload, which is not convenient for you to upload files.
To simplify the process of file synchronization with OneDrive and make sure error-free, utilizing the free cloud backup service CBackup can be immensely helpful. This tool helps you easily upload files to OneDrive just via your OneDrive account. You can find more advantages using this tool.
- It allows you to upload large files to OneDrive without file size limitations, which is especially useful when you upload a large volume of files.
- This tool allows you to add folders to OneDrive from any location, like external hard drives.
- You can make those folders automatically sync to OneDrive via the Scheduler function of this tool. Apart from OneDrive, it also supports syncing folders or files to Google Drive, Dropbox, and more cloud drives.
- It offers 10 GB of free cloud storage for its cloud. Also, you can get 1 TB of free OneDrive storage space by combining OneDrive accounts as many as you can.
Now, download and try the zero-error tool - CBackup on your PC to upload files to OneDrive.
Note: CBackup runs one-way sync from your PC to OneDrive, which can help you save your local space as well as prevent unexpected data loss.
1. Begin by signing up for a free CBackup account and then sign in.
2. In the Storage tab, select OneDrive, and then click on Authorize Now. Follow the instructions to grant CBackup necessary access to your OneDrive files.

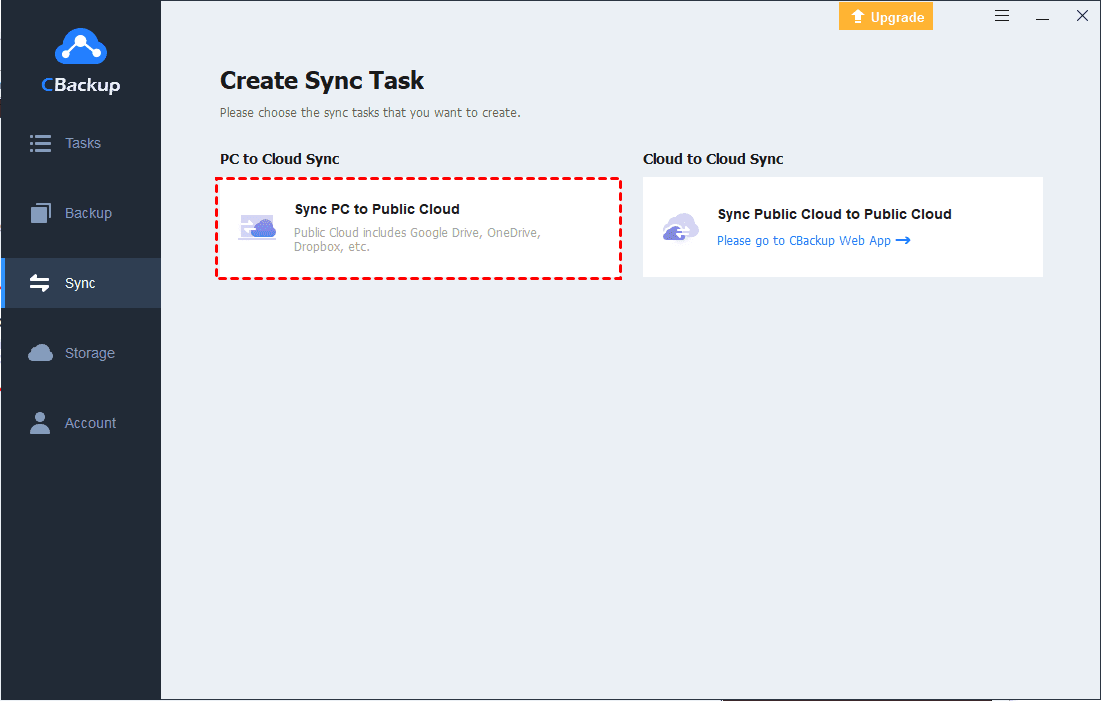
3. Navigate to the Sync section and select Sync PC to Public Cloud.
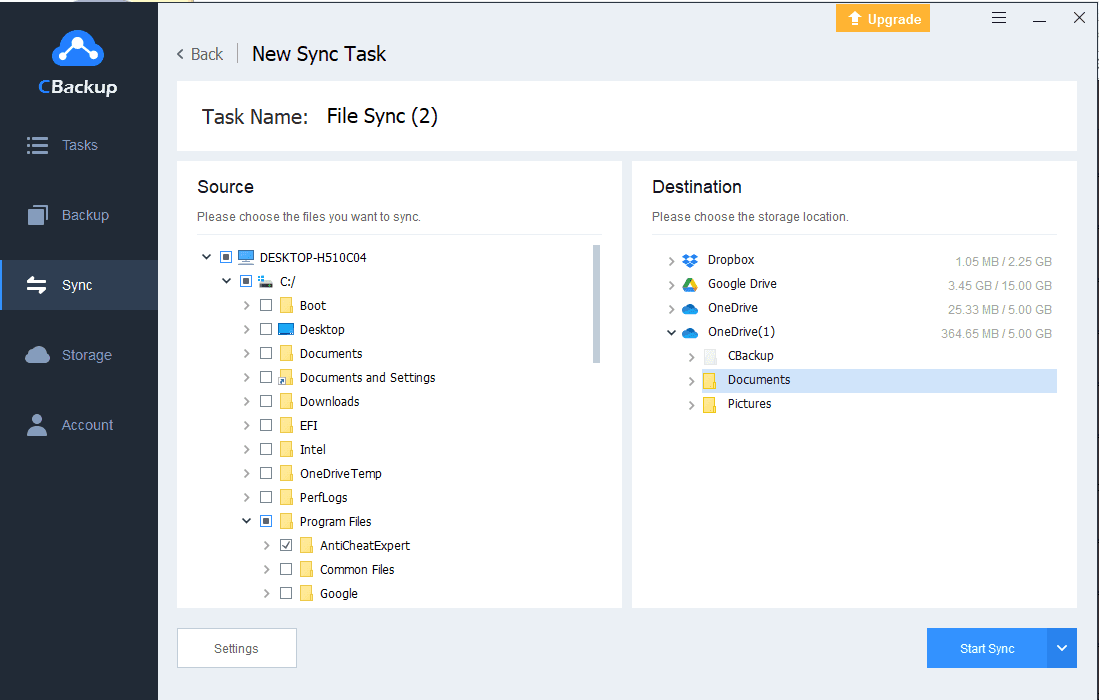
4. Choose the specific local files that you wish to synchronize to OneDrive. Select a folder within your OneDrive as the designated destination. Finally, initiate the process by clicking Start Sync to move files to OneDrive.
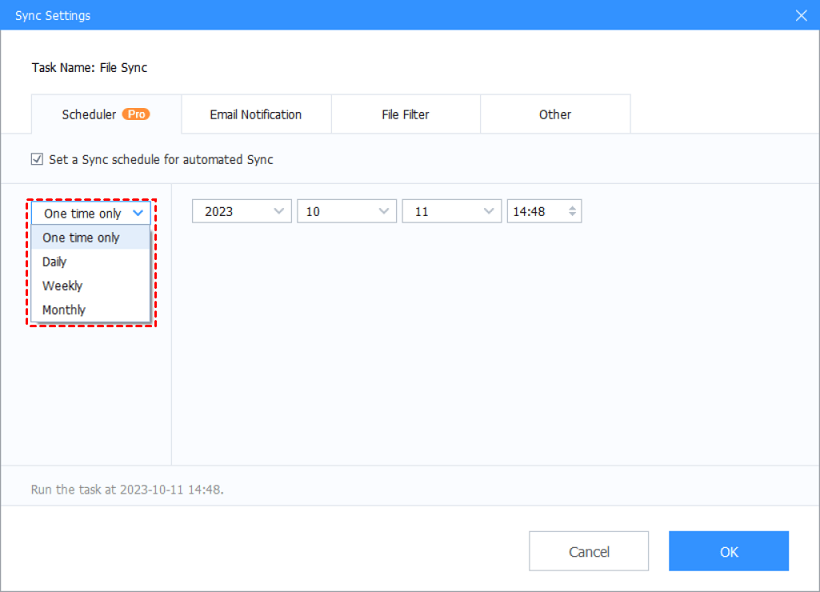
☞Tip: You can set up OneDrive schedule sync by hitting Scheduler under the Settings tab, ticking Set a sync schedule for automated sync, and finally setting the time you prefer.
Conclusion
If your OneDrive shows "Sorry, there was a problem displaying this folder" when accessing from File Explorer, you can try the solutions above. Besides, if you want to upload files to OneDrive error-free, you can try CBackup.
Also, as a free backup tool, you can choose it for Windows file backup to cloud or public clouds like Google Drive and OneDrive, especially when you have insufficient disk space or for data security.

Secure & Free
