
How to Set Up OneDrive Schedule Backup in Windows
This article will teach you how to set up OneDrive schedule backup with the OneDrive built-in setting or third-party automatic backup software. Please read on to learn more information.
by Jonna Lasted Updated April 10, 2024
OneDrive cloud storage in Windows
Windows users may be familiar with OneDrive because it is the online cloud storage service offered by Microsoft. In Windows 10, OneDrive integrates with your Windows 10 system as a default location for saving files, photos, and other documents. Meanwhile, it gives each Microsoft account user 5 gigabytes of free storage space and multiple upgrades options.
To help users backup files to OneDrive on Windows PC easily, OneDrive offers both web apps and desktop app for free. If you want to upload a few files or folders to OneDrive, you can use the web app directly. With it, you can quickly backup files to OneDrive without any downloading. However, if you need to sync files to OneDrive automatically, the desktop app is the best choice.
Why set up OneDrive schedule backup?
Although backing up files to OneDrive is not hard work with the above tools, each of the tools has some disadvantages. For example, you need to spend much time choosing and uploading files manually with the web app. As for the desktop app, syncing files in two-way will consume backup space quickly.
Therefore, some users may want to set up OneDrive schedule backup. In this way, they can not only protect your data continuously but also save much time and effort. However, many OneDrive users don’t know how to schedule OneDrive backups. If you are looking for ways to set up OneDrive schedule backup, please keep reading.
How to schedule automatic backup in OneDrive
Actually, there are two ways that can help you schedule an automatic backup in OneDrive with ease. If you want to take advantage of the Windows built-in tool, you can follow the first way. If you want to save time and effort, you can turn to the second way directly.
Method 1. Schedule OneDrive backup via Windows feature
As we all know, there is a backup and restore built-in tool in Windows that allows you to make backups of your file or system. With this tool, you can backup files to the local hard drive, external hard drive as well as a network path. Since OneDrive will create a folder on your computer after installing the desktop app, you can choose the OneDrive folder as the backup destination.
Here, we will show you the steps to Schedule OneDrive backup with Backup and Restore, but before the operation, please do the preparations as below:
-
Download and install the OneDrive app on your computer first. Figure out the location of your OneDrive folder (By default, the OneDrive folder is located on C:/user/your username).
-
Create a new folder in this OneDrive folder. Then right-click the new folder and select Properties. Under the Share tab, click Share… and complete the sharing process. Locate the shared folder’s network address. It is like //your IP address/the folder name.
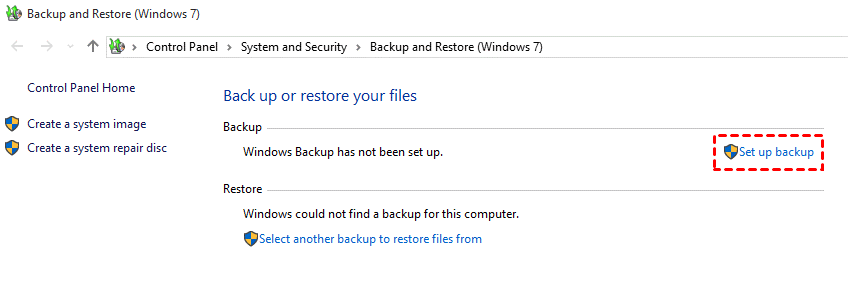
Step 1. Type “Backup and Restore” in your Windows search bar and open it.
Step 2. Click the Set up backup option which can be found on the window’s right side
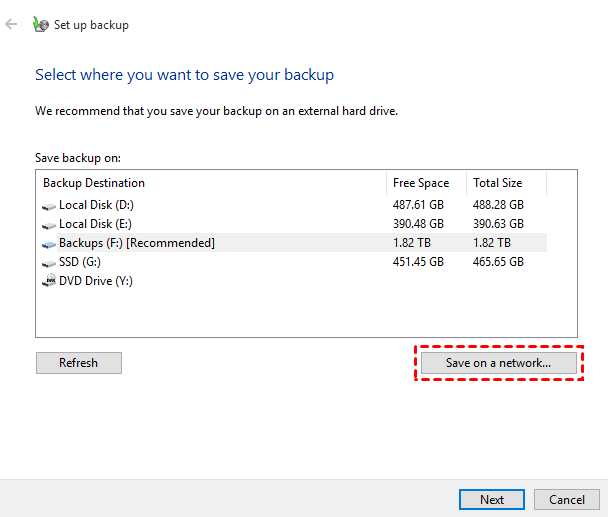
Step 3. You should choose a backup destination for your files. Here, click Save on a network.
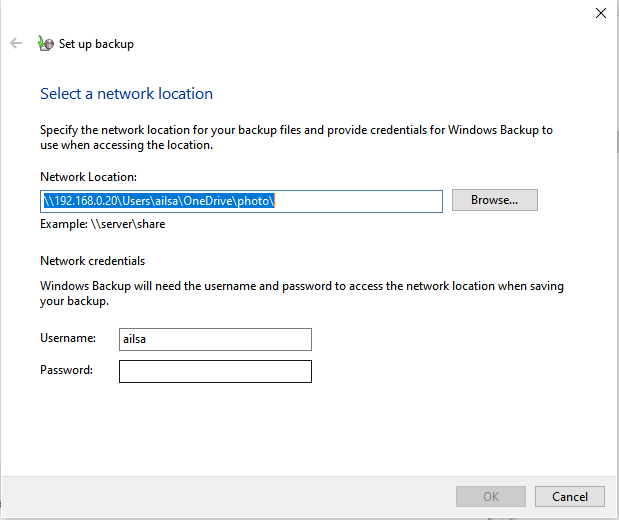
Step 4. Type the location of your OneDrive shared folder like //your IP address/the folder name. Then, type the Username and Password of your computer and click OK.
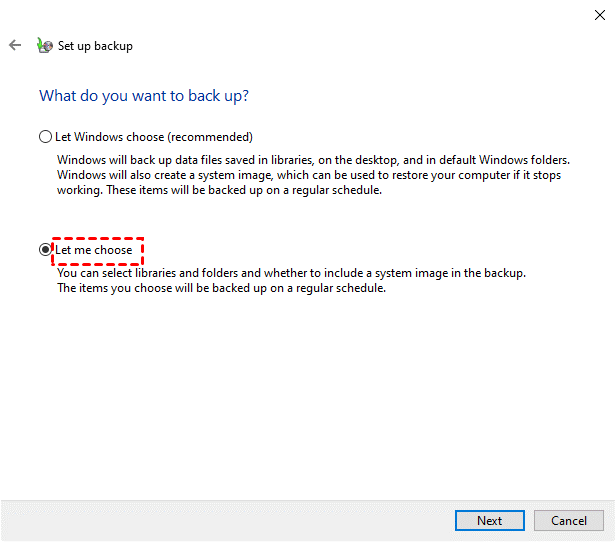
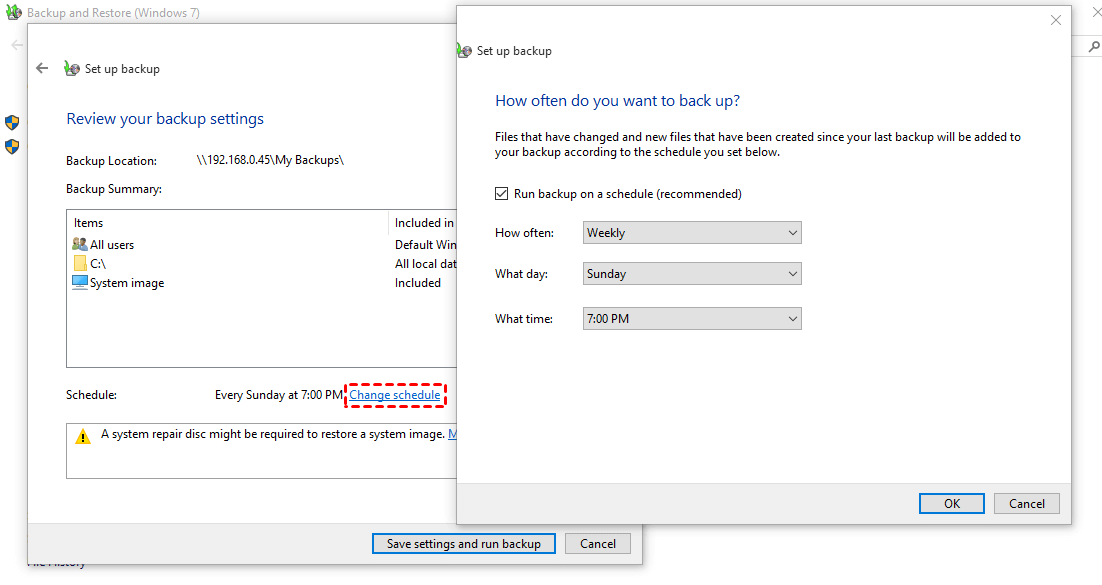
Step 5. Then, you will be asked to select the files that you want to backup. After selecting, click on Next and you will be asked to review your backup settings.
Step 6. On the review windows, click Change schedule. You can choose how often (daily/weekly/monthly) you want to execute the backup task. Uncheck the option Run backup on a schedule. Click OK after making your respective choices to start the backup process.
Method 2. Schedule OneDrive backup via a third-party tool
As we can see, schedule OneDrive automatic backup via the Windows built-in tool would be a cumbersome and tedious job. Therefore, if you don’t want to waste much time on file backup regularly, you can rely on a third-party tool like CBackup.
CBackup is a professional cloud backup service for Windows PCs. It allows you to backup PC files to public cloud storage like OneDrive, Dropbox, Google Drive. Besides that, it can help you easily set up scheduled backup tasks in specif time, daily, weekly, monthly mode. After setting, your data will be backed up at a regular interval or simply for a special timing.
Step 1. Download CBackup and install it to run.
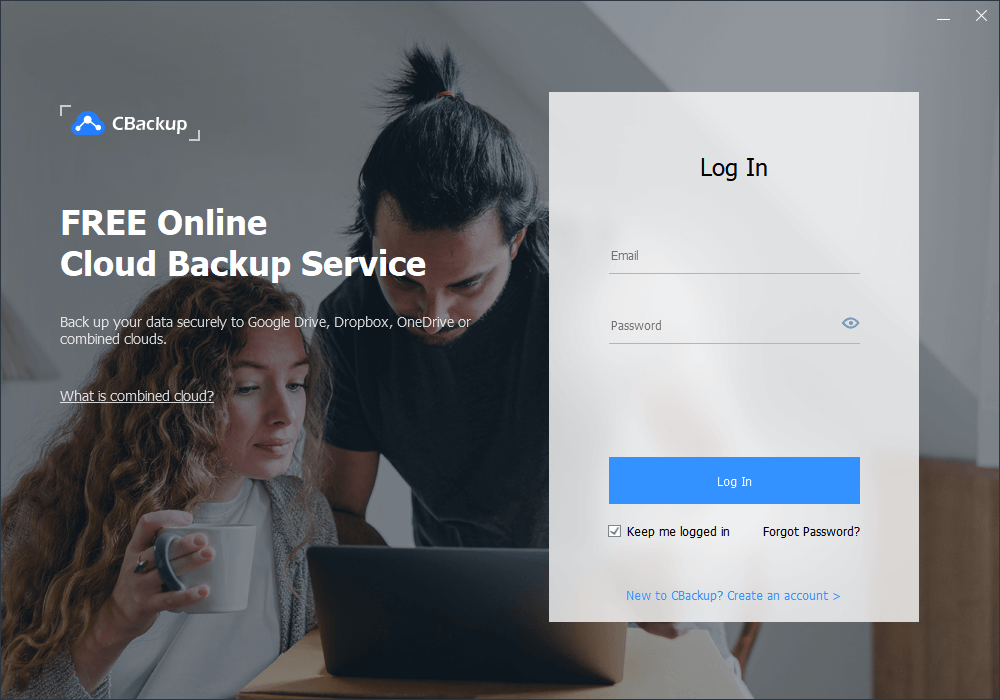
Step 2. Create a CBackup account and sign in.
Step 3. Click the Storage tab and then choose the cloud storage (here is OneDrive) that you want to add and backup files to.

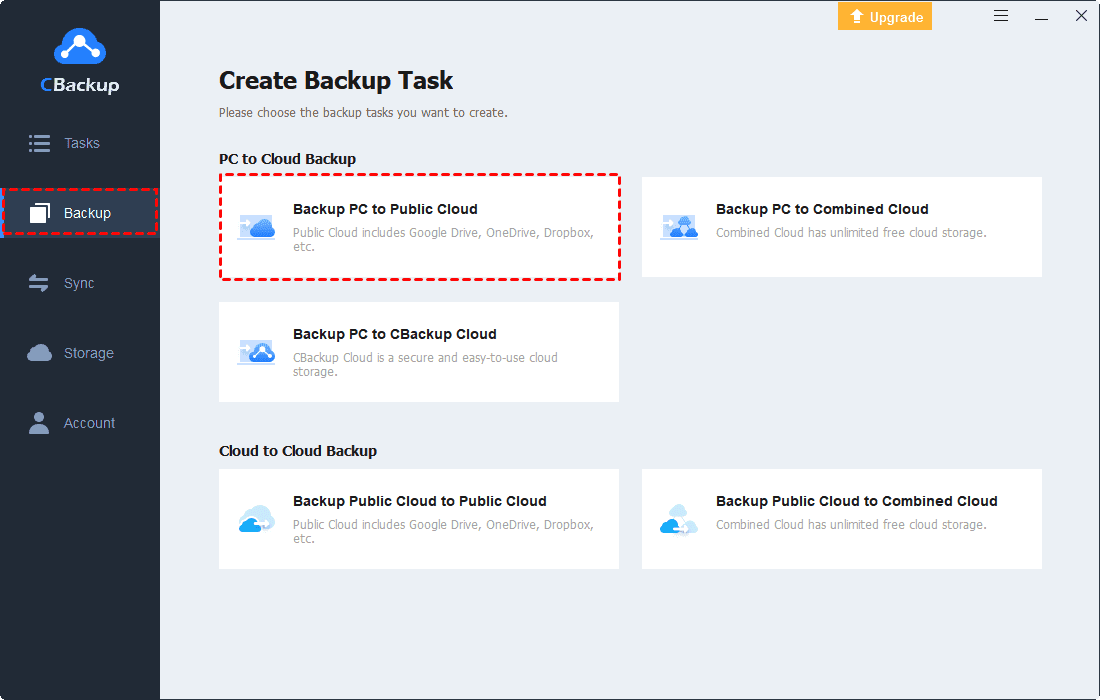
Step 4. Create an account and log in with it, then click Backup PC to Public Cloud under the Backup tab to create a PC to cloud backup task.
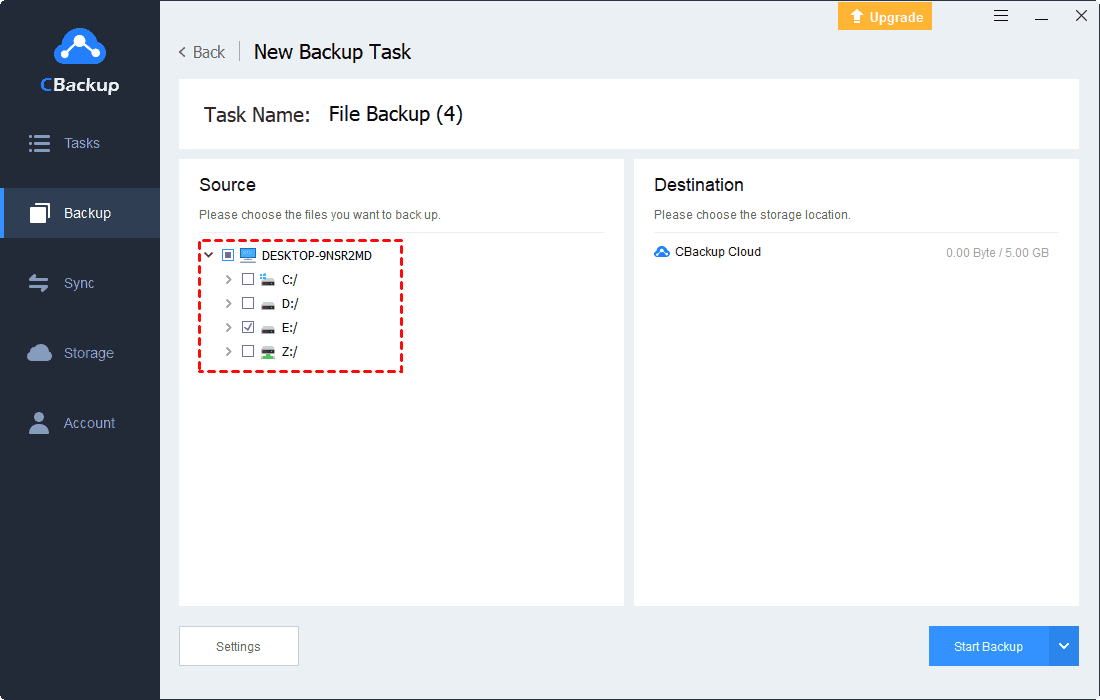
Step 5. Select the files you need to back up to the cloud. As long as you have enough backup space, you can even back up your entire computer. And, choose OneDrive as your backup destination.
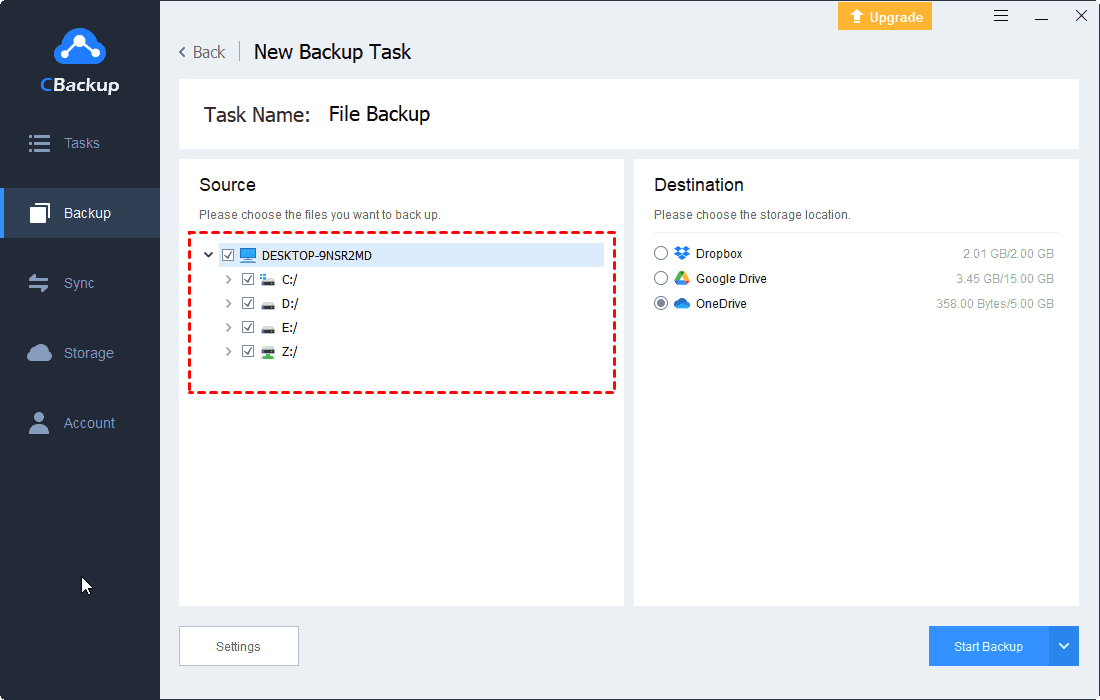
Step 6. Click the Settings button in the lower-left corner, and then select the time you need to automatically backup under Scheduler tab, or you can choose to automatically back up PC files to the cloud daily/weekly/monthly.

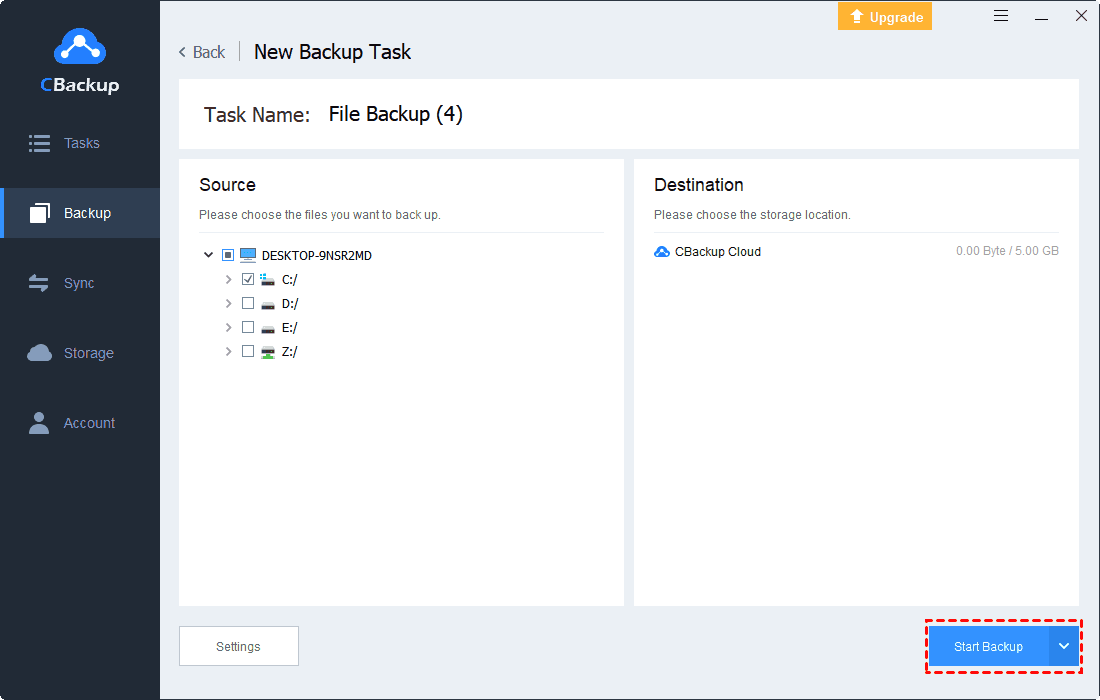
Step 8. Then click Start Backup to start backup task.

Schedule PC cloud backup with a better cloud backup service
Although OneDrive is a great cloud storage solution for Windows users, it also has many disadvantages. So, if you are not satisfied with OneDrive, you can switch to a better cloud backup service like CBackup and backup files to cloud. Besides backing up files to public cloud storage, CBackup also allows you to backup files to its cloud and supports cloud to cloud backup, and cloud to cloud sync.
Step 1. Download and install the CBackup app to your computer, it is suitable for Win 11/10/8.1/8/7/XP.
Step 2. Create an account and log in with it, then click Backup PC to cloud under the Backup tab to create a PC to cloud backup task.

Step 3. Select the files you need to back up to the cloud. There is plenty of space in cloud, and you can even back up your entire computer.
Step 4. Click the Settings button in the lower-left corner, and then select the time you need to automatically backup under Scheduler, or you can choose to automatically back up PC files to the cloud daily/weekly/monthly.
Step 5. Then click Start Backup to start windows 10 automatic backup to the cloud.
Summary
Follow the steps above, you can set up OneDrive schedule backup with Windows built-in tool – Backup and Restore or third-party tool – CBackup. Both the ways are free, you can choose one according to your needs. If you need a better to backup files to cloud regularly, you can also try CBackup.

Secure & Free
