
Samsung Cloud Can’t Backup Data: Not Enough Space (6 Fixes)
Are you suffering from Samsung Cloud can’t backup data for not enough space? The tutorial will help you terminate the anxiety of Samsung Cloud not working quickly. Please read on.
by CBACKUP Lasted Updated February 1, 2023
Samsung Cloud can’t backup data for not enough space
“I'm trying to backup my data using Samsung Cloud, but I get this message: Can't backup data; Not enough space in Samsung Cloud storage. But my backup size is only 1.89 GB and my available cloud space is 14.26 GB. Anyone else have this issue or know how to get around it?”
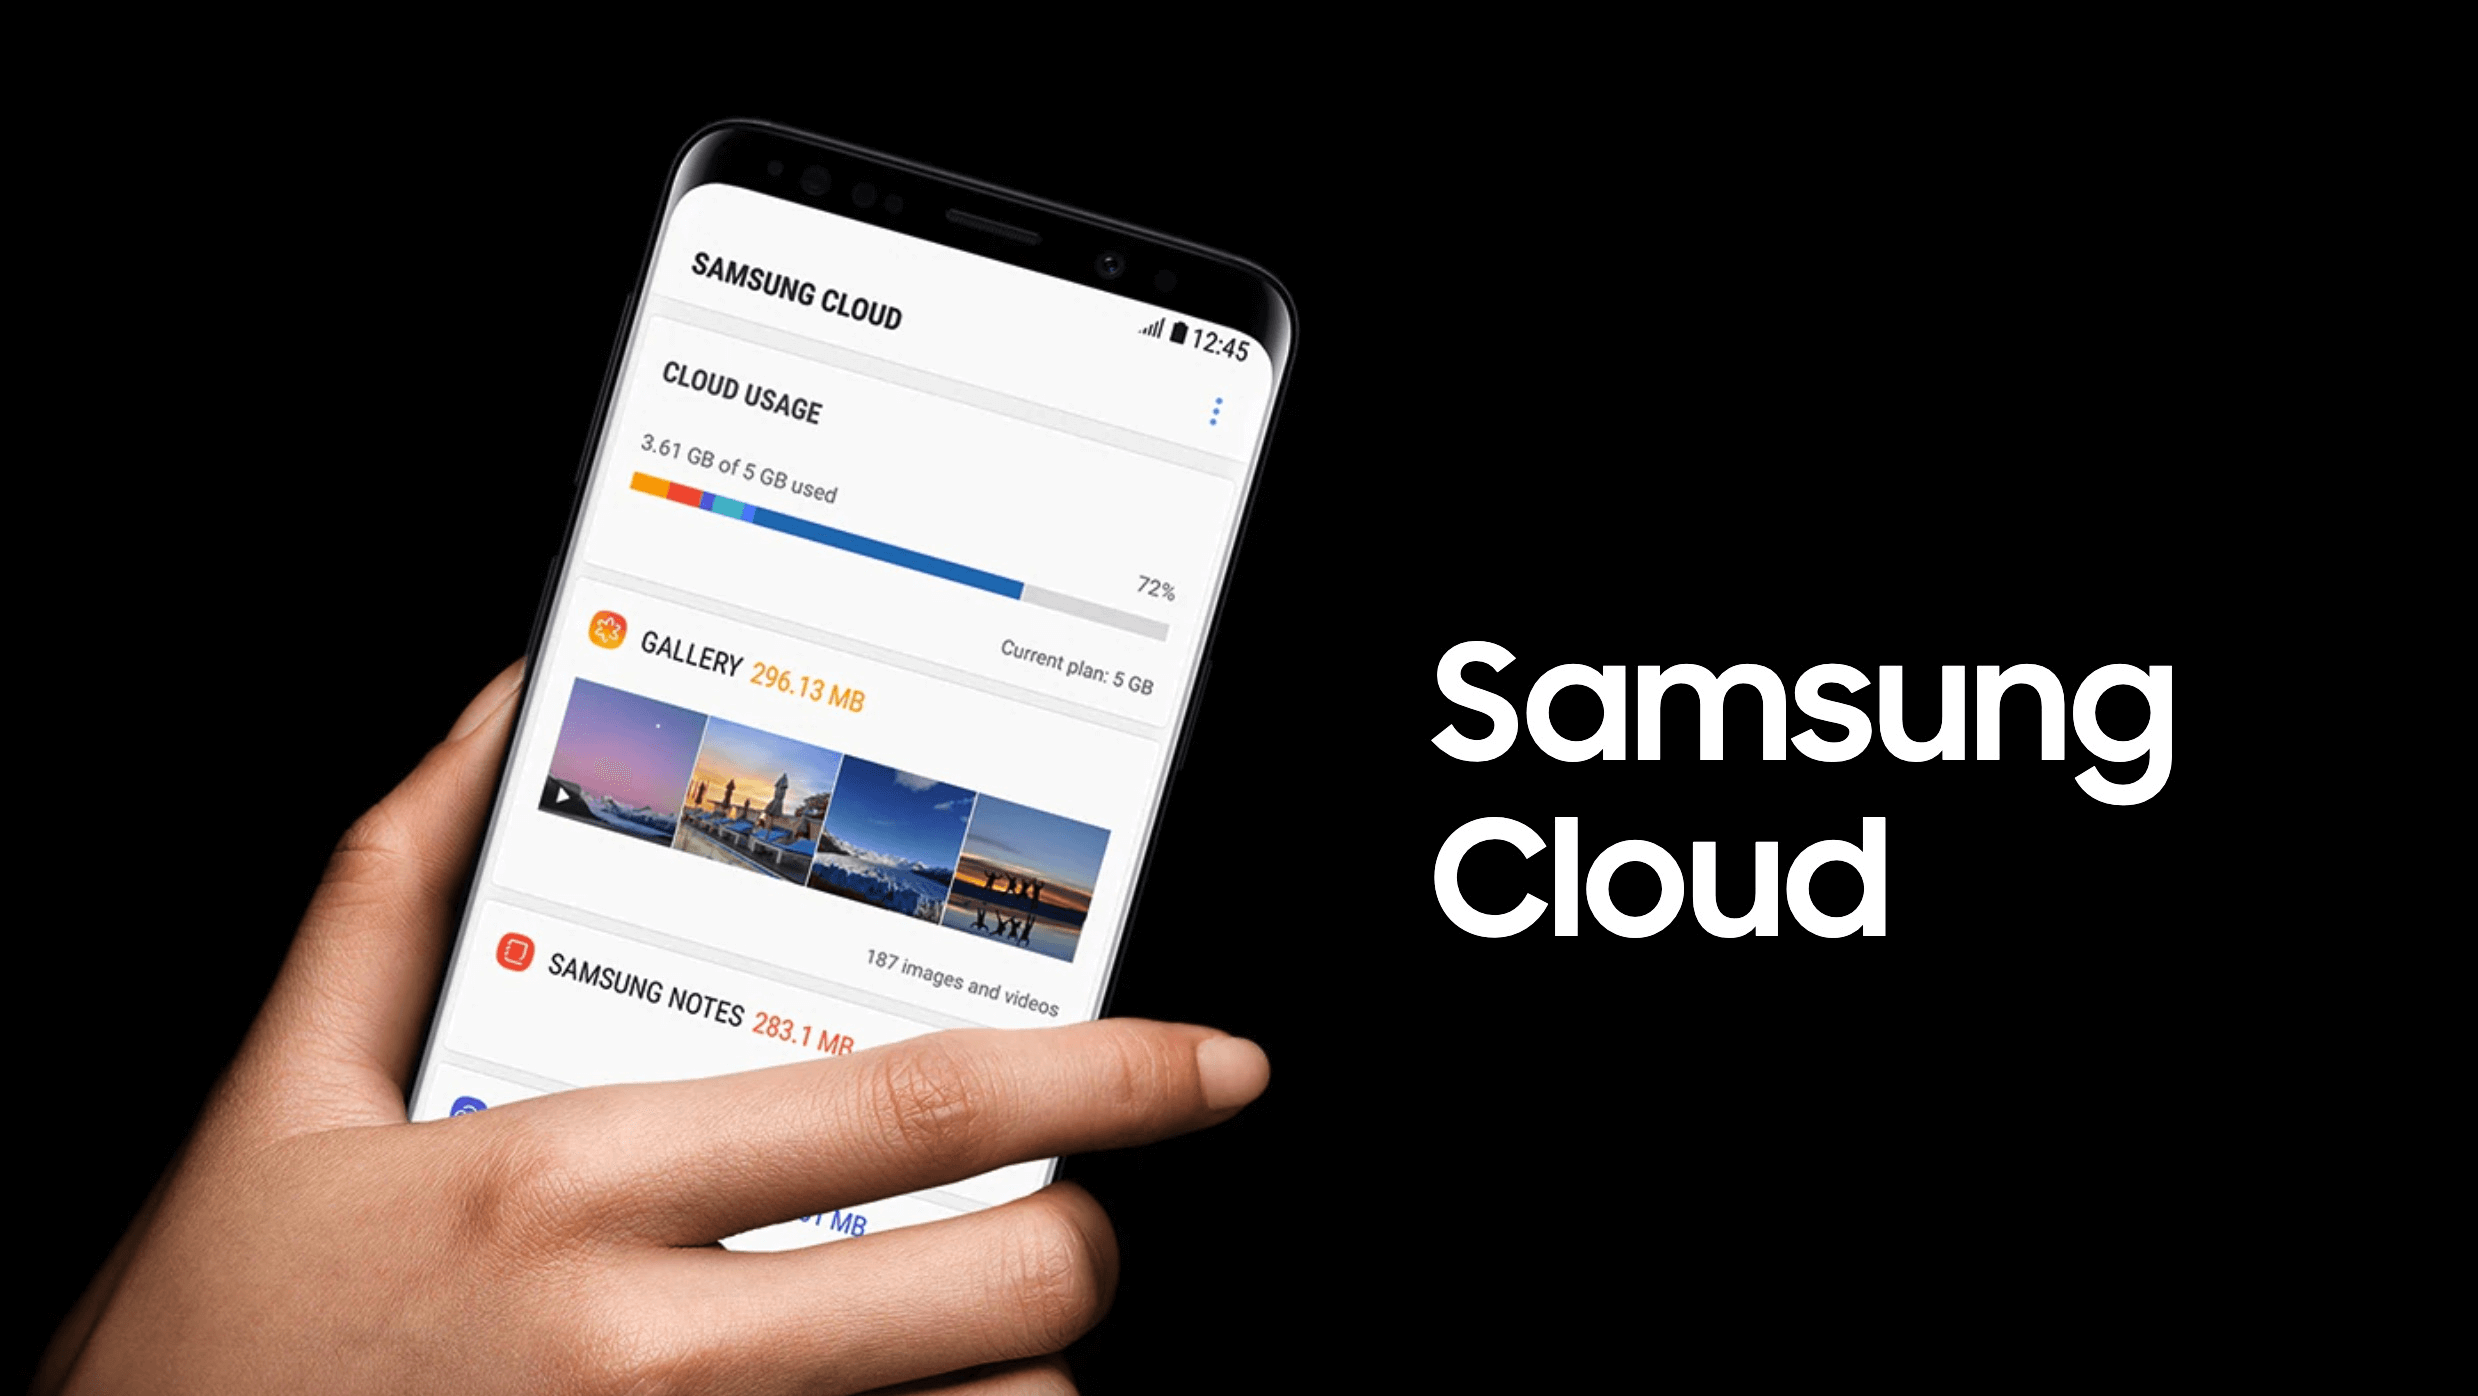
Developed by Samsung, the cloud storage service, Samsung Cloud allows Samsung users to automatically backup, synchronize, as well as restore data stored on the device, which is very convenient. However, lots of clients encounter Samsung Cloud can’t backup data for there is not enough space in the cloud or other unknown errors. So what can you do? Come on and read the content below.
Content Preview
Why is my Samsung Cloud not backing up?
Before solving your problem of Samsung Cloud not working, let’s explore why does this error appear. In most time, it’s due to there is not enough storage in Samsung Cloud. Maybe Samsung Cloud on your device has auto-backed up plenty of useless data to the cloud, which occupies much storage space.
While sometimes your Samsung Cloud fails to backup even though the cloud storage is sufficient. It may be caused by the feature of auto-backup of music on your device, which may obstacle the normal backup process of Samsung Cloud, so you can try turning it off permanently.
Besides, there may be other mistakes that could also cause your device backup failure, such as unreliable internet connection, incorrect Samsung account, outdated device system, etc. So in order to fix the error of Samsung Cloud couldn’t backup data, you are suggested to try the following 6 solutions.
Fix Samsung Cloud failed to backup for not enough space
The common 2 methods of fixing Samsung Cloud can’t sync data for not enough space will be demonstrated in detail as follows. Let’s get on the way now.
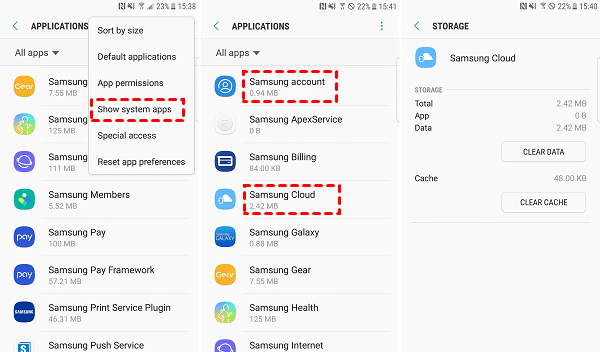
Method 1. Clear cache in Samsung Cloud
If your Samsung device failed to backup because of insufficient cloud storage space, then you can try to clean up cache and excess data in Samsung Cloud to free up storage space. To do this, you can try as below.
Step 1. Open up Settings in Samsung device, find Apps, and click it.
Step 2. Next, tap the three-dot icon to choose Show system apps > Samsung Cloud.
Step 3. Click Storage > Clear Data > Clear Cache step by step.
Step 4. You could conduct the same operations to clear the Samsung account data, just select Samsung account in the same place and click on Storage > Clear Data > Clear Cache in turn.
Method 2. Buy extra storage
If Samsung Cloud still shows the message that not enough free disk space, and it is unable to backup data as usual, you have to pay for more storage space then. To make other subscription plans, you can find and open Settings as before, and then click Accounts and backup > Samsung Cloud > Storage plan to view the plans.
✎Note: You’re able to choose from various service plans. For example, you can buy 50GB of storage for $ 0.99 monthly, or 200GB of storage for $ 2.99 monthly.
With larger storage space, your Samsung Cloud should backup data for you successfully now. What if my Samsung Cloud storage is available but it just can’t backup normally? Don’t worry. Here, we concluded some other solutions to Samsung Cloud failed to backup. Please keep on reading.
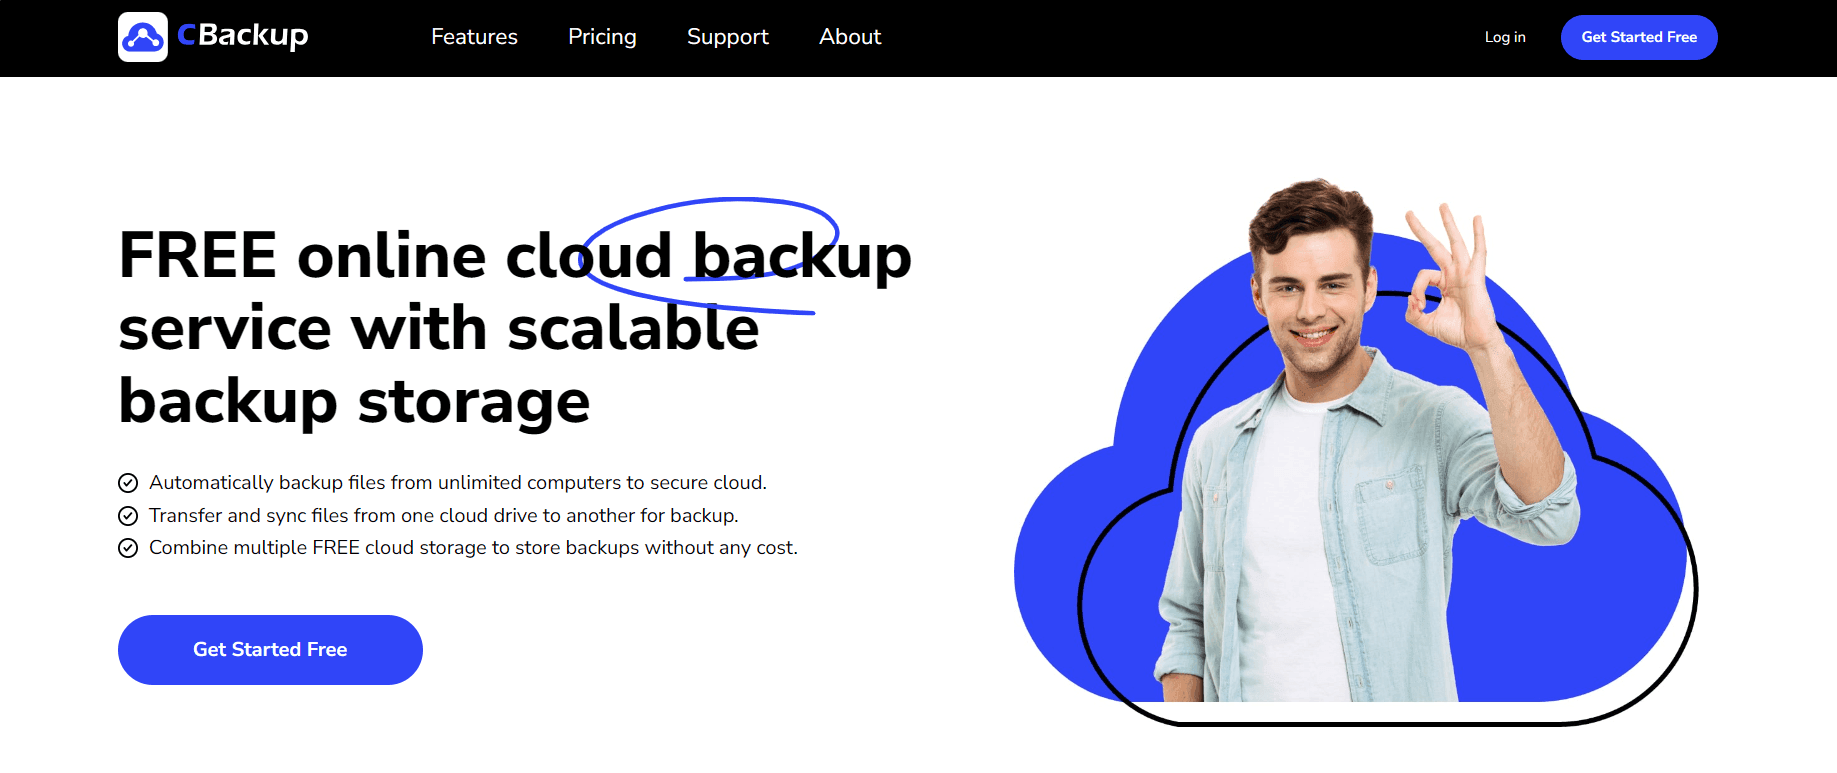
Best alternative to Samsung Cloud: CBackup
Actually, if you have trouble in backing up data to Samsung Cloud due to insufficient storage space and are afraid of vital data loss or damage, it is rather advisable for you to change with another cloud backup service to solve your backup difficulties in the long run. CBackup is a superbly operational and secure cloud backup tool, which can meet your needs well and help you realize PC auto backup simply and quickly.
CBackup offers free storage of 10 GB for every user, so that you’re allowed to backup multiple large files to the cloud trouble-freely. Based on its clear interface and undemanding design, it’s very easy for you to transfer files from local to cloud, and even between different drive accounts. With 256-bit AES encryption, OAuth authorization system, etc., in CBackup, you’ll never worry about the data security online.
OK, now, we’ll show you how to backup data to cloud in detail.
1. Download and install CBackup in your system at first, sign up for a free account and log in to CBackup.
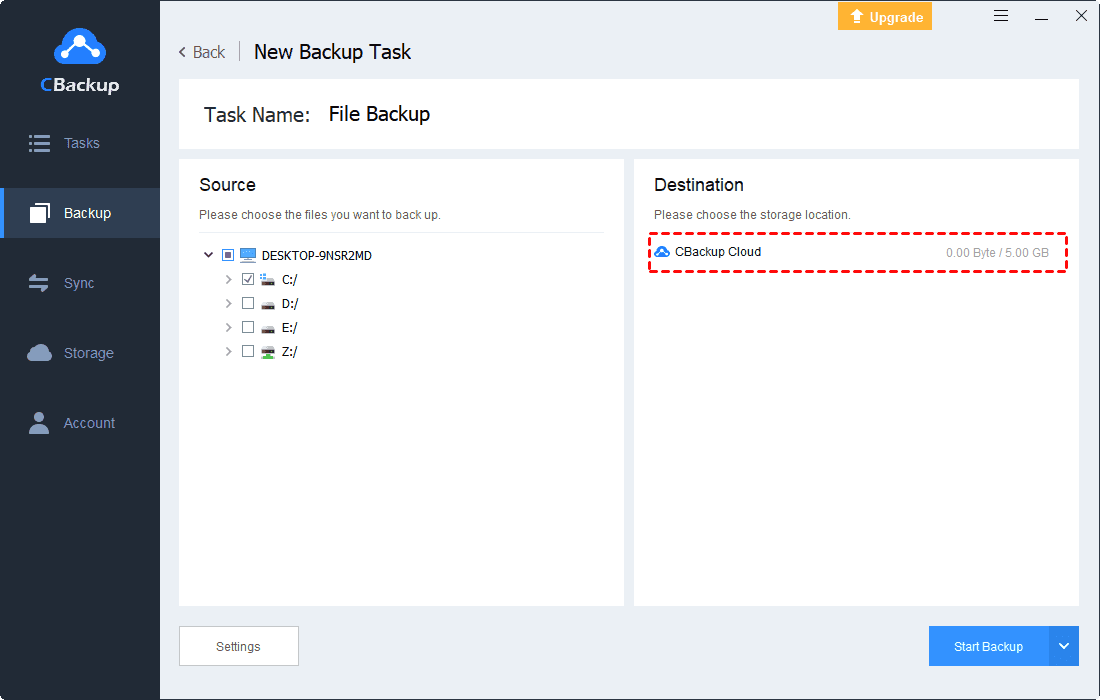
2. Then, click on the Backup button on the left bar to choose Backup PC to cloud. When creating the backup task, you can change Task Name according to your needs.

3. Please select computer or external files as your backup source. It specifies cloud as the backup target location automatically.
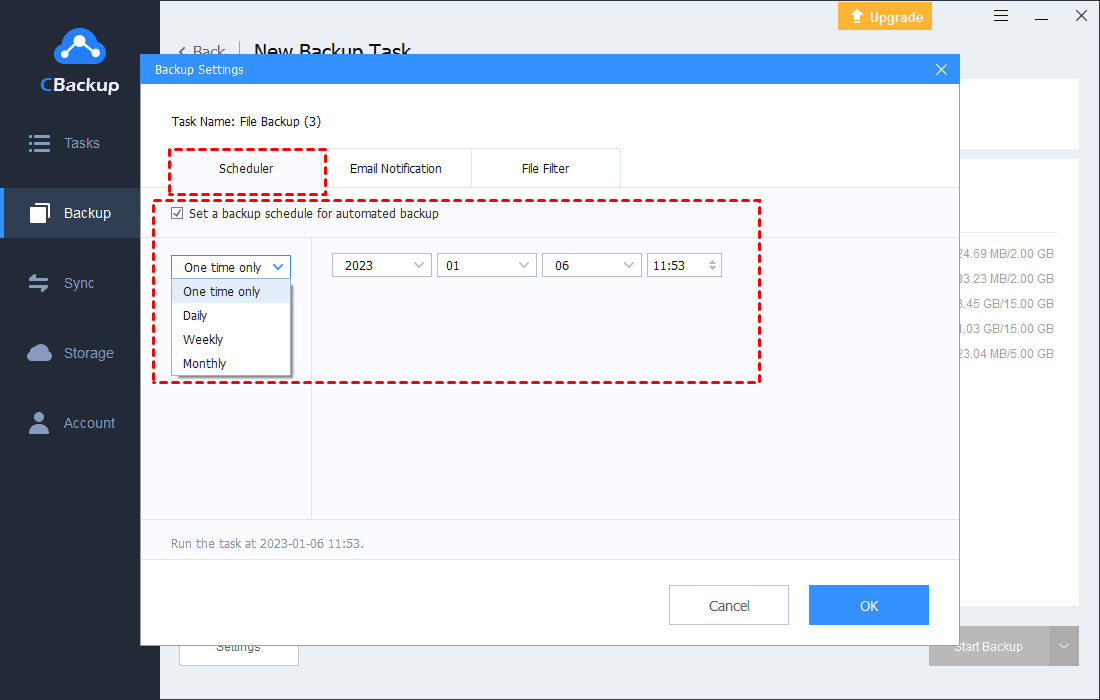
4. In order to set scheduled backup, click “Settings” on the bottom left and ''Scheduler'', then choose the scheduled mode you need, then it will automatically backup files as your settings.
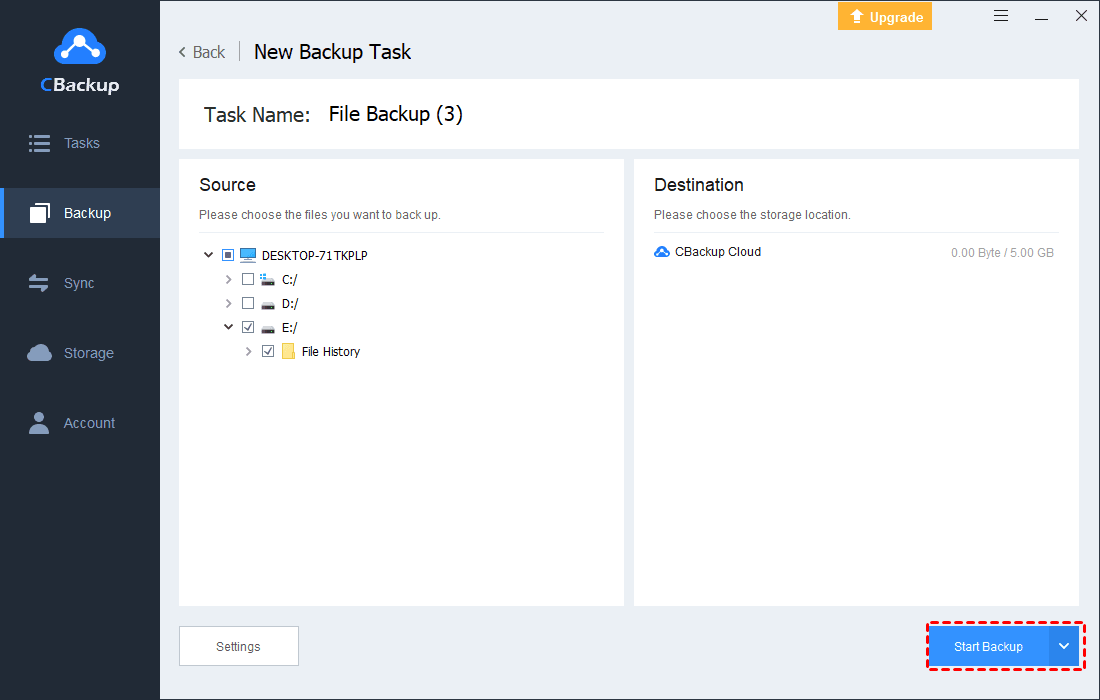
5. Lastly, please click on the Start Backup button to start the backup task simply.
✎Note: In addition to PC backup, you can also enjoy multiple services with CBackup as follows:
☛Cloud to Cloud Transfer: CBackup enables you to sync and backup data from cloud to cloud for free easily on one platform directly without changing accounts among multiple apps.
☛Smart Cloud Backup: CBackup offers file filter, email notification, backup scheme, flexible restore and so on with CBackup, which can satisfy your multiple demands.
☛Warm Support: It provides a skilled engineering team, listening to your needs and answering any technical consultation for free within 24 hours.
Tip 1: How to get more free cloud storage
What in case there is not enough space in CBackup? No worries. To start with, you can choose to purchase cloud storage surely, and you can enjoy 1,000 GB and even 10,000 GB of storage per month at the lowest cost, which is much more cost-effective than most cloud storage services.
However, if you have more than one cloud drive account, there is another way for you to enjoy larger cloud storage without any paying, that is to combine all your cloud storage together and enjoy free infinite space.
Seems to be interesting? Please have a try and do as follows.
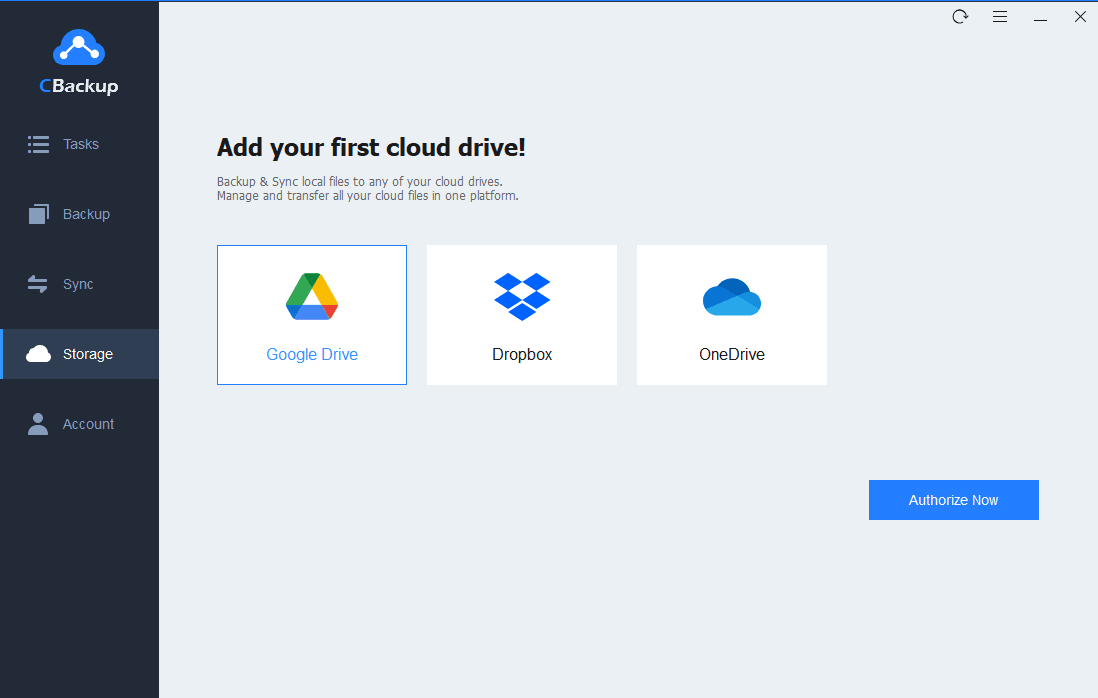
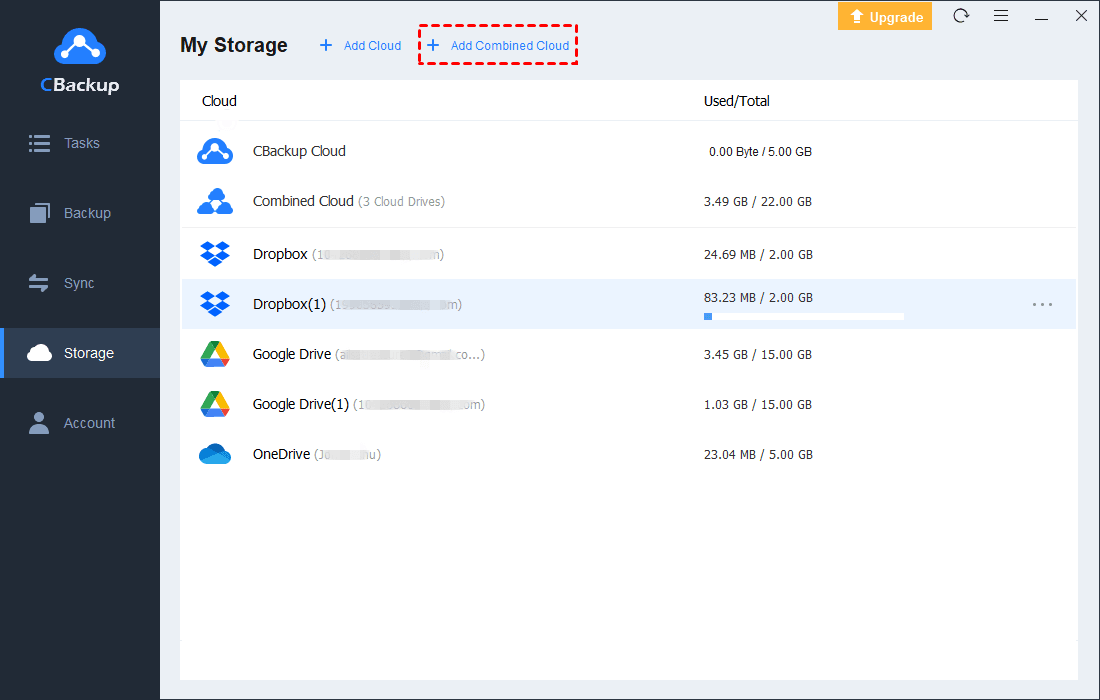
1. Click the "Storage" tab, then select the cloud drives that you want to migrate and click on "Authorize Now".
✎Note: Please follow the guide to authorize the public cloud, so that CBackup can access them normally.
2. After adding all your cloud drives, please click on "Storage" > "Add Combined Cloud" in turn.
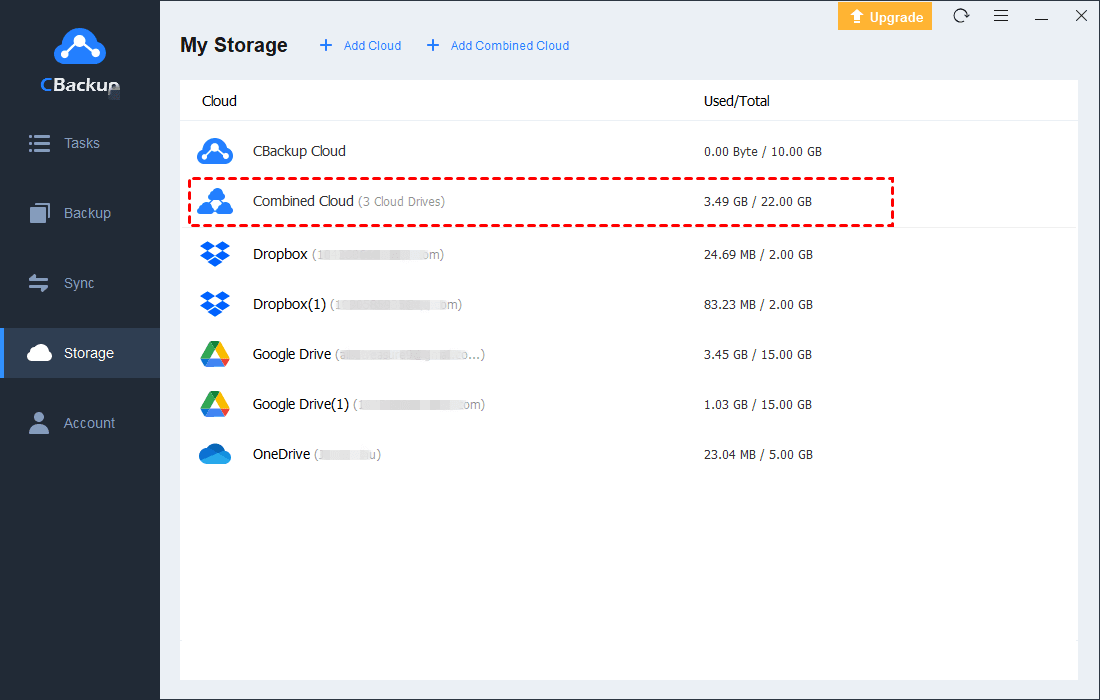
3. Next, you just need to select cloud storage accounts that you are ready to merge. After that, click on the "Next" > "Combine" button. Then you’ll see a "Combined Cloud" in the Storage list.
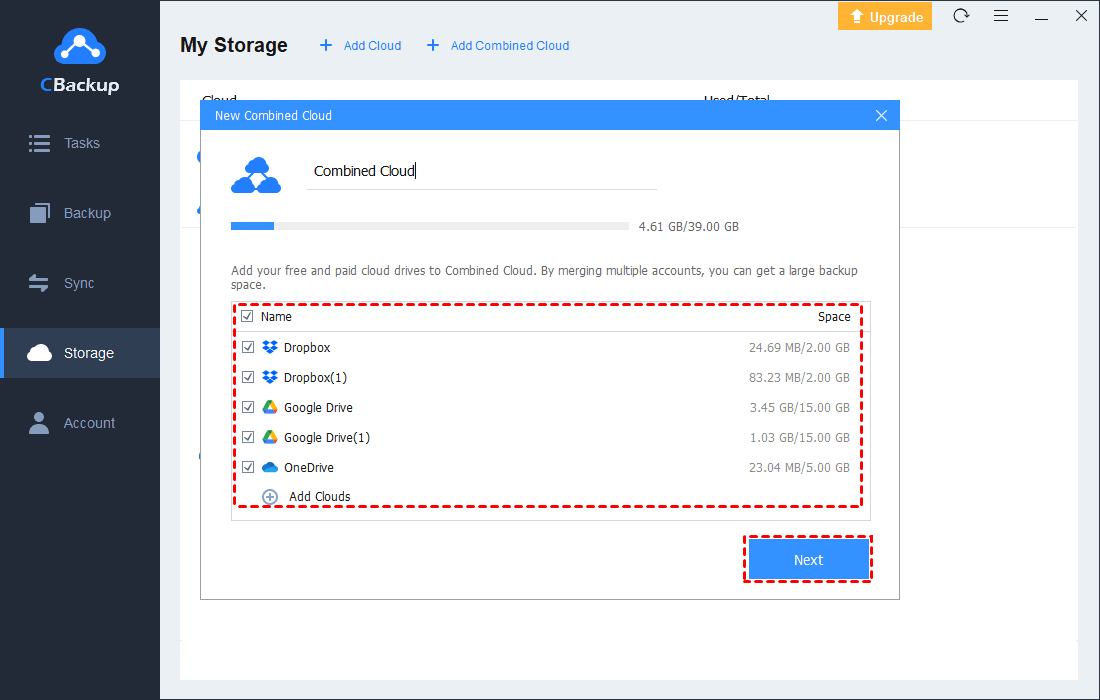
✎Note: If you wanna backup files to the combined cloud, you can choose it as the backup destination. You can also backup local files to OneDrive or other clouds as you need.
Tip 2: Fix Samsung Cloud backup failure in other situations
What if your Samsung Cloud backup not working due to other errors? Here are some tips for you. You can have a look if necessary.
Method 1. Make sure a stable network connection
Sometimes, unstable internet on the device will affect its performance, including data auto-backup. So, you can check if the network connection on your phone is reliable. Please do as follows.
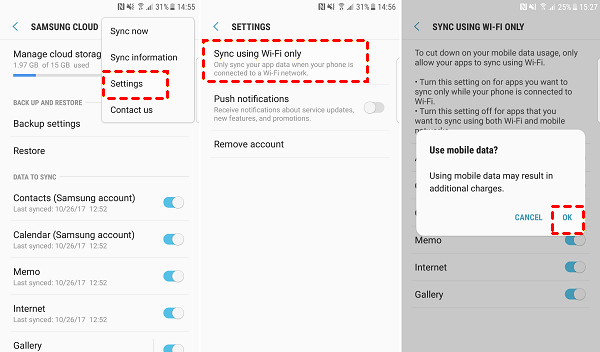
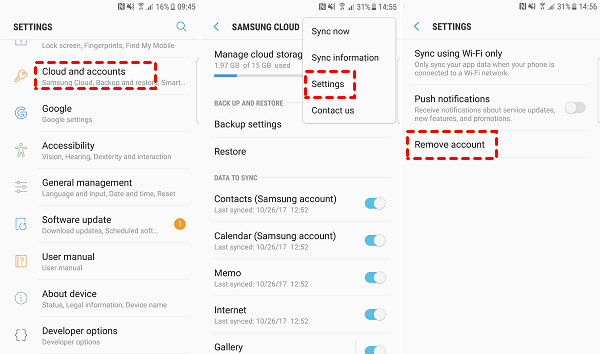
Step 1. Likewise, click the Settings option, then select Cloud and accounts > Samsung Cloud.
Step 2. Next, click on the three-dot icon, and tab Settings > Sync using Wi-Fi only by turns.
Step 3. After that, please turn off all options on the interface. Finally, tap on OK when the prompt pops up.
Method 2. Re-connect your Samsung Cloud account
If you have checked the internet connection and the issue still remains, you could try to sign out your Samsung Cloud account temporarily and sign in to it again. To do this, here are the steps for you.
Step 1. Click on Settings > Cloud and accounts > Samsung Cloud on your device accordingly.
Step 2. Then, tap the three-dot icon, select Settings again and click Remove account.
Step 3. After you remove the account successfully, re-connect your account and login to Samsung Cloud to back up.
Method 3. Update Samsung Cloud to the latest version
In addition, updated Samsung Cloud may lead to malfunction of data backup to the cloud automatically. So, you have to update your Samsung Cloud to the latest version and have a try again. Here’s how to do it.
Step 1. First of all, you need to log out of your Samsung Cloud and quit the application.
Step 2. Uninstall Samsung Cloud on the device.
Step 3. Go to the APP store on your phone to download and install the latest available version of Samsung Cloud.
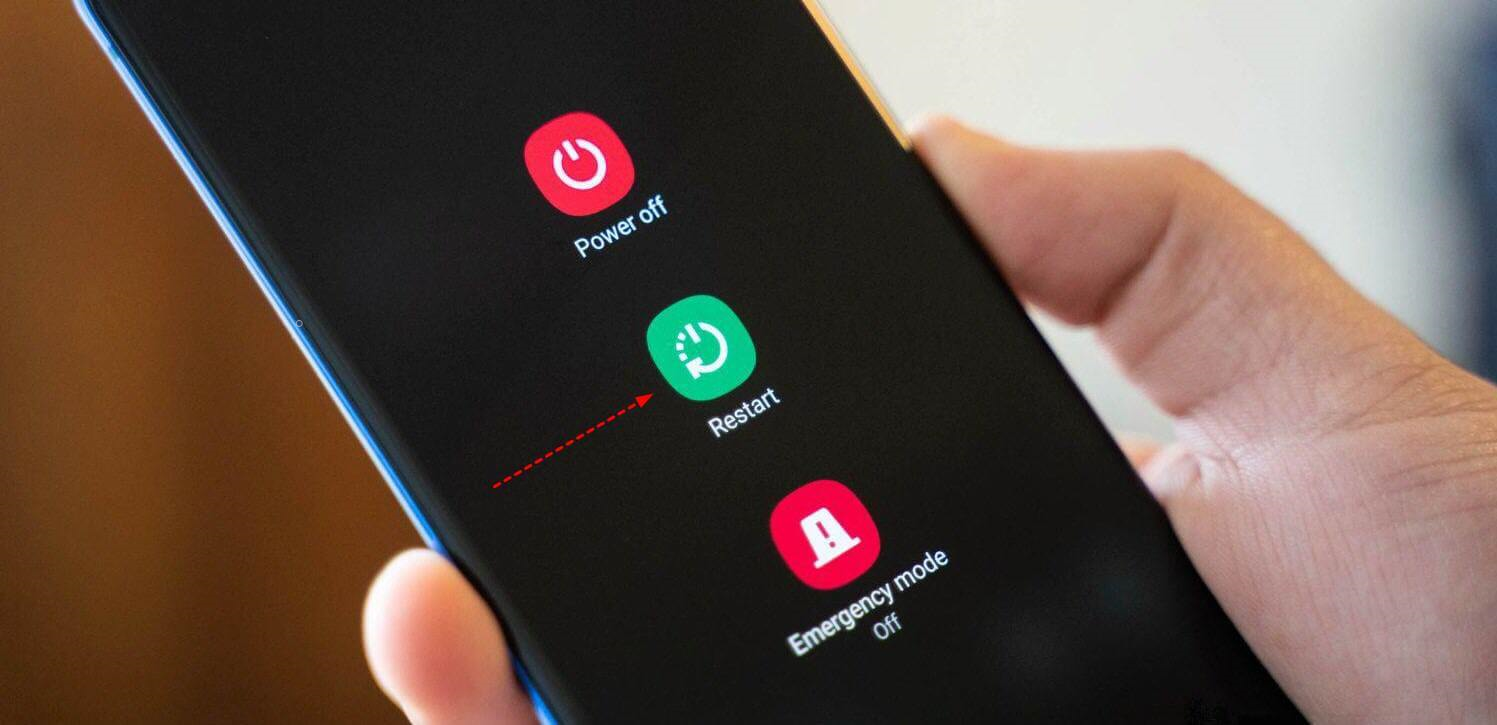
Method 4. Restart your Samsung device
What if the methods mentioned above do not work for You? In this way, you should try relaunching your Samsung device. Please long-press the power button of the phone, tap on Restart when the popup appears, then just wait for a while, and the device will restart. Now, you can have check if the data backup functions properly.
Summary
It’s really annoying that you can’t backup data with Samsung Cloud for not enough space, but this trouble can be resolved with the multiple solutions in the passage for you. Besides, if you wanna terminate the worries forever, you’d better change Samsung Cloud with the best alternative, CBackup, to make PC backup and cloud to cloud transfer easily for free.

Secure & Free
