
How to Get Windows Backup to Network Drive and Backup Network Drive
How to backup network drives and how to backup Windows to network drive? Click on this article for a clear answer.
by Jonna Lasted Updated June 10, 2025
What Is a Network Drive?
A network drive is a disk drive, NAS, or share on another computer or server on the same network (e.g., LAN). For example, within a business, you may have access to company or customer information on a network drive using a corporate network. But unless mapped, network drive is only accessible by entering the network path.
A network drive has a range of advantages, such as easy sharing of files, ease of adding storage, the ability to set file permissions, etc. Do you have a clue on how to create a Windows backup to network drive and how to backup your network drive? Here, we will list all the useful methods to save your time and energy.

Section 1. How to Backup Windows to Network Drive
There are 2 system native tools that can help you to create Windows 10 backup to network drive, as well as other Windows operating systems. One is Backup and Restore (Windows 7), and the other is File History. You can see the differences between the two options and enable network drive backups with them in the following content.
Way 1. Backup files to Network Drive with Backup and Restore
The Windows Backup and Restore utility allows you to create backups of files on your hard drive and the Windows OS. In addition to network locations, it also supports backing up files to external hard drive. If you turn its schedule setting on, it will automatically backup files.
Step 1. Open Control Panel, select System and Security, and go to Backup and Restore (Windows 7).
Step 2. Tap on the Set up backup button.

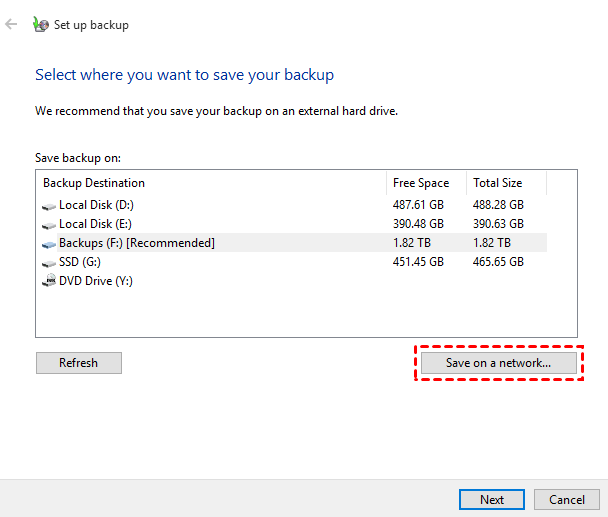
Step 3. Click the Save on network... button on the Select where you want to save your backup, and click Next.
Step 4. Tap Browse and select your network drive. Then, you should enter your username and password. After that, click Next to go to the What do you want to back up page.

Step 5. You can pick Let Windows choose (recommended) or Let me choose to determine the content for backup.

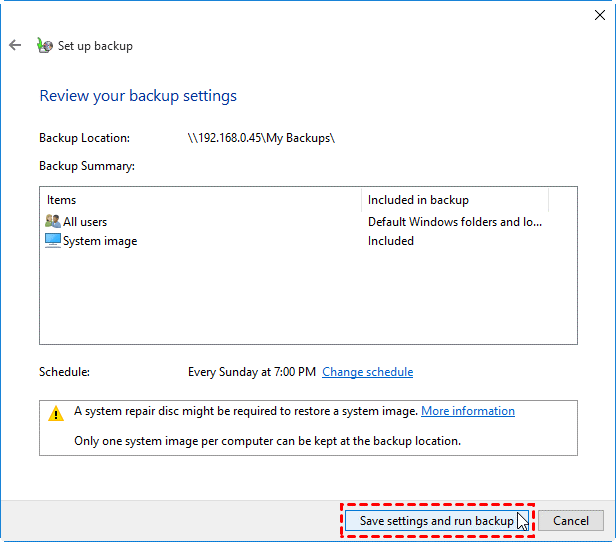
Step 6. You can click the Change schedule button to perform Windows auto backup to network drive. Then, click Save settings and run backup to let network backup drive on computer.
Way 2. Backup Windows to Network Drive via File History
File History is a simple and accessible method of data backup tool first launched on Windows 8. It can backup files including Pictures, Videos, Documents, and offline OneDrive files, but it can not be used to backup system settings or programs.
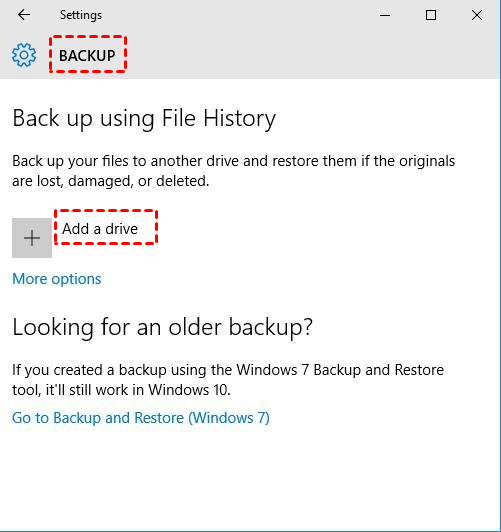
Step 1. Click Start > Settings > Update & Security > Backup in turn.
Step 2. Tap the “+” icon next to Add a drive and choose your network drive to save backups.
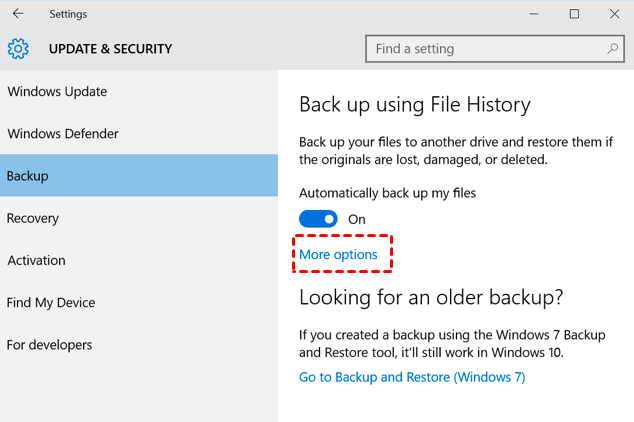
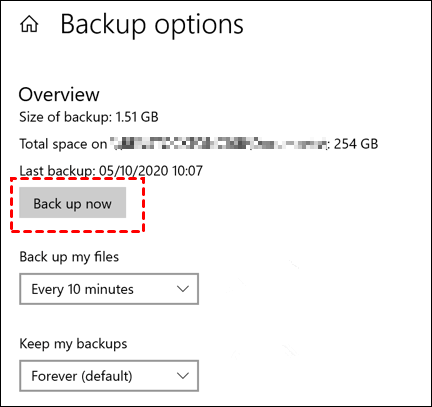
Step 3. Hit More options to configure your backup settings like backup plan and files/folders for backup.
Step 4. Finally, press Back up now.
Section 2. How to Backup Network Drive on Windows 10/11
If you want to create copies for your network drive, professional backup software like AOMEI Backupper is what you need.
This free backup software enables you to backup network drive to external hard drive, local drives, and cloud drives in a few steps. For example, you can do cloud backup for network drive to OneDrive and Google Drive with ease. You can set up a scheduled backup plan on a daily, weekly, or monthly backup frequency. What’s more, it provides full, incremental, and other backup modes.
Here, we use how to backup network drive to OneDrive as an example to show you detailed steps.
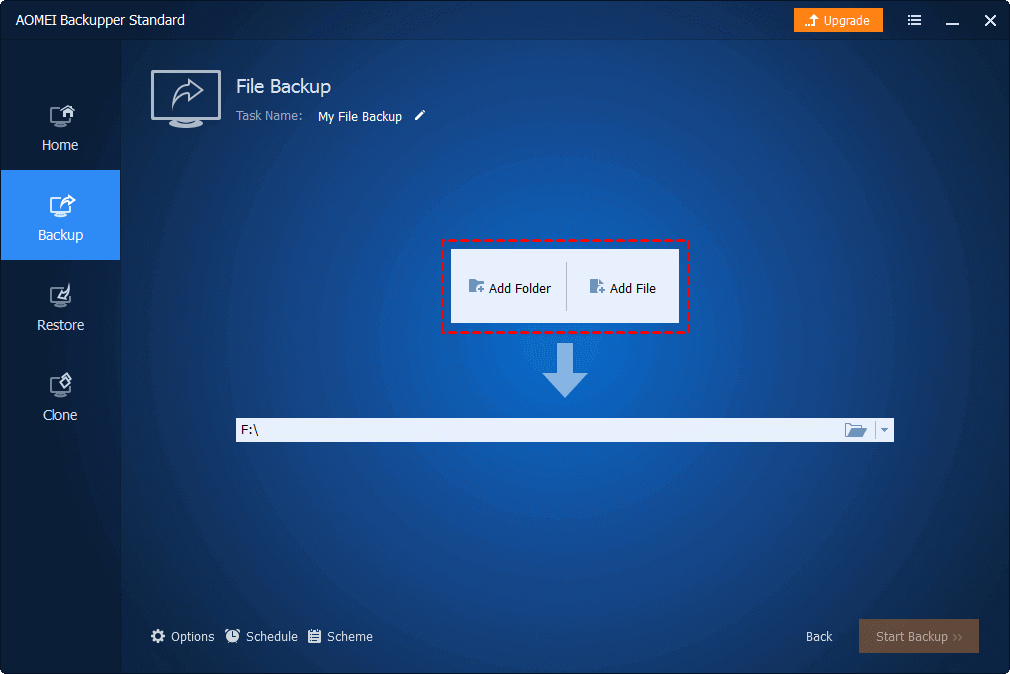
Step 1. Download and run AOMEI Backupper and choose the File Backup option on Backup tab.

Step 2. Click on Add File or Add Folder according to your needs. Select Share/NAS from the popping-out screen.
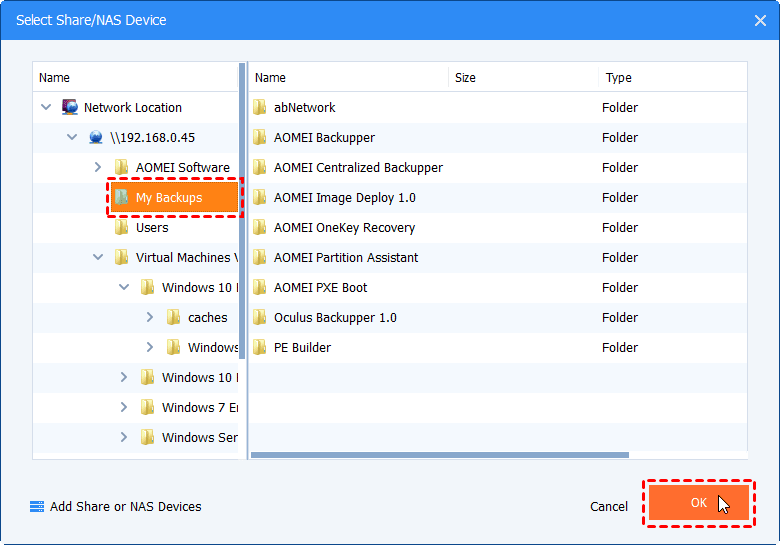
Step 3. Hit Add Share or NAS Devices and input the required info of your network drive and click OK. And then, you can choose folders on the network drive for backup.
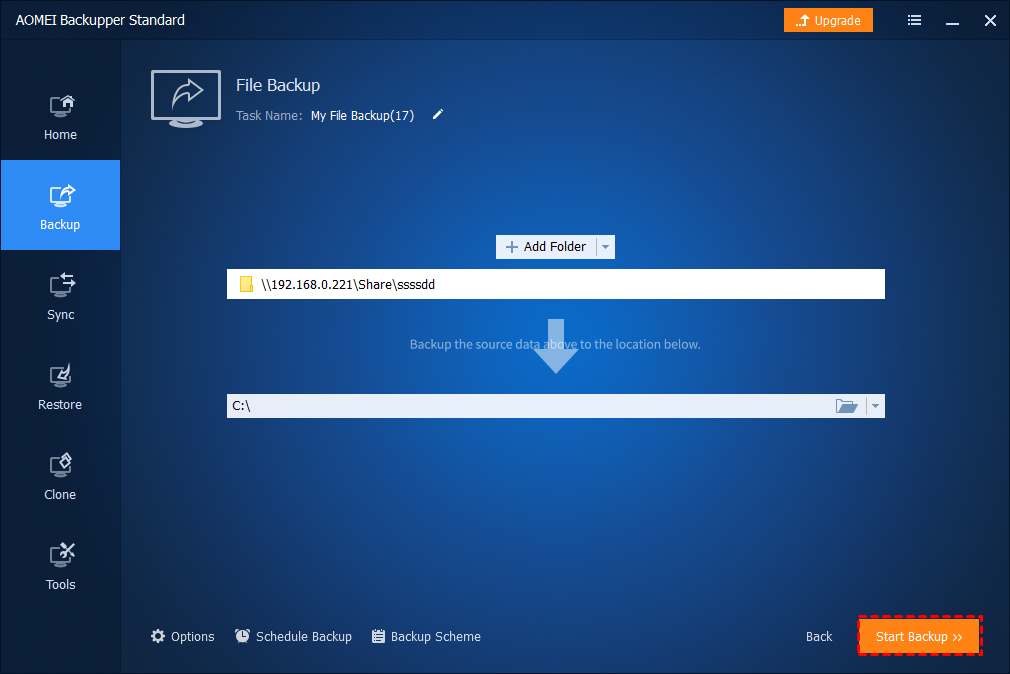
Step 4. Tap the inverted triangle on the destination column, click Select a cloud drive, and pick OneDrive.
Note: If you want to backup data to a local disk, you can choose the Select a local path option. Or, you can select Add Share or NAS Devices to store your data to another network drive. Please note that if you want to get clouds like OneDrive or Google Drive backup network drive, you need to launch the corresponding desktop app of the cloud storage service on your PC in advance.
Step 5. Then, click Start Backup to begin the task.
Bonus Tip: A Simple Way to Expand Cloud Storage for Free
After trying the above methods, you should be able to backup network drive and upload files to network drive. To avoid that you don’t have enough storage space for backing up data in NAS, we come up with a tip for you to increase cloud storage for free. We all know that upgrading cloud storage space can be expensive, but with a third-party free cloud backup service - CBackup, this is no longer the case.
This tool is designed to perform cloud backup for computer files and cloud files. It also offers a cloud space combination feature that lets you combine all the space of your cloud accounts to enjoy a huge backup space without any payment. Currently, Google Drive accounts, OneDrive accounts, and Dropbox accounts are supported.
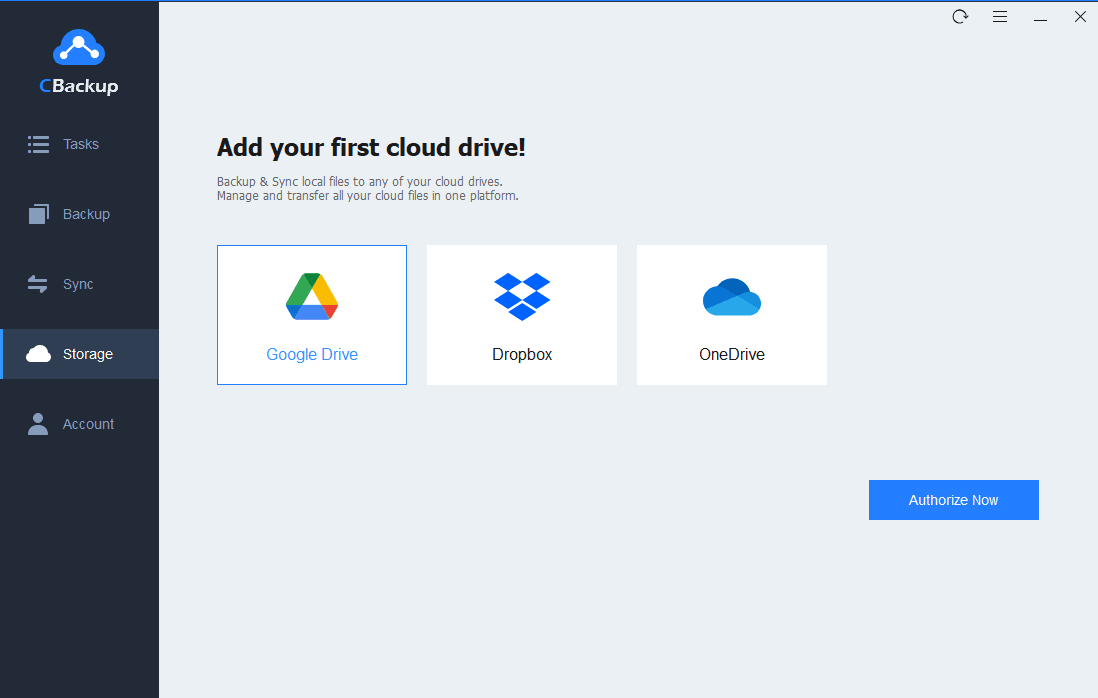
Step 1. Sign up for a CBackup account. Install the CBackup desktop app on your Windows PC and log in to it.
Step 2. Go to Storage and click on Google Drive, OneDrive, or Dropbox to hit Authorize Now. Then, log in to the cloud account to grant CBackup access to your cloud drive. You can repeat the steps to add as many accounts as you have.
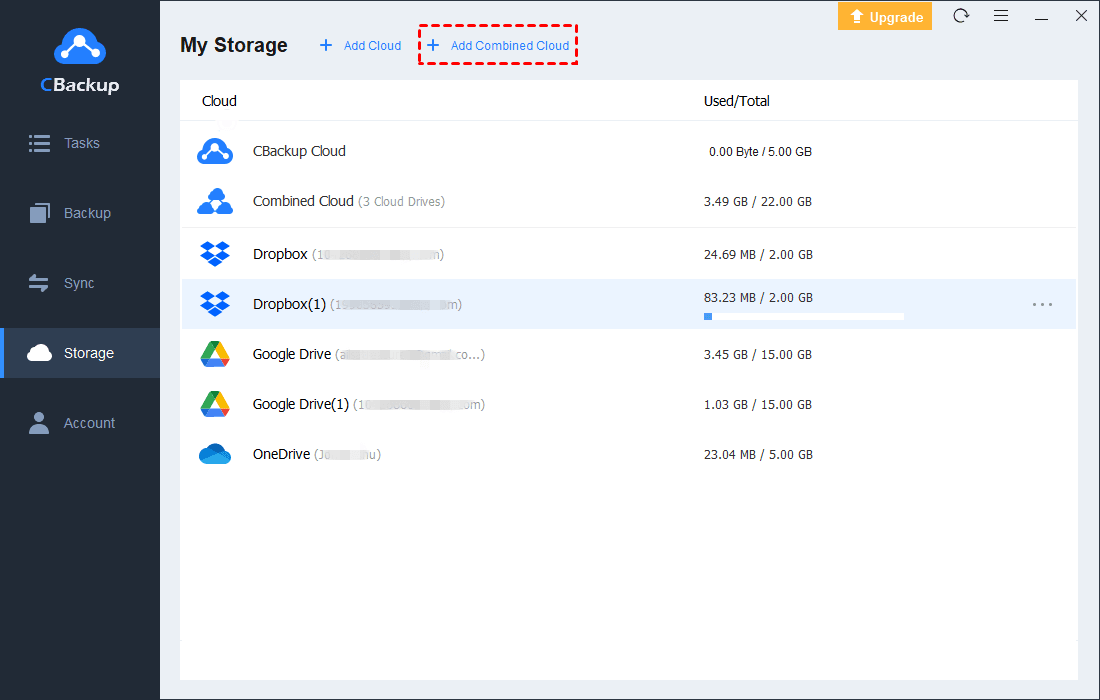
Step 4. After adding clouds, click the + Add Combined Cloud.
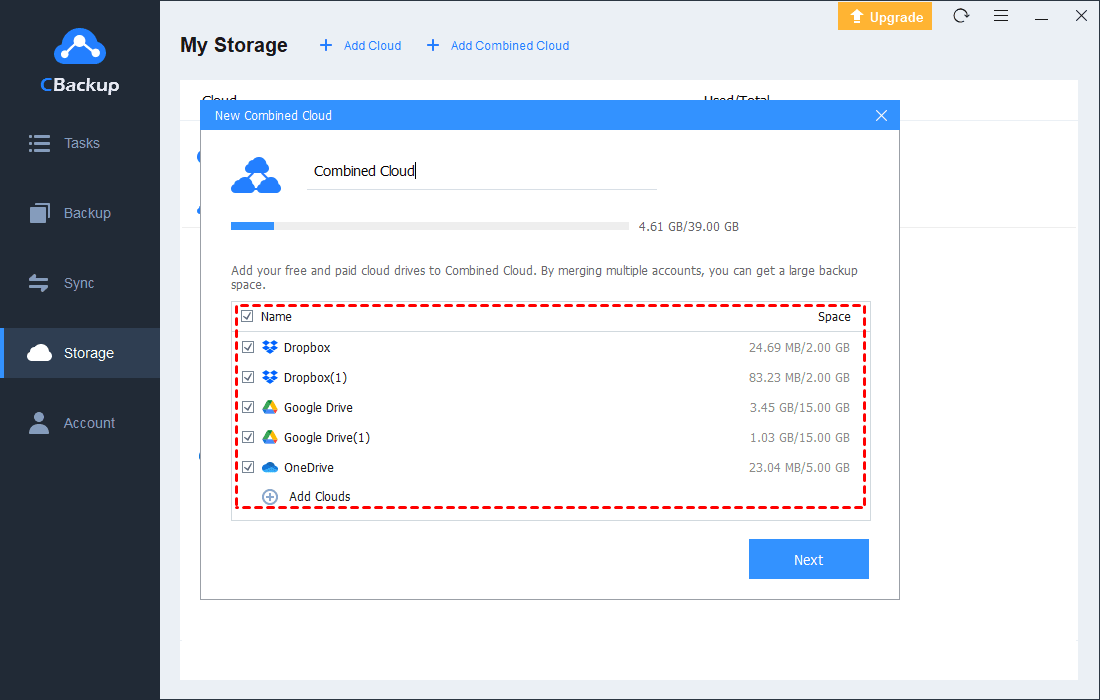
Step 5. Tick all accounts you wish to combine, click Next and then Combine to 1TB free cloud storage or more easily.
Conclusion
Now you not only know how to backup Windows data to network drives but also learn a free and simple method to backup network drives either to an external hard drive, local disk, or a cloud drive. Additionally, we introduce a freeware that entitles you to combine cloud space of multiple cloud accounts to increase free backup space without effort.

Secure & Free
