
Ultimate Guide: Google Cloud Backup and Restore
3 ways provided for Google Cloud backup and restore here. Follow the step-by-step guide to create Google Cloud backup and learn how to restore backup from Google Drive.
by CBACKUP Lasted Updated February 1, 2023
About Google Cloud Platform (GCP)
Speaking of Google Cloud backup and restore, almost all users may think of Google Drive, Google Backup and Sync (Drive for desktop). Yes, this is part of the google cloud and the most common part, and they meet the most basic data protection needs of users.
At the same time, Google offers the advanced users different cloud computing services named Google Cloud Platform (GCP), which runs on the same infrastructure that Google uses internally for its end-user products. Besides, it still provides a series of modular cloud services including computing, data storage, data analytics, and machine learning.
After saying that, it's time to backup and restore with Google Cloud. Please keep reading below to learn how to get backup from Google Drive and backup data to Google Drive.

How to Perform Google Cloud Backup and Restore?
Below, I will introduce 3 available methods. The first is the simplest and most common. The latter two methods will be extremely challenging for most users. However, you can decide which method to cloud backup and restore your data with Google Cloud.
-
Way 2: Google Cloud Backup and Restore via Exporting and Importing Entities
-
Way 3: Google Cloud Backup and Restore via Google Cloud Snapshot
Way 1 (Easiest): Google Cloud Backup and Restore in Android
You can enable Google auto backup on Android, and you can also follow the steps below to learn how to restore backups from Google Drive.
>> Google Cloud Backup: Open your phone's settings, scroll down to System and Backup, then turn on the backup service on the next window. If you don’t find the backup option, please manually search this option on your phone.
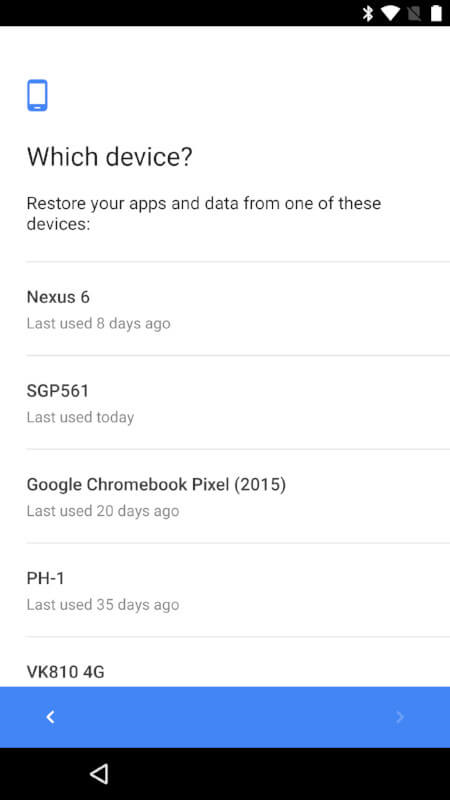
>> Restore Android phone from Google backup: Start your Android phone and log in to your Google Cloud account, then you will see a list of previous devices and the lasted used to date, select a device and restore your apps.
Next, I'll show you how to perform Google Cloud backup and recovery using exporting and importing entities, and Google Cloud snapshots.
Way 2: Google Cloud Backup and Restore via Exporting and Importing Entities
Before creating Google cloud backup with Export and Import Entities, please make preparations in the following.
-
Create a new project and enable billing for your project.
-
Create a Cloud Storage bucket in the same location as your Firestore in the Datastore mode database.
-
Assign an IAM role to your user account that grants the datastore.databases.export permission and the datastore.databases.import permission.
-
If the Cloud Storage bucket is in another project, give your project's default services account access to the bucket
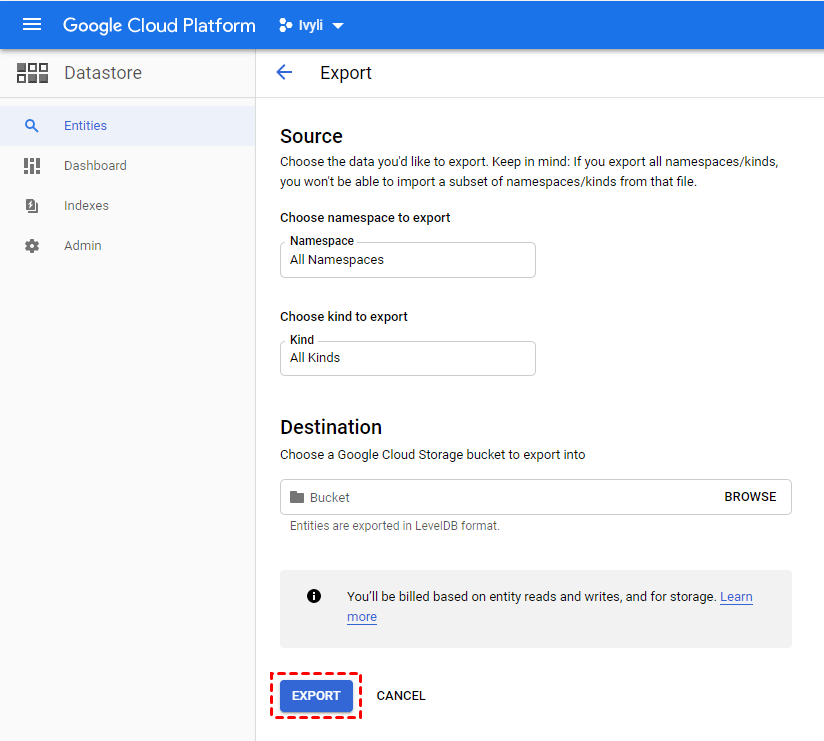
☛Google cloud backup by exporting all entitles:
Step 1. Go to the Datastore Entities Export page.
Step 2. Keep the default namespace and kind, then select a destination from your bucket and click EXPORT.
✎Note:
• The export process will create a metadata file for each specific pair namespace-kind, typically named as NAMESPACE_NAME_KIND_NAME.export_metadata. If the namespace or kind is invalid, the name will be export[NUM].export_metadata.
• If you want to export specific kinds or namespaces, you can use the above steps as a reference. All the steps are similar and the only difference is bucket you select.
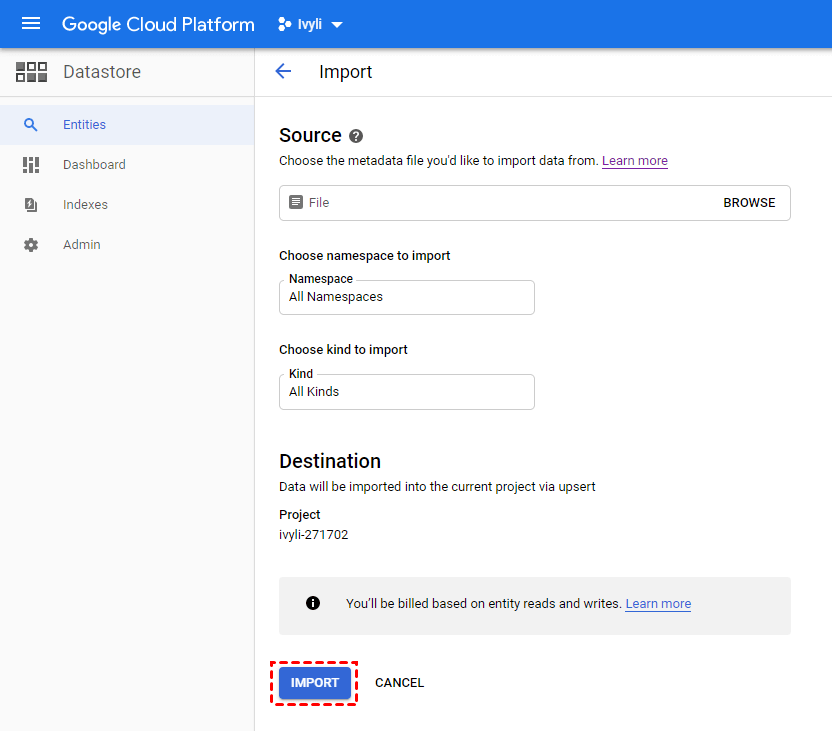
☛Restore backup from Google Drive by Importing all entities:
Step 1. Go to the Datastore Import page.
Step 2. Click Browse to select an overall_export_metadata file and keep the default namespace and kind, then click IMPORT.
✎Note: To import specific namespaces or kinds, you just need to set the namespaces and kinds to All Namespaces or to a specific namespace.
Way 3: Google Cloud Backup and Restore via Google Cloud Snapshot
Google Cloud Snapshot lets you create an incremental copy of your data created on the persistent disks. And it’s a point-in-time copy of the entire disk.
Before creating a snapshot in Google Cloud, please read the following suggestions and use them as appropriate.
-
Flushing disk buffers to ensure consistency for snapshots. Pause applications that write data to your disk and flush disk buffers to sync the file system with FLUSH at MySQL.
-
Create an image on the persistent disk attached. Because restoring the same snapshot to a persistent disk multiple times will incur network costs every time.
-
Schedule snapshots in the early morning, day, or weekend. The snapshot activity is busiest at the end of each working day, or at the midnight.
Now, come to the topic, how to create snapshots and restore them? Here are 2 commonly used ways, including Ad-Hoc, Scheduled. You can choose one of them and follow the detailed steps below.
☛Create an Ad-Hoc snapshot for Google Cloud Backup:
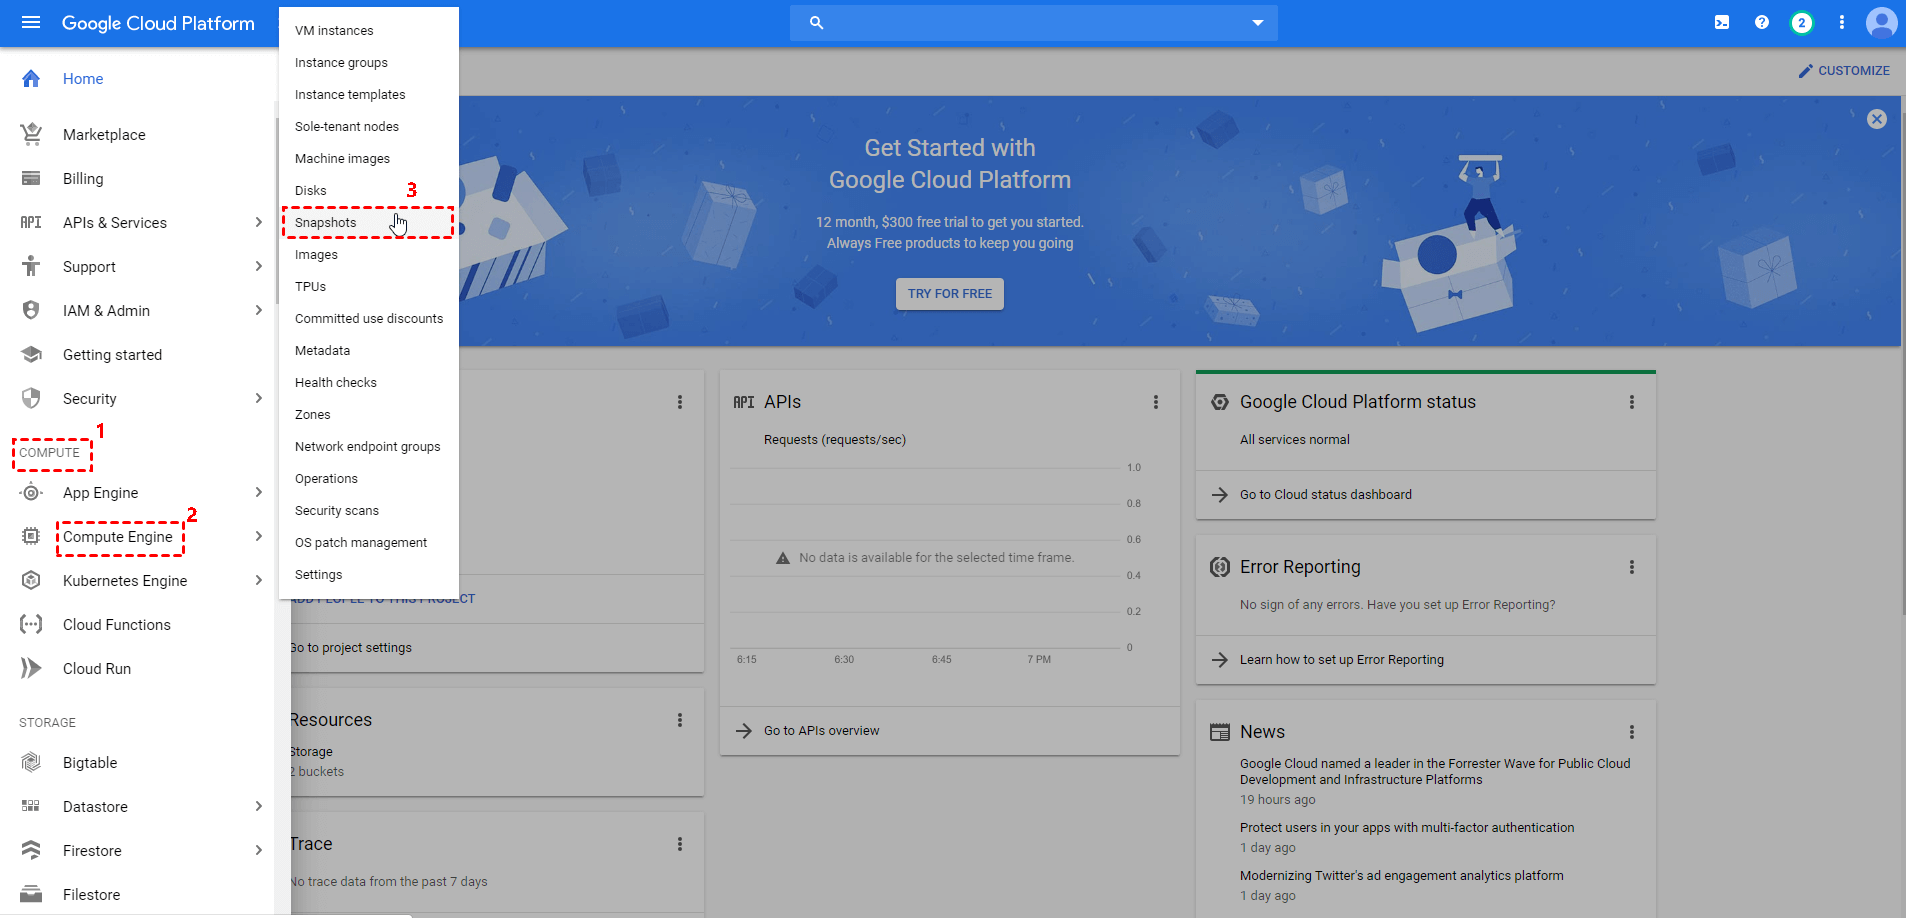
Step 1. Open your Google Cloud Console.
Step 2. Go to Compute and Compute Engine, then click on Snapshots.
Step 3. In the Snapshots page, click CREATE SNAPSHOT.
Step 4. In the Create a snapshot interface, type a name and description, then click Create. After the process ends, it will be listed under the snapshots.
☛Restore snapshot to restore Google drive files:
Step 1. Navigate to Compute Engine and click VM Instances.
Step 2. In the VM instances page, click CREATE INSTANCE.
Step 3. In the Create an instance interface, type name and select type for the new instance, then click Change under the Boot disk link.
Step 4. In the Boot disk window, go to the Snapshots tab and select the snapshot created before.
Step 5. Tick Allow HTTP traffic and Allow HTTPS traffic, then click Create.
Note: If you want to create a scheduled snapshot, you can click Create Snapshot Schedule instead and follow the on-screen instructions.
Alternative to Google Cloud Backup and Restore
As a matter of fact, except for the above three ways, there is an easier way to perform Google Cloud backup and recovery. It’s highly recommended to try the free cloud backup - CBackup, because of the following reasons:
-
It can free you from manually backup via daily, weekly, monthly backup.
-
It allows you to backup data during off-peak hours via specific time backup.
-
It helps you backup files with certain file extension by file filter.
-
It can make full use of the free space in cloud disks and help you get unlimited cloud storage. You only need to connect enough cloud disks to CBackup.
-
It’s free and easy-to-use.
Then, please do the following preparations before Google Cloud backup and restore with CBackup.
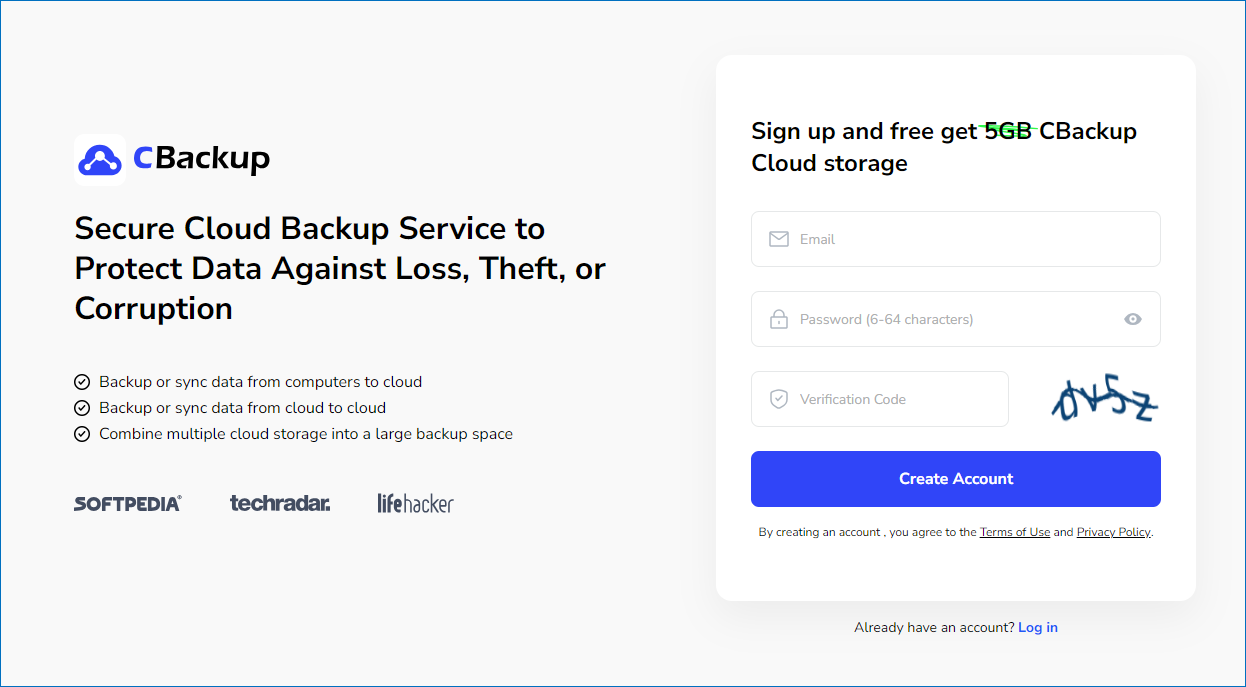
Step 1. Go to the main page of CBackup and get started to create an account, and sign in CBackup.
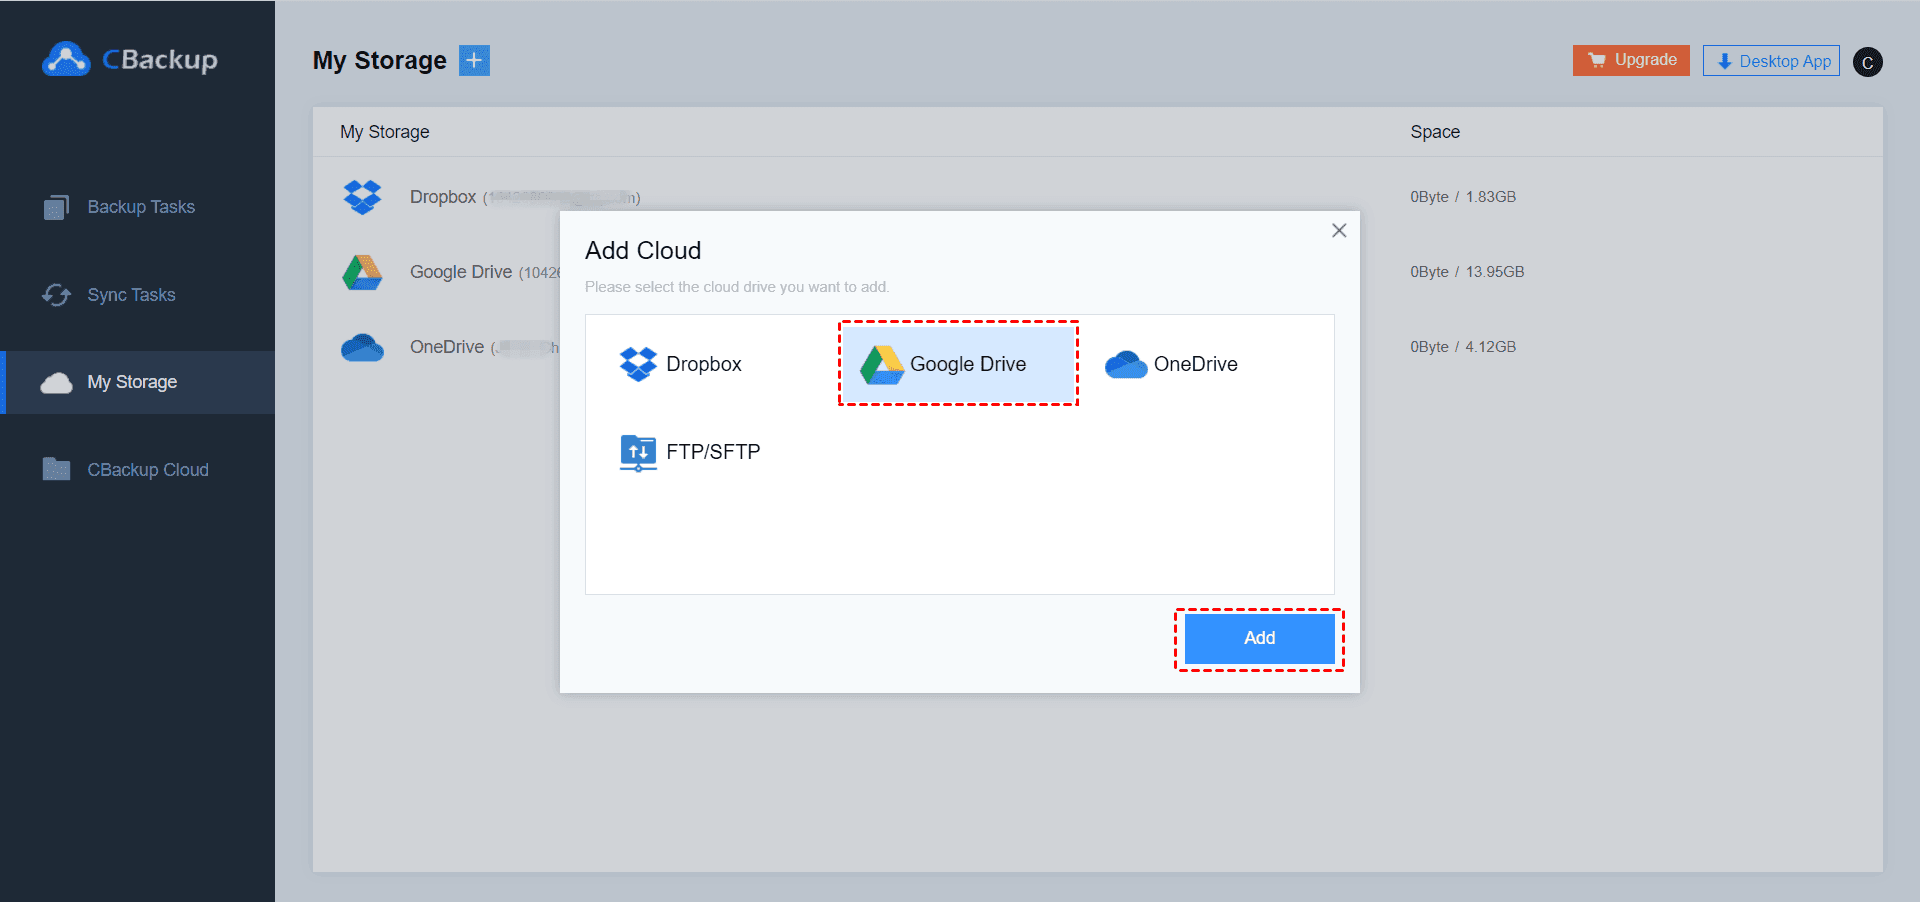
Step 2. Navigate to the My Storage tab, click + button, select Google Drive and click Add to continue, then allow CBackpper to access your current Google Drive, and modify Cloud Name and customize the Storage Path, and tick the Note option and click OK to add Google drive.
☛Google cloud backup with CBackup:
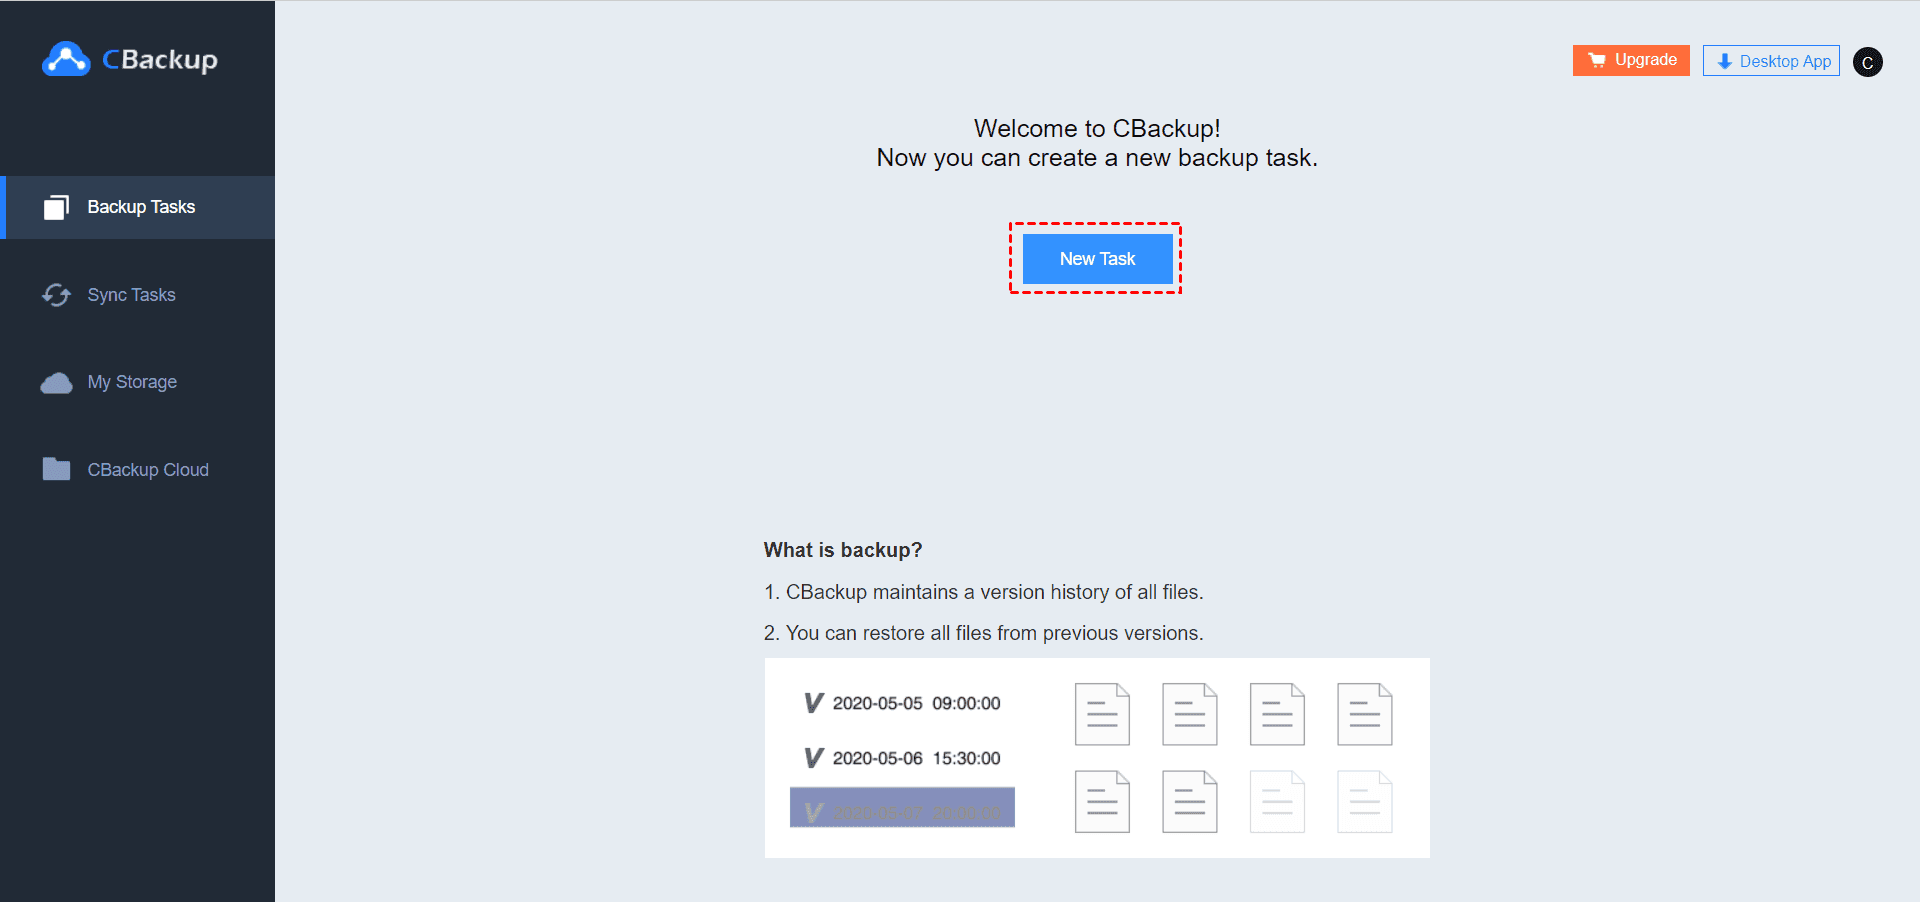
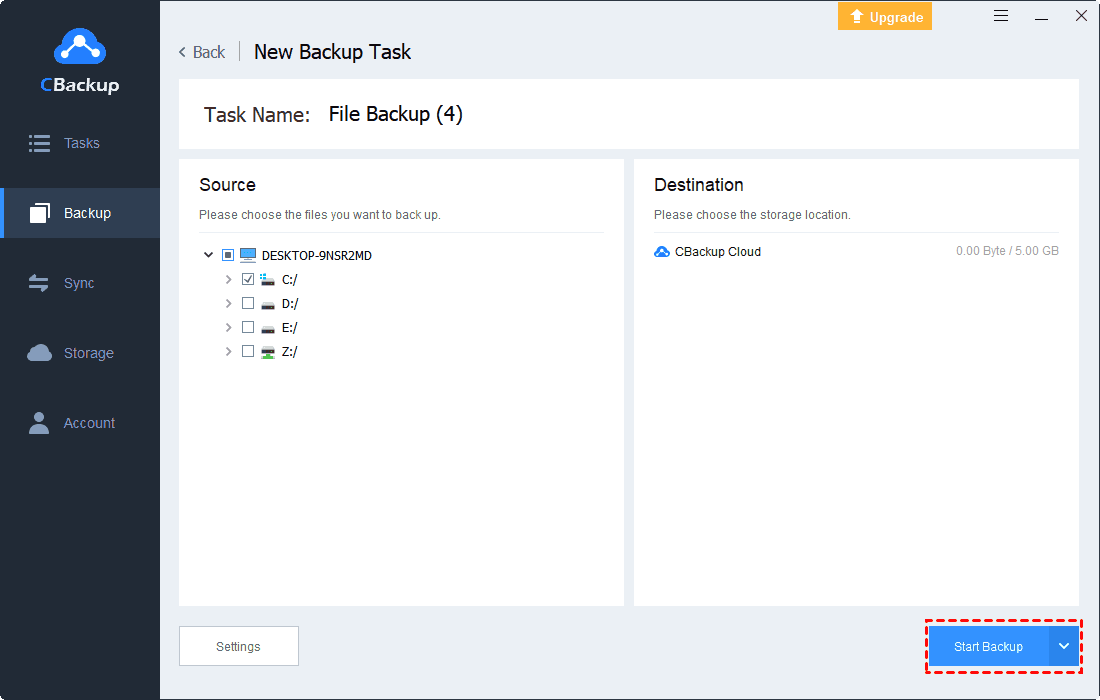
Step 1. Click Backup Tasks and tap the New Task button subsequently.
Step 2. Click Add Source and Add Destination to select both of your Google Drive accounts.
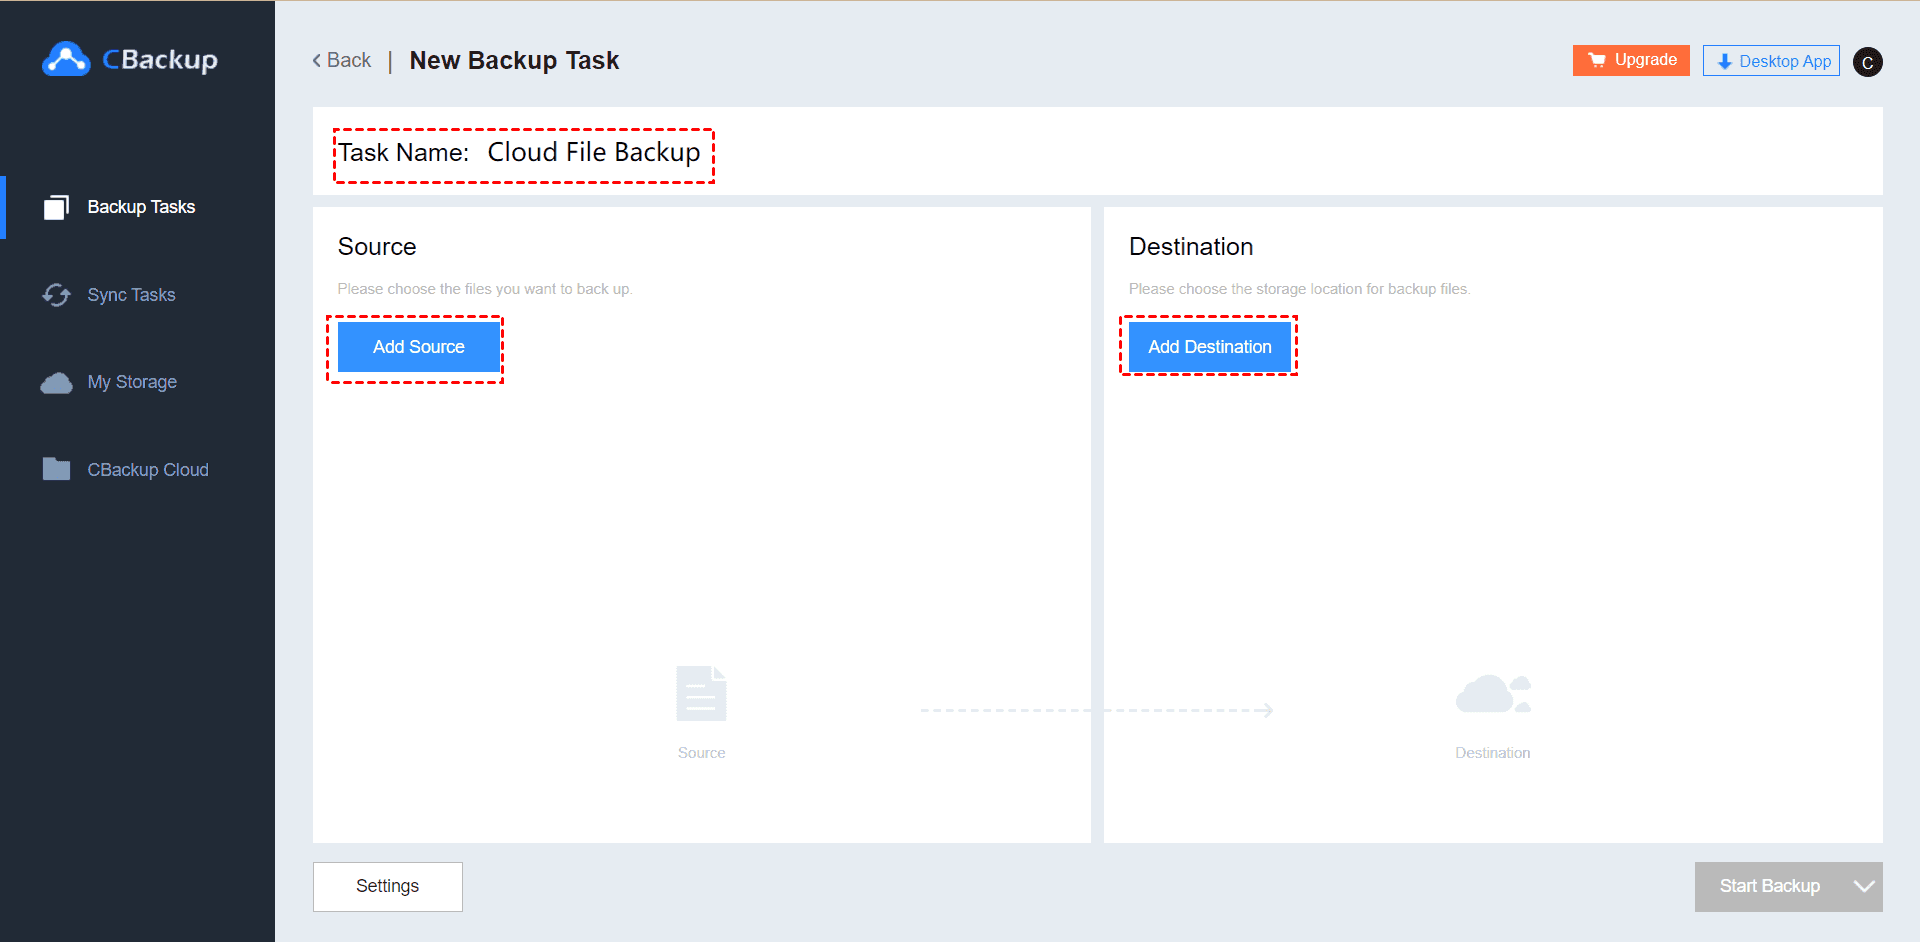
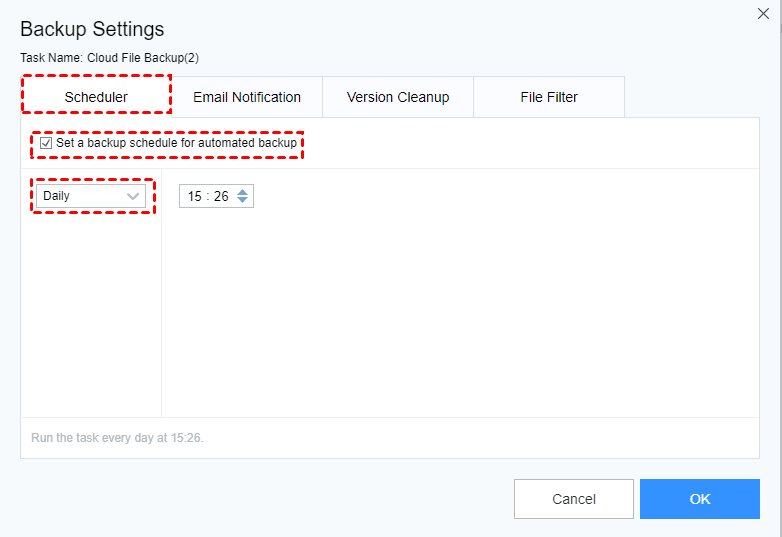
Step 3. Click Settings to set Google cloud backup settings and then click Start Backup.
✎Tip: The Settings enables you to create a schedule Google cloud backup via once, daily, weekly, and monthly, enable email notification, keep the version history as you want, use the file filter to choose the files you want to backup or does not want to backup.
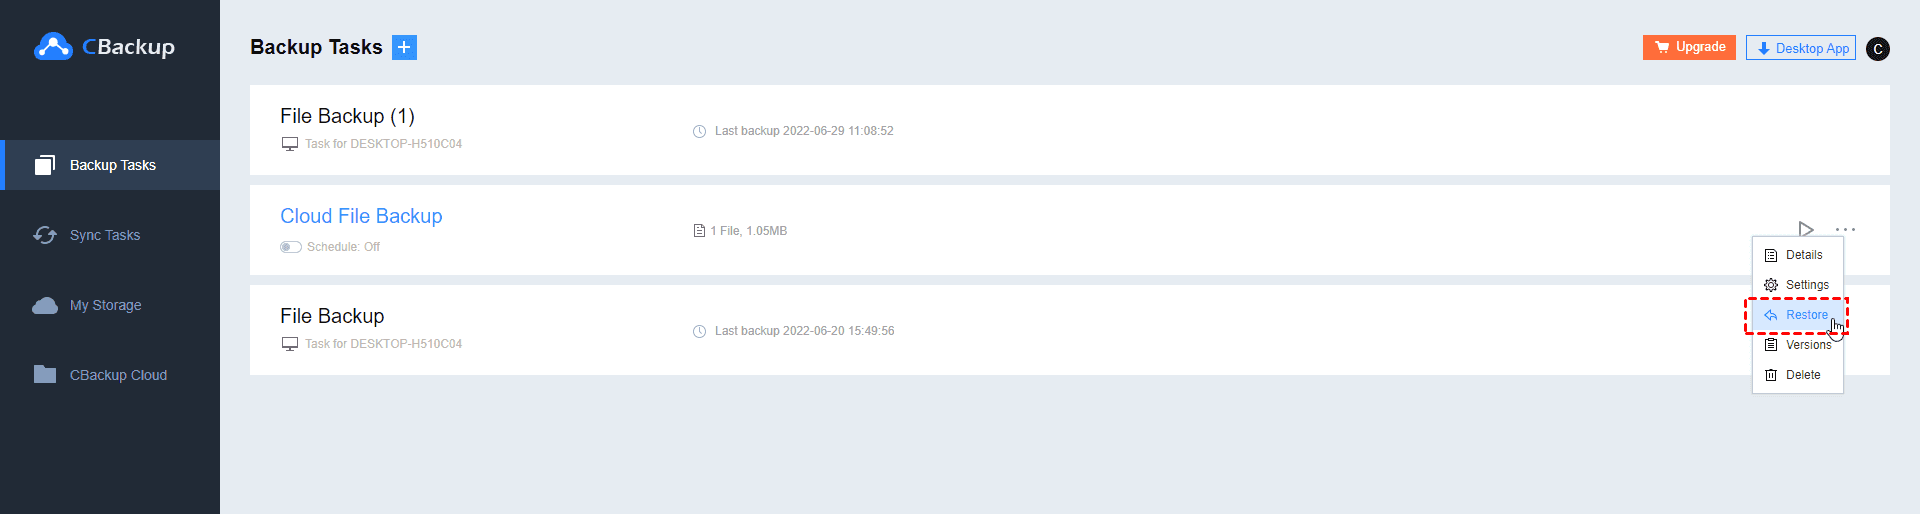
How to Restore backup from Google Drive with CBackup?
Step 1. Navigate to Backup Tasks, select the backup you want to restore, and click the three dots on the right side, then select Restore.
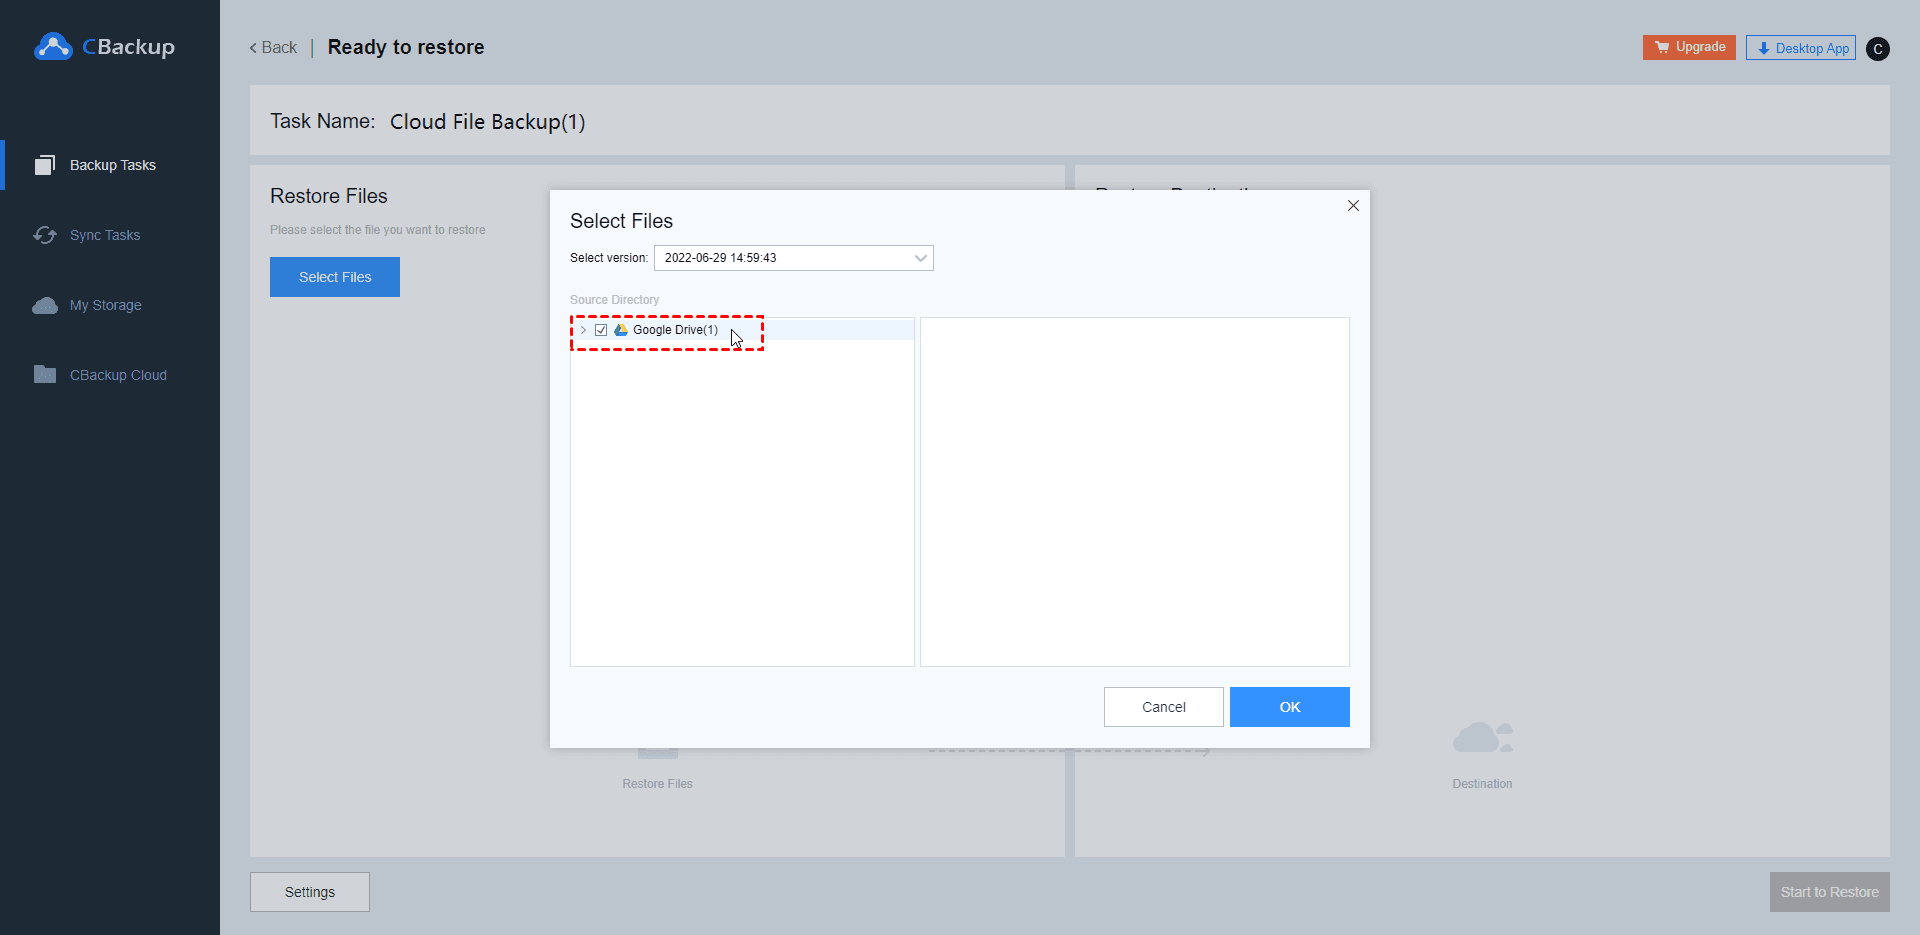
Step 2. Click Add Source and select folders in Google Drive, then click OK.
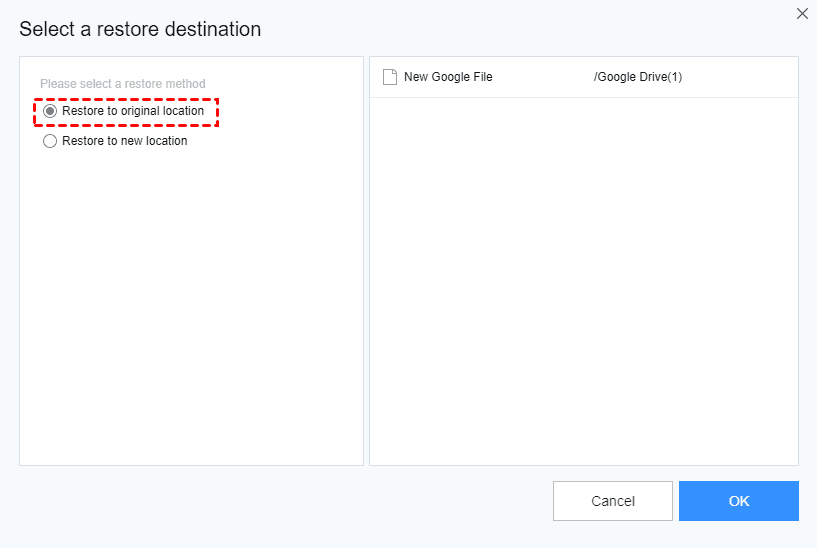
Step 3. Click Select Path and select Restore to original location or Restore to new location, then click OK to exit this window.
Step 4. Set the restore settings and click Start Restore to perfrom Google cloud recovery.
Besides, you could download the CBackup desktop app to automatically backup files to the cloud (Google Drive/Dropbox/OneDrive/cloud) with ease.
Final Thoughts
That’s all for Google cloud backup and restore. In this article, you can use the most common software Google Drive, also the advanced version Google Cloud Platform.
In addition, you can use cloud backup service – CBackup if you have multiple cloud drives. It can free you from low disk space warning and help you manage cloud storage accounts of all your cloud disks at one platform. And more, this software is complete free. Just try it for yourself.

Secure & Free
