
How to Add OneDrive to File Explorer on Windows and Mac
To quickly access your cloud files, knowing how to add OneDrive to File Explorer is essential. Whether on Windows or Mac, integrating OneDrive lets you manage and sync files directly from your computer. This guide covers adding first and additional accounts, with tips to customize your setup and fix common issues for smooth file management.
by Vanessa Lasted Updated June 27, 2025
Can I Add OneDrive to File Explorer?
Yes, you can add OneDrive to File Explorer. On Windows 10 and 11, OneDrive comes pre-installed and integrates automatically once you sign in with your Microsoft account. For Windows 7 and 8, you’ll need to download and install the OneDrive app manually. On Mac, OneDrive works through its app and appears in Finder.
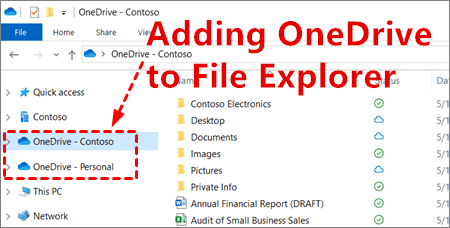
When you add OneDrive to File Explorer, a dedicated OneDrive folder shows up in the sidebar, giving you quick access to your cloud files alongside local files. This folder syncs automatically, so any changes—adding, editing, or deleting files—update across all your devices connected to OneDrive. This integration simplifies file management, enables offline access, and keeps your important documents backed up and up to date.
How to Add OneDrive to File Explorer on Windows 11/10/8/7 and Mac
Whether you use Windows or Mac, setting up OneDrive correctly ensures seamless access to your cloud files right from File Explorer or Finder. Let’s explore how to add OneDrive on both platforms with easy-to-follow instructions.
1. Add OneDrive Folder to File Explorer on Windows 11/10
Windows 11 and 10 let you add personal OneDrive to File Explorer with ease because the app comes pre-installed and works smoothly with the system. After setup, OneDrive shows up in the File Explorer sidebar, so you can open and manage cloud files as if they were stored locally. This method fits users who need quick access to files, offline use, and real-time sync across devices. You can improve performance by enabling Files On-Demand to reduce local storage use.
📝 Let’s walk through the process of adding OneDrive to File Explorer on Windows 11 or 10:
Step 1. Open OneDrive
Click the Start button, search for OneDrive, and open the app. If it’s already running, click the cloud icon in the system tray.
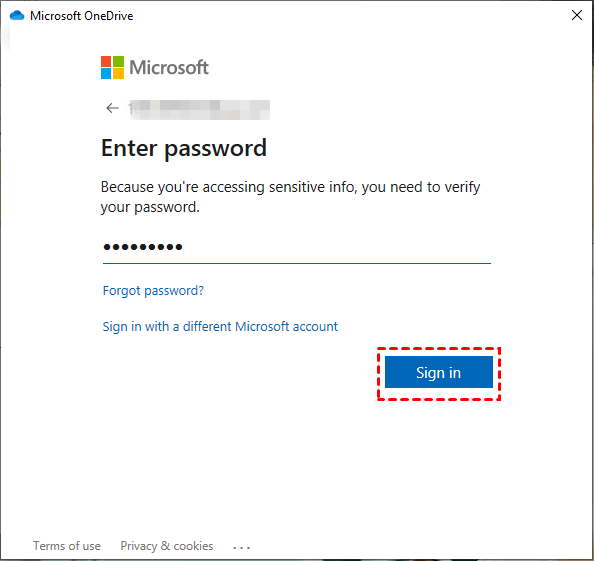
Step 2. Sign in to Your Microsoft Account
Enter your personal Microsoft account email and password. Click Sign in to continue.
Step 3. Choose OneDrive Folder Location
When prompted, confirm or change where you want to store the OneDrive folder on your PC, then click Next.
Step 4. Select Folders to Sync
Pick the folders you want to sync from your OneDrive account to your PC and click Next.
Step 5. Finish Setup and Access Files
Once setup is complete, open File Explorer. You’ll now see OneDrive listed in the sidebar for quick access.
2. Add Personal OneDrive to File Explorer on Windows 8/7
If you’re on Windows 7 or 8, you won’t find OneDrive pre-installed like in Windows 10 or 11. To add OneDrive to Windows Explorer, you’ll need to download and install the OneDrive desktop app yourself. While this setup gives you access to your cloud files through File Explorer, it doesn’t support features like built-in integration or Files On-Demand. You can only use one personal account, and syncing may run a bit slower.
That said, if you just want easy access to your OneDrive files without opening a browser—and you mainly use your PC for basic tasks—this method still works well. Even on older systems, it keeps your files organized and synced right alongside your local folders.
📝 Let’s look at how to add OneDrive folder to File Explorer on Windows 7 or 8 with a simple step-by-step guide:
Step 1. Download the OneDrive App
Visit the OneDrive download page and click to download the desktop app for Windows 7/8.
Step 2. Install the App
Open the downloaded file and follow the on-screen instructions to install OneDrive on your PC.
Step 3. Sign in with Your Microsoft Account
Once installed, launch OneDrive and enter your personal Microsoft account to sign in.
Step 4. Choose the Folder Location
Select where you want the OneDrive folder to appear on your PC and choose which files and folders to sync.

Step 5. Access OneDrive in File Explorer
After setup, open File Explorer. You’ll now see the OneDrive folder in the sidebar, ready for use.
3. Install OneDrive and Add an Account on Mac
When you install OneDrive on your Mac, it integrates directly with Finder, letting you access your cloud files just like local ones. This setup works well if you use Microsoft’s cloud storage for personal or work purposes and want your files to stay synced across all your devices. OneDrive on Mac also supports multiple accounts, so you can easily manage personal and work files separately.
While some features available on Windows, such as Files On-Demand, may not work the same way or could be limited on Mac, this method still provides a convenient way to handle your OneDrive files within the Mac environment.
📝 Here’s a simple guide to help you install OneDrive on your Mac and set up your account in just a few easy steps:
Step 1. Download the OneDrive App
Visit the official OneDrive download page and download the Mac version.
Step 2. Install the App
Open the downloaded .pkg file and follow the on-screen instructions to install OneDrive on your Mac.
Step 3. Launch OneDrive
After installation, open the OneDrive app from your Applications folder.
Step 4. Sign In to Your Microsoft Account
Enter your personal or work Microsoft account credentials and click Sign in.
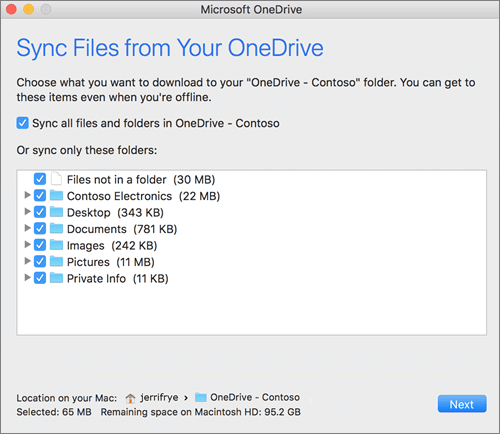
Step 5. Set Up and Sync
Choose the folder location for your OneDrive files, select the folders you want to sync, and finish the setup. Your OneDrive folder will now appear in Finder for easy access.
How to Add a Second OneDrive to File Explorer on Windows 11/10/8/7 and Mac
To keep your personal and work files organized, adding a second OneDrive account to File Explorer or Finder is a smart move. Let’s walk through how to set this up on Windows 11, 10, 8, 7, and Mac.
1. Set Up Two OneDrive Folders in File Explorer on Windows 11/10
Want to add another OneDrive to File Explorer on Windows 11 or 10? Doing so lets you access both personal and work (or school) files side by side without switching accounts or browsers. This setup simplifies managing your cloud storage and keeps your files organized across multiple accounts. It’s perfect for anyone juggling different Microsoft accounts for work and personal use.
The biggest benefit is smooth syncing and offline access for both accounts, so you can work without interruption. Just remember, Windows allows only one personal account per user profile—the second must be a work or school account. Adding two personal accounts at once requires complicated workarounds. To prevent syncing problems, keep each OneDrive folder in its location and avoid moving or renaming them manually.
📝 Here’s a simple step-by-step guide on how to set up two OneDrive folders in File Explorer on Windows 11/10:
Step 1. Sign in to Your First OneDrive Account
Click the OneDrive cloud icon in the taskbar and sign in with your personal Microsoft account if you haven’t already.
Step 2. Open OneDrive Settings
Right-click the OneDrive icon, select Help & Settings, then choose Settings.
Step 3. Add a Second Account
In the Account tab, click Add an account, then sign in with your work or school Microsoft account.
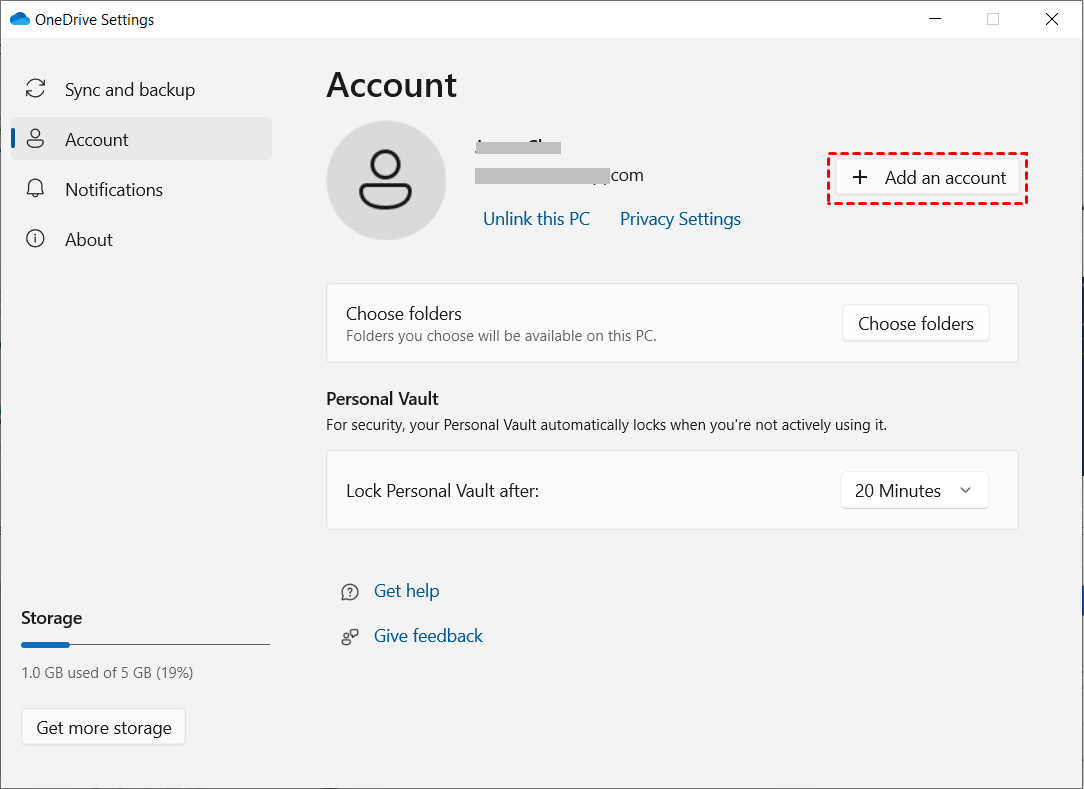
Step 4. Choose Sync Folder Location
Select a separate folder location for the second account to sync files and avoid conflicts with the first.
Step 5. Access Both OneDrive Folders
Once set up, both OneDrive folders will appear in File Explorer’s sidebar for easy file management.
2. Add a Second OneDrive Account to File Explorer on Windows 8/7
On Windows 7 and 8, managing two OneDrive accounts requires extra care compared to Windows 10 and 11. Unlike newer versions, these older systems don’t support seamless syncing or Files On-Demand, so both accounts will fully sync files locally, which can consume significant storage. It’s important to choose distinct folder locations for each OneDrive account to avoid sync conflicts and data overlap.
Additionally, Windows 7 and 8 don’t allow adding two personal accounts simultaneously—only one personal and one work or school account are supported.
📝 Here’s a step-by-step guide on how to add a second OneDrive to computers:
Step 1. Download and Install OneDrive
If you haven’t already, download the OneDrive app from Microsoft’s official website and install it on your computer.
Step 2. Sign in to Your First Account
Open OneDrive and sign in with your primary Microsoft account to set up your first OneDrive folder.
Step 3. Open OneDrive Settings
Click the OneDrive icon in the system tray, then select Help & Settings > Settings.
Step 4. Add a Second Account
In the Account tab, click Add an account and sign in with your second Microsoft account (work or school).
Step 5. Choose a Separate Folder Location
Select a different folder location for the second account to avoid sync conflicts. After setup, both OneDrive folders will appear in File Explorer.
3. Add Another OneDrive Account to the File Explorer on Mac
If you want to manage both personal and work files smoothly on a Mac, adding another OneDrive account to File Explorer is a helpful solution. This method suits Mac users who rely on Microsoft 365 for home and professional use and want seamless access to all their cloud files in one place.
However, because macOS lacks full on-demand file access like Windows, syncing multiple accounts can consume significant disk space. Despite this limitation, learning how to add another OneDrive account to File Explorer offers practical cloud file management, as long as users stay mindful of macOS-specific restrictions.
📝 Here’s a step-by-step guide on how to add a second OneDrive account to File Explorer:
Step 1. Open the OneDrive App
Click the OneDrive cloud icon in the system tray (bottom right corner).
Step 2. Access Settings
Click Help & Settings (gear icon), then select Settings from the menu.
Step 3. Add a Second Account
In the Account tab, click Add an account.
Step 4. Sign In to Your Second Account
Enter the login credentials for your second Microsoft account (work or school).
Step 5. Choose a Folder Location
Select a different folder on your PC for the second account to sync files without conflicts. Click Next to complete the setup.
Bonus Tip: How to Multiple OneDrive Accounts on One Computer Effortlessly
If managing 2 OneDrive accounts on one PC feels complicated, CBackup offers a simple and effective solution. This tool lets you link and control multiple OneDrive accounts from a single dashboard, so you don’t need to switch between accounts constantly. CBackup supports various cloud services like OneDrive, Google Drive, and Dropbox, making file management easier. It provides automatic backups, scheduled syncing, and seamless file transfers between accounts.
Using CBackup saves time and keeps your files organized without juggling multiple apps. This method works especially well for users who regularly access different OneDrive accounts. To learn more about managing 2 OneDrive accounts on one PC with ease, visit CBackup’s official page.
📝 Here is a tutorial to help you get started with managing 2 OneDrive accounts on one PC using CBackup:
Step 1. Sign Up and Log In
Visit the CBackup website, create an account, and log in.
Step 2. Add Your First OneDrive Account
Go to the “Storage” section and click “Add Cloud.” Select OneDrive and authorize CBackup to access your first account.

Step 3. Add Your Second OneDrive Account
Repeat the process to add your second OneDrive account by selecting OneDrive again and signing in with the other account.
Step 4. Create a Backup or Sync Task
In the “Backup” or “Sync” tab, set up a task to manage files between your OneDrive accounts or from your PC to the cloud. And you can also use the "Cloud to Cloud Sync" feature to sync the files in the 2 OneDrive accounts.
Step 5. Start the Task and Monitor
Launch the backup or sync task and monitor its progress from the CBackup dashboard.
Conclusion
In this post, we explored various ways on how to add OneDrive to File Explorer across different operating systems, including Windows and Mac. Whether you want to add a single account or manage multiple OneDrive accounts on one device, the methods covered offer practical solutions to improve your workflow.
From using the built-in OneDrive app to leveraging tools like CBackup, you can streamline your cloud file access and organization. Understanding these options helps you choose the best way to integrate OneDrive into your file management system effectively.
FAQs About Adding OneDrive to File Explorer
Let’s address some common questions users have about this process. Here are the FAQs About Adding OneDrive to File Explorer to help clarify any doubts and provide quick solutions to potential issues.
1. How to Customize OneDrive in File Explorer
Customizing OneDrive in File Explorer helps you personalize your cloud storage experience for better organization and easier access. Whether you want to change folder locations, manage sync settings, or adjust which files appear offline, customization gives you control over how OneDrive works on your PC. Here’s a quick guide on how to customize OneDrive in File Explorer in 5 simple steps:
- 1. Click the OneDrive cloud icon in the system tray.
- 2. Select Help & Settings, then click Settings.
- 3. Use the Account tab to change folder locations or add accounts.
- 4. Go to the Settings tab to adjust sync options like Files On-Demand.
- 5. Customize which folders sync by clicking Choose folders under the Account tab.
Following these steps lets you tailor OneDrive in File Explorer to fit your needs perfectly.
2. Why Do I Have Two OneDrive Folders in File Explorer?
If you see two OneDrive folders in File Explorer but don’t want the extra account, it usually means a second OneDrive account has been added to your computer. Often, a work or school account is added alongside the one for your personal use. This can confuse and take up extra space. To fix this and remove the unwanted OneDrive folder, follow these steps:
- 1. Click the OneDrive cloud icon in the system tray.
- 2. Select Help & Settings, then open Settings.
- 3. Go to the Account tab.
- 4. Find the unwanted account and click Unlink this PC or Remove account.
- 5. Confirm the removal, and the extra OneDrive folder will disappear from File Explorer.
This way, you keep only the OneDrive account you want and tidy up your File Explorer.
Part 1. How to Add OneDrive to File Explorer - Windows 11/10
Step 1. Directly search “OneDrive” in the Windows search box and click on OneDrive from the search result.
Step 2. The OneDrive folder will be displayed in the left sidebar of your Windows 10/11 computer. Click OK on the pop-up OneDrive isn’t signed in screen.
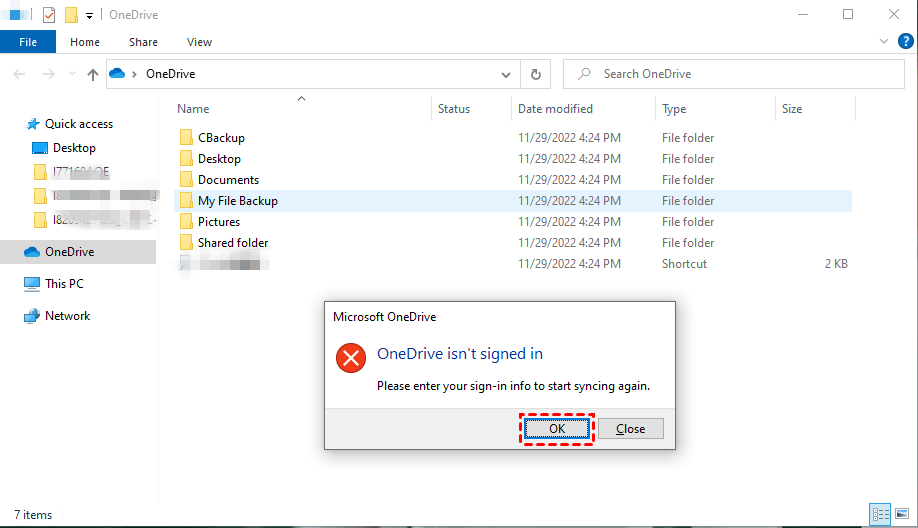
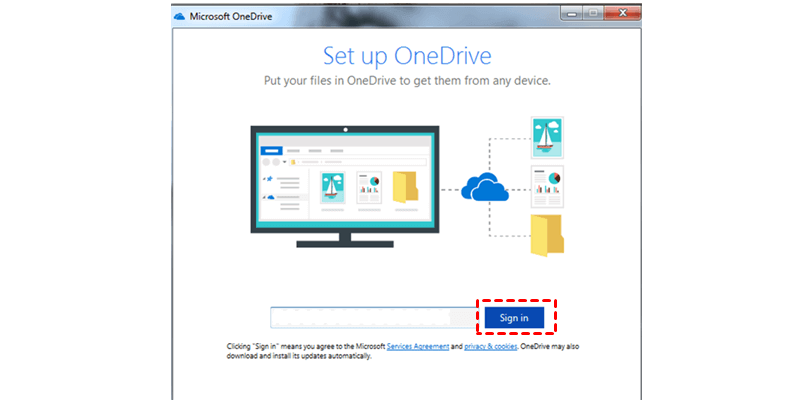
Step 3. Enter your password and click Sign in to set up OneDrive.
To add multiple OneDrive to File Explorer, like using OneDrive personal and business on the same computer, you can follow the steps below:
- Click on the OneDrive icon in the notification area, click Help & Settings, and then select Settings.
- Choose the Account tab and tap on Add an account. Then sign in with another credential. After that, there would be two OneDrive folders on File Explorer.

Part 2. How to Add OneDrive to File Explorer on Windows 7/8
If you are running on Windows 7, please follow the how to add OneDrive folder to File Explorer guide below to access all OneDrive files on PC easily.
Step 1. Download the OneDrive desktop app, then run it.
Step 2. Enter your personal OneDrive account and click Sign in.

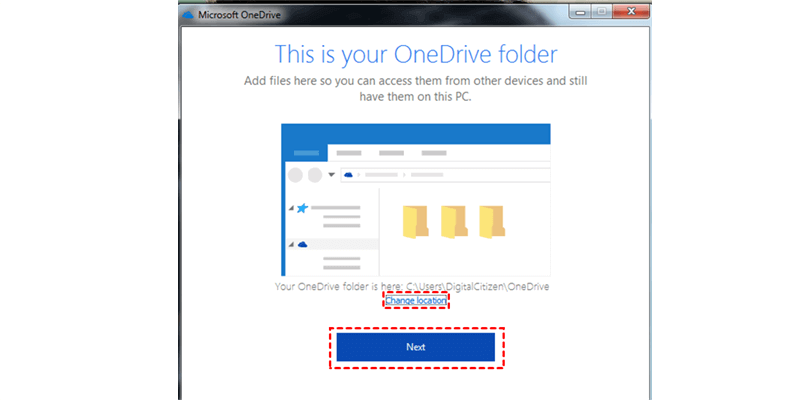
Step 3. Accept the default location of OneDrive folder and click Next. Or, you can click Change location to specify a path for the OneDrive folder.
Step 4. Select folders to sync from OneDrive to PC and hit Next.

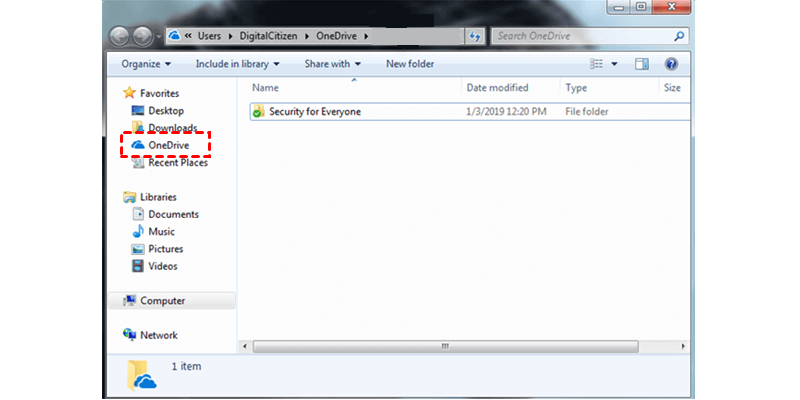
Step 5. You can go to File Explorer and find the OneDrive folder here.

You can also add Business OneDrive to File Explorer by clicking Settings > Account > Add an account to sign in.
How to Add OneDrive to Finder on Mac
Step 1. Download and install the OneDrive desktop for Mac.
Step 2. Run it and input your account and tap on Sign in.
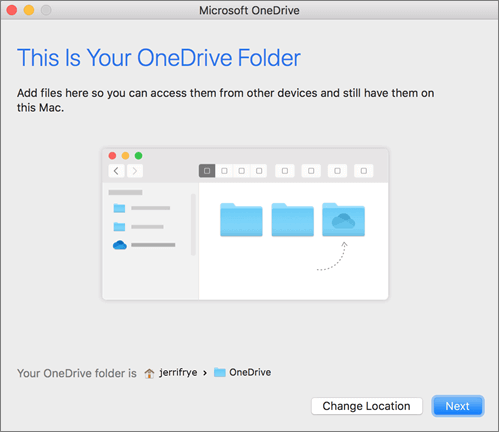
Step 3. Accept the OneDrive default location or click Change location to select a new one.
Step 4. Then, choose folders to sync to your computer and click Next.

Step 5. Click on Open my OneDrive folder and you can access all OneDrive files on Finder.
Frequently Asked Questions about Adding OneDrive to File Explorer
If you encounter some issues during the process of adding OneDrive folder to File Explorer, here are some frequently asked questions that may be helpful.
#1. Why is my OneDrive not showing in File Explorer?
Common reasons for OneDrive missing from File Explorer or OneDrive disappearing from Finder could be that you are not running the latest version of the OneDrive app, your Registry is running incorrectly, the OneDrive program is stuck, etc.
To fix it, you can update your OneDrive, restart/reset OneDrive, and modify your Registry.
#2. How Do I Pin a OneDrive Folder to Explorer?
If you wish to pin the OneDrive folder to the Quick Access pane, right-click it, and select Pin to Quick Access.
Tip: Upload All Files to OneDrive Automatically with CBackup
Although you can upload files using the OneDrive folder, this requires you to manually add files and folders repeatedly, which is not convenient for synchronizing a large number of files. And adding OneDrive to File Explorer navigation pane may result in OneDrive taking up hard drive space, causing your computer to run slowly. To make OneDrive file sync much easier and save your local space, the free cloud backup and sync service CBackup can do you a favor.
- It allows you to add folders to OneDrive from any location without moving, including external hard drives and USB drives.
- You can use it to upload files to OneDrive on daily, weekly, and monthly schedules.
- Apart from OneDrive, it supports syncing files and folders to Google Drive, Dropbox, and more public cloud drives.
- When the OneDrive cloud storage is insufficient, you can use it to combine multiple clouds and increase OneDrive storage space without paying anything.
Download and run CBackup on your computer. If you are supposed to sync USB drive to OneDrive, plug it into your computer in advance. Then, go on with the following steps:
Step 1. Apply for a CBackup account for free and sign in to the CBackup desktop app.
Step 2. Click Storage on the left menu, select OneDrive, and complete the authorization to add it to CBackup.

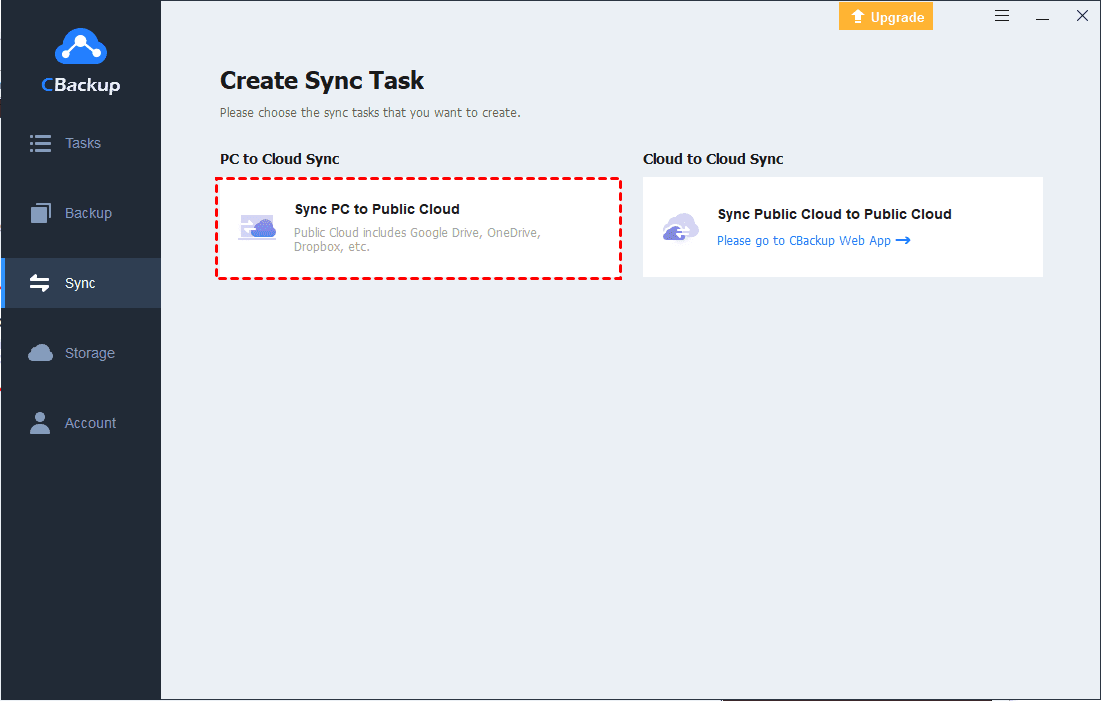
Step 3. Tap Sync and select Sync PC to Public Cloud.

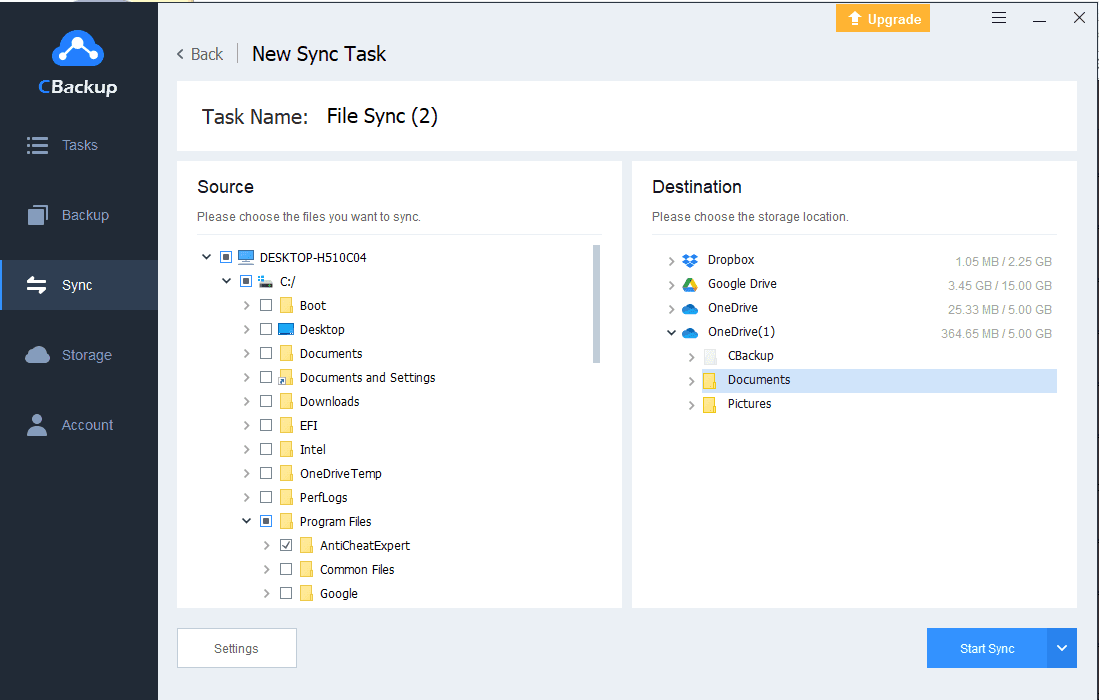
Step 4. Name the task and select files and folders to sync. Then, choose a OneDrive folder to save the synced data. To perform auto file sync, click Settings > Scheduler to choose a suitable frequency.
Step 5. Finally, click Start Sync to upload any folder to OneDrive without manually adding.

The Bottom Line
This article describes full guides on adding OneDrive to File Explorer and Finder. Besides, if you want a method to sync all files to OneDrive without manually adding them to the OneDrive folder, you can resort to the sync software CBackup.

Secure & Free
