
Windows 11 Backup Options Missing: Solutions & Guide
Learn how to restore missing backup options in Windows 11 and enable essential services and settings to ensure the security of your valuable data.
by CBACKUP Lasted Updated April 1, 2024
Where is Backup Option in Windows 11?
In the digital age, safeguarding your data is paramount, and Windows 11 provides robust backup options to ensure the security of your files. If you've found yourself wondering, "Where is the backup option in Windows 11? "You can access the Windows 11 Backup and Restore and File History with the following steps:
To access Backup and Restore on Windows 11:
1. Go to "Control Panel" → "System and Security" → "Backup and Restore (Windows 11)".
2. Select "Set up backup" under the "Backup" section.
3. Select "Backup Drive" → click "Next".
4. Select "Let Windows Choose" → click "Next".
5. Click "Save settings and run backup".
To access File History on Windows 11:
1. Open the Start menu and search for "File History settings".
2. Click on "File History settings" to open it.
3. In the File History settings window, click on "Turn on" to enable File History and select a drive where you want to store your file history backups.
4. Click on "More options" to customize settings.
5. Once configured, File History will automatically back up your selected files and folders at the specified intervals.
However, encountering the issue of Windows 11 backup options missing can be perplexing and concerning for users. fret not, as we delve into practical solutions to address this dilemma.
Solutions for Windows 11 Backup Options Missing
The problem of Windows 11 backup not working can be a concerning issue for users, potentially leaving their valuable data vulnerable to loss or corruption. Fortunately, there are practical solutions available to address this dilemma and restore essential backup functionalities.
Part 1. Windows 11 File History Missing
File History is a built-in feature in Windows 11 that allows users to automatically back up files to an external drive or network location. When it comes to Windows 11 backup options missing, it might be File History not working or missing, to fix this problem, you can:
#1. Enable File History Service: If File History is missing or disabled, users can enable the File History service through the Services application.
1. Press the Windows key + R to open the Run dialog box.
2. Type "services.msc" and press Enter to open the Services window.
3. Scroll down and locate "File History Service."
4. Right-click on it and select "Properties."
5. Set the Startup type to "Automatic" and click "Apply" followed by "OK."
#2. Turn on the File History Option: After enabling the File History service, users can turn on the File History option in the Settings app to configure backup settings and begin backing up their files.
1. Navigate to Settings > System > Storage.
2. Click on "Advanced storage settings."
3. Under "Backup options," toggle the switch to turn on File History.
Part 2. Backup and Restore Missing in Windows 11
Volume Shadow Copy is a Windows service responsible for creating backups of files and volumes, which is essential for certain backup and restore functionalities. When you encounter Backup and Restore missing in your Windows 11, you can:
#1. Enable Volume Shadow Copy: If Volume Shadow Copy is disabled, users can enable it through the Services application.
1. Press the Windows key + R to open the Run dialog box.
2. Type "services.msc" and press Enter to open the Services window.
3. Scroll down and locate "Volume Shadow Copy."
4. Right-click on it and select "Properties."
5. Set the Startup type to "Automatic" and click "Apply" followed by "OK."
#2. Run CHKDSK Command: CHKDSK (Check Disk) is a command-line utility in Windows that scans and repairs disk errors, which can sometimes interfere with backup and restore operations. Running CHKDSK can help resolve underlying disk issues that may be causing backup options to go missing.
1. Open Command Prompt as administrator.
2. Type "chkdsk /f" and press Enter.
3. Follow on-screen prompts to schedule CHKDSK to run on the next system restart.
4. Restart your computer to allow CHKDSK to scan and repair disk errors.
By implementing these solutions, users can effectively address the issue of missing backup options in Windows 11 and ensure the safety and security of their valuable data.
CBackup: Best Backup Guide to Protect Your Windows 11 Data
In the face of missing backup options in Windows 11, CBackup emerges as the ultimate cloud backup solution to safeguard your valuable data effectively. Compared with Windows 11 backup to external drive, CBackup revolutionizes the backup process, offering unparalleled convenience and reliability with its intuitive interface and robust features.
Here's why CBackup stands out:
- User-Friendly Interface: CBackup boasts an intuitive interface, making file backup and restoration a breeze.
- Multi-Cloud Support: Seamlessly backup your files to multiple cloud storage providers, ensuring redundancy and reliability.
- Incremental Backup: CBackup employs incremental backup techniques, minimizing storage space usage and optimizing efficiency.
- Scheduled Backup: Set up automated backup schedules to ensure continuous protection of your valuable data.
Steps to Cloud Backup with CBackup
Step 1: Installation and Sign-Up
Download the CBackup client and install it on your device. Then, proceed to create a CBackup account or log in if you already have one.
Step 2: Access Backup Settings
Navigate to the "Backup" section within the CBackup client and select "Backup PC to cloud."

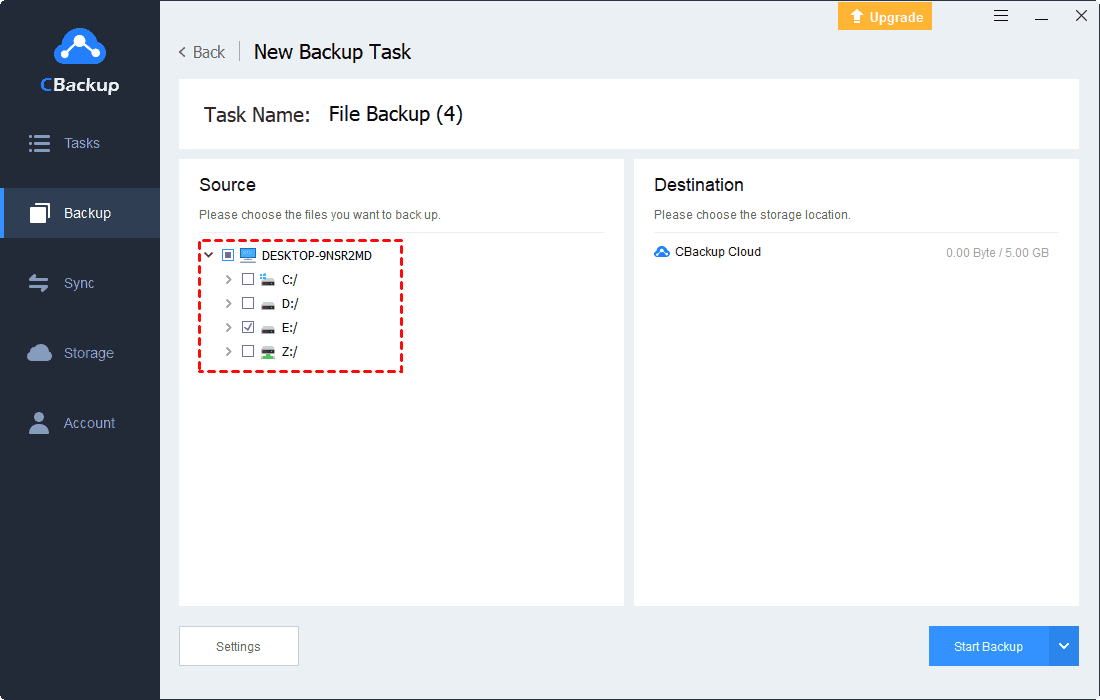
Step 3: Select Backup Content
Choose whether to include all computer files or opt for specific folders as the backup source.
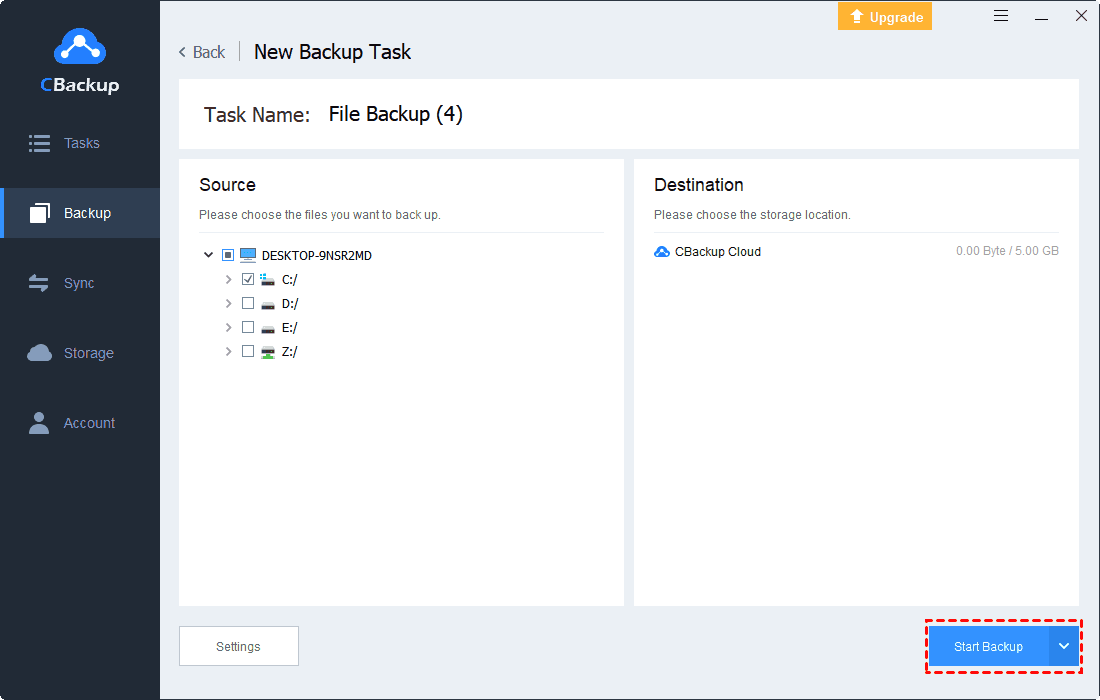
Step 4: Initiate Backup
Click on "Start Backup" to kickstart the backup process, ensuring the protection of your data.
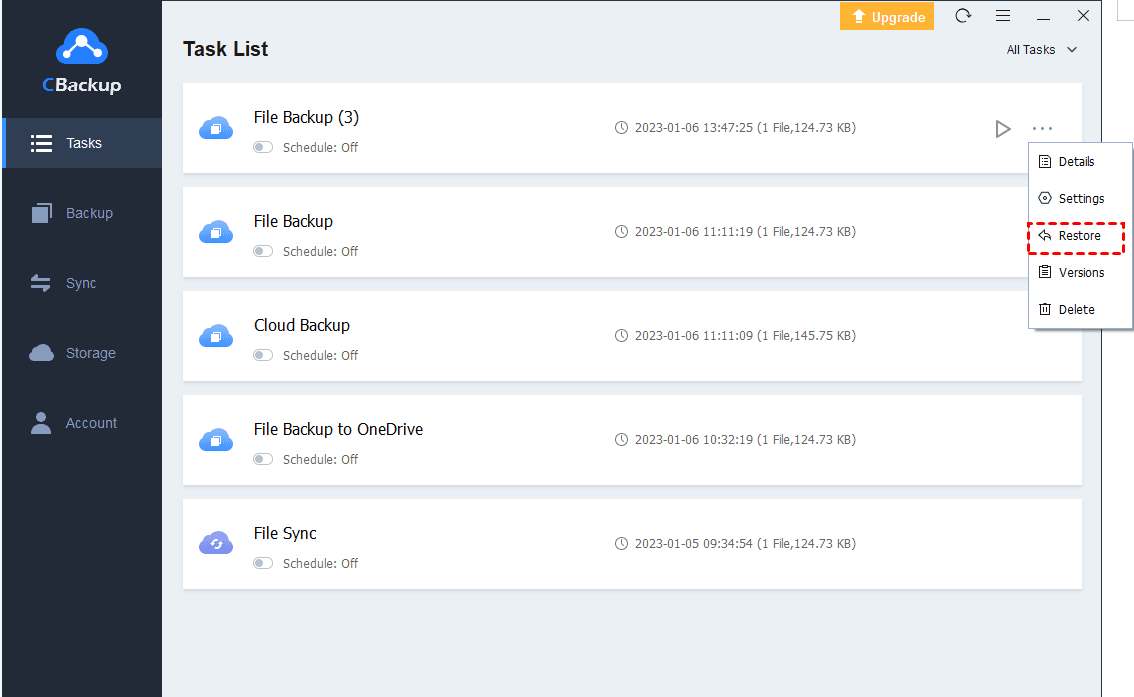
Restoring Data Backup in CBackup:
To restore backed-up data in CBackup, simply locate the backup task, click on the three-dot button next to it, and select "Restore" to effortlessly complete the file restoration process.
Unlock the full potential of Windows 11 backup with CBackup and experience peace of mind knowing your data is secure.
FAQs about Windows 11 Backup Options Missing
#1: How can I restore missing backup options in Windows 11?
Follow our comprehensive guide to enable essential services and settings for restoring backup options in Windows 11 effectively.
#2: Does CBackup support automated backup scheduling?
Absolutely! CBackup allows users to schedule automated backups at their convenience, ensuring continuous data protection without manual intervention.
#3: Is CBackup compatible with Windows 11?
Yes, CBackup is fully compatible with Windows 11, offering seamless backup solutions tailored to the latest operating system.
#4: Is CBackup free to use?
CBackup offers both free and premium plans, catering to the diverse needs of users. Users can enjoy basic backup features with the free plan or opt for premium plans for enhanced functionality.
Conclusion
In conclusion, the issue of Windows 11 backup options missing can be resolved with practical solutions and the adoption of reliable backup software like CBackup. By following the outlined steps and leveraging the capabilities of CBackup, users can ensure the safety and security of their valuable data in the ever-evolving digital landscape of Windows 11.
Don't let missing backup options leave your files vulnerable-embrace the power of CBackup and safeguard your digital world with confidence.

Secure & Free
